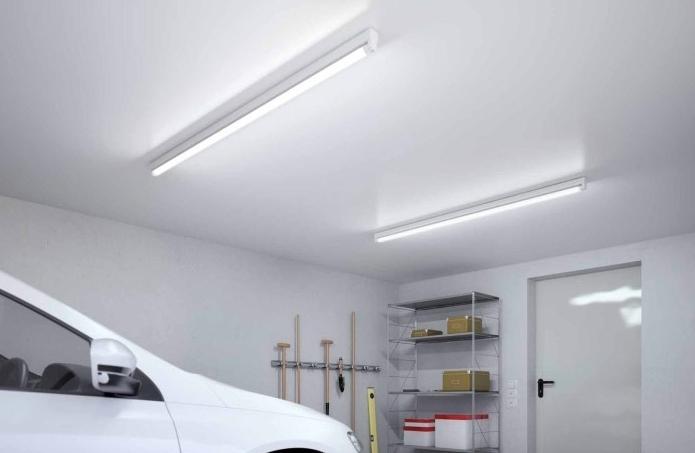
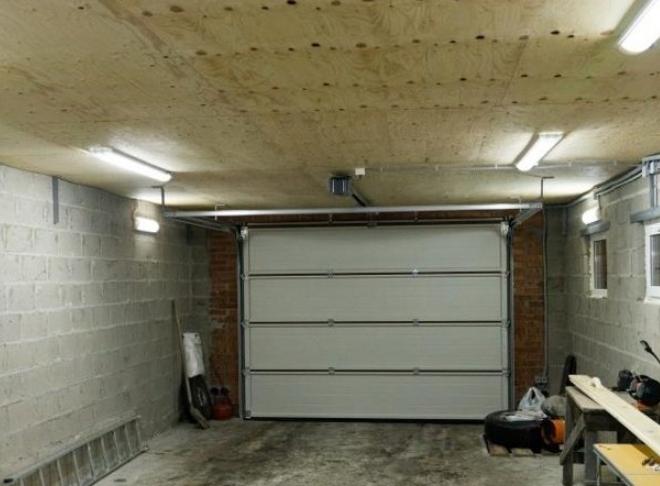
Do-it-yourself lighting wiring in the garage
You can make lighting in the garage without the involvement of specialists in order to save money. The work is simple, you can deal with it in just a few hours. To assemble a safe and reliable system, you must comply with the basic requirements of the Electrical Installation Rules (PUE) and first make a detailed project that indicates the location and characteristics of all elements.
General requirements
Basic information on wiring in garages is contained in section 2.1 of the PUE, but other chapters also contain important data that will be required during operation. For simplicity, the most important points are collected in this section:
- Wiring can be laid in different ways. If the surfaces are non-combustible (brick, blocks, metal, etc.), an open method can be used. To do this, choose a cable with a reinforced sheath.For walls and ceilings sheathed with wood and other flammable materials, it is imperative to use non-combustible corrugation or cable channels.
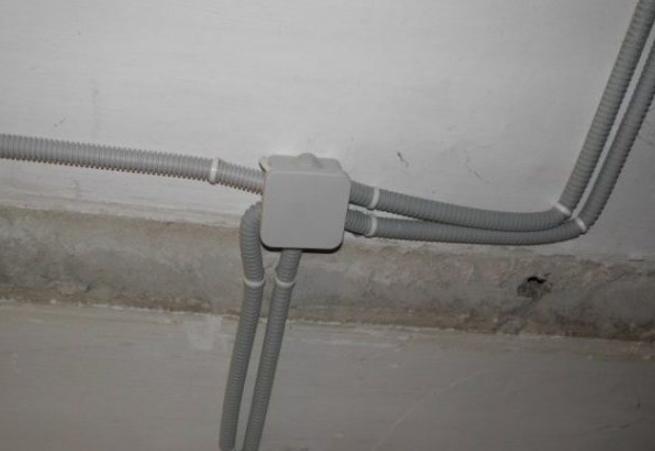
![open wiring in non-combustible corrugations]() It is possible to lay open wiring in non-combustible corrugations.
It is possible to lay open wiring in non-combustible corrugations. - To equip the system, you can use both copper (VVG) cable and aluminum (AVVG). The first option is preferable, as it has less resistance, bends better and lasts longer. Options such as ShVVP or PVS cannot be taken, they should be used for portable installations, and are not suitable for stationary power supply.
- The cross section of the cable cores should be selected based on the load that it must withstand during use. It is better to choose options with a margin; for a garage, a copper cable with a cross section of 2.5 mm is most often used2 or aluminum section 4 mm2.
![Do-it-yourself lighting wiring in the garage]() The table will help you choose the cable section depending on the power of the electrical equipment used.
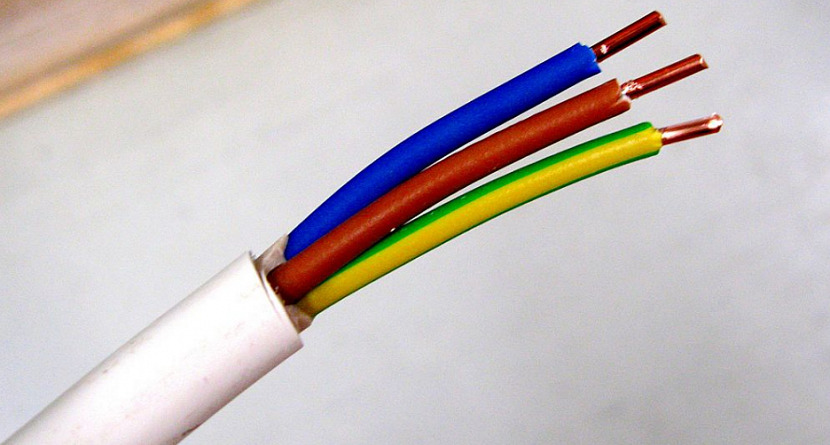
The table will help you choose the cable section depending on the power of the electrical equipment used. - According to modern electrical safety requirements in the garage, it is imperative to make grounding. It should be provided for in the diagram, and when buying a cable, choose three-core options if the network is single-phase or five-core if it is three-phase.
![Do-it-yourself lighting wiring in the garage]() Cable for connecting a single-phase load with a grounding conductor.
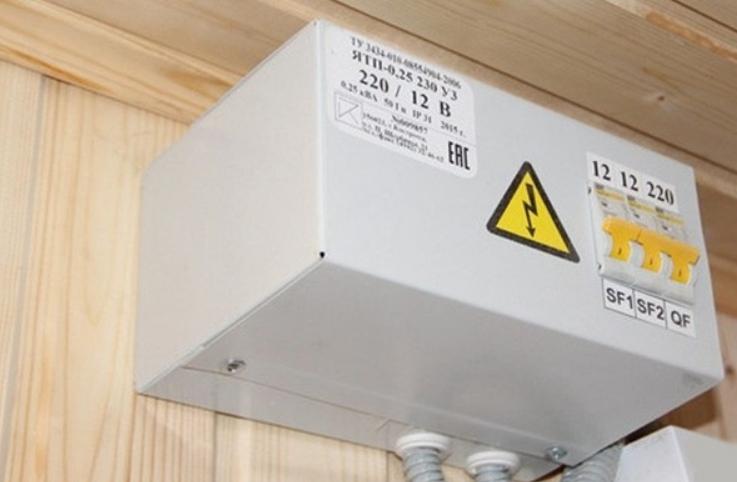
Cable for connecting a single-phase load with a grounding conductor. - Safety rules prohibit the use in the garage, and especially in the inspection pit, of carrying, powered by 220V. In this case, you need to purchase an LED lamp powered by 12 V. It can be powered from a car battery, but it is better to install a stationary step-down transformer, to which you can connect any equipment powered by 12 Volts.
![a step-down transformer.]() When using low voltage, a step-down transformer is added to the system.
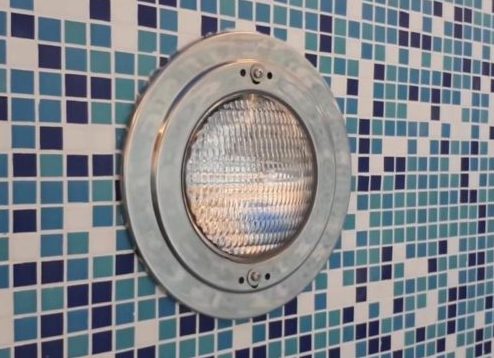
When using low voltage, a step-down transformer is added to the system. - For lighting, choose luminaires with protection level IP65 or higher, they should work well in fluctuating humidity and dusty environments. Choose airtight shades that will provide protection even at low temperatures.
- Sockets must also be selected with moisture protection, they must be grounded. Ideally, choose closable structures that prevent moisture or foreign objects from getting inside.
![Do-it-yourself lighting wiring in the garage]() When choosing sockets, carefully look at the degree of protection.
When choosing sockets, carefully look at the degree of protection. - The cable must be laid strictly vertically or horizontally. Diagonal fastening to reduce the angle is not allowed. Crossings and bends at an acute angle are prohibited.
- Before you conduct and connect electricity, you need to coordinate the work with the leadership of the garage cooperative (if any). There you can also find out what documents are required.
- The minimum distance from the ceiling when laying the cable along the wall is 10 cm; a distance of at least 15 cm must be observed from openings and communications.
- The light should be distributed evenly, there should be no dark corners and uneven lighting. Choose equipment with diffused light so that it does not hit your eyes.
- It is better to provide different options for turning on the light so as not to use all the equipment all the time. Ideally, select local areas (for example, above the workbench) so that they can be connected separately.


By the way! If a street lamp is installed in front of the entrance to the garage, it is worth equipping it with a motion sensor so that the light turns on and off automatically.
Types of light sources
When choosing a lamp or other light source, you need to pay attention to several points: equipment safety, working life, protection from moisture and dust, resistance to temperature extremes. Therefore, it is necessary to evaluate all the pros and cons of each type and make the right decision.
Lamp types
Different options are suitable for a garage, but you need to take into account the conditions of use and structural features. Based on them, you can choose one of the following types:
- Incandescent lamps used to be installed in all garages, but today they are rarely used due to the high consumption of electricity and a small resource of work. The filament gives not very high quality light and distributes it unevenly. Lamps for the garage are most often bulky due to the large diffuser and massive body. During operation, they get very hot, which creates an additional danger.
![Do-it-yourself lighting wiring in the garage]() Incandescent lighting example
Incandescent lighting example - Halogen bulbs - These are improved products with a tungsten filament and an inert gas pumped into the flask. The light from them is much brighter, but the electricity consumption is also high. During operation, the surface gets very hot, so a ceiling is a must, this type does not tolerate shock, power surges, dust, so it will not work in the garage. A plus is the ability to use low-voltage lamps operating on 12 V through a power supply.
- Fluorescent lamps give a bright light, while not consuming a lot of electricity. They can be both in the form of flasks and in a compact version for a standard cartridge. Suitable only for heated garages, since at temperatures below 5 degrees they work poorly and quickly fail.Another drawback is the mercury vapor inside, which evaporates into the air when the flask is damaged.
![Do-it-yourself lighting wiring in the garage]()
- LED lamp and lamps consume the least electricity and give an even light without flickering. You can choose a different color temperature, which is also important for comfort. For good visibility, it is better to choose cool tones that provide bright, even illumination. Instead of lamps, you can use lamps or LED strips, which can serve as backlighting or full-fledged lighting of individual areas.
![LED lighting is the safest]() LED backlighting is the safest and most economical to date.
LED backlighting is the safest and most economical to date.

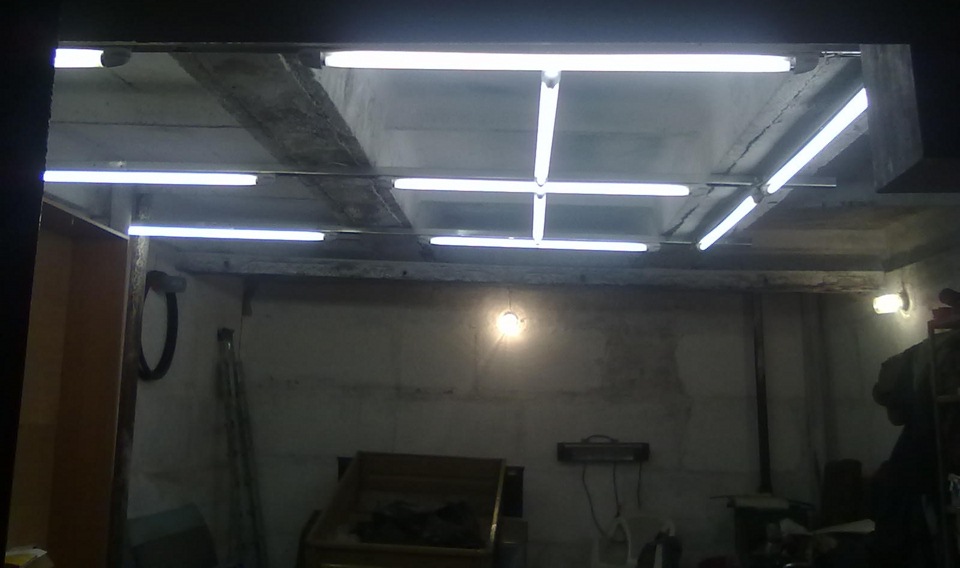
You can combine different options if it gives a good result. But If possible, it is better to equip the garage with low-voltage LED lightingto ensure safety. A good LED garage lamp is more expensive, but due to energy savings and a long service life, it will end up being cheaper.
Pit lighting
This part of the garage is distinguished by the most difficult operating conditions for lamps, so it is necessary to select equipment carefully. To make a safe and durable system, you should follow a few tips:
- Choose luminaires with an IP67 moisture and dust protection class. This is the most reliable option that can withstand even a jet of water and works with severe air pollution. Information on the protection class is on the packaging or in the documentation for the luminaire.
![Lamps with moisture protection.]() Lamps with moisture protection.
Lamps with moisture protection. - It is worth using only options whose ceiling lamps do not heat up during operation. During repair, you can accidentally touch the surface and get burned.It is better if the glass or diffuser is plastic, and the surface is protected by a metal or polymer frame.
- For safety, only low-voltage lighting should be used, operating from 12, 24, 36 or 50 volts. The best solution is LED equipment, as it is not afraid of dampness, shock and operates at a minimum voltage, while the quality of light will be excellent.
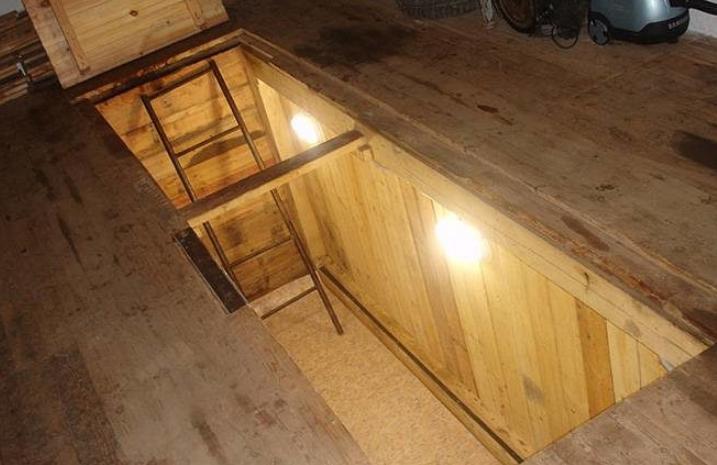
- It is worth positioning the lamps approximately at shoulder level, it is good if there is a niche in the pit for these purposes, it is much more convenient to set up and fix the equipment. Since you need to direct the light to different places, you can put LED spotlights - for the garage this is a great solution that will illuminate exactly the part of the bottom of the car that you need.
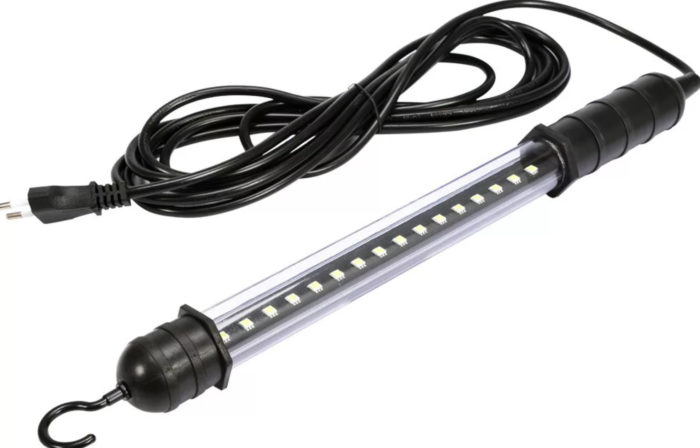
- Be sure to take care of carrying, with it you can highlight any place. It is better if it is an option in a shockproof case with a hook to hang it where you need it. The lamp must also work from a low-voltage line.
![Do-it-yourself lighting wiring in the garage]() A great option is the LED carrier.
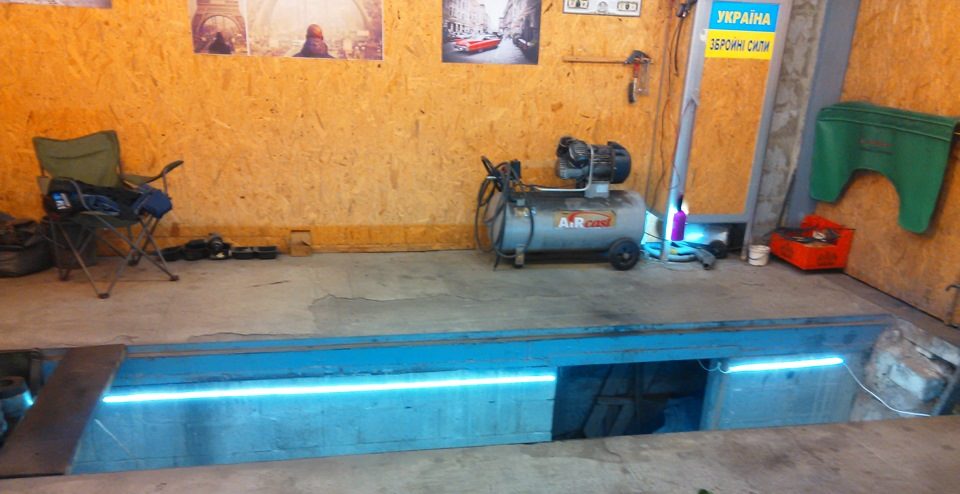
A great option is the LED carrier. - You can use an LED strip to illuminate the pit. In this case, you need a waterproof version in a silicone shell. It is better to choose cold white light, calculate the amount according to the size of the pit. Most often, the tape is attached on both sides along the entire length.
The step-down transformer for the pit must be taken out of it. Usually it is placed in a switchboard, but you can equip a small cabinet closer in which to place the equipment.
Calculation of the number and power of fixtures
Illumination standards are in SNIP 05/23/95. In order not to understand the documents, it is easier to highlight the main points and, in accordance with them, determine the necessary number of fixtures and them location:
- For simplicity, use the norm for garage lighting in lux (this is an indicator equal to 1 lumen per square meter). If the garage is for repair work, then the minimum rate is 200 lux, when they just put the car in the room, 50-100 lux is enough. When carrying out work for a long time (more than 4 hours a day), it is necessary to provide illumination of at least 300 lux, and for painting and body work - 500 lux and more.
- For each type of lamp there is data on the luminous flux, and for LED it is indicated on the package. To calculate the illumination rate for a garage, you need it area in square meters times 200. For example, if the room is 4x5, then 20x200 = 4000 lux. On average, a 10 watt LED option gives a luminous flux of 700 lm, so you need 6 light sources (you need to round up).
- It is better to use two less powerful lamps instead of one - the more uniform the light, the better. Therefore, it is worth considering in advance the location of the equipment, based on the characteristics of the garage and its size.
- With a large garage width, it is better to place the lamps on the ceiling with an indent of at least 50 cm from the wall, the rows should be no less than a meter apart from each other. If the ceiling height is high, additionally fix the lighting elements on the walls at a height of 150 cm from the floor.
![Do-it-yourself lighting wiring in the garage]() The location of the fixtures should be selected individually for each garage.
The location of the fixtures should be selected individually for each garage. - If the ceilings are low, you can only do wall lamps, evenly distributing them on the walls. Light the working area either with equipment located below eye level, or install ceiling lights that can be adjusted if necessary.
- Plan the lighting of the viewing hole based on the norm of 200 lumens per square meter. Arrange evenly so that there are no dark areas. You can additionally make the backlight on the steps to secure movement.
By the way! To see what is on the floor and safely get out of the car, you can make a light at a level of 40 cm from the floor.
How to get the job done
To do everything right, you must follow the step-by-step instructions and follow it step by step. Then no problems will arise and it will not be difficult to understand the process. All work is important, if you miss a moment, then you have to redo the system or even lay it again.
Training
You need to start long before the work is done. First of all, obtain all the necessary permits and deal with the connection to the power line. You also need to prepare a tool for work, its set depends on the method of laying the cable. It is important to remember the following:
- First of all, create a project. It provides for all the important points: the installation location of the electrical panel, the location of junction boxes, lamps and sockets. Also determine how the cable will be laid, where it is better to place a step-down transformer and other lines, if any.
- Buy lamps, sockets, switch cabinet and other components - automatic devices, RCDs, connecting blocks, transformer, etc. Also, purchase a cable of the required section, take it with a margin, since you need to leave the ends for connection, and the actual consumption may turn out to be a little more than according to plan.
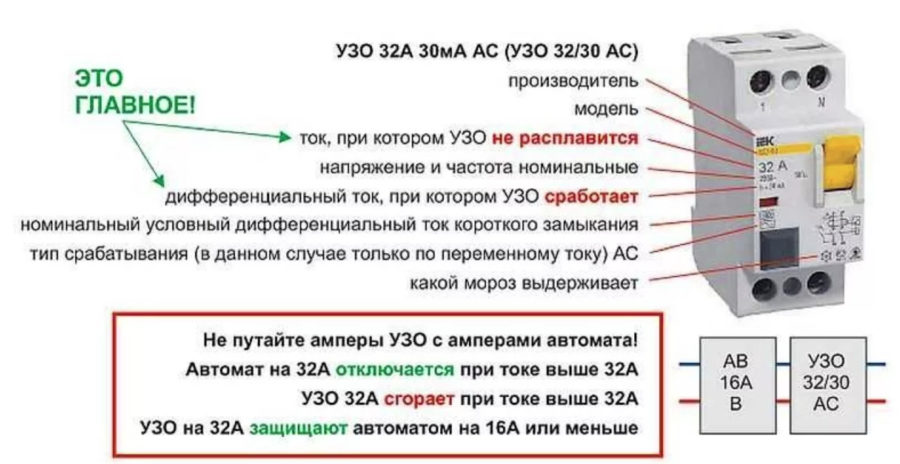
![Do-it-yourself lighting wiring in the garage]() Residual current device (RCD)
Residual current device (RCD) - Also buy everything you need to lay the cable.If it is placed in an open way, then cable channels or special brackets are needed. With hidden laying, you will need a corrugated sleeve, which is laid along the entire length of the cable lines.
- Define connection method. If you need to supply separately, use the option with an overhead line or underground cable laying. In garage cooperatives, electricity is usually run through the top of the garage and a branch line must be made.
If you need to make strobes, you will need a puncher with a shovel for concrete and a grinder with a disk for stone.
Wiring
It is best to do hidden wiring to eliminate any risk of damage to the cable and hide it from adverse influences. The work is done like this:
- Laying lines are marked, the easiest way is to make marks on the walls in order to have clear guidelines in front of your eyes. Remember the rules and lead the cable strictly vertically or horizontally.
- If open wiring is used, fix the cable channel with self-tapping screws or dowel-nails, depending on the type of wall. Cut corners at 45 degrees so that the joints are clear and do not open the cable.
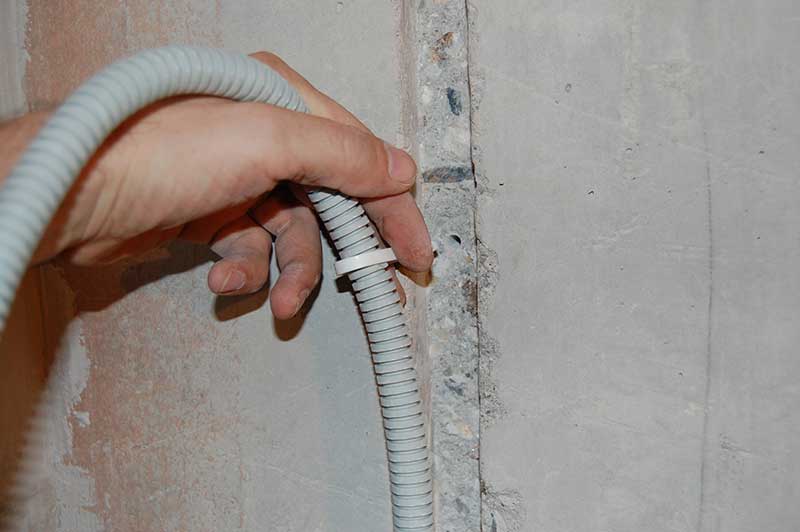
- With a hidden option, strobes are made of such a size that a corrugated sleeve is placed there. The easiest way is to make cuts with a grinder, and then knock out with a perforator.
![Do-it-yourself lighting wiring in the garage]() An example of laying in a strobe.
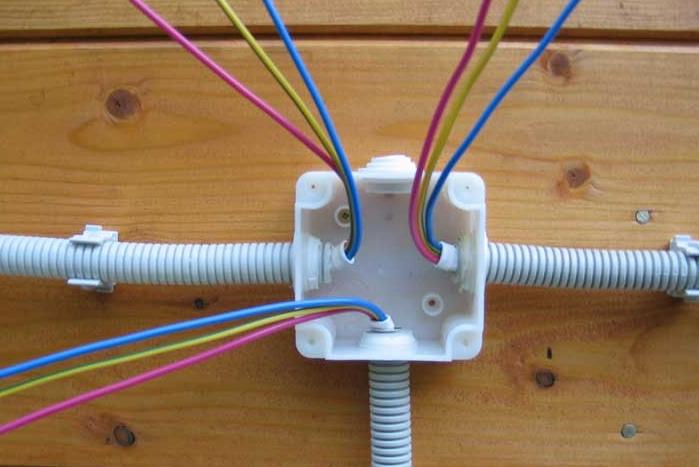
An example of laying in a strobe. - Lay the cable. Make connections using blocks. If twists are used, they must be soldered and placed in a heat shrink tube.
![Do-it-yourself lighting wiring in the garage]() All branches are made through junction boxes.
All branches are made through junction boxes. - After laying, close the cable channel or putty the strobes to hide the laying place, leave the wires drawn out in the right places.
- Pay special attention to the wiring that is led into the inspection hole. It should be hidden and well waterproofed. The ideal solution is to lay it when pouring the screed.
- Fix fixtures and sockets in their locations. Choose a mounting method depending on the type of equipment and the surface on which it is installed. Pay special attention to the contacts, they must be reliable and well insulated.
There are special wiring connectors that ensure the tightness of the joint.
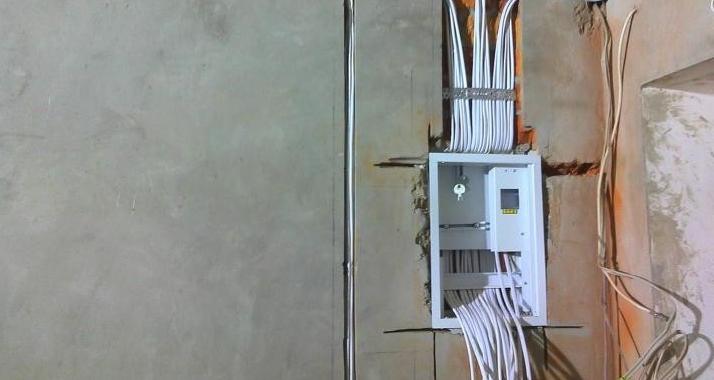
Electrical panel installation
This is the main element from which all lines in the garage are conducted, so it must be done with high quality, not to save on components. Work is carried out as follows:
- The distribution cabinet is fixed, it is best to put it near the entrance for easy switching on and off.
- First of all, an introductory machine is installed, which will be responsible for the supply of electricity. If necessary, install a counter.
- Next, you need to install linear automata. Here everything is done according to the scheme, models of suitable power are selected. Also, an RCD is installed on each machine to protect against short circuits, it must switch both phase and zero.
- A step-down transformer is installed, it is also easiest to place it in the shield.
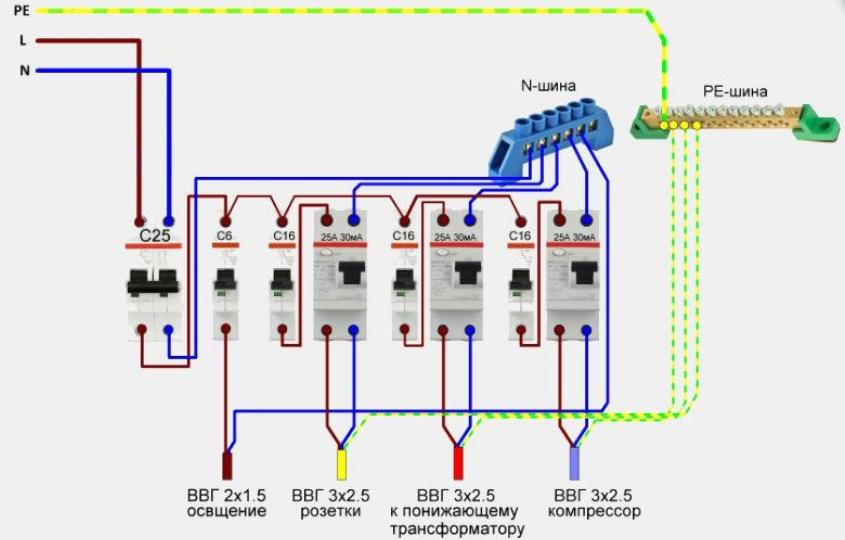
By the way! Do not forget about the ground loop, it should be done when wiring.
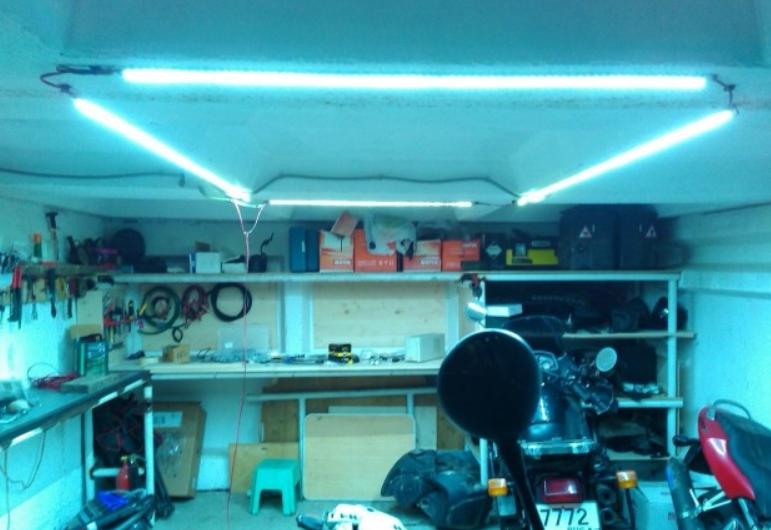
Affordable LED strip lighting
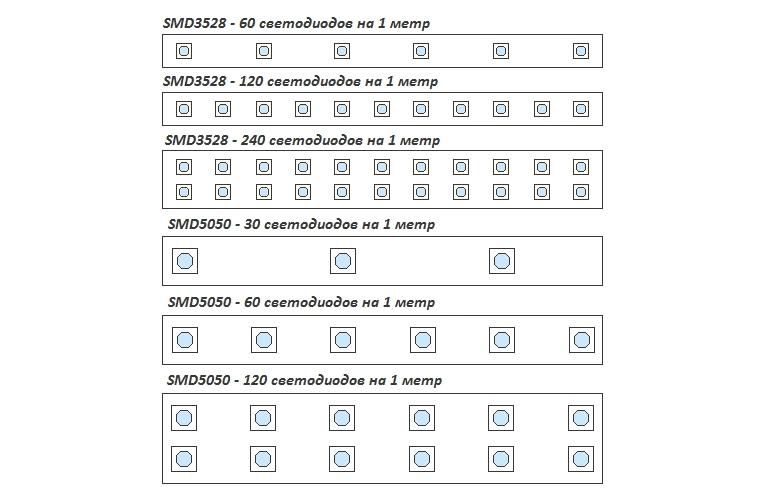
If you don’t want to bother with wiring and installing fixtures, you can make safe low-voltage lighting, which can be powered by one switch or socket. First of all, you need a sufficient amount of LED strip (you need to know characteristics of one diode, to divide by this figure the required power, the result will be the number of diodes that will be required).
Diodes can be located on the tape with different frequencies, the more of them, the better. Choose options with cool white light. colored ribbons RGB it is better not to take it, since their light characteristics are an order of magnitude lower than those of monochromatic ones.
For power, you can buy a ready-made module, or you can adapt power supplies from a computer to further reduce the cost of the project. You will also need wires for connection, connectors or a soldering iron for connections contacts.

Step-by-step instruction
Even those with minimal electrical experience can do the job. To make the light in the garage using tape, you need to follow a few simple recommendations:
- Choose the location of the LED strip. Beams, or any flat surface, work well. If the ceiling or wall is curved, it is worth fixing a flat rail or aluminum profile on it so that there is a basis for the future lighting system. It is easier to fix the tape on a beam or other wooden element that is not very smooth. If you first glue a construction double-sided adhesive tape on a foam basis, it will ensure the reliability of installation.
- LED strip cut in the right place (it is marked on the surface) and gently stick, gradually removing the protective film from the back. If double-sided tape was used, remove the protective layer from it, the tape is attached very firmly to such a base.
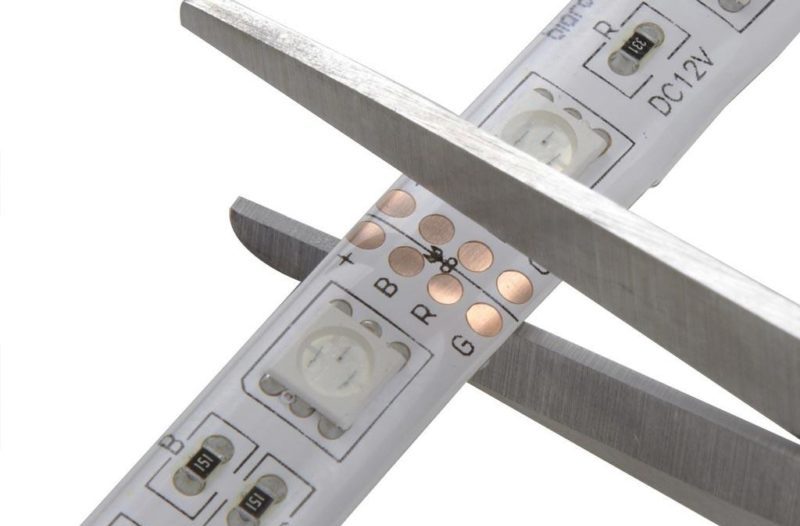
![Places for scissors.]() The places for cutting on the LED thread are additionally marked with a dotted line or a scissors icon.
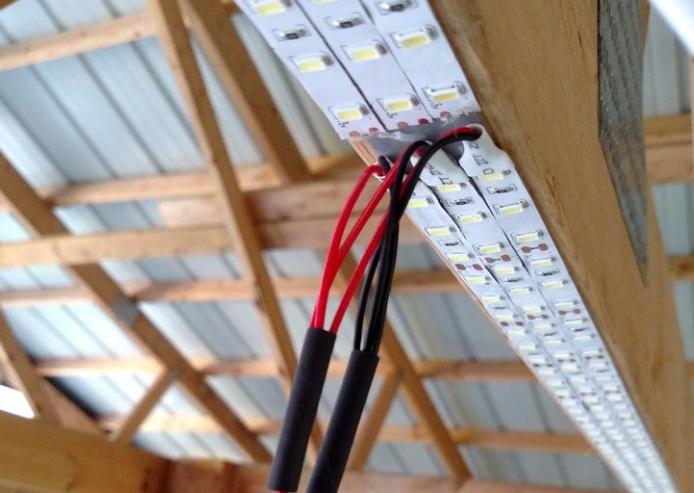
The places for cutting on the LED thread are additionally marked with a dotted line or a scissors icon. - If one line of diodes is not enough, you can fix two or even three. Due to this, high-quality light is provided so as not to put lamps. Next you need to solder the wires or connectors. Connect each tape separately if you connect them successively, the light will be dim. Solder all connections and place in heat shrink tubing to protect from moisture.
- The wires can be brought to the location of the power supply, they can be mounted on the walls with brackets or special clips. If power supplies from a computer are used, then the required number should be calculated according to their power. It’s easier to put a ready-made version through which the light is connected.
If your garage has lights with reflectors, you can paste there tape to increase the intensity of illumination.
In conclusion, thematic video:
It is not difficult to conduct light in the garage, if you understand the topic, draw up a detailed diagram and lay the wiring in accordance with the PUE. It is best to use LED lamps or strips, as they operate at low voltage, consume little electricity and have a long life.