Features of connecting LED lamps
LED lights are gaining popularity these days. They spend less electricity, have different lighting angles, different colors. With their help, you can create an interesting design, zone the room. Connecting an LED lamp is quite simple, even in a hard-to-reach place. But the installation has some peculiarities.
Features of LED light sources
LED lamps come in different shapes and designs. They can take the form:
- a long ceiling resembling a fluorescent lamp;
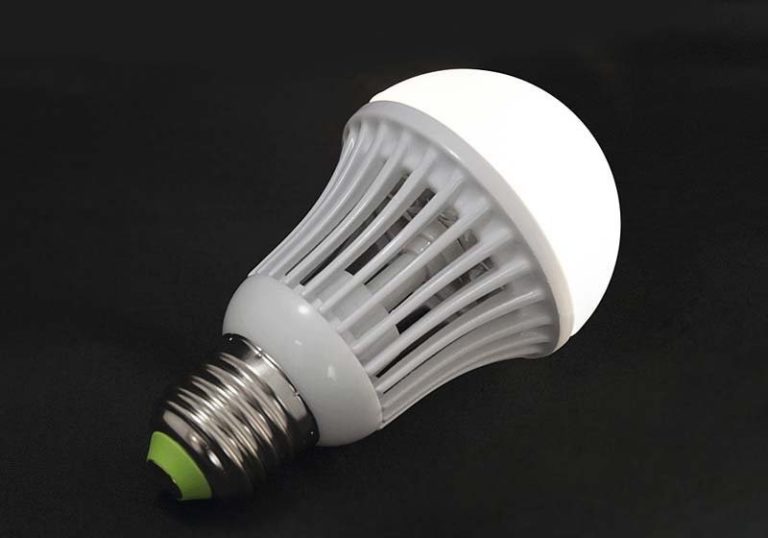
- light bulbs with a base resembling an incandescent lamp;
- flexible threads that can be shaped into any shape.
LED lamp or lamp usually has plafondthat scatters bright light. Due to this, the lighting becomes softer, the angle of the glow changes. LED options can be mounted to the ceiling or walls using various methods:
- screw into the base of the chandelier;
- have a hanging mount;
- attach to the wall or ceiling with self-tapping screws.
The lamps are produced in different types of operating voltage: 400 V, 220 V and 12 V. In any case, they require the purchase of an additional power supply or dimmer, which will allow you to connect the lamp directly to the network.

Despite the nuances in connection, any LED lamp have advantages:
- low power consumption;
- powerful light output or bright glow;
- long service life.
Among the shortcomings, the high cost of devices and the cold color of the glow, which not everyone likes, are noted.
Basic connection methods
Since LED lamps have a different viewing angle, they are usually connected to different schemes. The choice of connection scheme depends primarily on:
- fastening method;
- illumination angle of the LED;
- the number of lights in the room.
There are three connection schemes in total:
- consistent;
- parallel;
- radial.
Series circuit
The daisy-chaining of LED fixtures is simple and is used if there are no special requirements for lighting design. The advantage is cable savings and ease of installation. All lamps are connected in a chain one after another. However, if one of the lamps fails, the entire chain will go out. To find the problem, you will need to check each of them.
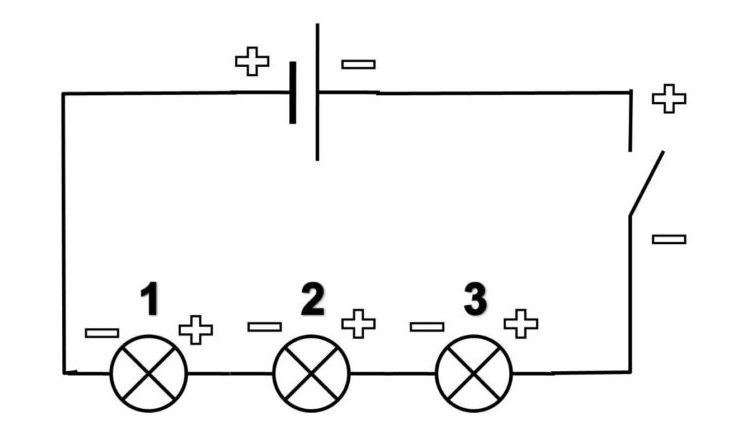
In one circuit, no more than 6 lamps or light bulbs can be connected. Otherwise, their brightness will decrease due to an increase in the total resistance of the circuit.
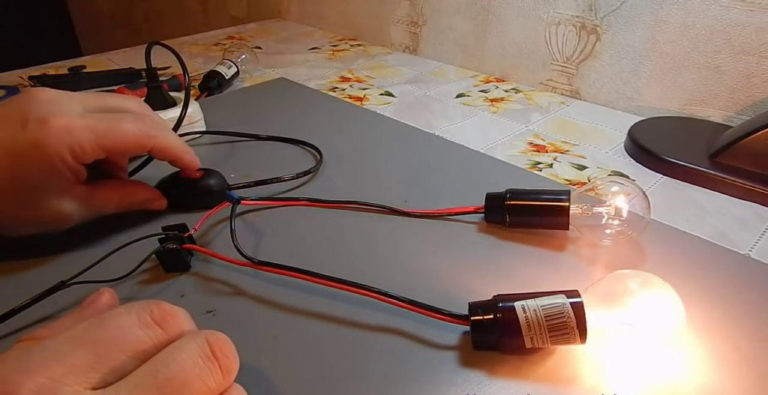
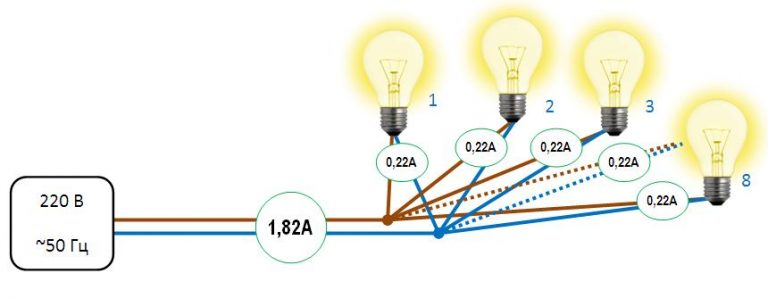
parallel circuit
The parallel circuit allows you to connect the LED lamp each separately.For 12V fixtures, you will need to install several dimmers or one for the entire parallel circuit.
With the circuit, a common cable is pulled from the switch, which has a branch to each light bulb. If one of the lamps fails, it will go out without hitting the entire lighting system. A defective instrument will be immediately visible and can be quickly replaced.
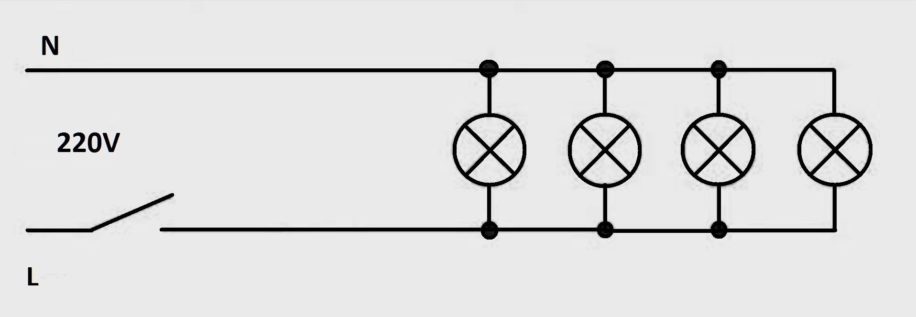
This method is more time consuming and requires more cable. However, this scheme is designed primarily for rooms with a large area. With this connection, the brightness of the light will not depend on the number of bulbs.
Advice! When choosing a cable for connection, it is important that the abbreviation "NG" is present in the marking, indicating the incombustibility of the wire, because. connecting a large number of light bulbs increases the risk of fire hazard.
Beam scheme
The beam scheme for connecting an LED lamp is used to connect light bulbs in chandeliers. It resembles a parallel method. In this scheme, the cable runs from the switch to a distribution outlet or node, from which separate branches or rays extend to each light bulb.
If one of the LEDs burns out, the rest will glow, because. Each has a separate wire.
The main disadvantage of this connection method is the complexity. When using the method in a room with a large area, such a technique is possible: the central cable stretches to the center of the hall, and rays depart from it to each lamp.
What is a driver for?
A feature of LEDs is that as they warm up, the current passing through them increases. This can lead to failure shortly after the start of operation. To monitor and regulate the voltage level during operation is required driver.
The choice of power depends on the minimum and maximum values of the LEDs. If you select a driver with too low minimum values to connect LED lamps, then the dimmer will not be able to lower the voltage to the required values \u200b\u200band the lamps will burn out. And vice versa, when limiting the upper voltage, if a large current is required, then the devices simply will not be able to catch fire.
You can connect as many lamps as you like through one driver to the power source, since current of the same strength will flow through them.
LED Connection Methods
When LEDs are on, their resistance changes constantly as they heat up. In order for them to work stably, different methods of controlling and changing the voltage are used.
Shunting an LED with a conventional diode
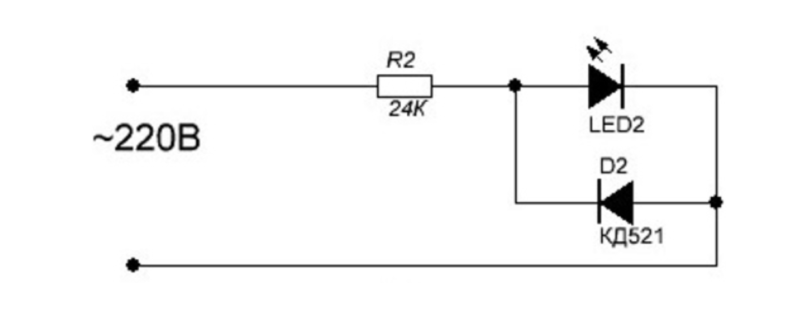
This technique is used with any scheme for connecting LED lamps. The shunting method consists in the fact that a simple low-power semiconductor is connected to the LED circuit in the opposite direction, which acts as a resistor. It is placed on the opposite course parallel to the entire scheme.
Its main function is to straighten and smooth the voltage supplied to the LED. With a parallel or beam connection, a different voltage can fall on each device, so it would be wiser to use a different method here - anti-parallel voltage rectification.
Back-to-back connection of two LEDs
This method is similar to the previous one, but differs in that the resistor or rectifier is connected to each lamp individually. That is, voltage shunting occurs at each stage, regardless of the entire circuit.
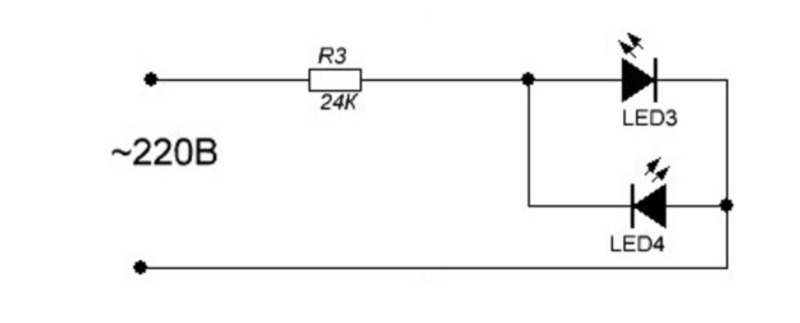
The downside is that as a result, the voltage will drop throughout the circuit.This means more electricity consumption. However, given that LEDs consume significantly less current than other lamps, this disadvantage is not significant.
How to connect through the switch
Scheme of connecting a single-gang switch.
When connected to a switch, it is also necessary to use a voltage regulator that quenches the resistor. First, the zero phase is connected directly from the junction box. After that, a resistor is connected to the lamp, and then a wire with the main phase is connected to it.
With such a connection sequence, if you mix up the phases, nothing serious will happen. The only thing is that the lamps will be energized constantly, and the switch will not perform its function. If you change the sequence, and first connect the resistor to the switch, then the phase confusion will lead to the burning of the lamps immediately.