Do-it-yourself lighting wiring in the bath
Lighting in the bath is of great importance, especially for the steam room, since there is most often no natural light there. To do everything right, you must follow a number of recommendations, since the operating conditions are very different from the standard ones and any violations can lead to short circuits or even fire. According to statistics, fires in baths most often occur precisely because of poor-quality or improperly laid wiring.

Security requirements
All standards for baths and saunas are set out in GOST 50571.12-96, SNiP II-L.13-62, as well as in the seventh edition of the PUE (Chapter 7). To make it easier to understand, the main requirements are collected in this section:
- Wiring can be carried out both closed and open method.The first is suitable for wooden buildings and for cases where the surface is already trimmed. For laying, a cable channel or PVC corrugation is used; it is forbidden to use metal pipes and other elements that conduct current.
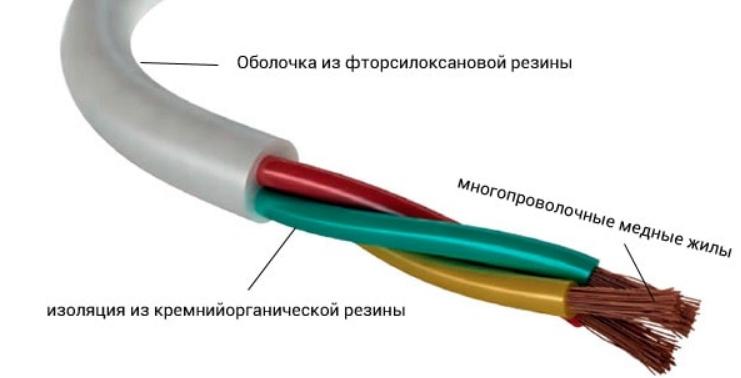
- It is best to use a cable that can withstand heating up to at least 170 degrees. Suitable copper options RKGM, PRKS, PVKV, PRKA. You can also use a single-core or multi-core PMTK, designed to operate at temperatures up to 200 degrees. From foreign analogues, OLFLEX HEAT 205, designed for use in saunas, is suitable. As for other rooms in the bath, where the temperatures are not as high, VVGng-LS is suitable there.
![cable options]() One of the cable options used for laying in saunas and steam rooms.
One of the cable options used for laying in saunas and steam rooms. - Do not use a cable with metal braided elements, because due to humidity and temperature, they will quickly rust. With an open laying method, the combustible surface must be at least 10 mm. Be sure to use a non-flammable gasket that protrudes on both sides by a centimeter.
- It is strictly forbidden to install sockets, switches and junction boxes in the steam room. They should be taken out of the room and located in the most convenient place to make it easier to lay the cable.
All metal elements (furnace body, lamp, etc.) must be grounded, and the building must also be equipped with lightning protection. - In the distribution switchboard, it is imperative to install circuit breakers for protection against short circuits and RCDs. RCDs should be selected so that the tripping current does not exceed 30 mA, and preferably 10 mA.
![Do-it-yourself lighting wiring in the bath]() Residual current device (RCD)
Residual current device (RCD) - It is not possible to lead the cable over the oven, it is better to choose a place at a distance from it.You can connect wires using pads, soldering, special sleeves or welding. It is forbidden to use twists, since in difficult conditions such a connection does not provide the necessary reliability.
- When choosing the power of the equipment, lighting standards for different rooms in the bath are taken into account. In the steam room, locker room, relaxation room and shower room, the minimum level is 75 lux, if there is a pool, then there is a norm of 100 lux and more.
- If a natural lighting in rooms no, it's worth equipping emergency light, which will allow you to safely leave the premises during power outages on the main line.
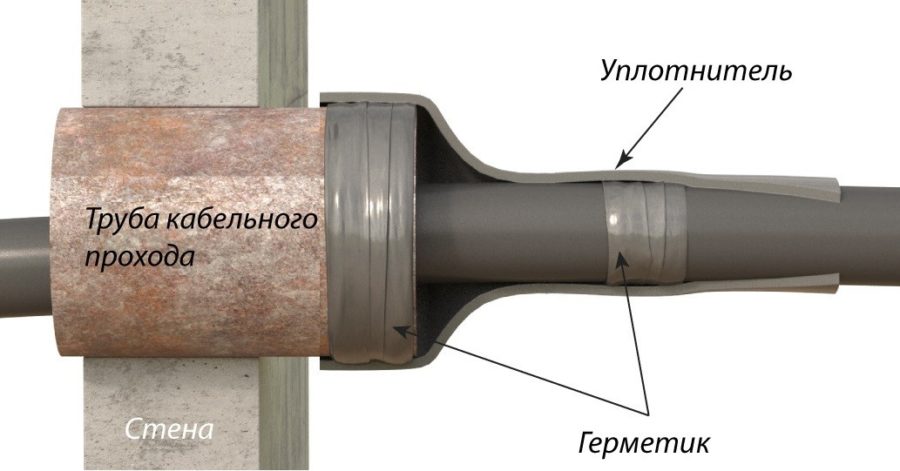
- When passing the cable through the wall, you need to insert a piece of metal pipe. This is necessary in order to prevent damage to the cable when the wall is deformed.
- When choosing fixtures and sockets for all rooms, consider the conditions of use. For places with high humidity, choose models with protection class IP65 or higher. Standard equipment can be placed in changing rooms or corridors.
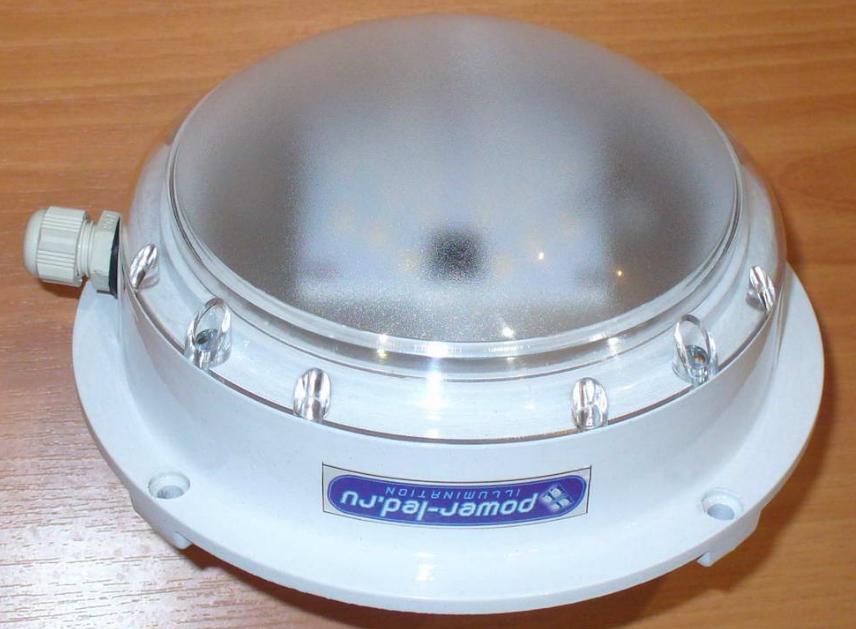
![Sealed Heat Resistant LED Downlight]() Sealed heat-resistant LED lamp for rooms with temperatures over 100 degrees.
Sealed heat-resistant LED lamp for rooms with temperatures over 100 degrees.

By the way! In order not to lay wiring in the steam room, you can conduct it in adjacent rooms and make holes in the wall for connection at the locations of the lamps. In this case, you do not have to protect the cable, the work will be greatly simplified.
What voltage is best for wet rooms
The light in the steam room should be not only functional, but also safe. It is necessary to pay attention to the choice of a suitable voltage, there are several options:
- For the main power supply of all premises, single-phase voltage is most often used. for 220 V.This is the most common solution, which is also suitable for lighting in a steam room, subject to several conditions: protection using differentiated automata and RCDs, grounding using the TN-C-S system. It is also mandatory to have an EMS (potential equalization system).
- If powerful electrical equipment with high power consumption is used, then a three-phase input is suitable. This option is used to power boilers, underfloor heating, pumps, etc. And the requirements for lighting in the steam room are the same as for a single-phase one.
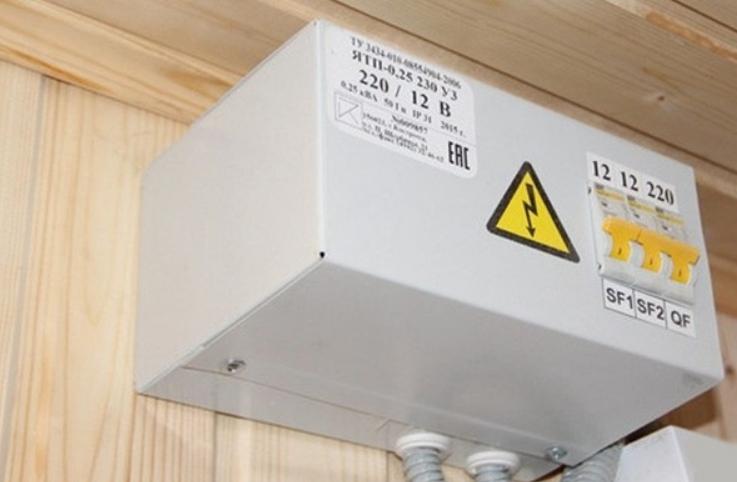
- The single-phase reduced version is used for lighting. If you lead the light into the bath, operating on a voltage of 12 or 36 volts, then the level of safety for a person will be many times higher. This is the most preferred solution for which a step-down transformer is required. It should be installed in a shield or in a room with a normal level of humidity; it cannot be fixed in showers and steam rooms. If you implement this option not only in wet rooms, but also in the rest room, corridor and dressing room, you can save on electricity.
In addition to lighting from a low-voltage line, other equipment can also work. If necessary, you can install and sockets.
What lamps are suitable for the steam room
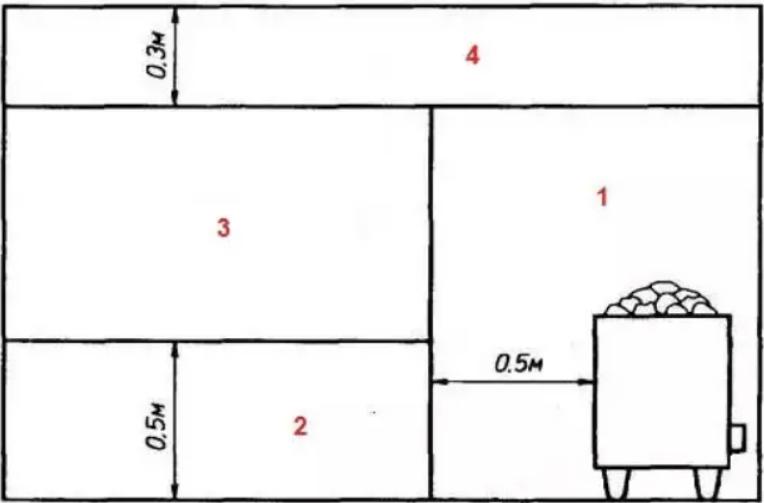
First of all, you need to remember a simple rule: lamps in the steam room can not be placed on the ceiling. They are always fixed to the wall at least 30 cm from the ceiling. Moreover, they should be located in the third zone, in the second one you can put only the backlight, the easiest way to navigate is according to the scheme.
There are a few simple guidelines to keep in mind:
- Illumination of the second zone can be done using lamps with a heat resistance of 50 degrees. But it is better to put options there that can withstand high temperatures in order to eliminate any problems.
- In the third zone, the main lighting is placed, only lamps with a moisture protection level of at least IP54 should be selected. At the same time, the ceiling and the body must normally withstand heating up to 125 degrees.
- When choosing, it is best to give preference to models with a ceramic base, they tolerate heat much better. Plastic bases are not the best solution for a steam room with changes in temperature and humidity.
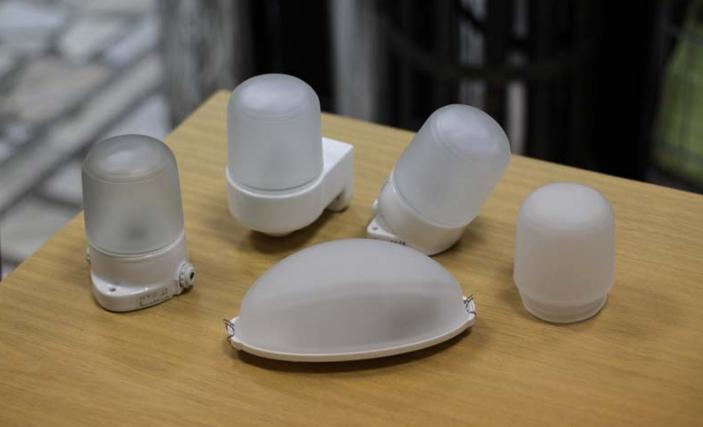
![plafonds on a ceramic base.]() Ceiling lamps on a ceramic base are best suited for a steam room or sauna.
Ceiling lamps on a ceramic base are best suited for a steam room or sauna. - The plafond can be made of frosted glass or heat-resistant polymer material. Usually, for tightness, a silicone gasket is placed between the ceiling and the body.
From the video you will learn whether it is worth using LED lamps in the bath.
As for light sources, there may be several options. All of them showed themselves well in their work, so you need to choose based on the characteristics of the steam room and the budget:
- Incandescent lamps is the traditional version still in use today. They consume a lot of electricity, do not last very long, but are cheap. Usually, bulbs with a power of more than 60 W cannot be placed in ceiling lamps, so the light is not very bright, the shade is yellow, close to natural.
- Halogen options work well in the steam room, as they themselves heat up to high temperatures, so hot air does not harm them. They differ in the quality of light and can operate on both standard and low voltage, which is very important.The service life is not very long; for maximum efficiency, heat-resistant lamps should be purchased.
- Fluorescent lamps allow you to equip comfortable lighting in a sauna or steam room, as they have different brightness options and glow with a minimum flicker rate. They come in different shapes and sizes, the main thing is to buy a model with a high degree of protection against moisture and heat.
- LED lamps were not previously used in steam rooms, as they did not tolerate extreme conditions well. But now there are models that are specially designed for high temperatures, you only need to choose options for saunas, standard equipment cannot be used. Diodes consume little electricity, give a soft diffused light and operate at low voltages.
- Fiber optic lighting systems are considered among the best for steam rooms. They consist of a projector and long light-transmitting elements that are placed in the right places and give a comfortable light. The option is more difficult to install and costs much more than other solutions, but it can withstand heating up to 200 degrees and provides the maximum level of security.
Review of prices for popular bath lamps.
Options for placing lamps in the bath
It all depends on the room, as there are several types with different operating conditions. It should be noted that you can install lamps with the maximum level of protection everywhere. The main features are:
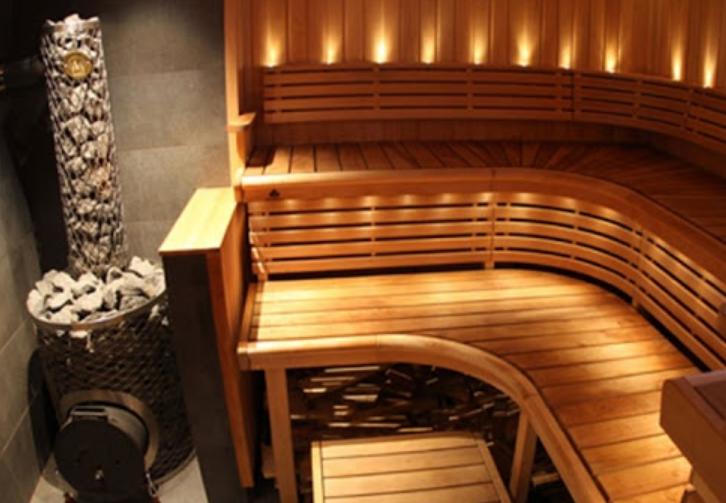
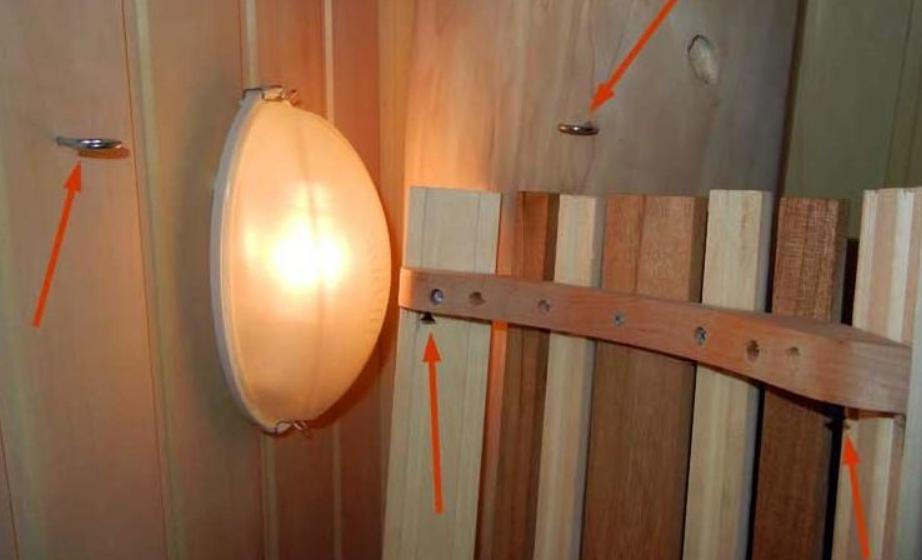
- In the steam room, it is best to place lamps on the wall or in the corners. When choosing a location, consider safety, equipment should not interfere with people.If the room is small, it makes sense to place the light source in a wooden frame so that no one will definitely touch it. The backlight in the bath can be located at the bottom of the wall or under the shelves, if they are not solid and let in light.
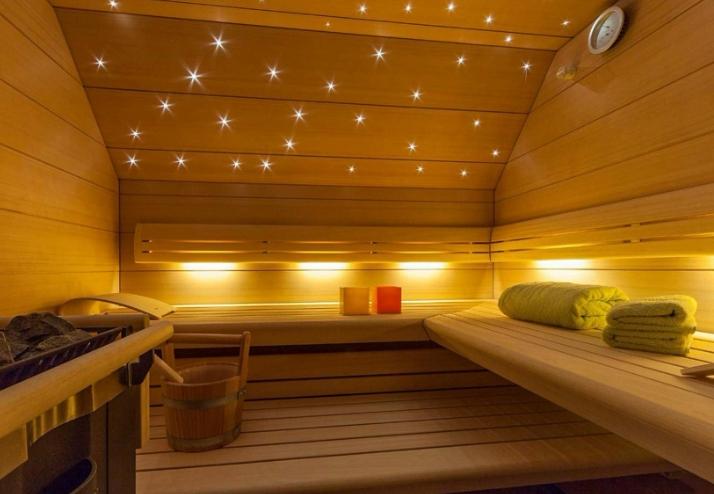
![Light sources in the steam room]() Light sources in the steam room can be located behind the seat back or under it.
Light sources in the steam room can be located behind the seat back or under it. - For showers, choose fixtures with a high degree of protection against moisture, they must withstand even a direct hit by a jet of water. But it is better to place them so that less splashes fall on the surface and at the same time the illumination is normal in the booths and in other parts of the room. It is allowed to mount the equipment both on the walls and on the ceiling.
- In the dressing room people undress, there are also mirrors, sockets for connecting electrical appliances. There are no restrictions on equipment, you can place lamps on the walls, use spotlights, or hang a chandelier or light panel in the middle.
- For a rest room, lighting is chosen based on comfort and design. It can be any model - from classic chandeliers to the LED strip. It is only worth remembering that it is better not to use fluorescent lamps for unheated rooms, as they do not work well at temperatures below 5 degrees.
In the corridor and in front of the entrance, it is better to place lamps designed for open air. So that the light on the street does not work for a long time and turns on only when there are people in the yard, the easiest way is to install a motion sensor.
Stages of installation of electric lighting
It is necessary to make not only the light in the steam room, but to create a complete and safe electrical supply system in the bath. Therefore, for simplicity, the work must be divided into stages and performed in turn.
Training
Even before the installation begins, a number of preparatory work must be carried out. Their list and complexity may vary. But most often the process consists of the following actions:
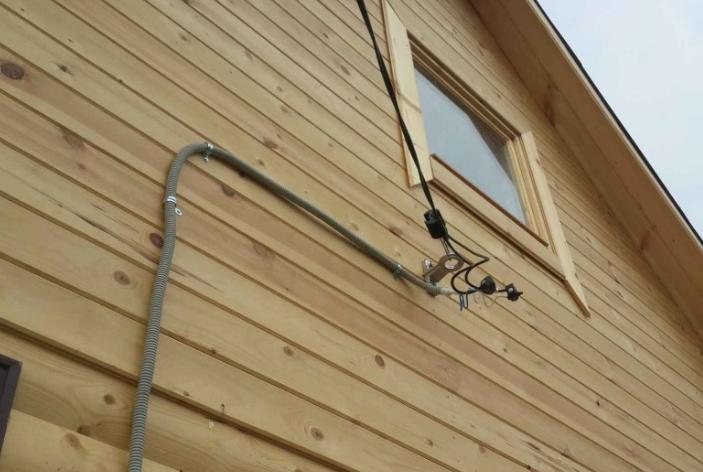
- Bringing the power cable to the bath. An overhead line is usually used, the cable is mounted on a special bracket on the wall, the height of the location should exclude accidental contact between people and animals. The second option is underground laying, it is an order of magnitude safer, but also more difficult. You will have to dig a trench, lay the cable in the HDPE pipe, but you can bring it directly into the room under the location of the shield.
![power line connections]() Most often, to connect the power line, you need to call an electrician from the power supply organization.
Most often, to connect the power line, you need to call an electrician from the power supply organization.![Do-it-yourself lighting wiring in the bath]() Scheme of cable routing through the outer wall.
Scheme of cable routing through the outer wall. - Drawing up a project. The more detailed and precise the diagram, the better. It is necessary to indicate all the lines that are required, it can be lighting through a step-down transformer, sockets, a boiler, underfloor heating, an electric boiler, etc. It is also necessary to provide grounding. For each branch, you need to install an automatic machine and an RCD to ensure safety.
![Sample project in the bath]() An example of a project in a bathhouse with a boiler and underfloor heating, lighting is done through a 12 V transformer.
An example of a project in a bathhouse with a boiler and underfloor heating, lighting is done through a 12 V transformer. - Calculation of necessary components and materials. First of all, determine which cable and how much you need, it all depends on the power of the equipment. If there is a boiler, it is worth reading the manual, it indicates the optimal cable section, which must be used to connect it. The easiest way is to make a list of everything you need. Do not forget about junction boxes and corrugation or cable channel - it depends on the laying method.
- Get everything you need for work.It is better to take a cable and other goods measured by linear meters with a margin in order to exclude a situation where several tens of centimeters are missing. Choose high-quality components, do not save on this. Prepare the necessary tools, it all depends on the specifics of the installation.

It is necessary to draw up a project in advance in the prescribed form and coordinate it with the supervisory organization.
Laying and connecting cables
Choose the location of the electrical panel, it is best to put it in a dry room near the entrance. The size is selected depending on the number of machines and RCDs that need to be installed. Sometimes there is also a step-down transformer. It is best if the cabinet will be locked to protect it from children. Work is carried out as follows:
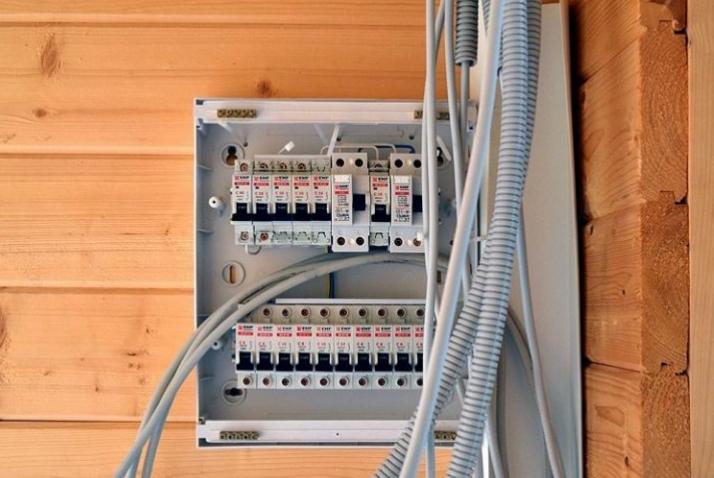
- The shield must be fixed at a height of 140-180 cm from the floor level. The power cable is wound through a separate machine, which can be used to turn off all power consumption if necessary. Next, all machines and RCDs are installed, they are easy to mount on a special bus. You can stick stickers indicating the purpose of one or another option, so as not to confuse.
![switchboard]() The size of the switchboard depends on the number of circuit breakers and RCDs that need to be installed.
The size of the switchboard depends on the number of circuit breakers and RCDs that need to be installed. - Make marks on the walls to see how the cable will go. Also mark the location of switches, fixtures and junction boxes.
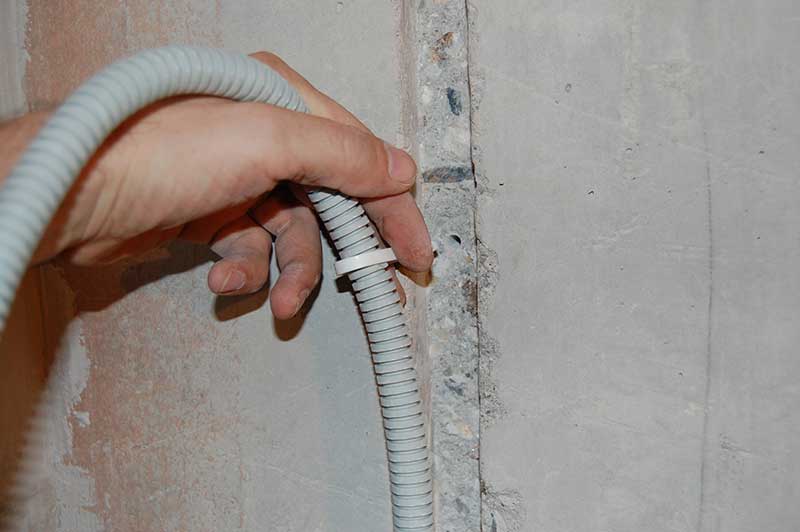
- If a hidden version of the gasket is used, then strobes are made using a puncher and a grinder with a disc for concrete. Cutouts are also made for sockets, switches and junction boxes; for this, it is easiest to use special crowns of a suitable diameter. In strobes, the cable is laid using PVC corrugations.
![Do-it-yourself lighting wiring in the bath]() An example of laying in a strobe.
An example of laying in a strobe. - With an open laying method, a corrugation or cable channel is fixed on the surface in compliance with all conditions. Boxes, switches and sockets can be both overhead and built-in.
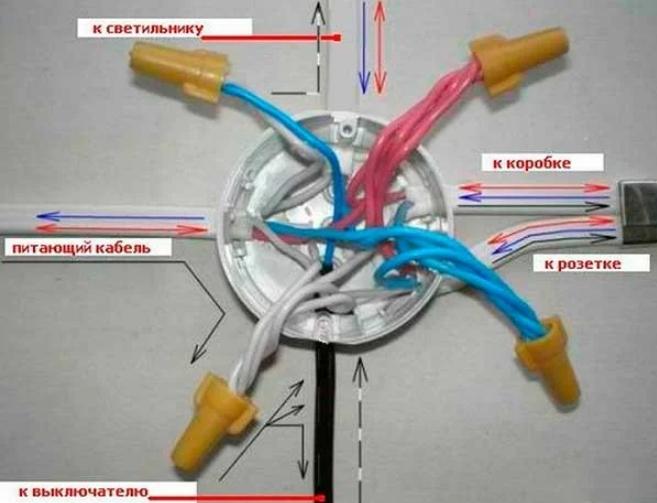
- Make cable connections only in junction boxes. It is best to use moisture-resistant caps or terminals for this. This is the simplest and most reliable solution that allows you to connect wires without even having much experience.
![sealed caps]() Special sealed caps for connecting wires - ideal for wet rooms.
Special sealed caps for connecting wires - ideal for wet rooms. - At the connection points, all energy consumers leave ends of sufficient length so that they can be connected without pulling the cable.
Do not forget about grounding, to the circuit of which the electrical panel and all the elements that require it are connected.
Fixture installation and inspection
After laying the wires, you can proceed to the final work. Everything is quite simple here:
- Connect lamps, sockets and switches using blocks or sealed caps if they are in a room with high humidity.
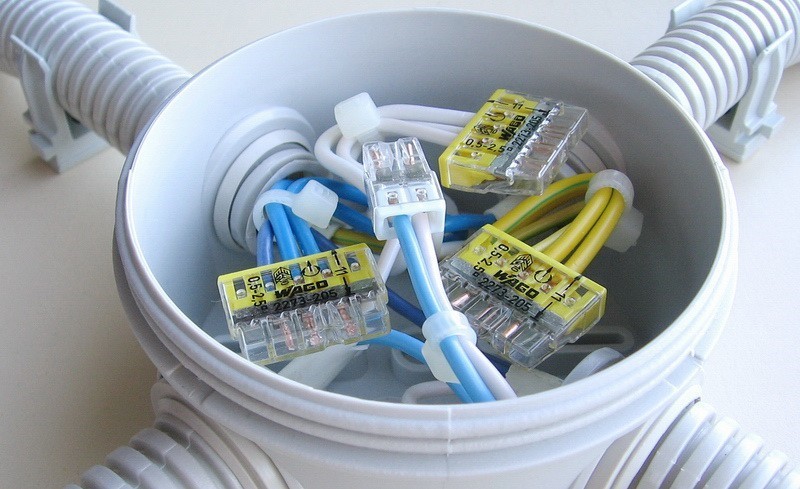
![Do-it-yourself lighting wiring in the bath]() An example of the correct connection of wires in a junction box.
An example of the correct connection of wires in a junction box. - Secure the equipment to the walls or ceiling in a suitable manner. The main thing is to firmly fix the elements in order to prevent them from falling.
- Connect the power supply and check the operation of all lights and sockets.
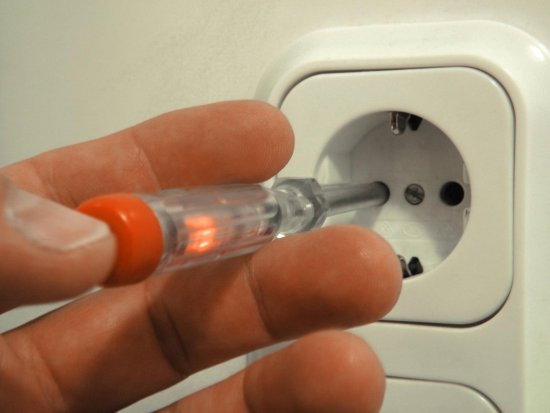
![Do-it-yourself lighting wiring in the bath]() Checking the socket with an indicator screwdriver.
Checking the socket with an indicator screwdriver. - Call a representative of the electrical testing company to verify all readings and issue a permit for use. This is the only way to be sure that everything is done correctly.
Low-voltage lighting can be powered both from a transformer and from a battery that will power the lights during power outages.
At the end of the video life hack: How you can save on buying a lamp in the bath.
It is not difficult to lay wiring in a bath, but a number of restrictions must be observed, since electrical equipment is operated in difficult conditions. It is important to follow the technology, choose reliable fixtures and assemble the system in such a way as to protect it from moisture and damage.