How to make your own lighting
Everyone can make a backlight from an LED strip. The process does not require special knowledge and the presence of a special tool, it is not difficult to get by with a minimal set that is almost always at hand. The main thing is to understand the installation features and choose high-quality components that will last a long time.
Options and places of use, pros and cons of application
You can use LED strip almost everywhere, which makes this variety universal. But there are several options that are used most often and provide a good result:
- Perimeter ceiling lighting. The tape is laid in a niche or behind a plinth, which is attached with a slight indent from the surface. Due to the reflection, the light is diffused, providing a uniform effect and a beautiful highlight of the contour of the room.
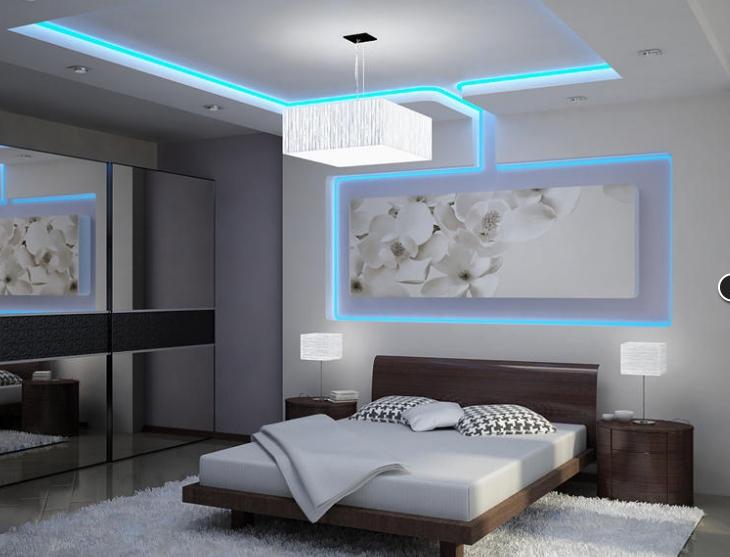
![How to make your own lighting]() LED lighting can transform any room.
LED lighting can transform any room. - Laying tape under protruding elements or in recesses on ceiling complex configuration. Due to this, you can highlight the original design details and emphasize them. There are different options, it all depends on the situation.
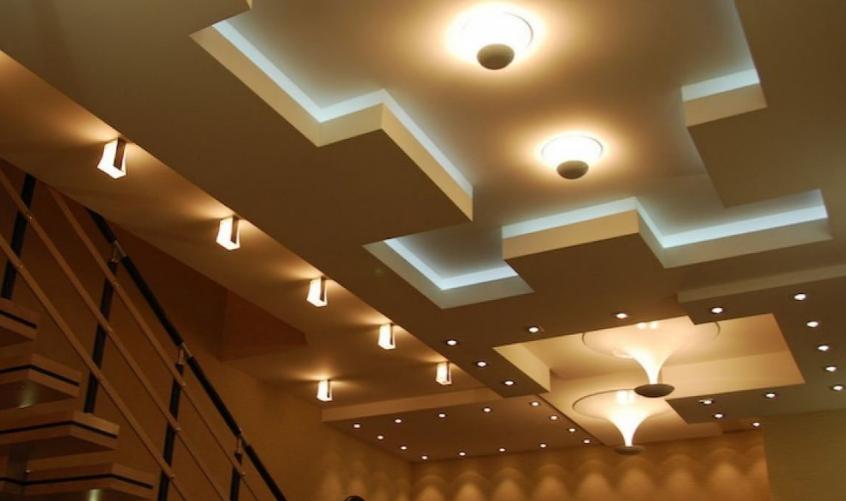
![How to make your own lighting]() Design solution with several types of lighting.
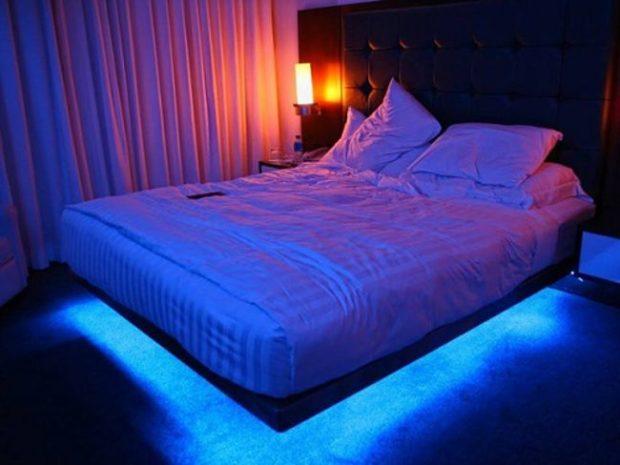
Design solution with several types of lighting. - Illumination of niches in the wall or under furniture. This solution gives the interior a modern touch. And if you place the LED strip along the bottom contour of the bed, wardrobe or other furnishings, this will give them a floating effect.
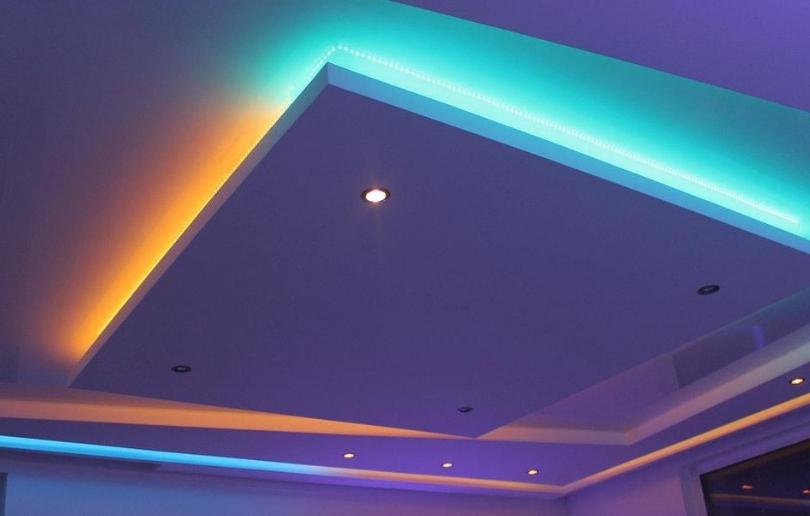
![How to make your own lighting]() The tape can move from the ceiling to the walls, creating an interesting effect.
The tape can move from the ceiling to the walls, creating an interesting effect. - Using LED strip as the main lighting. In this case, a large width aluminum profile is built into the ceiling, inside which several rows are glued to ensure the desired light intensity. Outside, the element is covered with a diffuser to make the lighting uniform and soft.
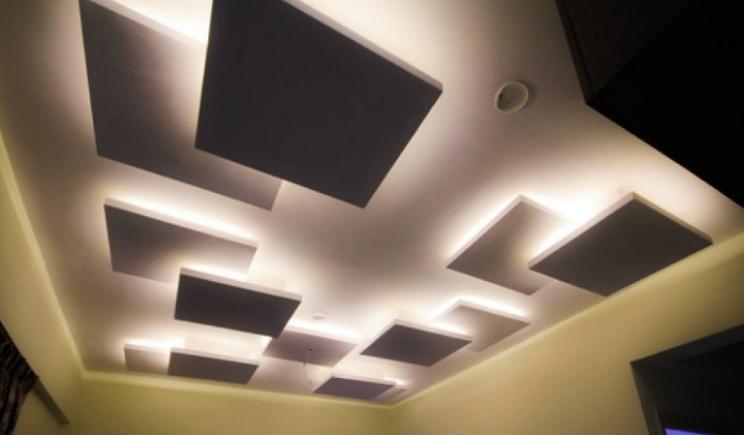
![How to make your own lighting]() Illuminated multi-level segments replace the main light.
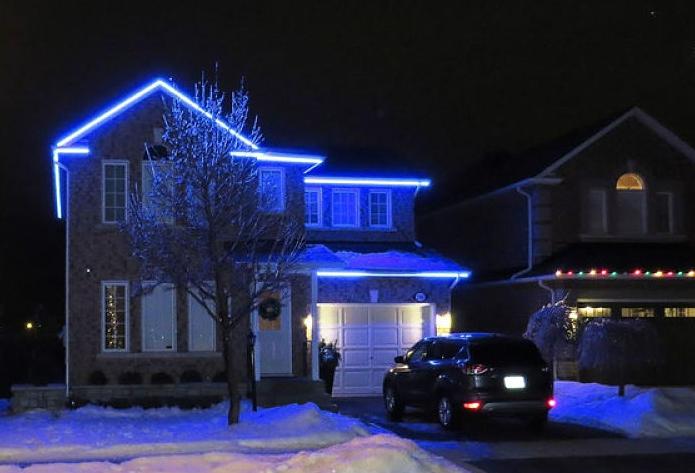
Illuminated multi-level segments replace the main light. - Facade lighting and other elements of outdoor decoration or use of tape in gazebos, patios, etc. In these cases, a waterproof tape in a silicone sheath is used, which is not afraid of precipitation and temperature changes.
![How to make your own lighting]() Option with illumination of the facade of the house.
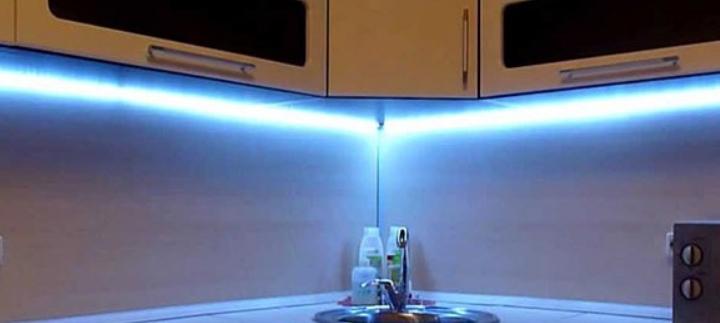
Option with illumination of the facade of the house. - Illumination of cabinets from the inside in the kitchen. An original solution that is often used in facades with glass inserts.
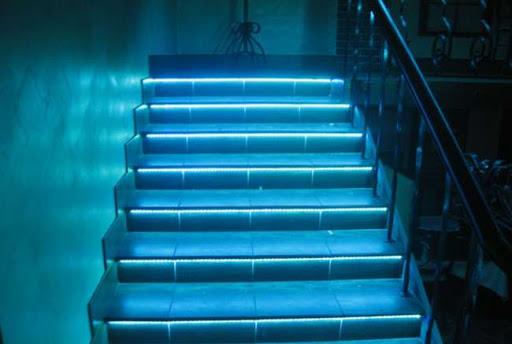
- Illumination of stairs - this not only makes the design original, but also increases safety.
![How to make your own lighting]() Decorate the stairs in several ways: build into the railing, install on each step or only on some, run along the entire length.
Decorate the stairs in several ways: build into the railing, install on each step or only on some, run along the entire length.
Read also: Stretch ceiling lighting with LED strip
You can use the backlight in other cases, only the main ones are listed here. LEDs are very popular due to a number of advantages:
- Attractive appearance of the interior with soft lighting. Due to the uniform subdued lighting, you can achieve different effects, which expands the design possibilities.
- big variety of options, they can differ in a number of criteria, which allows you to choose the right solution for any conditions.
- Economical electricity consumption. Today it is the most energy-saving option that reduces electricity costs.
- Safety of use. Firstly, during operation, the diodes heat up much less than incandescent and halogen options. Secondly, they do not contain hazardous substances, as in fluorescent flasks. Thirdly, the system operates from low voltage, so there is no danger of electric shock and you can use the tape in rooms with high humidity.
- Installation of LED lighting is much easier than any other equipment option. It is not difficult to understand the installation, if you follow the instructions, the work will take a little time.
The service life of the LED backlight is also much longer than that of any other analogue.
This type of lighting also has certain disadvantages. The main thing is the high price for high-quality tapes, although every year it becomes less and less. It should also be taken into account that a long service life is possible only with correct installation, any errors reduce the resource at times.
Recommended: How to install led strip on curtain rod
Types of tapes used, which one is better to choose
There are various equipment options on the market that differ in a number of criteria. Before purchasing, it is worth considering how the tape will be used and which variety is best suited for indoor or outdoor installation. Depending on the color, the following types are distinguished:
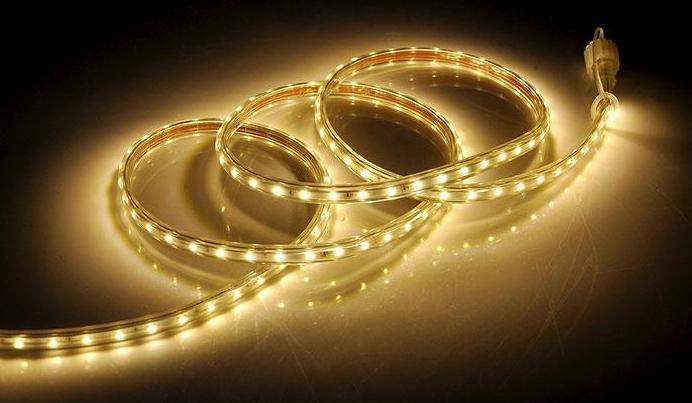
- Single color ribbons (SMD). Suitable for creating a monochromatic backlight, white options are most often used, although they can also be colored. They differ in color temperature.
![How to make your own lighting]() One-color ribbon is brighter than multi-color.
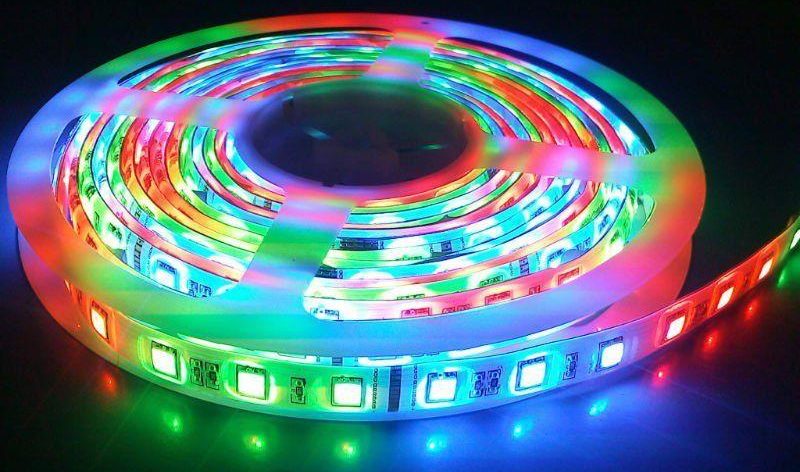
One-color ribbon is brighter than multi-color. - Multicolor Views (RGB). They usually consist of red, blue and green light sources. Due to the different combination of diodes, millions of shades can be adjusted. The best solution for decorative lighting.
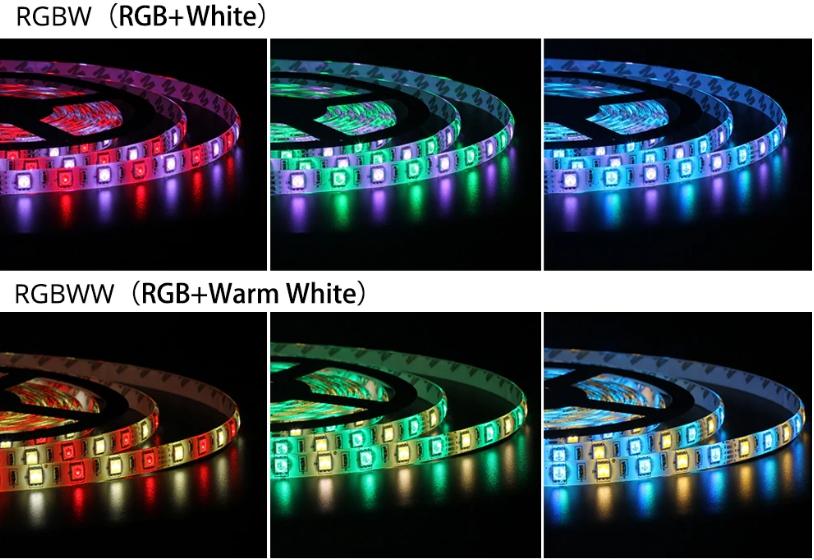
![RGBW stripe.]() This is what the included RGBW strip looks like.
This is what the included RGBW strip looks like. - Universal Ribbons (RGBW) consist of both colored and white LEDs. Therefore, they are capable of producing pure white light of high quality. Products are suitable when the tape is used not only for illumination, but also as an addition to the main lighting.
![How to make your own lighting]() RGBW has additional white LEDs, thanks to which you can get new shades that cannot be adjusted on a standard tape.
RGBW has additional white LEDs, thanks to which you can get new shades that cannot be adjusted on a standard tape.
The brightness of the tape depends on two factors, which are also desirable to consider:
- Power of one LED, usually depends on the size, but is indicated in the documentation or labeling. Due to this, it is easy to calculate the total indicator for the tape or its piece.
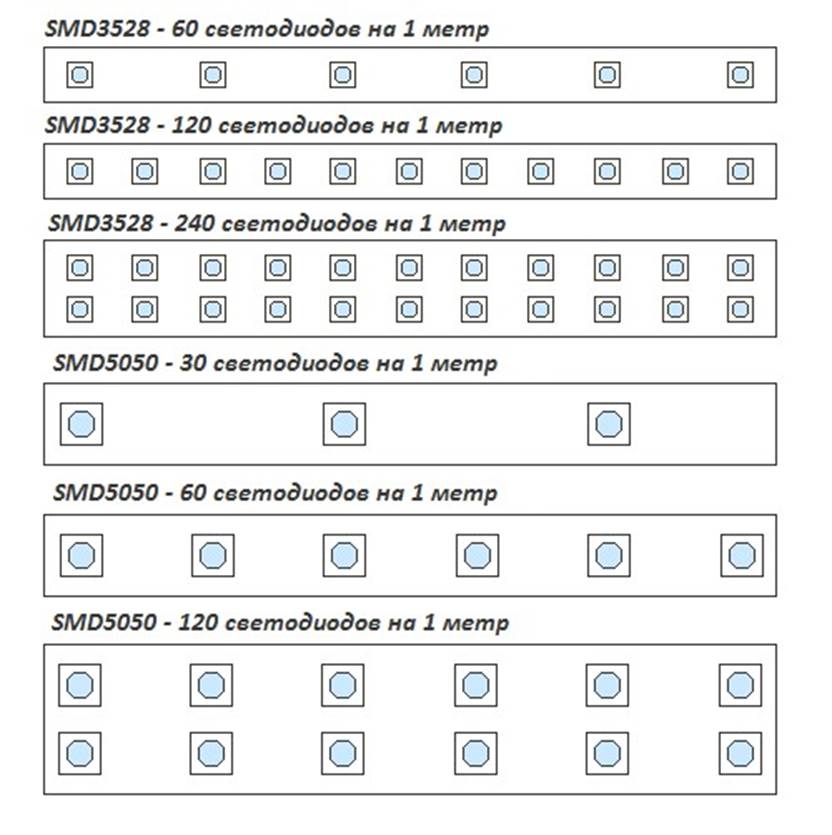
- The number of LEDs per linear meter ranges from 30 to 280 pieces, so the brightness varies greatly. Diodes are located both in one and in two rows, their number depends on the size of each element.
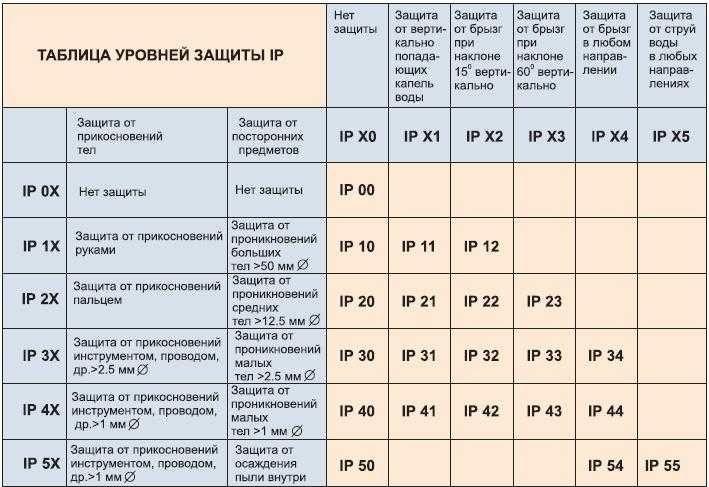
The degree of protection of the tape from adverse effects. The product always has an IP marking, which tells you what the product is protected from. For simplicity, all the necessary information is presented in the table below, the meaning of the first and second numbers in the designation is described there.
How to make LED lighting with your own hands
Before starting work, it is worth preparing so as not to waste too much time. First of all, the location of the tape is determined and the total length is calculated. Usually pieces of 5-15 m are sold, but they can be cut in increments of 5 to 50 mm, there is always a designation on the tape with a dotted line after a certain distance. Also need a power supply suitable power (at least 30% more powerful than required) and controller if available. Wires are used for connection and an aluminum profile, on which glued ribbon. The profile itself can be glued on double-sided tape or fastened with self-tapping screws.
To turn on automatically, you can use motion sensors.
How to connect led strip
It's very important to get it right fasten pieces of tape between themselves, and also connect the wire from the power supply or controller, it is best to do this with a soldering iron. The instruction consists of the following steps:
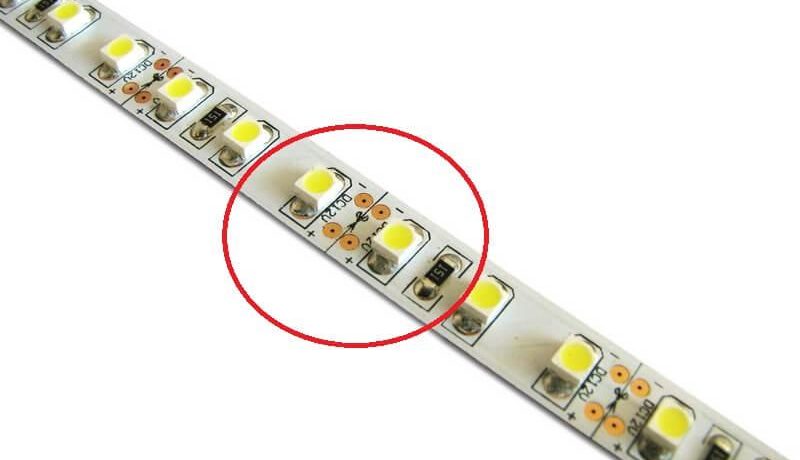
- The length of the tape and the place of cutting are determined, based on the characteristics of the room. You need to focus on the nearest area with a dotted line.
![How to make your own lighting]() The cut line creates a slight expansion between the LEDs.
The cut line creates a slight expansion between the LEDs. - Cut better with sharp scissors to get a clear, even cut and the tape is not deformed.
- The conductors are stripped at a distance of just over a centimeter. You just need to open the contacts and look at the polarity, it is always marked.
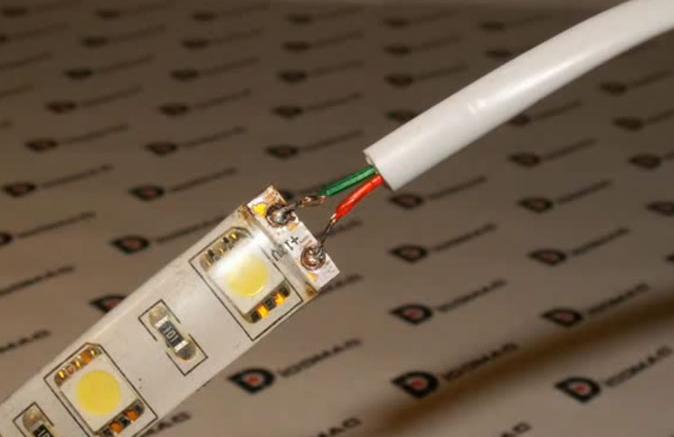
- To the conductors carefully soldered wires of suitable length and section. Work is carried out as with standard soldering.
![How to make your own lighting]() The quality of the soldering is of great importance.
The quality of the soldering is of great importance. - The connection point is best covered with heat shrink tubing. At the same time, it will strengthen the soldering and protect it from damage.
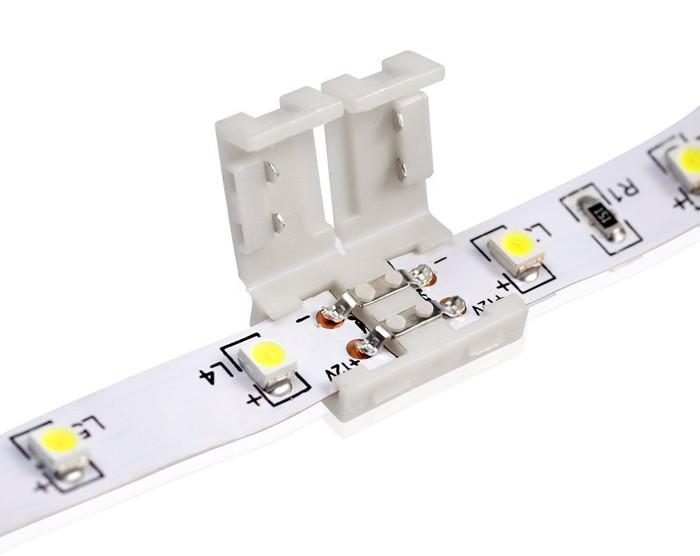
If a tape in a silicone sheath is used, the connection is made with a special connector, and the junction is additionally treated with a sealant.
Which connection scheme is preferable
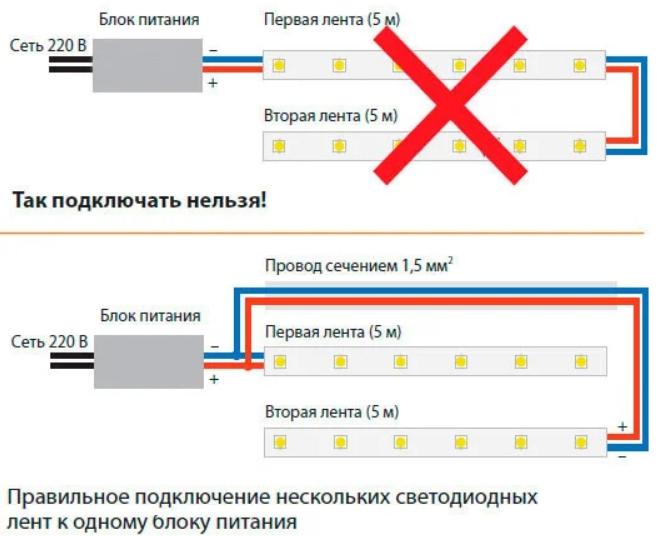
LEDs have such a feature: with an increase in the length of the tape, the brightness of the light decreases, so you should not choose a serial connection scheme. It is important to remember a simple recommendation here - with a large length, the elements are connected to the power supply in series, and the length of one piece must not exceed 5 meters. For clarity, the correct and incorrect options are presented.
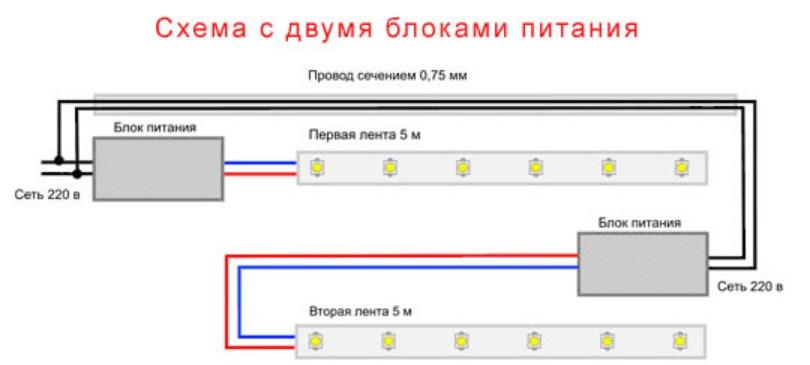
In some cases, it is required to connect two units, below is a diagram for this option. It is important to do everything right to ensure a stable power supply.
Better connect tape on both sides, this will reduce the load on the current-carrying tracks.
Mounting features, do I need a radiator
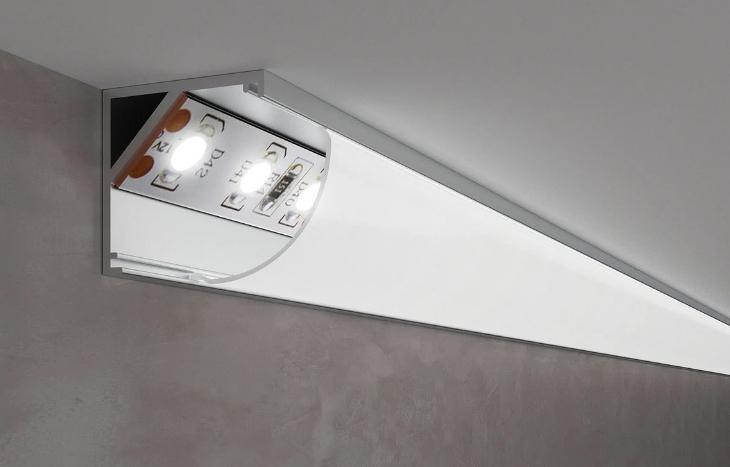
To make the LED backlight durable and protect it from overheating, it is recommended to glue the tape on the aluminum profile. It effectively removes excess heat, preventing overheating and extending the life of the diodes.
Usually there is an adhesive layer on the back of the tape, you need to remove the protective film and firmly press the element to the surface. It is also worth finding a place for the power supply so that it is not noticeable, but at the same time cools normally.
Recommended for viewing: An interesting solution for illuminating the wall in the bathroom.
Making LED backlighting with your own hands is not difficult if you choose the right scheme in advance. It is necessary to cut the element in certain places, solder the wires with high quality and use an aluminum profile for cooling.