Description of the installation of spotlights in the ceiling of the plasterboard
Installation of spotlights in drywall can be done quite easily with your own hands, without the involvement of a master. The article talks about the technical nuances of installing fixtures in the ceiling from a mixture of gypsum and cardboard at home with step-by-step instructions. Tips and advice are also given on how to avoid common problems.
Requirements for the placement of spotlights on a plasterboard ceiling
There is no one strict configuration for the location of spots on a plasterboard ceiling, everyone builds it himself. The main question is: what kind of lighting should the spots provide - full or zonal? Based on this, the layout of the fixtures is formed. There are no restrictions, but one of three configurations is usually used:
- In several rows, perpendicular to the wall in which there is a window.
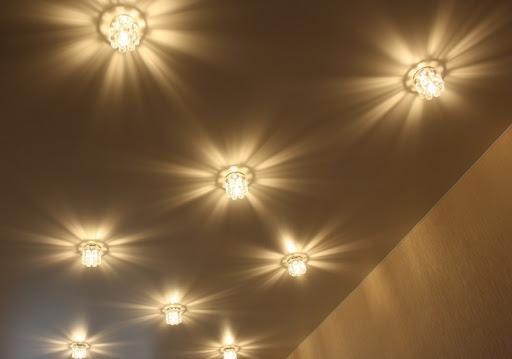
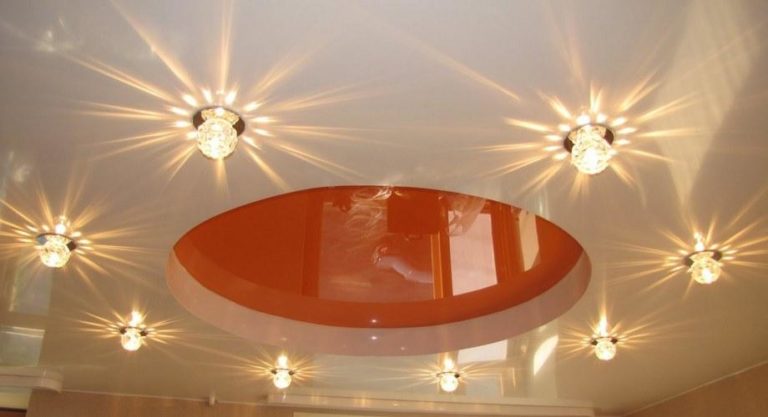
- Around the pendant chandelier along the periphery of the ceiling.Here the chandelier plays the role of the main lighting device in the room, and the spotlights play the role of additional ones.
Important! There are 2 rules. The distance between the wall and the spot closest to it is at least 60 cm, the distance between rows is a meter.
What to have on hand
After marking the places for attaching lamps and wiring, the next stage begins - cutting holes for spots. They are called strobes. Their shape is determined by the design of the lamp, it can be round, square, etc.
To install spotlights in a plasterboard ceiling, you will need the following tools and materials:
- electric drill;
- crown for wood processing;
- thin and indicator screwdrivers;
- terminal block;
- pliers or pliers.
Types of fixtures and lamps for mounting on the plasterboard ceiling
Spotlights for installation in plasterboard ceilings are built-in and overhead. In embedded spots, the technical part is hidden above the ceiling, and the decorative part protrudes above the plasterboard surface. Overhead lights are mounted on the surface, and the method of their installation is similar to mounting a chandelier. In addition, according to the design nuances, spotlights for plasterboard ceilings are rotary or fixed, single or block. The spots use different types of lamps – from incandescent to energy-saving fluorescent. LED lamps are the most popular now.
Selection of points for fixing spots, preparation for installation
When the scheme is selected, it is necessary to transfer it to paper in all details.

After that, it is necessary to mark the spot attachment points on the ceiling.
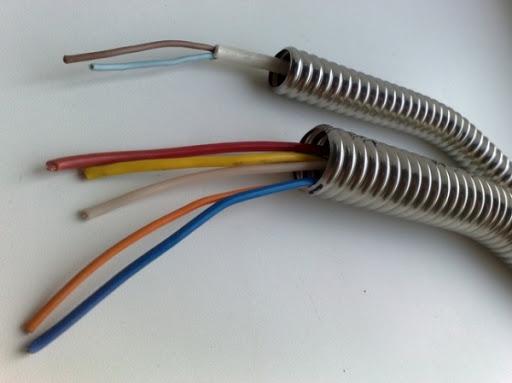
The next step is wiring. This can be done both after assembly on the ceiling of the metal frame, and in front of it (the second option is more difficult). The main thing is to prevent the intersection of the lamp and part of the frame at one point, they should be dispersed. All cables must be insulated with a corrugated hose. It not only provides additional protection, but also extends the life of the cable. According to the chosen spot fixing scheme, the connection can be serial or parallel. As for the wires, there is no need to torture yourself with section calculations depending on the power consumption. Suitable cross section 1.5 mm2 PVS. The material is soft copper.
Installation of fixtures
When starting to install fixtures, you need to make sure that there is no current in the network. This is done by checking the socket or contacts on the ceiling with an indicator screwdriver.
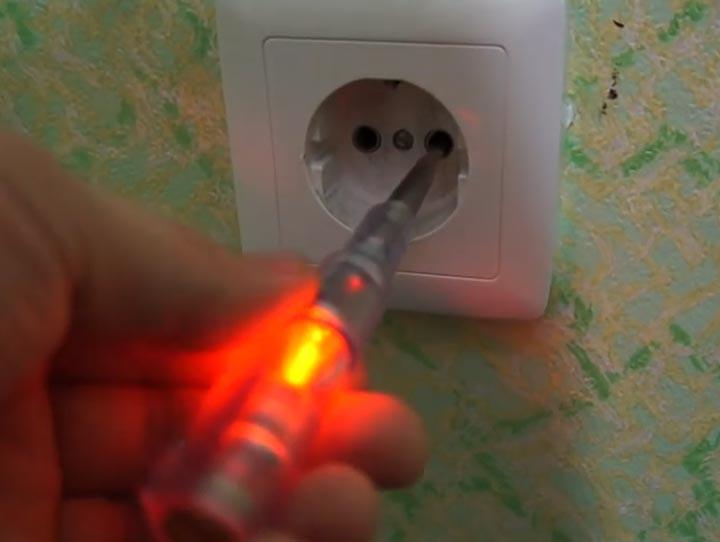
If there is no electricity in the network, you can start drilling strobes.
You should always pay attention so that the hole does not fall on the section of the profile frame. If you do not take this moment into account, all the work will go down the drain, and the ceiling surface will be damaged. In order to prevent this, you need to make the most accurate, verified to the centimeter markup of the ceiling.
When the strobe is drilled, it is necessary to connect the input wires from the junction box to the lamp. The best way is with terminal blocks (terminals). They provide reliable fixation and insulation of cores. In addition, this connection is fast.Another plus of the terminal blocks is the "clutch" lived from different materials, different sections.
After the lead wires and the lamp are connected, you need to firmly fix the spot inside the plasterboard ceiling. For this purpose, the spring legs of the lamp are clamped, and the body is carefully placed in the gate.
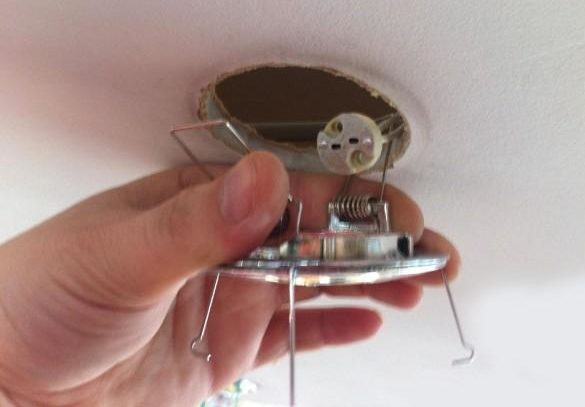
Advice! Instead of using the manual method, you can fix the spring legs with wire, and after installation, bite it with pliers or pliers and remove it. A similar method is useful for a fragile plasterboard ceiling, as well as an expensive lamp. This reduces the risk of damage to the ceiling or electrical appliance.
If there is a threaded base in the spot, a light bulb is screwed in after the body is planted. Finally, the final step, which is also the simplest - verification. It is enough to flip the switch, and it will become clear whether everything went well, whether the lamp is connected correctly. Lack of light flicker, sparks - all this indicates a malfunction and requires rewiring.
Installing Embedded Spots
Separately, it is worth mentioning recessed spotlights - models consisting of decorative and technical parts. The order in which they are installed is:
- Disassemble the lamp.
- Place the technical part in the hole in the same way.
- Pull out the power cable through the cartridge, connect it to the spot wires.
- Push the wires back.
- Attach the decorative part to the technical part so that it is on this side of the plasterboard ceiling.
Video: Installation of lighting points in drywall
Helpful Tips
In order for the installation of a spotlight on a plasterboard ceiling to be successful, it is enough to know some useful “life hacks”. For example:
- Starting installation, you need to make sure the color coding of the wires. As a rule, it is standard, but sometimes there are exceptions. Electricity is no joke, so it's best to make sure the connection is correct.
- Grounding wiring is a direct concern for health and life.
- Wires can be connected in many ways, not only with terminals. The most important thing is to reliably isolate and reduce the possibility of metal oxidation to zero.
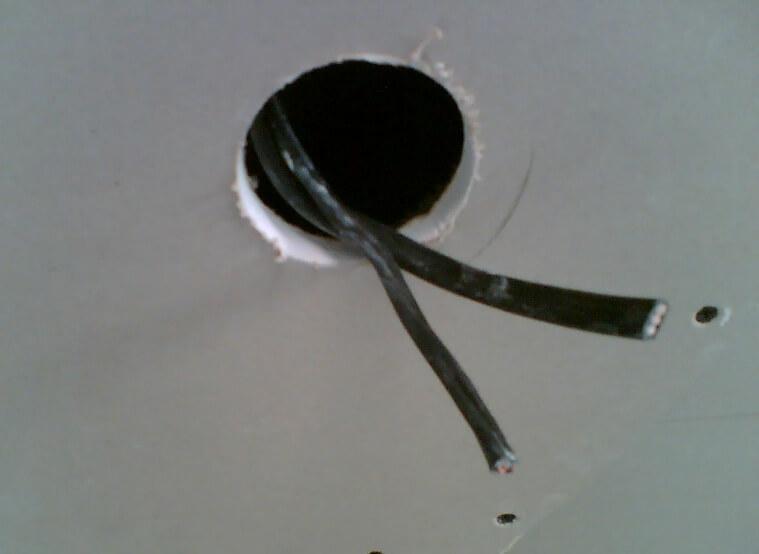
![Description of the installation of spotlights in the ceiling of the plasterboard]() Wires must be securely insulated.
Wires must be securely insulated. - Consider the ratio of price and electricity consumption. For example, LED lamps economical and durable, but cost a lot, halogen often burn out. Looks like the best solution energy-saving lamps.
- The installation of the spot should be started only after the complete finishing of the GKL ceiling.
- Fluorescent lamps during the installation of the lamp, it is better not to touch it with your hands. There is nothing dangerous in this, however, this can affect the lamp's "life" for the worse.
- Even if the lamp has a square shape, it is better to drill the strobe with a round crown. Then you can manually make the corners.
- Do not allow the lamp and ceiling to overheat. LED lamps get the least heat.
- In the layout of the lamps, you need to combine the correct location with beauty. Excessive minimalism is not always appropriate here.
- If there is no self-confidence, it is better to call the master.
What to do if on the finished ceiling the lamp hit the profile.
What mistakes should be avoided
So that all the work does not go down the drain and does not entail dismantling or more disastrous consequences, common mistakes should be avoided.
- Work is carried out only with the power off.
- The absence of a corrugated hose on the wires can lead to ignition of the wiring and a fire. Not to mention other advantages of corrugations: protection against moisture, extension of service life, etc.
- It is necessary to avoid getting part of the frame on the hole for fixing the lamp.
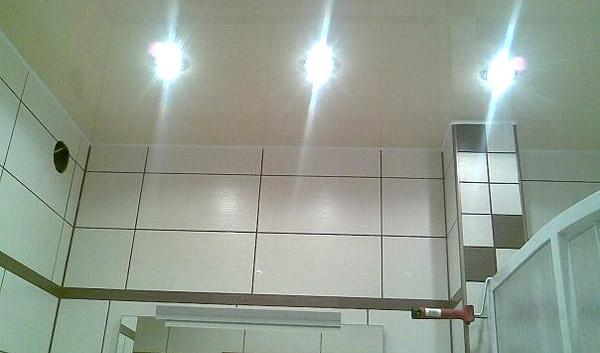
- If the spot is mounted in the GKL ceiling of the bathroom, its body must have a sufficient index of resistance to moisture and water ingress.
- Installation of spots in the bathroom.
![Description of the installation of spotlights in the ceiling of the plasterboard]() Installation of spots in the bathroom.
Installation of spots in the bathroom. - The type of lamp should correspond to the required tasks. For example, dimmable LED lamps are suitable for a dimmer (light dimmer), since other types of lamps either simply do not support this option or quickly fail.