Interesting lamps made of wood and epoxy resin
One of the non-standard and trendy lighting solutions is an epoxy lamp. Using this material, you can get not just a lamp, but a genuine art object. The article will talk about how to make a lamp out of epoxy with your own hands. As an addition - tips and useful life hacks.
Advantages of epoxy and wood fixtures
From epoxy resin, you can get a lamp of extraordinary beauty, in which a miniature cosmos seems to be frozen. The material provides a rich field for the implementation of creative ideas. The cured resin is similar to colored glass, but, unlike it, it is completely safe and does not break. Epoxy lamps have a number of advantages:
- original look;
- resin adheres well to all surfaces;
- reasonable price and environmental friendliness of materials;
- long preservation;
- soft diffused light from the lamp;
- lamps are suitable for any design of the room;
- high resistance to mechanical stress.
Design Options
Briefly about the popular varieties of lamps made of wood and epoxy resin.
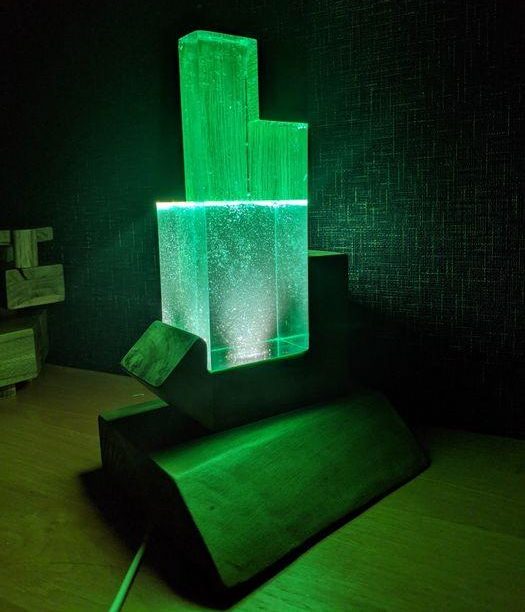
- floor standing. Designed for floor lighting stairs in the house. In addition to the visual effect, they provide practical benefits, helping to walk safely in the dark.
![Interesting lamps made of wood and epoxy resin]() A floor lamp helps to move around a dark room.
A floor lamp helps to move around a dark room. - Sconce. For sconces, an outlandish base made of epoxy is often used, on which an ordinary lampshade is hung. It turns out soft diffused light of unusual shades. Another option is minimalist sconces with white or black resin lanterns.
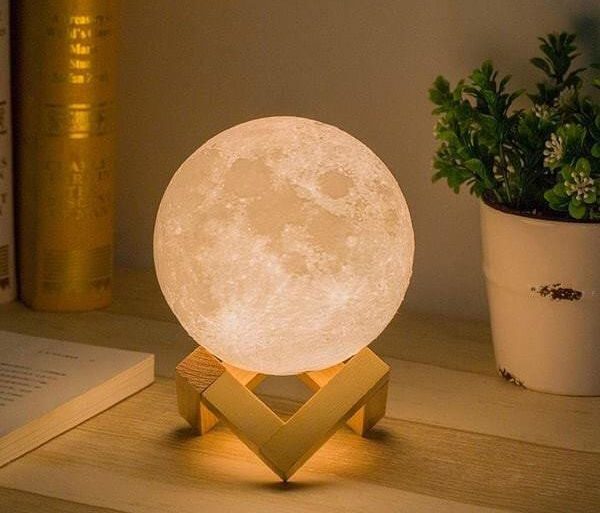
- Nightlights. Epoxy lamp will decorate any table or cabinet bedrooms. Here you can show your imagination. The night sky, the forest will be embodied in resin. One of the most beautiful lamps is a round epoxy moon.
![Interesting lamps made of wood and epoxy resin]() Refined night light made of epoxy in the shape of the moon.
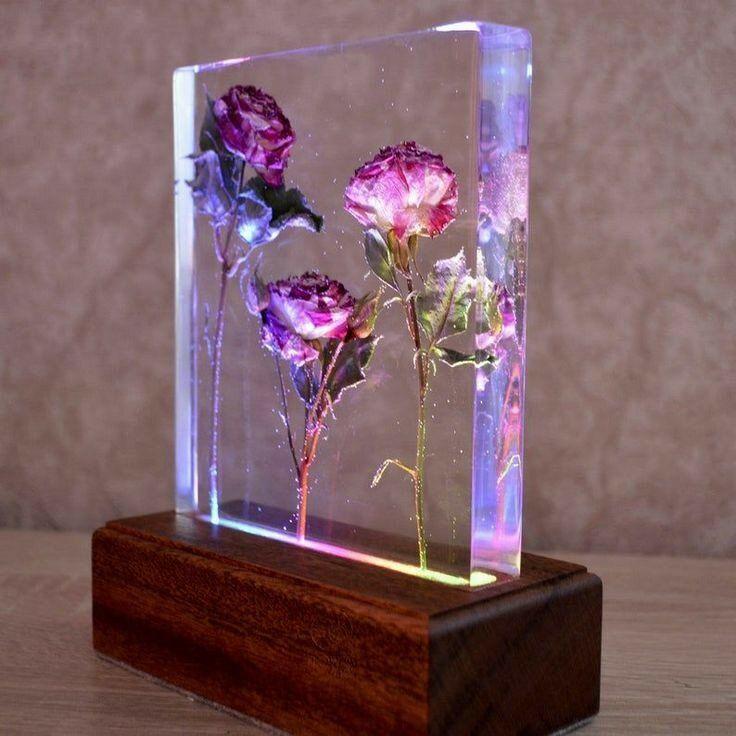
Refined night light made of epoxy in the shape of the moon. - Decor of individual elements. Individual parts of the interior decorated with resin and wood illumination will add originality to the room. For example, they can be decorated with lamps, where flowers, leaves, tree bark, moss shimmer inside.
![Interesting lamps made of wood and epoxy resin]() Flowers inside an epoxy lamp
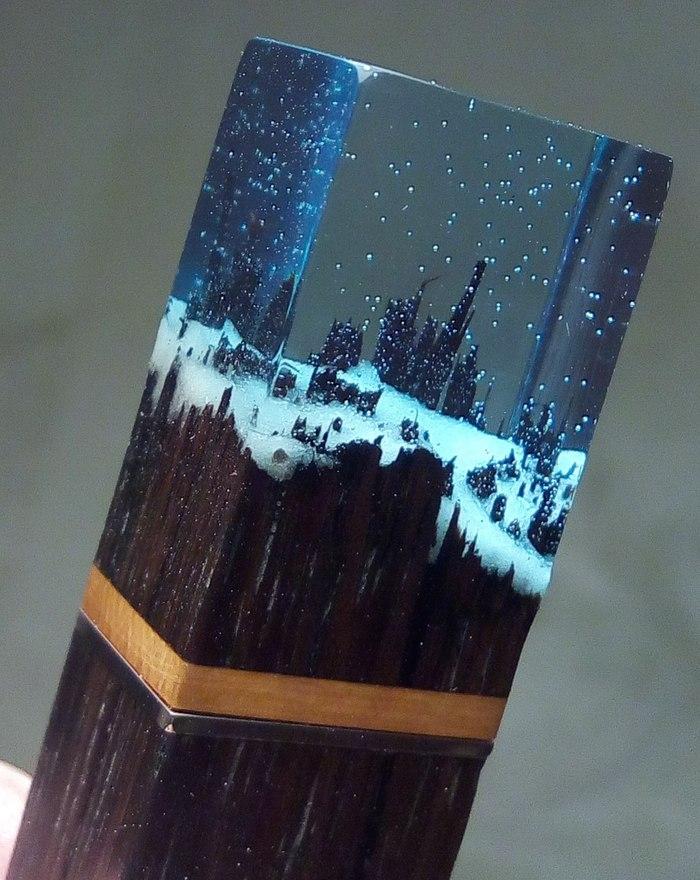
Flowers inside an epoxy lamp - Picture in the lamp. Some craftsmen even manage to capture works of art in epoxy resin. Most often these are natural landscapes. Such masterpieces are installed on the walls or placed on the table.
- floor lighting. With epoxy you can make floor lighting. In particular, this method is good for the hallway and bathroom.
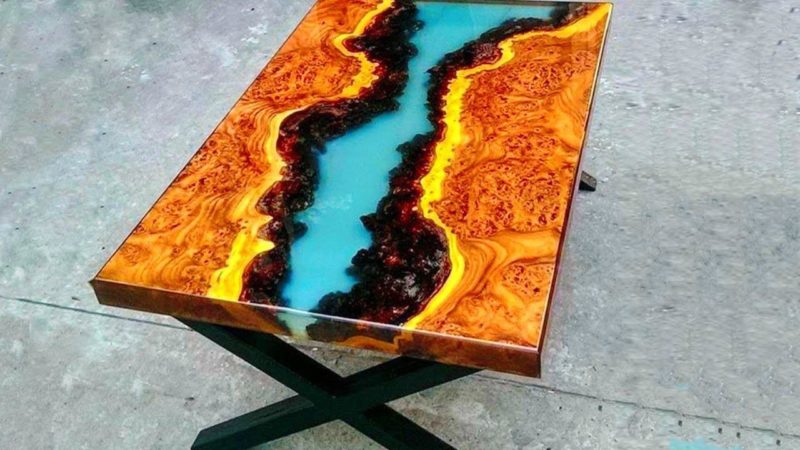
- Furniture decor. A romantic atmosphere will be created by illuminated pieces of furniture made of epoxy resin: tables, bedside tables, chairs. Beautiful and functional at the same time.
![Interesting lamps made of wood and epoxy resin]() Beautiful epoxy table.
Beautiful epoxy table.
Step by step instructions and tips
If there is an intention to make a lamp out of epoxy resin with your own hands, you should take this seriously. Texts, videos on YouTube, personal experience of acquaintances - everything will come in handy. It is better to stock up on a full bag of information, as well as pre-draw a sketch of a future craft. Now - a step-by-step algorithm of work.
What tools are needed
For the manufacture of do-it-yourself lantern you will need a list of such improvised means:
- a flat block of wood (more about it a little further);
- epoxy;
- resin hardener;
- coloring pigments, pastes;
- liquid for impregnating and processing wood;
- milling machine;
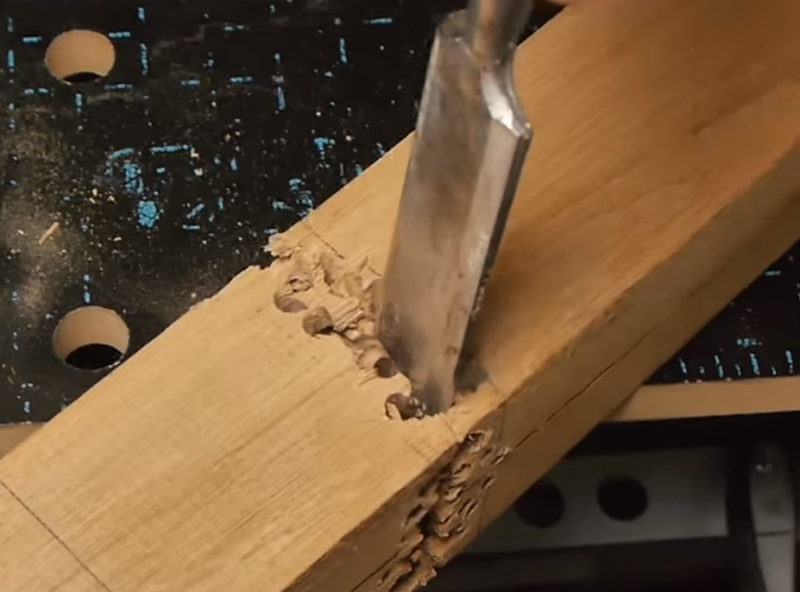
- chisel;
- sanding belts with different grain sizes;
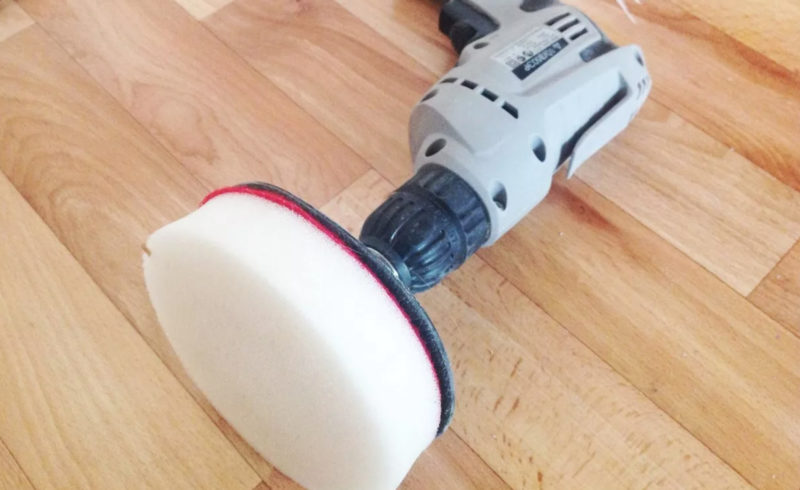
- drill with different types of drills;
- sealant;
- acrylic for the filling box;
- cartridge and LED lamp of low power (up to 3 W).
Additionally, you will need a trifle:
- pencil;
- ruler;
- scotch;
- tassel;
- disposable cups.
The choice of a bar under the base
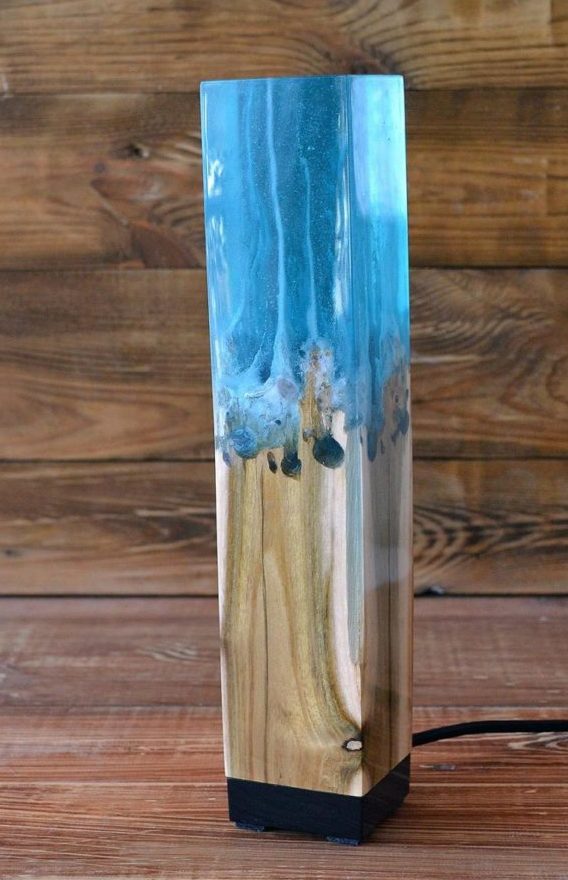
Perhaps the main thing in the manufacture of a lamp from epoxy resin is to choose a high-quality base. It should be a smooth, solid bar of wood (preferably oak), without breaks and cracks. It can, of course, be further polished, given a beautiful shape, but the bar itself must initially be of high quality. Standard length - 25-30 cm, cross section - up to 100 mm.
Foundation preparation
Next, you need to decide which side of the bar will go under the base, and which should be given to the epoxy.Two parallel lines are drawn under the ruler across the beam, and then an arcuate line must be drawn along one of them. It will become a guide for drilling the bar with a drill. Then, with the help of a chisel, it is divided in two.
Next, you need to drill a hole for the LED on both sides of the bar in the center. It should be through: only in this way will light enter the epoxy "half". It is worth measuring the diameter of the cartridge, the lamp, and making the width of the hole a little larger.
It is necessary to secure the lamp socket against the risk of resin ingress. To do this, a round piece is cut out of a transparent non-solid material (plastic, plexiglass), equal in diameter to the upper hole, and placed in the hole from the side of the resin.
Filling box
The next step is pouring the epoxy resin. You need to pour directly onto the base. To prevent the material from spreading, it must be “contained” with the help of a special temporary box. For its manufacture using acrylic sheet. All sides should be slightly longer than the corresponding side of the base. The box is fastened into a single structure with adhesive tape. The gaps between the walls of the box and the base should be carefully sealed with sealant.
fill
Before pouring, the epoxy resin must be mixed with a dye and a hardener in strictly indicated proportions. They are usually written on packages.
It is recommended to pour epoxy in several layers. It takes at least 2-3 hours for each layer to dry, and it is even better to leave it to dry overnight. So with every layer.
Recommended for viewing: Mistakes when working with epoxy resin.
Drying
If additional decorative elements are planned, they must be added immediately, otherwise the mixture will dry out. Complete curing of the epoxy resin will take at least a day. After checking the quality, the filling box and fragments of the sealant are removed.
Resin grinding and polishing
Cured epoxy must be carefully sanded. At first, you can use nozzles with coarse grain (80, 100), but as you progress in work, it is worth gradually increasing the grain size. At the last stage of grinding, you will need tapes with a grit index of 2000 and above.
Sanding epoxy gives it a matte finish. If gloss is needed, this is also easy to achieve. You will need a felt circle, as well as a special paste for polishing plastic surfaces.
Warp processing
Do not forget about the processing of the base. This will give the wooden part of the lamp a shine. Various varnishes or oils with flame retardant properties are suitable for processing.
Summing up electricians
It is necessary to drill a hole from the bottom into which the cable with the cartridge and the LED bulb is placed. The cartridge must be securely fastened with a collar or clamp. In conclusion, it is checked whether the “freshly assembled” lantern works.

Additional decor
It is better to put the wooden base on low foam rubber legs so that the surface on which the lamp will stand and the tree do not conflict. Another way is to completely “dress” the base in a special stand, for example, made of plastic.
The epoxy part can be turned into a true masterpiece by adding:
- decorative wood shavings;
- small transparent stones, beads;
- dry leaves, berries;
- luminescent pigments.
Recommendations for making and using
A few important tips before you get started:
- Only jewelry or decorative epoxy is suitable.
- All work must be carried out on a level surface and in a well-ventilated area.
- Be sure to protect your hands with rubber gloves, and your face with a respirator or mask, as well as goggles.
- After completion of work, the room must be ventilated for several hours, the longer the better.
There are no special tricks in the operation of epoxy resin lamps. The only, but very important warning: do not allow the polymer to overheat. To do this, use LED lamps of low power.
Video lesson: Making a night lamp made of oak and epoxy resin.
A few little tricks
In conclusion, a couple of interesting solutions and life hacks that will come in handy when sculpting an epoxy lamp:
- From the bottom of the hole for the light bulb, you can cover a little foil. It will reduce the risk of overheating of the base.
- A drill will help mix the epoxy well. However, this will cause the polymer to bubble. If the bubbles are not provided by the design, they can be eliminated in a simple way. The resin container is heated in a water bath, and soon the air leaves. Those bubbles that remain are easily removed by piercing with an ordinary toothpick. Heating temperature - no more than 50 degrees.
- Pouring resin in layers will create breathtaking transitions. The main thing is to let each layer harden well.