How to remove a chandelier from the ceiling yourself
The process of dismantling lighting fixtures is not so complicated as to wait for an electrician for this, and, moreover, spend money on something that is quite realistic to do yourself. However, taking on this task without tools at all, minimal skills in handling them and basic knowledge of safety is also not worth it. This is especially important if you have to not only remove the chandelier in order to throw it in the trash, but also the subsequent installation of a new device.
Preparing for a replacement
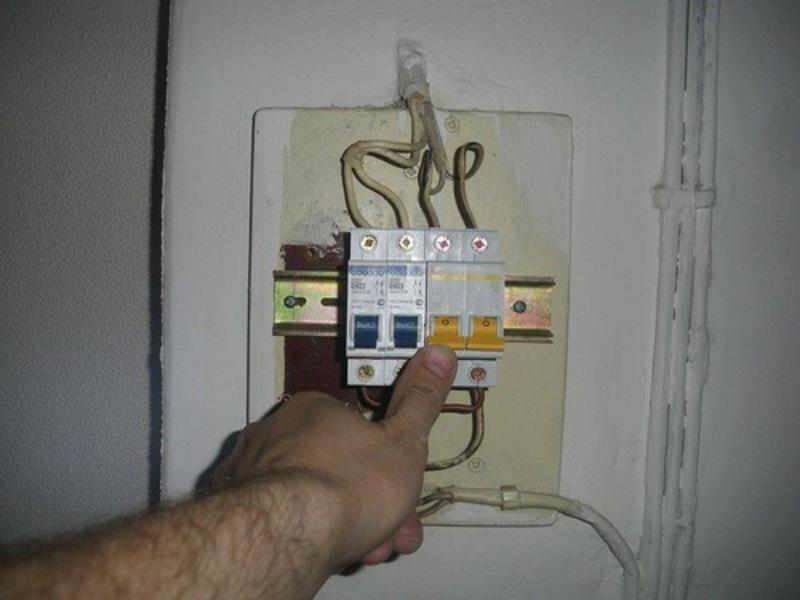
Regardless of the type of chandelier model and ceiling design, there are general rules that must be followed when carrying out any work with electrical wiring in the premises. First of all, you need to de-energize the building.
Since there is residual electricity in some defective or handicraft electrical appliances, or the building has a parallel connection to autonomous power sources (diesel generators, solar panels, etc.) bypassing circuit breakers.
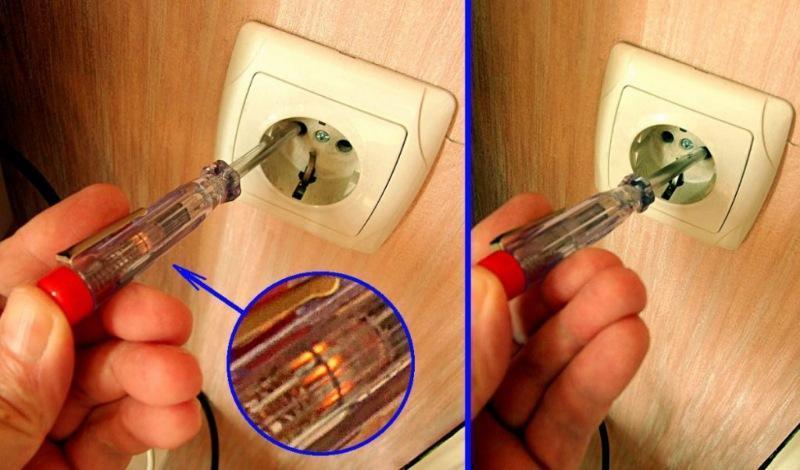
In extreme cases, if there is no indicator screwdriver, then any electrical appliance, such as a TV, hair dryer, iron, will perform its task.
If it is precisely established that there is no voltage in the network, you can start working.
To change almost any chandelier on the ceiling you will need:
- stepladder, stable chair, and preferably a table;
- screwdriver (including indicator);
- pliers;
- knife;
- wire cutters;
- set of wrenches;
- new chandelier with fasteners;
- protective dielectric gloves and construction goggles.
If the new luminaire has a fundamentally different type of attachment, you may have to use a hammer drill or impact drill.
Step-by-step dismantling instructions
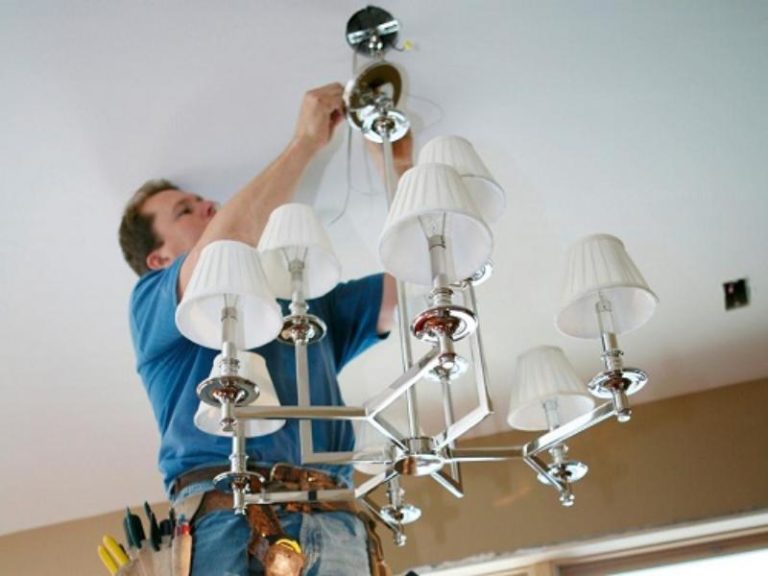
After turning off the electricity and making sure that there is no voltage in the network, it is necessary to install a stepladder next to the chandelier so that the knees rest against the upper steps, and the lamp itself is in front of the face.
If there is no platform on the stepladder, it is better to have a person nearby who can be fed the removed parts or unnecessary tools.
Dismantling of shades and decorative elements
Before dismantling the chandelier, it is better to remove all excess body kit from it. For plastic parts, this is possible and not critical, but glass elements make the structure very heavy.In addition, when working at height, there is a risk of dropping fragile parts, which are unlikely to be found and purchased in nearby stores. Therefore, it is necessary to remove everything that is removed so that nothing interferes and there is full access to the fasteners.
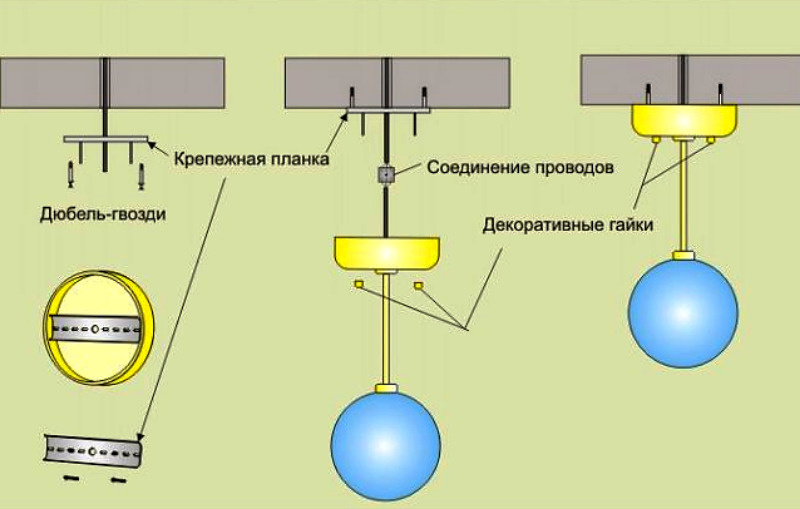
If the chandelier is a consignment note, of the “plate” type, then its ceiling, as a rule, is fixed with metal clips from the outside.
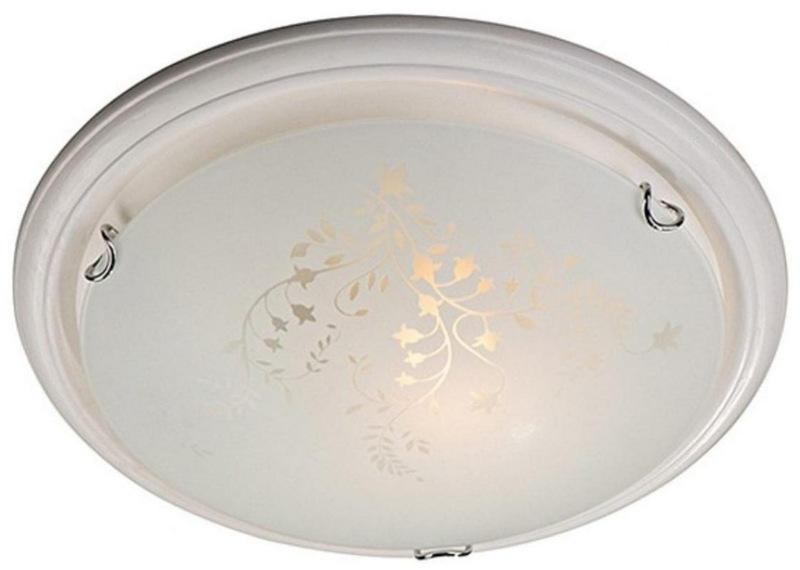
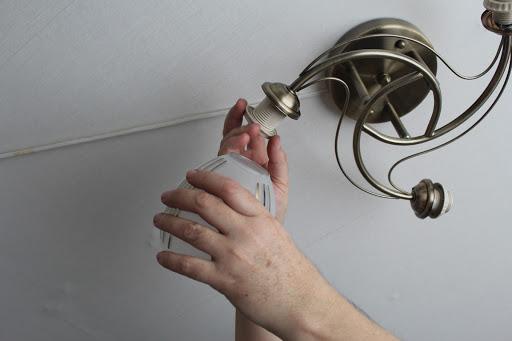
In pendant chandeliers, the shades are in the shape of a glass or bowl. Before removing these items, unscrew sources of light. To fix the glasses, a special skirt is used on the cartridge, which must be unscrewed.
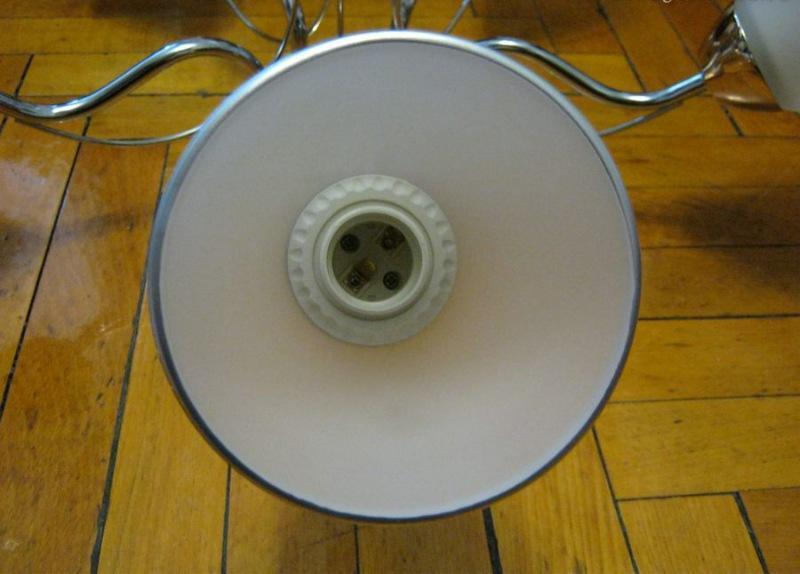
Usually this can be done by hand, but in some models the glass is so narrow that the hand does not fit into it. For these cases, there are such keys.
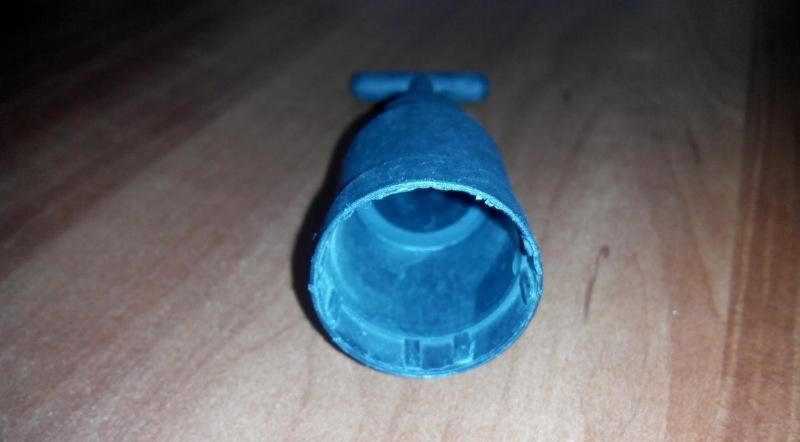
They come with a lighting device and find a device suitable for a particular patron, it will be difficult, so it is better not to lose such keys. You can unscrew the skirt without a key only together: when one person turns the nut with two screwdrivers, and the second simultaneously turns the cover counterclockwise.
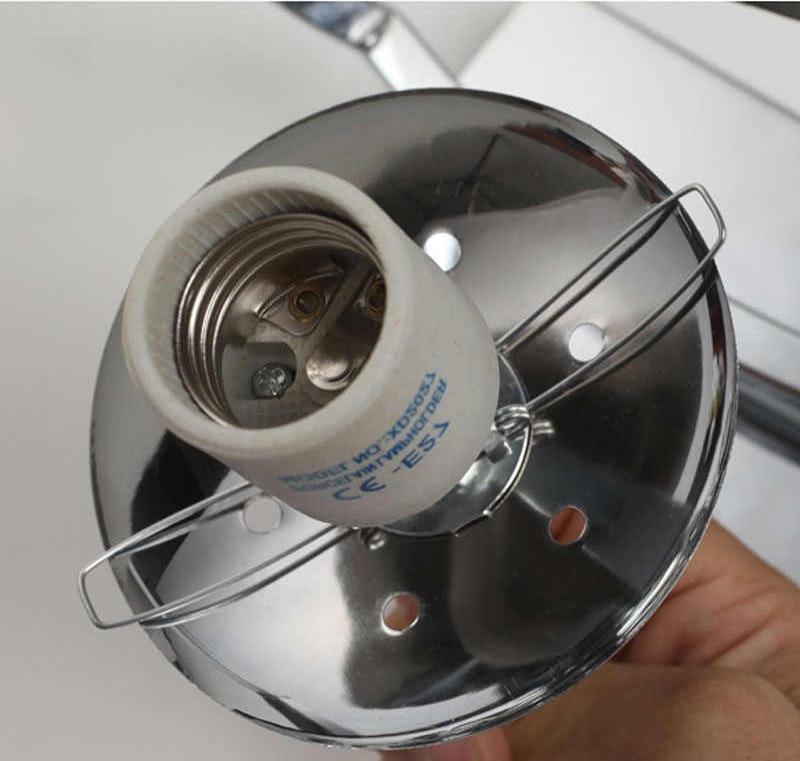
For removing the cover just pull it towards you, the springs are compressed and straightened already on the released cartridge, as in the photo. Accordingly, in order to put the decorative diffuser back on, the springs will have to be compressed and filled inside the hole.

Although in most cases, decorative parts cannot be dismantled without violating the integrity of the fasteners. However, for small-sized models this is not so critical, and massive multi-tiered systems cannot be removed alone without outside help.
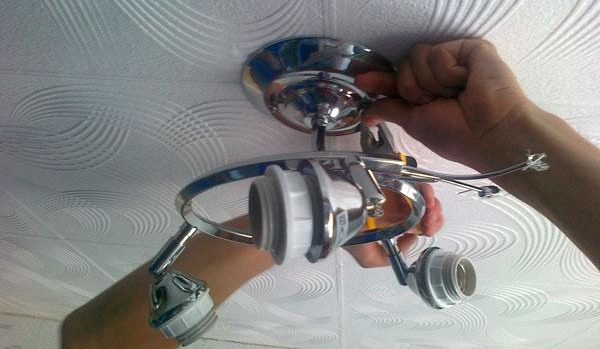
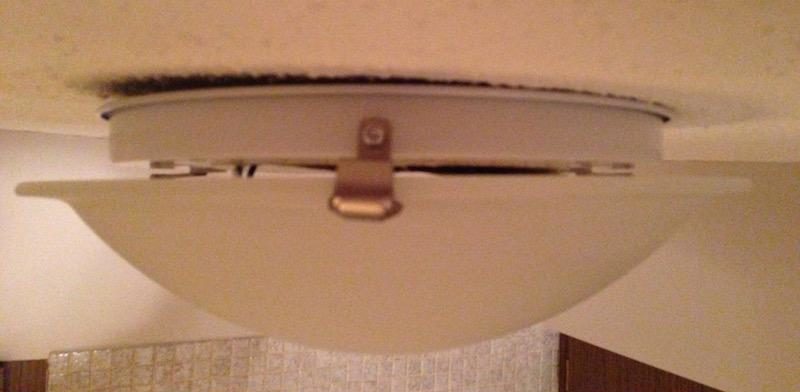
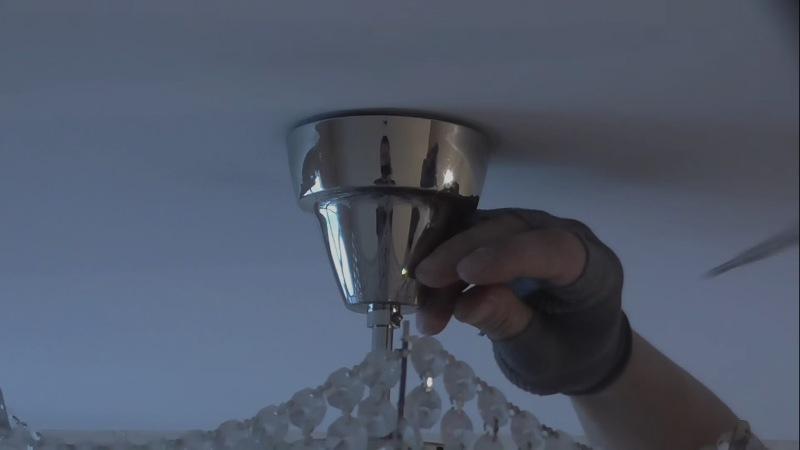
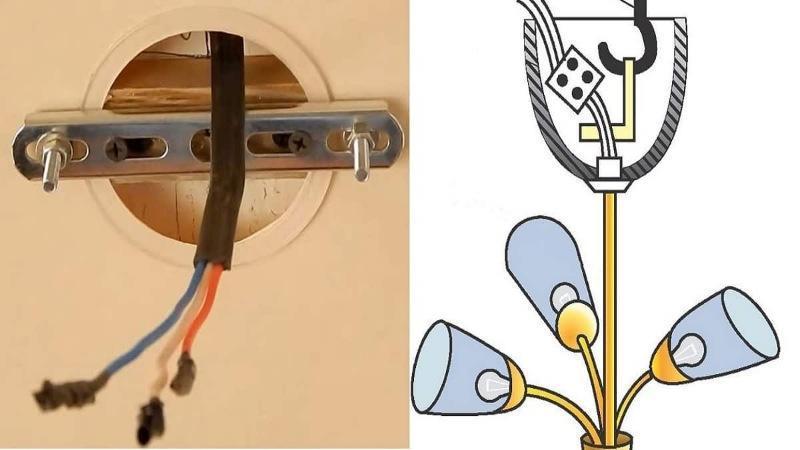
After removing the shades and decorative elements, it is necessary to provide access to the wiring. To do this, on hanging chandeliers, you will have to remove the cap held by a bolt on the bar.
Disconnecting wires
After gaining access to the mount, it is necessary to disconnect the wires and it is recommended to do this before the stage of dismantling the chandelier from the fasteners, such as a hook or plank. In cases with fixed caps, after unscrewing the decorative bolts, the lamp remains hanging on the wires, so you will have to use outside help to keep the device suspended. Further actions are best done with dielectric gloves.
There are several types of wire connections:
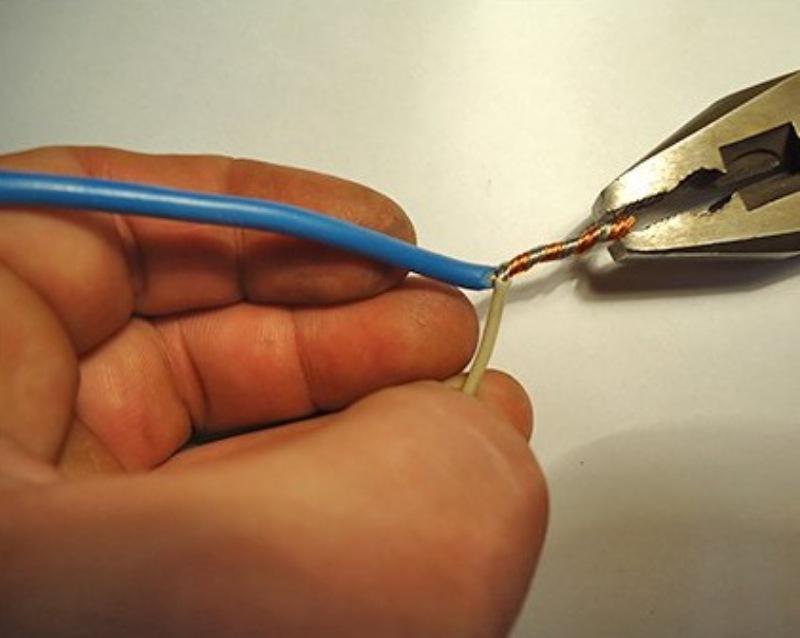
- Twisting - in addition to being complicated, it is also an unreliable option. First of all, it is necessary to unwind the insulating tape or cut off the heat shrink tube with a knife. When the twist is free, it must be unwound with pliers or cut with wire cutters at the base of the joint if it is tinned with tin.
![How to remove a chandelier from the ceiling yourself]() According to the rules, such contacts must always be tinned to form a monocore, otherwise there is a risk of sparking and ignition of the braid. The presence of tin on the connection speaks, at a minimum, of the conscientiousness of the electrician who mounted the device to be removed.
According to the rules, such contacts must always be tinned to form a monocore, otherwise there is a risk of sparking and ignition of the braid. The presence of tin on the connection speaks, at a minimum, of the conscientiousness of the electrician who mounted the device to be removed. - Screw terminal blocks.
![How to remove a chandelier from the ceiling yourself]() The screws will have to be unscrewed a little, and the wire removed, and then unscrew the twisted contacts. Ideally, the twist should be in a metal crimp nozzle.
The screws will have to be unscrewed a little, and the wire removed, and then unscrew the twisted contacts. Ideally, the twist should be in a metal crimp nozzle.![How to remove a chandelier from the ceiling yourself]() Such nozzles are necessary so that at the moment of tightening the edges of the bolt, the hairs of the stranded wire do not fray. If such a nozzle is present on the contact, the wire will have to be cut.
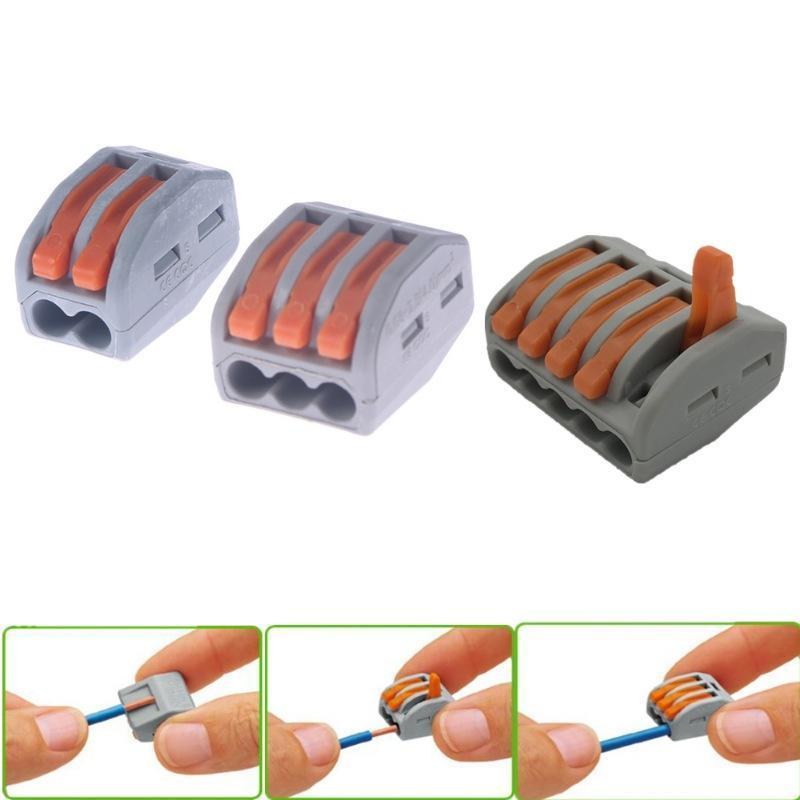
Such nozzles are necessary so that at the moment of tightening the edges of the bolt, the hairs of the stranded wire do not fray. If such a nozzle is present on the contact, the wire will have to be cut. - WAGO system clamps.
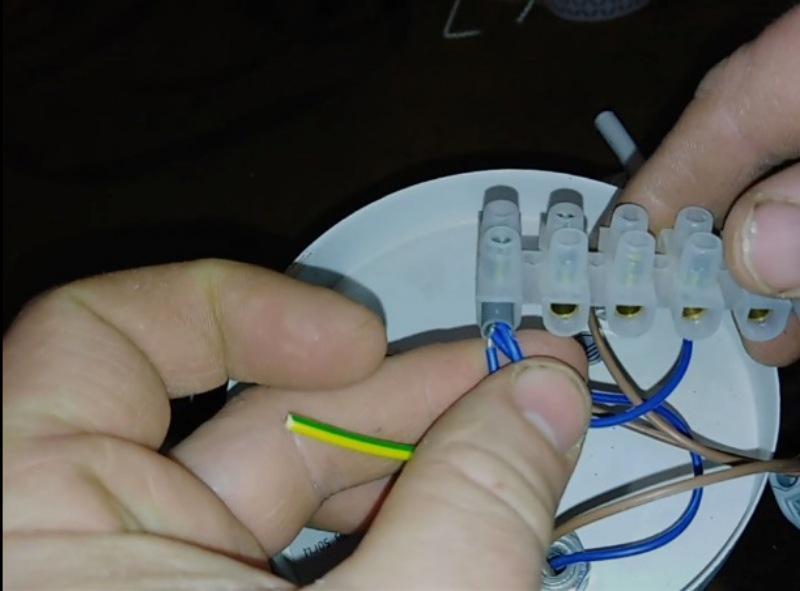
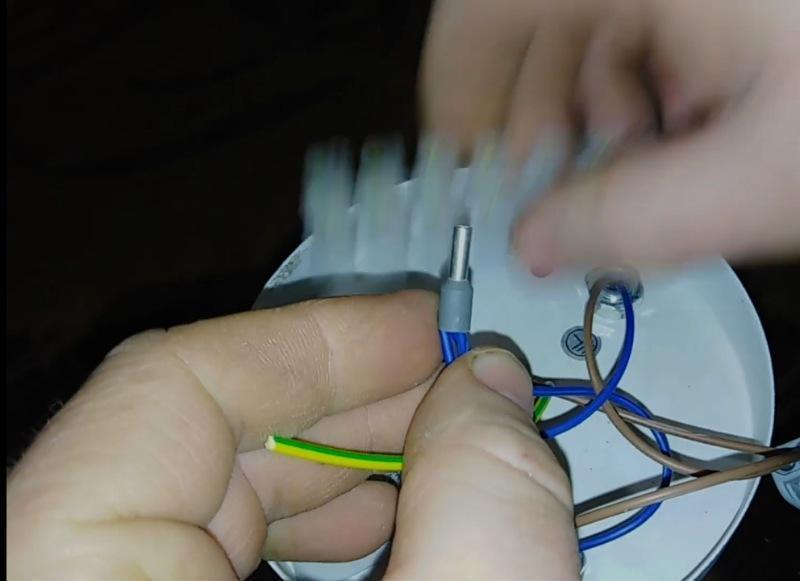
![How to remove a chandelier from the ceiling yourself]() Perhaps the easiest and safest option. It is convenient in that the clamp levers are snapped off even with one hand, while the second one remains free or the chandelier is held by it, if it has already been removed from the fasteners.
Perhaps the easiest and safest option. It is convenient in that the clamp levers are snapped off even with one hand, while the second one remains free or the chandelier is held by it, if it has already been removed from the fasteners.
Of course, in all cases, it is easiest to cut the electrical wire at the base of the contact, but it happens that the supply of free cable is limited, and with each such dismantling it will be reduced more and more. In addition, temporary lighting can be immediately connected to the free terminal without the need to remove the trim from the block or strip the wire from the braid for twisting and insulating.
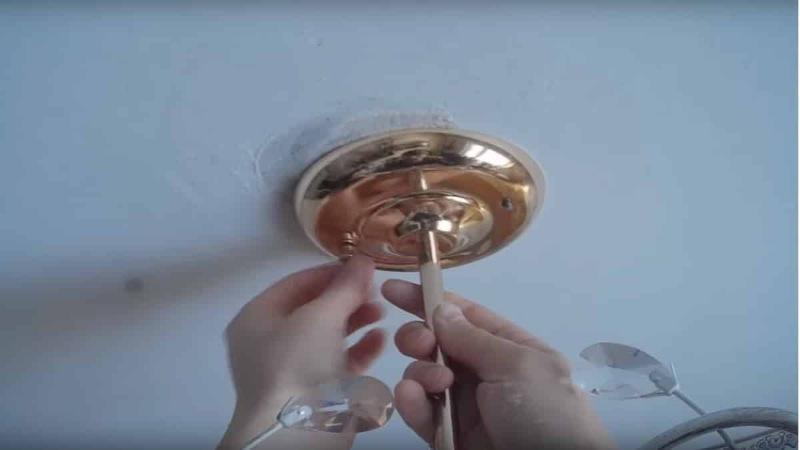
Removing the chandelier from the ceiling
When all unnecessary parts are removed and the wire connections are open, you can proceed to dismantle the lighting fixture. For the most part, the process of removing a lamp depends on the complexity of its attachment, which exists in several versions:
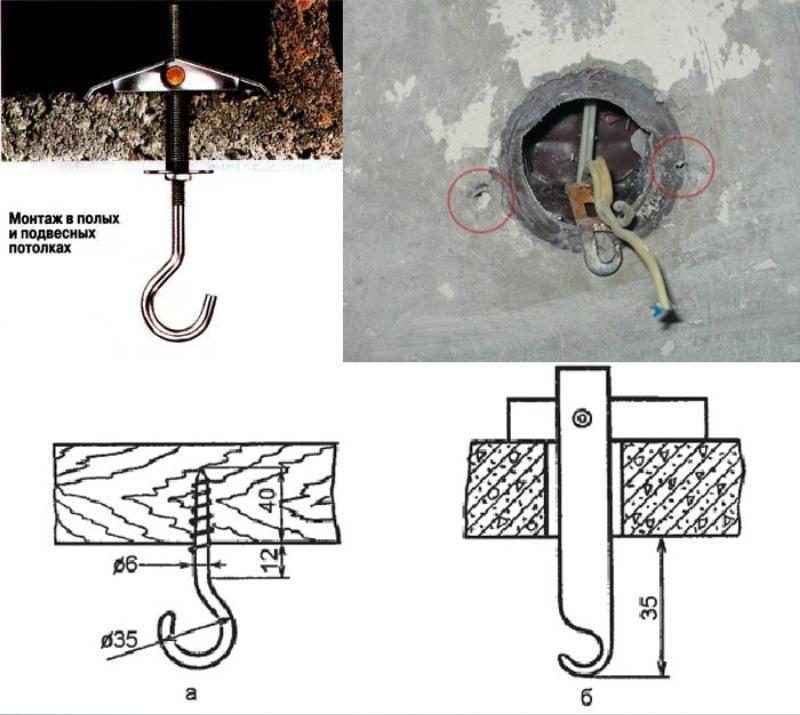
There is no need to remove the hook itself or remove the bar, unless, of course, it is planned to overhaul the ceilings or replace the lamp with a fundamentally different type, with a different mount
outboard
When removing dowel fasteners directly from the drywall sheet, it must be borne in mind that the holes will have to be re-drilled, because. gypsum crumbles from old holes. New dowels will no longer fit so tightly and the chandelier may come off. If a mortgage platform is installed under the gypsum craton, then this is not necessary.
Stretch
When carrying out dismantling activities on any tension web, you must be careful not to accidentally cut or pierce it with sharp objects. If additional elements of the lighting scheme are located on the laying site: a choke, a transformer, a ballast, then it is better not to push them from the site onto the tension fabric. Due to limited space, it is sometimes very difficult to return them to their place. Pulling a stuck throttle by the cable is also fraught with a wire break and in the future it will be possible to get it only by removing the ceiling from the mounts.
Concrete
The simplest option that does not require special handling. All that is needed for dismantling from concrete floors is knowledge of the principle of fastening a particular model of a chandelier.
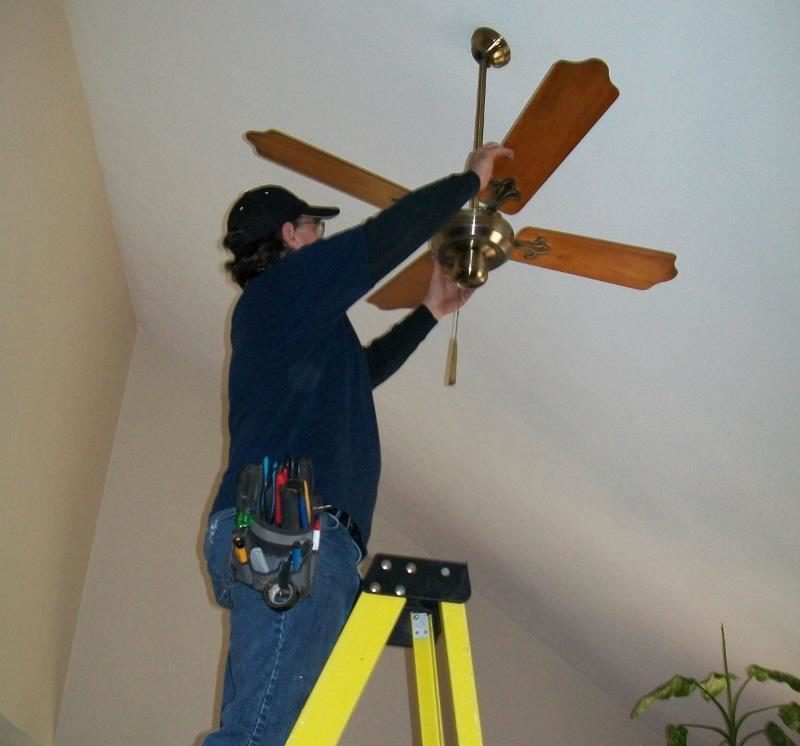
Assembly and installation of a new chandelier
The easiest way is if the mounting device on the new model is similar to the old one. Each device comes with assembly instructions, so there is no problem in this case.If, for example, you have to install hook fasteners instead of a plank, or vice versa, and there is no mortgage platform, then you can’t do without drilling the ceiling.
Be careful! Before perforating the main concrete floor, you should definitely study the layout of the internal electrical wiring. If the drill gets into the strobe and accidentally damages the cable, then the tension fabric or drywall sheets will have to be dismantled to repair the electrical cable.
In the version with the mounting plate, you will have to remove it to fit the bolts in the mounting holes to the new dimensions. The distances between the holes are different for each model, and a bar that is too narrow or too wide will have to be replaced with the original one. With hook fastening, there may be difficulties with the length of the hook. If necessary, it is extended with an additional section or shortened by twisting deep into the landing platform.
The wires are connected in the reverse order, but it would be more correct to replace the twist or old terminal blocks with new spring or Wago system.
At switch type change from a single-key to a two-key, you will have to lay another wire to the place where the chandelier is attached. It is correct when the switch breaks the phase, and the zero for all the bulbs is common.
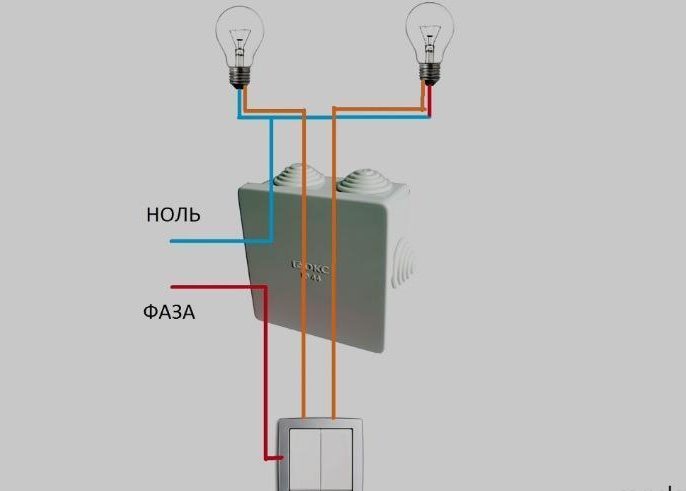
Note! The reverse arrangement of the phase and zero on the switch is also allowed and the device will work, but then even in the off state one contact in the cartridge will be energized, which is fraught with electrical injury when lamp replacement.
Recommended for viewing: How to connect a chandelier to a two-gang switch
How to install temporary backlight
When carrying out major repairs in the room, you will need a light source. There are several options for solving this problem:
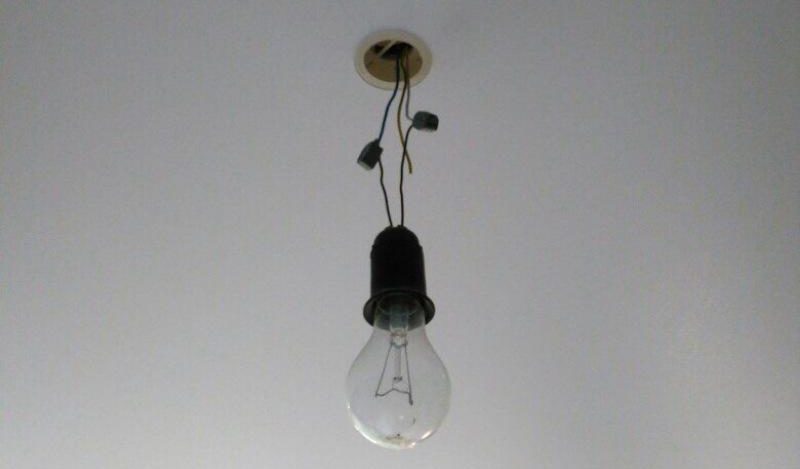
- Connect chuck with a lamp to the main cable that powers the old chandelier.
![How to remove a chandelier from the ceiling yourself]() Two wires 30–40 cm long are attached to the cartridge. The ends of the wires are stripped and connected to the terminals on the ceiling.
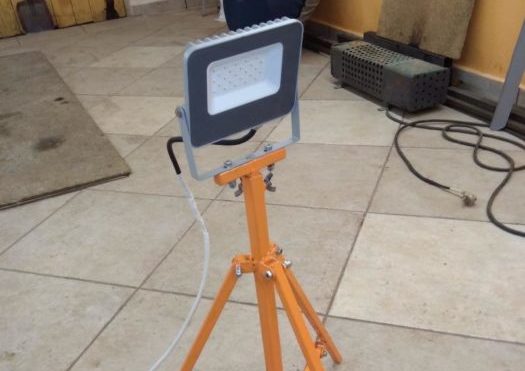
Two wires 30–40 cm long are attached to the cartridge. The ends of the wires are stripped and connected to the terminals on the ceiling. - When it is not possible to use the main electrical network in connection with the replacement of wiring or capital work dangerously close to the strobe, external light sources will have to be used. As an option - portable construction spotlights, but regular table lamps will do.
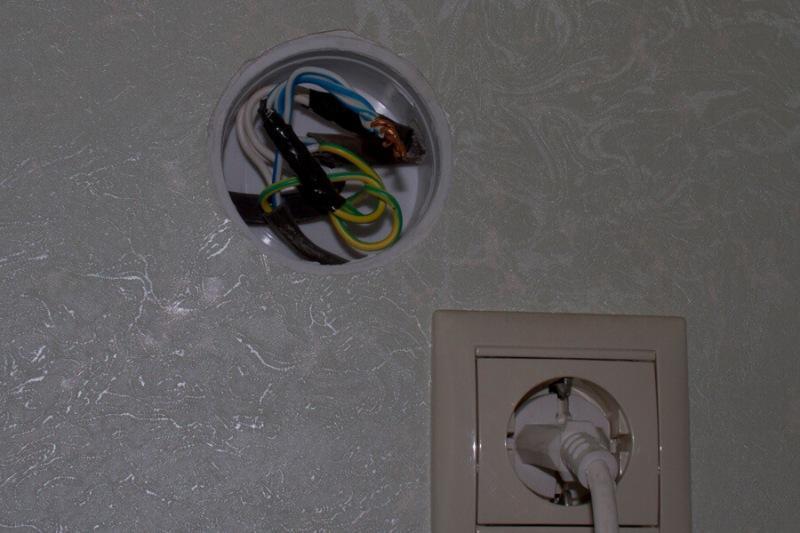
![How to remove a chandelier from the ceiling yourself]() To power them, a long carrying is required, most often connected to neighbors through a window or to autonomous power sources.
To power them, a long carrying is required, most often connected to neighbors through a window or to autonomous power sources.![How to remove a chandelier from the ceiling yourself]() You can not turn off the circuit breaker for the entire building, but turn off a separate room at the junction box. Then the carrier is simply plugged into the socket of the adjacent room.
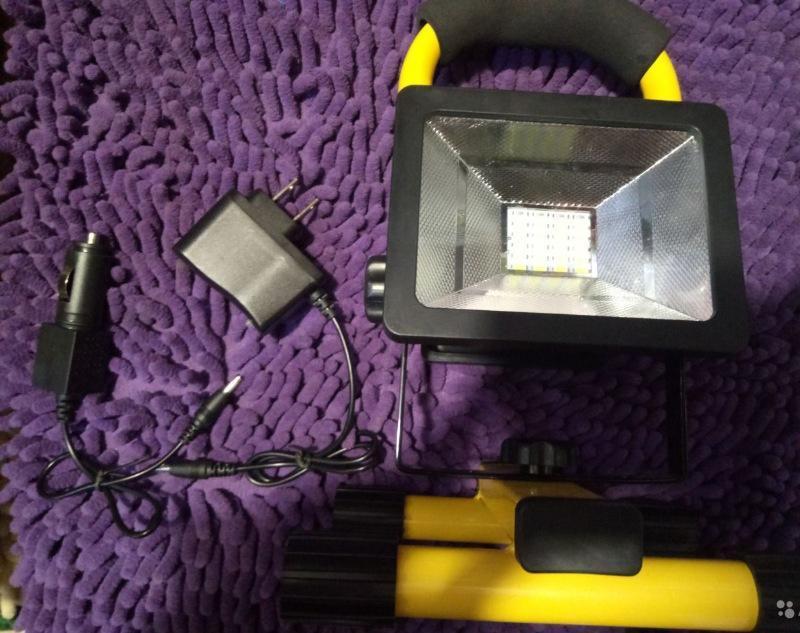
You can not turn off the circuit breaker for the entire building, but turn off a separate room at the junction box. Then the carrier is simply plugged into the socket of the adjacent room.![How to remove a chandelier from the ceiling yourself]() For short-term work, searchlights on batteries are suitable: since the capacity of modern batteries allows them to be used from several hours to a day without recharging.
For short-term work, searchlights on batteries are suitable: since the capacity of modern batteries allows them to be used from several hours to a day without recharging.