How to replace the light switch in the apartment with your own hands
Replacing a switch is a job that you can do yourself. But it is connected with electricity, so you need to read the step-by-step instructions in detail, study all the safety rules.
When do you need to replace a switch?
There are a number of reasons why a switch may need to be replaced. It:
- Breaking. A switch with a broken key affects the convenience and safety of use.
- Wear. Although switches serve for decades, sooner or later they wear out.
- Installing a different view. Often it is required to replace a one-button switch with a two-button switch or a conventional one with a touch switch.
- Repair work. These elements become part of the overall interior of the room, so during repairs they are often replaced with new ones.
Switches are inexpensive, and replacing them takes only 10-15 minutes. But for this, you should study the instructions in detail.
Step-by-step instructions for replacing switches
The switch replacement workflow consists of several steps. It starts with preparation, then proceeds to dismantling, disassembly and installing a new one.
Training
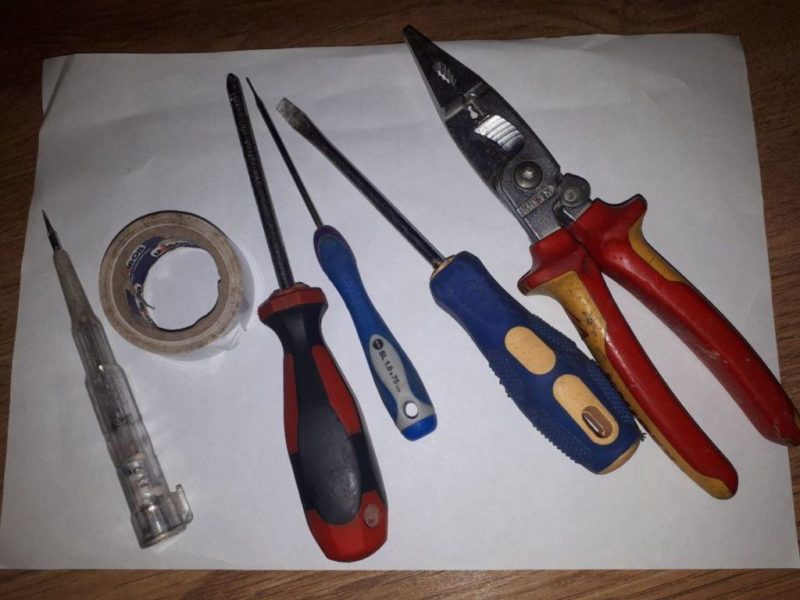
First you need to prepare all the working tools and materials that will be required. The basic list includes:
- Voltage indication tool.
- Screwdrivers (it is better to take several Phillips and flat ones).
- Pliers.
- Insulating tape.
- Stationery knife.
- Flashlight (it will be more convenient to work with a headlamp).
Some decide to use the indicator as the main screwdriver. It is better not to do this, so as not to damage the instrument.
If the need for replacement is due to a malfunction in the lighting in the room, then first you need to make sure that the switch is really the problem. To do this, you should check the operation of electricity in other rooms, the serviceability of the light bulb, the cartridge.
Before starting work, the apartment must be de-energized. The machine can stand both inside the apartment and be located in the electrical panel on the floor. Be sure to check the absence of voltage indicator.
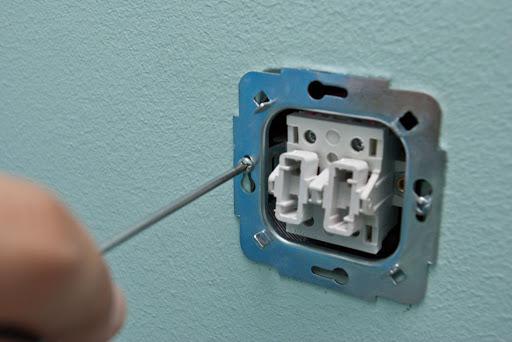
Removing the old switch
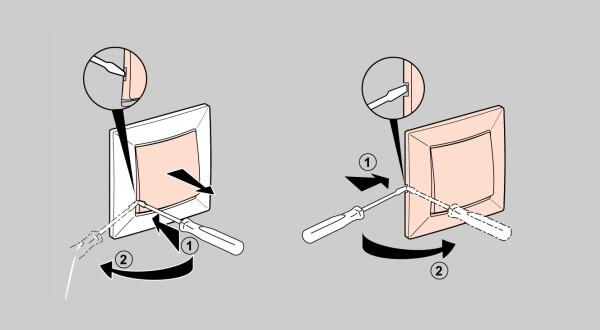
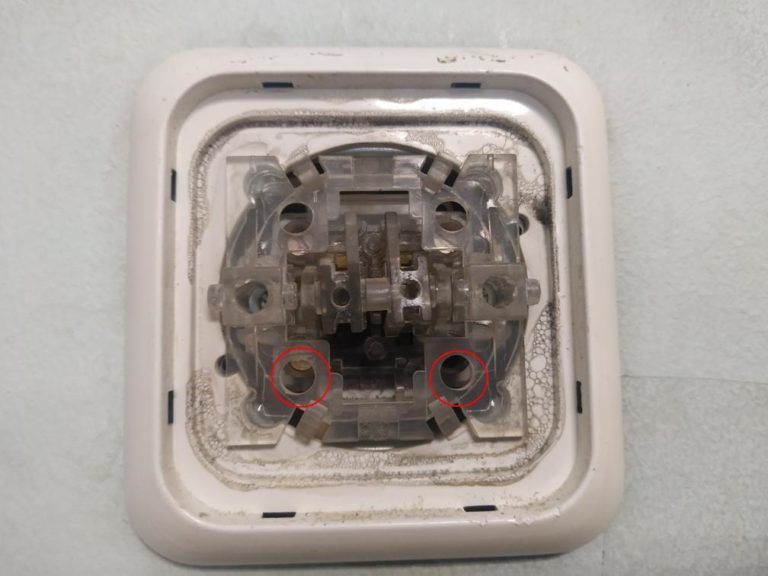
To remove the old device, you must first remove the protective cover. It is fixed with two screws that are located on the sides or under the button. If the fasteners are under the button, then it must be removed by slightly prying with a screwdriver or fingers.
The single-key switch is installed in the socket and is held there by spacer legs.The design has screw terminals with wires connected. Before dismantling, it is important to figure out which core the phase goes through. For this, an indicator is used. To determine the phase, you need to turn on the voltage, so it is important to be as careful as possible.

After that, it is necessary to turn off the voltage on the machine and continue the removal:
- Unscrew the fixing elements of the spacer legs.
- Pull the switch out of the socket.
- Disconnect the wires: first the phase, then the other.
Advice! In order not to confuse in the future which wire is phase and which is not, you need to mark it with a piece of electrical tape.
Step-by-step removal of the switch in the apartment
The internal switch has a simple construction with one or more keys, its removal is carried out in several steps:
- The machine turns off the electricity supply to the apartment.
- The keys are carefully pry off with a screwdriver or other similar object, dismantled.
![How to replace the light switch in the apartment with your own hands]()
- The switch frame is removed.
- Then you need to unscrew the screws that fix the device in the wall.
![How to replace the light switch in the apartment with your own hands]()
- Pull the switch out of the socket.
- Disconnect wires.
In order to avoid problems with connecting a new device, you need to take a picture of how the wires are connected to the old one.
Working with wiring
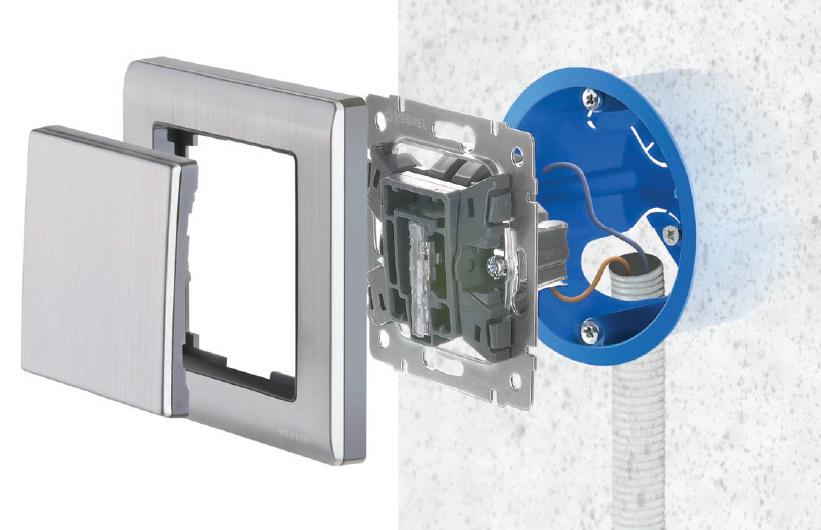
Before changing the switch to a new one, you must make sure that the wiring is working properly and prepare it. In some rooms, a hidden wiring option is used when the switch is installed in a special box. There is also open wiring with overhead products.
When dismantling the old switch, the phase wire is checked, it is important not to confuse it.If there is even slight damage on the surface of the wire, it is better to cover them with electrical tape.
Installing a new switch
To replace the design of the light switch with a new one, you need to proceed as follows:
- Strip the ends of the wires by 10-15 mm from the insulation. To do this, use a clerical knife or a special tool.
![How to replace the light switch in the apartment with your own hands]()
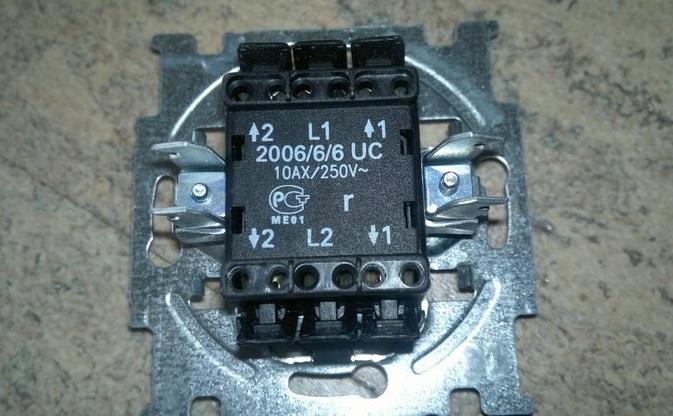
- Insert the cleaned wires into the openings of the contacts of the new switch. The previously marked phase wire is inserted into the hole, which is marked on the device as L1. The neutral wire is inserted into input L2.

- After that, you need to fix the wires by tightening the contact screw. To check the tightness, you can slightly pull the wire, while it should remain in place.
- The switch is inserted into the socket, fixed inside with sliding strips.
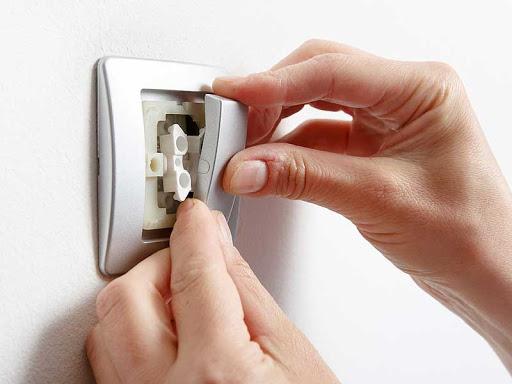
- Next, the switch frame is inserted, screwed on.
- The last step is to install the keys. They are usually attached to special clamps.
![How to replace the light switch in the apartment with your own hands]()
After installing a new device on the machine, the supply of electricity to the house is turned on, the operability is checked.
Diagrams and connection
Peculiarities connections wires to the switch depend on which type of device is selected. Before starting work, you should familiarize yourself with the popular schemes.
Single key variant
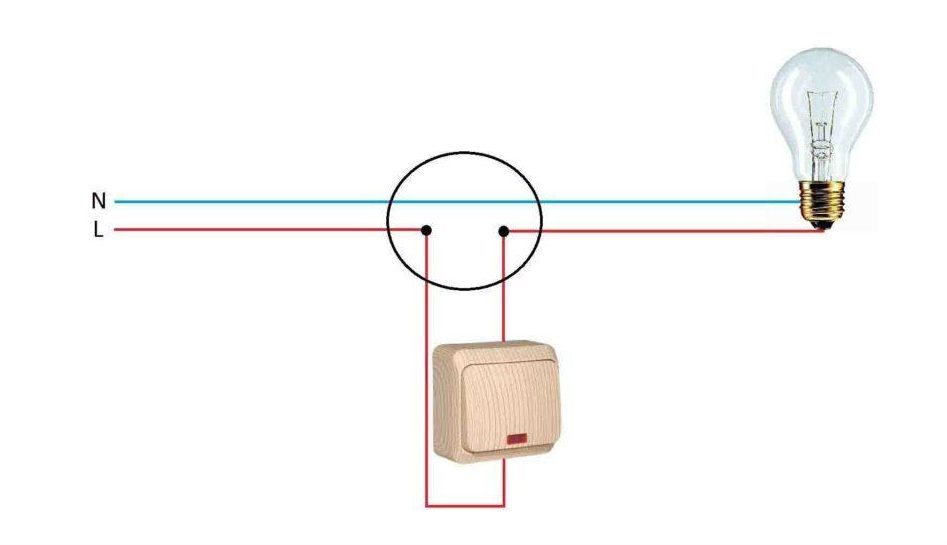
Connecting a switch with one button is the simplest. Its peculiarity is that only two wires are connected to the corresponding contacts, regardless of whether it is an internal or external option:
- First you need to clean the edges of the wires (strictly with the power off).
- Insert contacts into special compartments.For the phase contact, which is usually red, compartment L1 is intended, and for the other wire (blue or black) - L2.
- Screw terminals fix the contacts in the compartments.
- The switch is inserted into the socket, fixed in it.
- The operation of the device is checked.
For more information about connecting a single-gang switch, see this article.
Connection with two keys
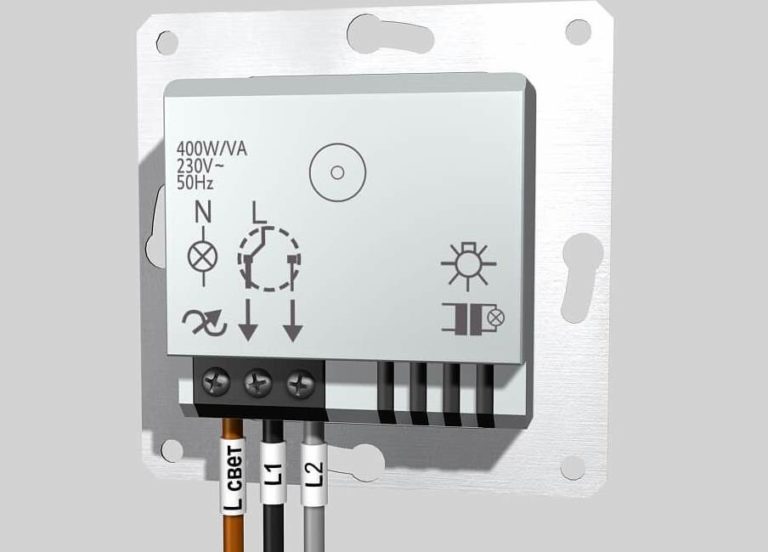
Connecting double key type devices operate according to the same instructions as when connecting a single-key. The only difference is in the wiring diagram, which here consists of three terminals.
A single phase wire is inserted into the compartment marked L3, paired wires are inserted into L1 and L2 (no difference).

Change from one-button to two-button
Sometimes people decide to change the old switch with one key to a new one with two. This is often done during repairs, when a few more lamps are added to the room in addition to the main chandelier.
From new light sources, you need to run wires to the phase wire, which was connected to the old switch and to the common wire from the ceiling. In the switch itself, everything is as usual, the phase wire is inserted into the corresponding connector.
From the video you will learn how to change a single switch to a double or triple.
Installing a dimmer switch
The connection diagram of a switch with a dimmer is not much different from connecting a conventional single-key device. According to the instructions, the corresponding wires are inserted into the terminals and fixed there.
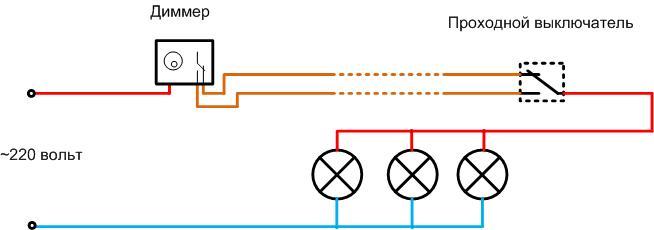
It is necessary to select either the switch to the light bulbs, or vice versa. There are special dimmers for LED lamps, incandescent lamps, etc. There are also dimmable bulbs.
Safety rules at work
Although replacing the switch is a simple task, it remains the most dangerous. Mistakes made can lead to fire, failure of lighting equipment, or even electric shock to the person conducting the work.
Basic safety rules:
- power outage. Anyone can accidentally touch a bare wire, so the apartment machine must be turned off before work.
- Studying instructions. Switches are produced according to standards, but sometimes there are unique options with other connection schemes. Be sure to read the instructions before installation.
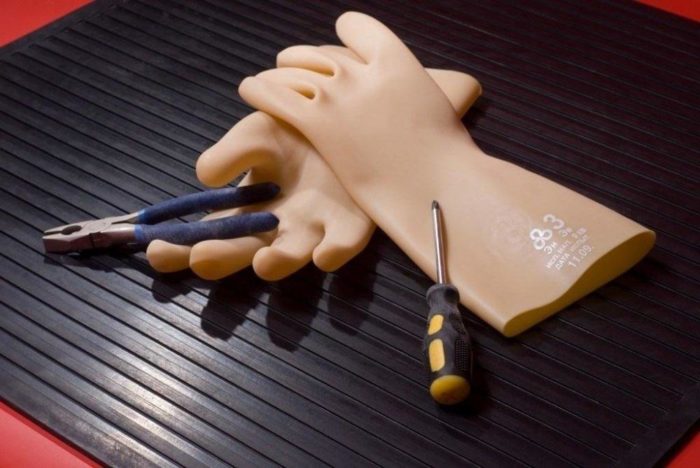
- Protective clothing. Be sure to wear rubber gloves. Also, goggles and special boots will not be superfluous.
![How to replace the light switch in the apartment with your own hands]() Rubber gloves and suitable tools.
Rubber gloves and suitable tools. - Instrument isolation. Tools are best used with a rubber handle. They can also be additionally covered with electrical tape.