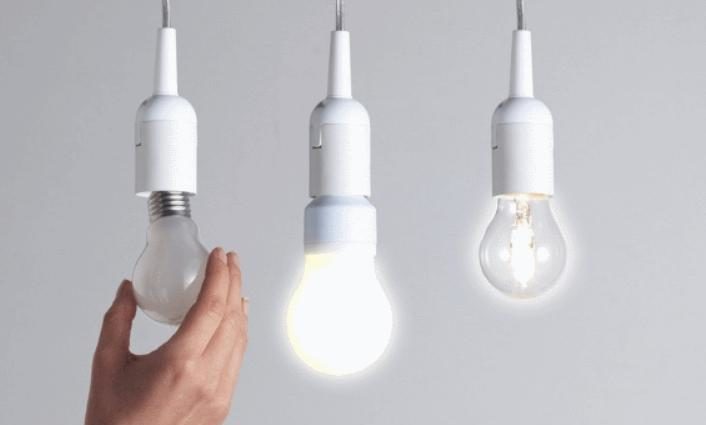
Bulb replacement instructions
Replacing a light bulb is the simplest job at first glance, which is not difficult for anyone to carry out. But according to statistics, a very large proportion of electric shocks in everyday life occurs precisely when the lamp is unscrewed or screwed in. Therefore, it is worth considering the process in detail in order to figure out how to ensure safety and quickly replace a burned-out element.
Substitution Rules
First you need to study the general rules for working with electrical equipment, which are mandatory when replacing light bulbs of any type. There is nothing complicated here, but nevertheless, most people neglect simple recommendations:
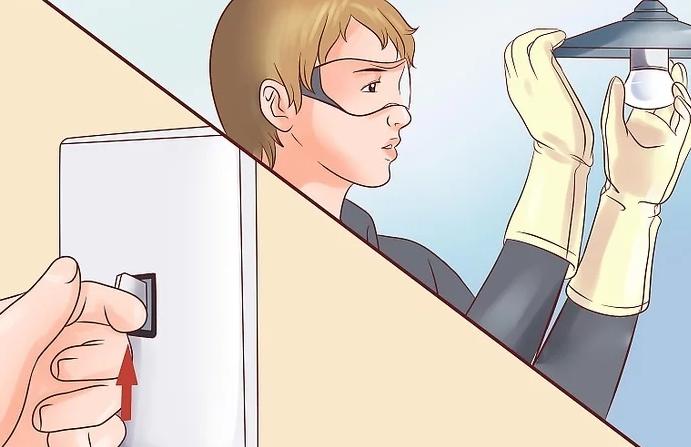
- It is advisable to buy dielectric gloves. They last for many years, and can be purchased and put in the pantry to use when needed. You can work in them, even if it is not possible to turn off the power supply when replacing a failed element.
- Use cloth gloves if the light bulb does not lend itself.When it is not possible to move the thread from its place and a lot of effort is required, it is better to wear strong gloves made of fabric or leather to protect the hand if the bulb bursts.
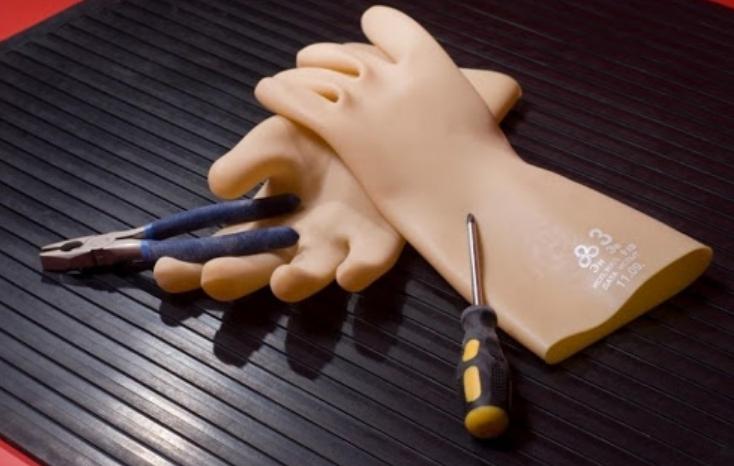
![dielectric tool]() The tool must be dielectric.
The tool must be dielectric. - Carry out work in good visibility. Since the electricity is most often turned off, and the lamps burn out mainly at night, when they are turned on, lighting must be provided. If you have a headlamp, this is the best option, but you can ask someone to light it with your phone.
- Take a reliable stool or other device to reach the ceiling. Very often, when replacing a light bulb, people are injured not due to electric shock, but due to falling from an unreliable design. The height should be such that you can work comfortably and do not have to stretch your arms.
- Always check for voltage with a multimeter or indicator screwdriver. After removing the light bulb, you should not climb into the socket with your fingers without making sure that there is no current there. The check will take a few seconds, but it will rule out any problems.
Note! Do not carry out work with wet hands, especially if the voltage is not turned off.
Replacement process
With the right preparation, you can quickly and safely change any type of lamp. At the same time, the set of tools and devices may differ, it all depends on the characteristics of the work. General recommendations are:
- Wear electrical gloves if possible. If they are not there, use any rubber option that is at hand, or at least fabric.
- It is advisable when buying a screwdriver, pliers or round-nose pliers to choose varieties with dielectric handles, rated for 220 V. They are always marked, this is also indicated on the packaging.But even such a tool should be used with caution.
- It is worth wearing protective goggles. They are inexpensive, but useful for different purposes. For example, when working with a raised head, it is impossible to get into the eyes of both glass fragments and small debris and dust, which often fall during disassembly of the ceiling or replacing a light bulb.
- Turn off the power supply in the entire apartment or in the part where you need to repair. It is best to clarify in advance what each of the machines in the panel is responsible for, so as not to confuse anything and de-energize the lighting. Usually a separate node goes to it, so other consumers of electricity will not be left without voltage.
- If the house has an old-style shield, then it is enough to unscrew one of the plugs to de-energize the room. But even after turning off, you need to be careful and remember about the residual current that may remain in the network. Even it is enough to severely defeat a person.
- Install a chair, table, stepladder or any other device to ensure the convenience of work. It is important not only to choose a reliable design, but also to ensure a stable position in order to prevent tipping over. You need to check this in advance, and not climbing up.
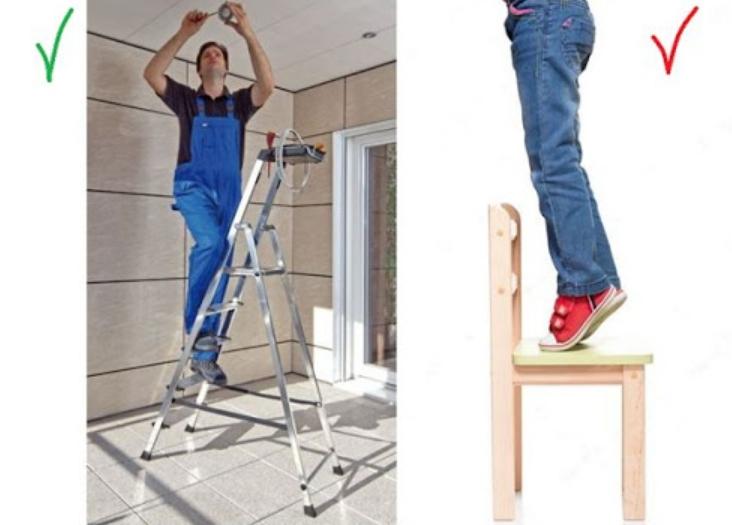
Important! If the light bulb is located at a great height, work only on a reliable stepladder that ensures safety. At the bottom, a second person must necessarily secure and support the stairs.
In which direction and how to unscrew
This seemingly simple action causes many difficulties for those who carry out work for the first time.Therefore, you need to follow a few simple recommendations in order to change the light bulb correctly and minimize the risk of damage to it:
- If the surface is hot, it is better to wait until it cools down. Take your time as the risk of damage is much higher.
- Grasp the flask with all fingers and evenly distribute the load over the surface. If you press only from one or two sides, then the probability that the bulb will burst increases significantly. Take so as to hold from all sides.
- If the cover interferes with work, it is better to remove it first. It all depends on the design of the chandelier, you need to act according to the situation. The main thing is not to damage the fastenings and the ceiling itself and not to drop it.
- Use gloves, preferably fabric with a polymer coating. Firstly, they allow you to securely grip the slippery glass surface. Secondly, even if the flask bursts when unscrewing, glass fragments will not hurt your hand and you will protect yourself from severe cuts.
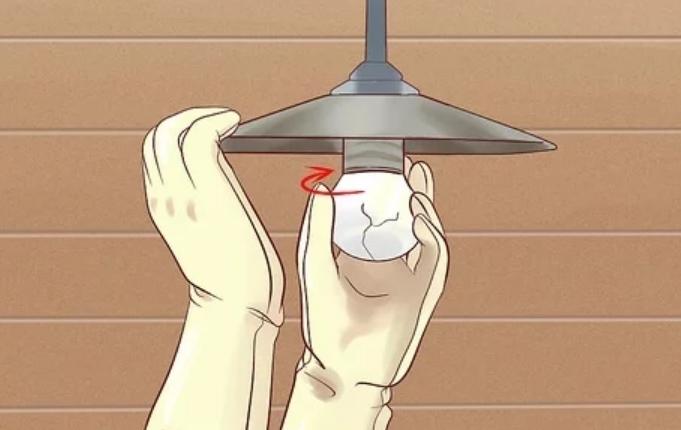
- Always turn counterclockwise or from right to left. In all light bulbs, the thread direction is the same, so you need to immediately turn them in the right direction so as not to twist even more and complicate your work.
![twisting]() Twisting counterclockwise.
Twisting counterclockwise. - If the base is burnt from overheating or does not lend itself, you need to work with extreme caution. First, firmly grasp the flask and gently rock it from side to side, pushing slightly inward. Often, after such manipulations, the lamp breaks. It should be torn off with a sharp, precise movement, without pressing hard on the glass so that it does not crack.
- If the cartridge is collapsible, the easiest way is to unscrew the lower part along with the light bulb.In this case, the top one can also rotate, in which case it should be held by hand or any suitable device.
- To remove the removed lamp from the cartridge, it is better to pre-treat the thread with a liquid wrench and leave it for a while. And then try to unscrew the base. If the flask burst, follow the instructions in the section below.
Advice! To prevent sticking of light bulbs, a little grease should be applied to the base before installation. Suitable lithol or grease. Then in a few years there will be no problems.
Subtleties of replacing damaged lamps
If during operation or when unscrewing the flask burstit's much more difficult to change a light bulb. The part remaining in the cartridge must be removed. There are several ways, you need to choose the right one, based on the situation:
- If the flask has completely fallen out, you can try to unscrew the metal element using small pliers or round-nose pliers with long jaws. You need to carefully grab the edge of the base, you can bend it a little with a screwdriver to make it convenient to work. Shaking, twist counterclockwise, the main thing is to pick it up, then the work will go much easier. During operation, be careful not to damage the threads in the cartridge.
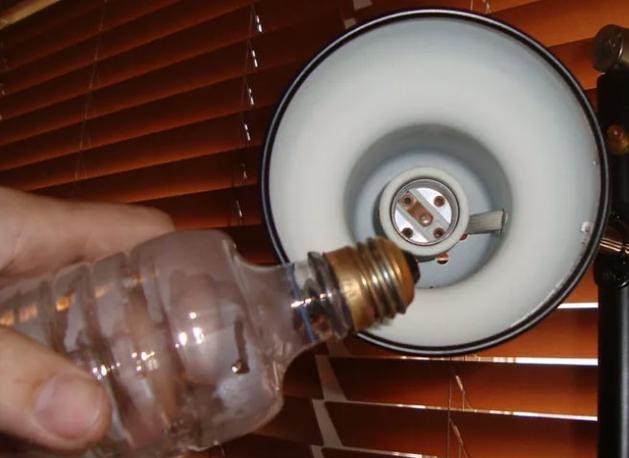
- You can use a small plastic bottle. To use it to unscrew the base from the cartridge, you need to heat the neck with a regular lighter so that the plastic becomes soft. Then insert it into the cartridge, pressing it inward so that it hardens in the base and after cooling it sticks securely. Then twist counterclockwise, holding the bottle.
![extract with a bottle]() The bottle can quickly remove the base remaining in the cartridge.
The bottle can quickly remove the base remaining in the cartridge. - If you have a champagne cork with a thicker top, you can use it. The thin side, if necessary, should be cut a little with a knife so that it enters the base. If a stem remains inside (a leg on which a tungsten filament stands), it must first be removed with pliers. Insert the cork all the way so that it is well fixed and unscrew the rest.
- When small pieces of glass and a leg remain in the base, you can try to unscrew the light bulb with a potato. To do this, you can cut the potato in half, there should be a piece that will be comfortable to hold in your hand. Press the half into the light bulb so that it is well fixed on the fragments, then carefully unscrew the base.
![twisting potatoes.]() An example of twisting a light bulb with a potato.
An example of twisting a light bulb with a potato. - If you can unscrew the lower part of the cartridge, it is better to do this, it is more convenient to work on the removed element. Again, the threads can be treated with a liquid wrench to make it easier to unscrew.

In the most difficult cases, you need to change part of the cartridge to a new one, and if it is not separable, cut the wires and attach a new one. Do not forget that the glass must be carefully cleaned, it is best to use a vacuum cleaner.
Video: Dangers when replacing, common breakdowns
Installing a new light bulb
After the burned-out element is unscrewed, you need to insert the light bulb correctly to ensure its secure fastening and long operation. There are no particular difficulties, just follow a few tips:
- Check the condition of the thread and the absence of soot on it, if the base had to be torn off. If there is damage or dents, it is better to replace the outer part of the cartridge, it can be bought as an assembly.
- Be sure to bend the contact on the inside so that it is well pressed against the base. You just need to pull it towards you a little, because over time, the spring steel loses its elasticity and the contact worsens, which often leads to the bulb burning out.
- First, wrap the outer part of the cartridge until it stops, it should not hang out. Then carefully screw the bulb in a clockwise direction. If it does not enter easily, gently wiggle or twist a little and wrap again, you can not apply force.
After finishing work, turn on the power supply and check bulb operation. If everything is in order, you can remove the tool and fixtures.
Lamp recycling
It all depends on the type of light bulb, so you need to sort out the main options in order to understand how to properly dispose of them:
- Incandescent lamps can be disposed of with normal household waste. But at the same time, they are dangerous due to the fact that they can break and cause injury or damage to the package. It is best to take them out immediately to rule out problems.
- Halogen lamps also do not need to be disposed of separately. They are an order of magnitude stronger, so they do not pose any danger.
- LED options are made of plastic, do not contain hazardous substances, can be disposed of with household waste.
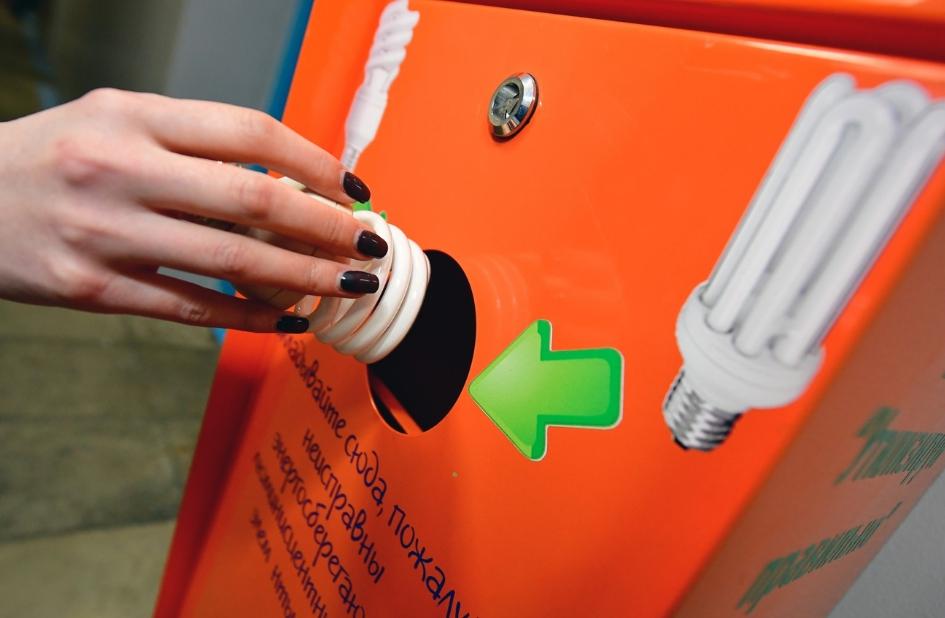
- Energy-saving fluorescent lamps contain mercury vapor and should therefore not be disposed of as usual. Need hand over to specialized points reception or put in special containers, they are in many cities.
For all its simplicity, replacing a light bulb requires certain knowledge and compliance with basic safety standards. It is important to turn off the electricity before starting work and protect your eyes and hands in case the bulb is damaged. And if the lamp burst, use one of the methods described to extract it.