Assembly and connection of the chandelier
To assemble a chandelier, you need to understand its design and think over a scheme connectionsoptions may vary. It is also necessary to study the assembly instructions and determine which option for mounting to the ceiling is best suited. When connecting to the network, it is important to respect the polarity and ensure a reliable wiring connection.
Stages of assembly and connection of chandeliers
Regardless of the design and number of horns, the process can be divided into several stages. Each of them is important, so you need to understand all the nuances in order to carry out the work efficiently and quickly:
- Assembly and connection of all elements. The most important thing here is to understand the design features and study the instructions. Even if it is in a foreign language, there should be a diagram or photographs with step-by-step tips for independent work. If there is no instruction, you should proceed from the photo on the package, usually there are different angles.
- Proper grouping of wires. This point is especially important when using multi-key switches. There are several options, depending on the number of shades and the connection diagram, it's easy to figure it out if you study the section below on this issue.
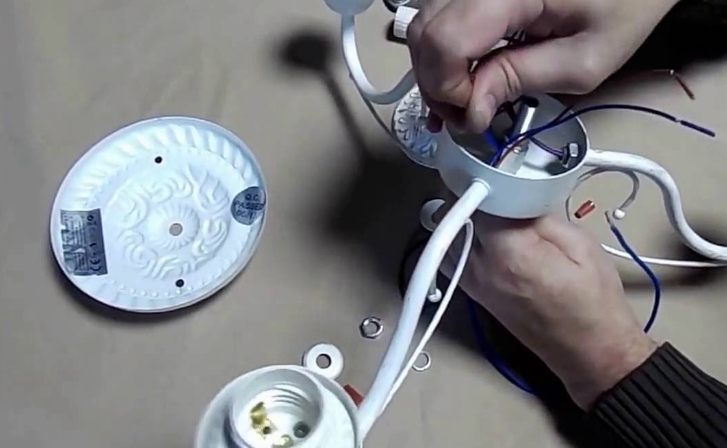
![group wires when using a single-gang switch]() The easiest way to group wires is when using a single-gang switch.
The easiest way to group wires is when using a single-gang switch. - Fixing a chandelier to the ceiling. It all depends on the fastening that comes with the kit and on the material from which the partition is made. Usually you can choose between several options - self-tapping screws, dowel-nails and special hooks that can be either screwed into a tree or driven into chopsticks. And for hollow structures, special fasteners are used with a spacer part, which opens above the surface of the ceiling.
- Connecting the terminals of the chandelier to the wiring. Polarity must be observed. If the contacts are weak, then over time they burn out and the bulbs simply stop burning. And if you do not isolate the connection, then over time it will begin to oxidize, which is also undesirable.
Before finally attaching the contacts and closing the attachment point with a decorative cap, it is worth checking the operation of the system before assembly.
If the instructions have additional recommendations, you need to be guided by them when performing work. When buying, it is advisable to choose models with an Assembly Manual in Russian. Each stage should be analyzed in detail.
Mechanical assembly of the structure
The more complex the chandelier and the more decorative elements on it, the more time will have to be spent on assembly. The process should be organized like this:
- Unpack all the components and arrange them so that everything you need is at hand. It is best to prepare the table and provide good lighting.You should have a set of screwdrivers and wrenches on hand so that there are no problems with assembly.
- It is worth making sure that all the parts are in stock. It is very important to make sure of this in advance in order to return the chandelier to the store or exchange it if there are problems.
- It should be assembled from the top of the case, installing all the necessary elements according to the instructions. Align all parts evenly and clamp them with nuts or other fasteners.
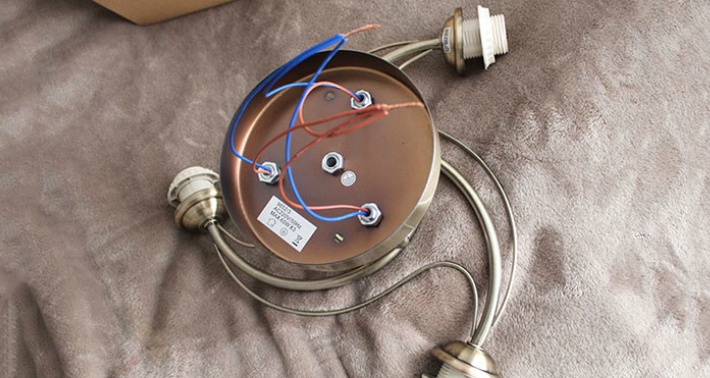
![wires are pulled through the hole first]() When attaching the horns, wires are first pulled into the hole
When attaching the horns, wires are first pulled into the hole - Next, you need to attach the horns, for this they are put on the seats and fixed with a nut. You need to pick up a wrench of a suitable size and do not clamp it all the way. First, you should make sure that they are arranged symmetrically and only then finally fix them.
- If required, then you need to stretch the wires through the central tube. Often they are already laid, which simplifies the work.
For non-standard chandeliers, the process may differ, so when choosing, it is better to look at the design in order to understand how it is assembled.
It is worth remembering that the decor in models with pendants must be fixed after installation. This also applies to ceiling lamps, they should not be installed immediately, this will simplify installation. It is better to finally assemble the lamp when it hangs on the ceiling.
Video instruction:
Dividing wires into groups
A crucial stage, on which depends how the chandelier will work. It all depends on the required modes. It's easy to figure it out, you need to remember a few recommendations:
- If a single-key switch is used, then connecting the wires is not difficult.Usually they come in two colors - zero is always with blue or blue insulation, and the phase can have a different coating - from black or white, gray and many others, Chinese manufacturers do not have a single standard.
- When the model has two wires per ceiling, and you need to separate the light into two keys, you need to follow a simple instruction. Think about how to separate the light bulbs and connect the appropriate wires. Then connect them to the desired output of the switch. It can be turned on in two modes, and if two buttons are pressed, then all the ceiling lights will light up.
- For models with triple leads from each light bulb, you can make different modes by combining them for 2.3 or even more keys. In this case, you should combine them in accordance with the chosen scheme, there are a lot of options.
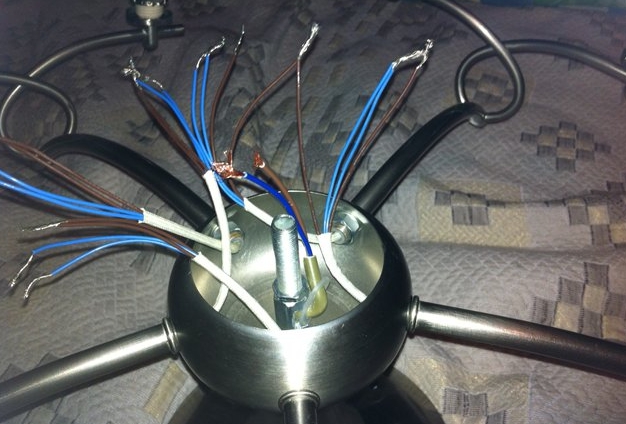
![The more keys on the switch, the more difficult]() The more keys on the switch, the more difficult it is to group the wires
The more keys on the switch, the more difficult it is to group the wires - When connecting the wires, it is not necessary to twist, as this is an unreliable option, due to which, over time, the wiring will start to heat up and may burn out. It is best to solder them with tin, then the connection will be reliable and durable.
- If you need to connect through a block, which is most often used in modern equipment, then a copper wire should be soldered to the twist. Select the length so that it is convenient to connect the contacts. If possible, insulate the twist with a heat shrink tube, this is the most reliable and durable solution.
The ends of the wires need to be stripped in order to connect and solder well.
Fixing a chandelier to the ceiling
The structure must be securely fastened to eliminate any problems. Choose a method depending on the material for the manufacture of the ceiling and the fasteners that come with the kit:
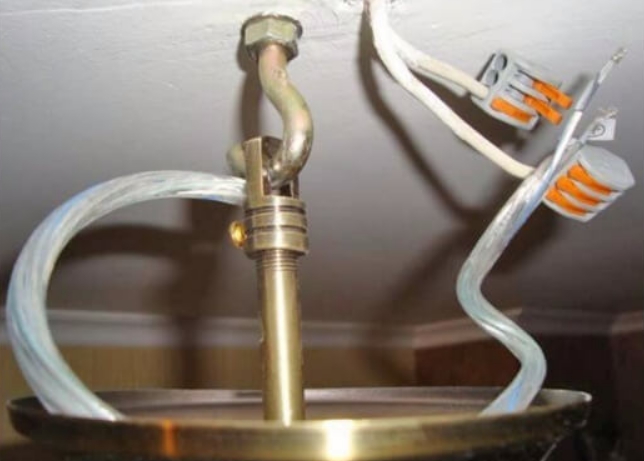
- In a wooden floor for a hook, you must first drill a hole, the diameter of which is 2-3 mm smaller than the threaded part. Screw in by hand or with a screwdriver, which is simply inserted between the protrusions. Determine how much to leave outside to hang the chandelier.
- In the concrete floor, you need to pick up the dowel according to the size of the hook. Drill a hole in the concrete, the main thing is to choose the right depth so that the dowel enters completely. The hook can be both screwed in and carefully hammered to the desired position.
![hook fastening]() Hook option
Hook option - If an installation plate is included in the kit, then you need to attach it to the surface and simply screw it on with self-tapping screws (option for a wooden floor). Choose the length according to the situation, usually 4-5 cm is enough.
- For a concrete ceiling, the process is a little more complicated. First, mark the holes and drill them according to the diameter of the dowels. Insert the dowels into the slab or through the plate and fasten. Then attach the chandelier and fix it with nuts that are screwed onto the studs.
Related video:
If there is a stretch ceiling in the room, then a special platform is first installed above the canvas, to which the chandelier must be attached.
Phase search and connection
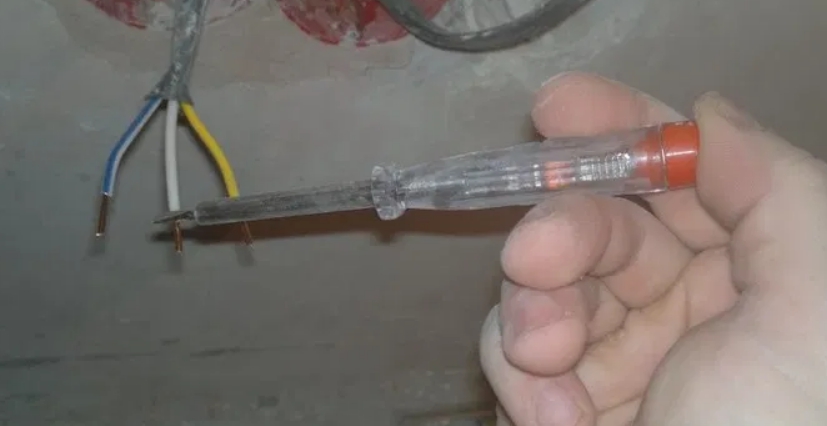
In order not to confuse anything, you should determine the exact location of the phase and zero. To do this, it is best to pre-prepare an indicator screwdriver and a multimeter. Follow simple guidelines:
- Switch off mains voltage. In the connected cable, strip the ends by 1-2 cm and push the wires apart so that they are guaranteed not to connect. Then turn on the voltage and check each terminal with a screwdriver, attaching a sting. The phase is where the lamp lights up, the second output is zero.
- If three wires are connected, then you need to determine which one is grounding, it will not work with a screwdriver. In this case, you will need a multimeter. First, the power wire is determined with an indicator screwdriver. And then you need to place the contacts of the multimeter between the phase and the remaining wires. If the indicator is 220V, then the second output is zero, if the voltage is much lower, then this is grounding.
When carrying out work, be careful. Do not touch with your hands and do not connect the cable screwdriver with a sting, so as not to short the wiring.
Rules of care and operation
In order for the equipment to serve as long as possible, simple recommendations should be followed. You need to remember the following:
- It is advisable to wash all decorative elements with removal 1-2 times a year. Plafonds can be soaked in soapy water to make it easier to wipe off dirt. In the kitchen, this should be done more often - once every 3-4 months.
- If there are crystal details, then they cannot be soaked in soapy water, they will fade from this. It is best to add a little ammonia to warm water for shine. After washing, spread on a clean cloth until completely dry. It is better to hang with fabric gloves so that there are no fingerprints on the crystal.
- Wash the fittings with a glass cleaner. Apply it to the surface and leave for a few minutes, then wipe with a clean microfiber cloth.
- After washing, do not turn on the chandelier for at least an hour, so that all the elements have time to dry completely.
When disassembling a complex structure, take a picture of it so that you can put it back together without any problems.

Assembling a chandelier with your own hands is not difficult if you buy an option with detailed instructions in Russian and clear diagrams. When assembling, think over the order of connecting the shades, especially if a multi-key switch will be used. Do not forget that from time to time the elements need to be washed.