How to hang a chandelier on a plasterboard ceiling
Even before the stage of installation of suspended ceiling structures, it is necessary to plan the lighting system in advance. After finishing work, hanging a chandelier on drywall without prepared fixtures is difficult, but possible. But without the electrical wiring previously laid to the location of the lamp, installing a chandelier will not work.
Choosing a chandelier for plasterboard ceilings
According to the rules, all wires are hidden in the space specified by the width of the metal profile - between the main ceiling and the suspended one. The same space reduces the height of the room, which for a room with low ceilings is a limitation in the choice of lighting fixtures. In order to save space for such premises, overhead chandeliers are most often used.
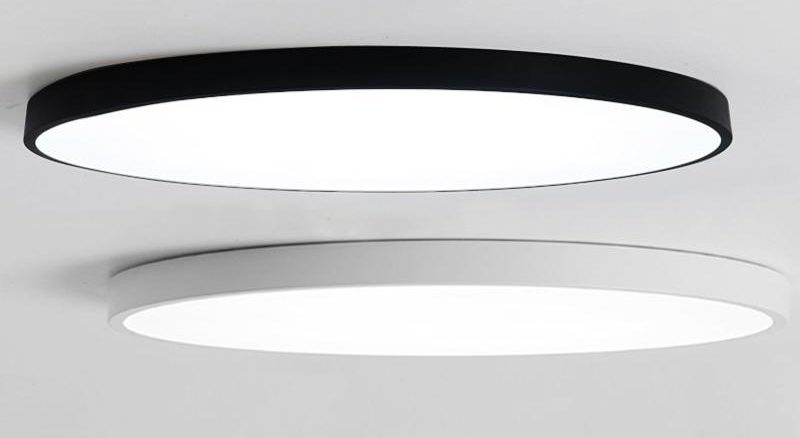
If the height of the room initially exceeds 2.8 meters, for example, as in Stalin's apartments, then the dimensions of the lamps are already limited only by imagination and common sense. Although it is customary to install soffits in suspended and suspended structures, classic chandeliers also have a place in this case.

When choosing a lamp model, it is better to determine in advance the type of its fastening. If you plan to install the chandelier directly on the drywall sheet, then 2-3 kg is the limit for her mass. Otherwise, the canvas will deform or collapse under a point load. Anything heavier is attached directly to the main floor slabs.
Fixture installation
If a network cable has already been connected to the place of the proposed installation of the lamp, you can fix almost any chandelier to the plasterboard ceiling. Technically, this is not so difficult if you have the necessary set of tools and have minimal skills in handling them.
Preparation and selection of tools
At the preparatory stage, it is necessary to determine the attachment point and mark the ceiling. Chandeliers are usually placed in the center of the room, and if there are several, then in such a way that there are no shaded areas in the room, except when this is required by the design plan.
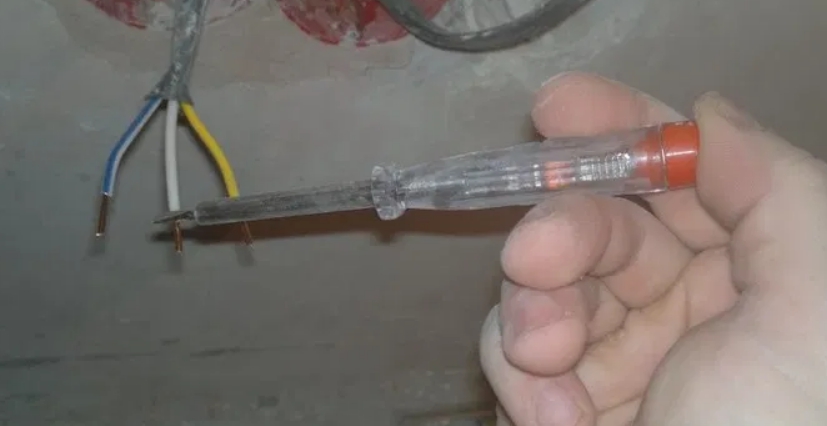
Note! If you have to make holes in the concrete floor, you need to check the floor plan, which should indicate the location of the internal electrical wiring.This will help to avoid damage in case of accidental perforation of the strobe with the cable. In any case, before carrying out work, switch off the power supply at the circuit breaker.
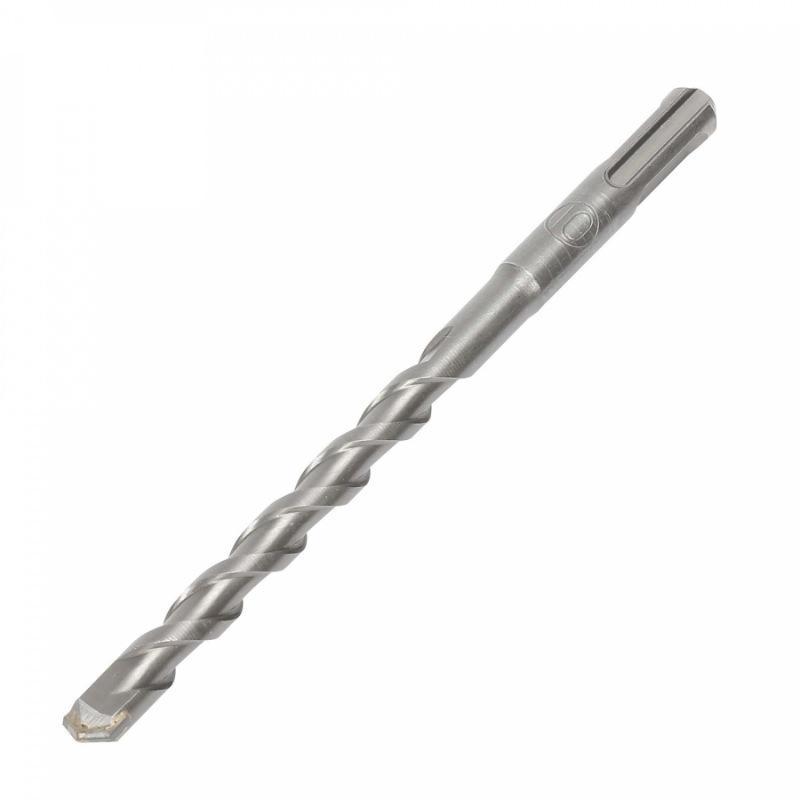
To install most types of fixtures you will need:
- roulette;
- marker, pencil;
- screwdriver or screwdriver;
- wire cutters;
- hammer drill or impact drill with a drill bit for concrete.
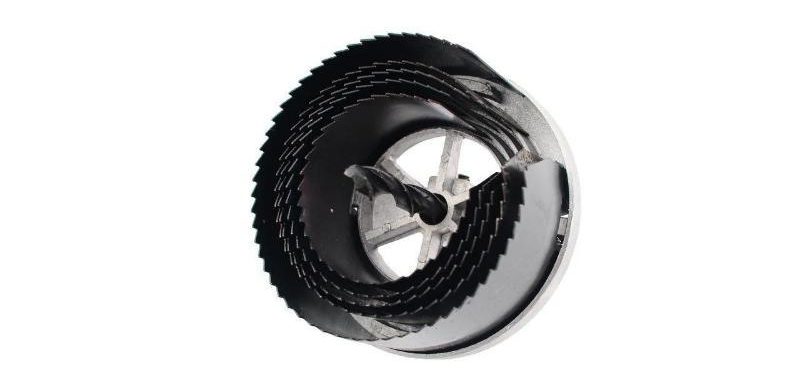

If you plan to make a large hole in the GPL, you will need:
- indicator screwdriver;
- drills with crowns;
- paint thread;
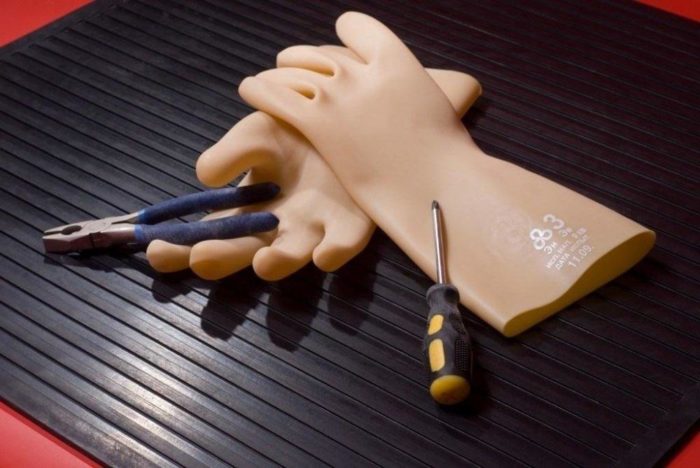
- protective equipment - construction dielectric gloves, mask;
- insulation (preferably terminal blocks);
- fasteners and fixing parts - dowels, anchors, hooks.
Mounting process
After the installation site of the lighting device is marked with appropriate markings, it is necessary to determine the type of mounting system.
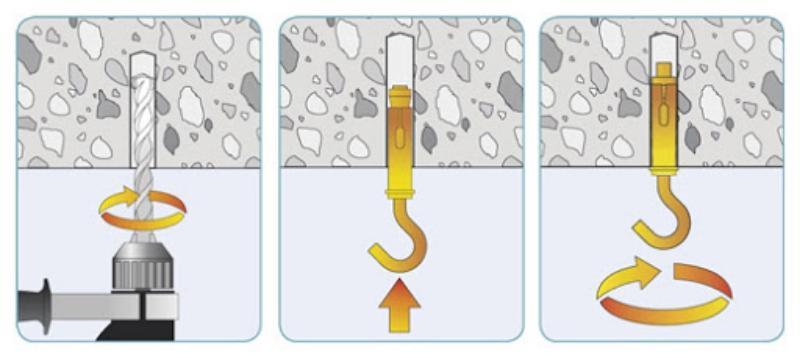
On the hook
There are two types of hook type fasteners:
- anchor - for massive models from 10 kg.
![How to hang a chandelier on a plasterboard ceiling]()
- On a self-tapping screw with a dowel - for hanging chandeliers weighing 3-10 kg.
![How to hang a chandelier on a plasterboard ceiling]()
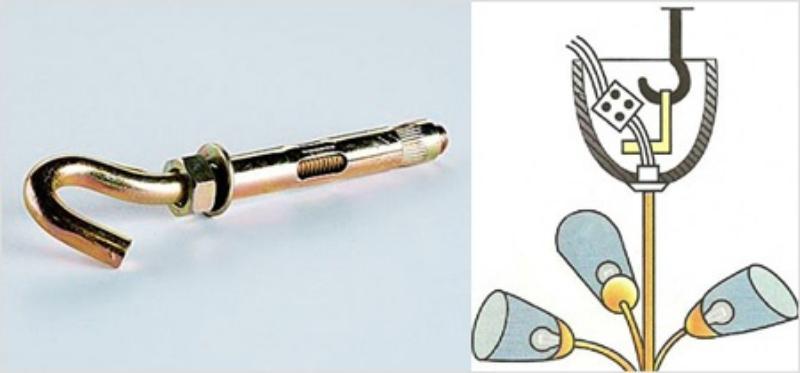
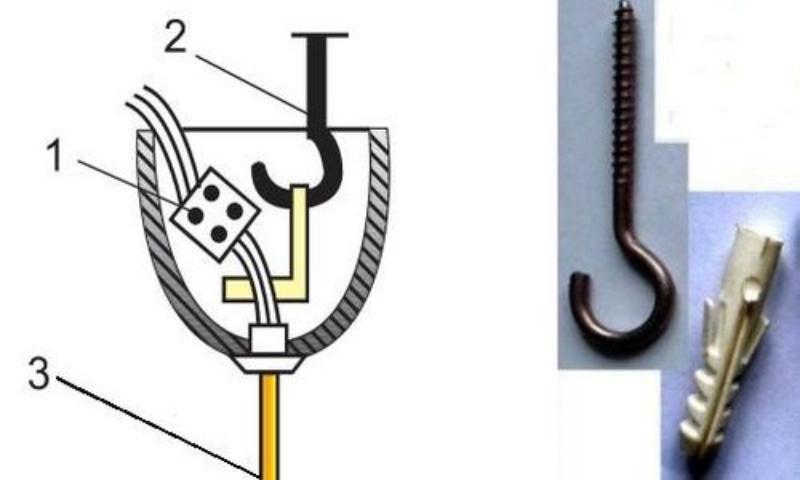
Both systems are similar in principle of installation. A hole is drilled in concrete using a perforator, corresponding in diameter and length to the dowel. A dowel is driven flush into it, after which, by twisting the hook, the spacers are wedged and the fastener is fixed inside the hole. The luminaire is suspended by an eye in the rod, and the attachment point is closed with a decorative cap.
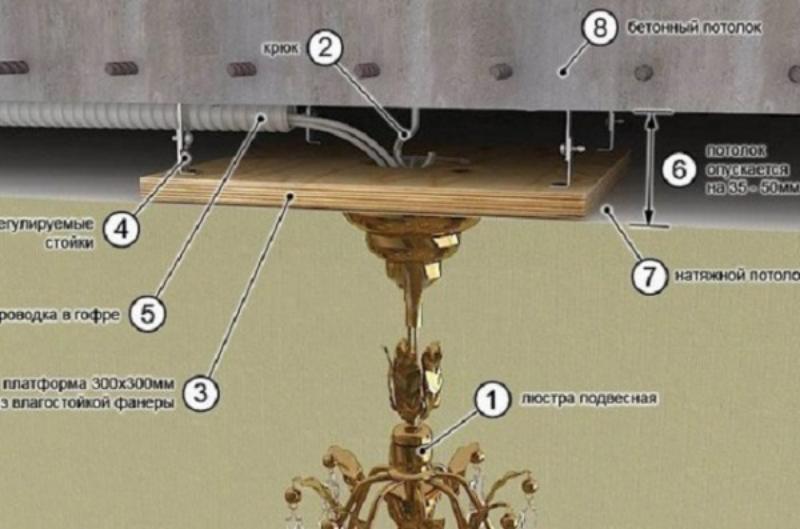
On the mortgage profile
To install any type of chandelier even before the installation of a plasterboard ceiling, a special embedded platform is mounted at the attachment point.In the factory version, such platforms are most often universal, but there are options with a fixed diameter and a pitch between the bolt holes. Universal ones are more practical, their size and inner diameter can be adjusted by cutting with an ordinary construction knife.
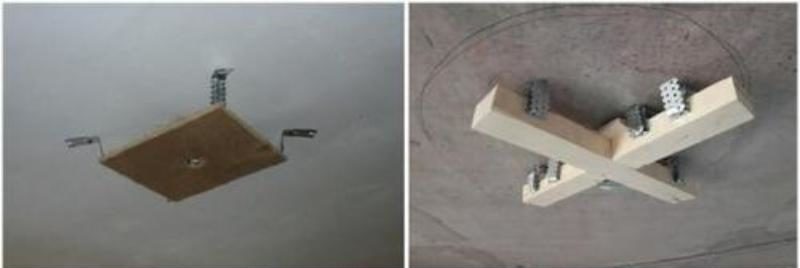
For fixing, flexible profile suspensions are used. The distance from the ceiling to the platform is adjusted by bending the metal profiles. To determine this distance, a paint thread is stretched between opposite walls, at the point of attachment of the plasterboard ceiling so that the platform is adjacent to its surface. This method is also suitable for stretch fabric.
If mounting strips are included with the chandelier, then they are screwed to the site through the gypsum board using ordinary self-tapping screws, having previously drilled the drywall with a drill, equal in diameter to the self-tapping screw. This is important if there is a gap between the platform and the sheet.
The distance between the mounting bolts on the bar for different models is individual, they must be set and fixed with nuts before the stage of its installation on the platform. In addition, the position of the bar depends location chandeliers relative to the walls of the room, which must be taken into account when pre-marking the holes for drilling.
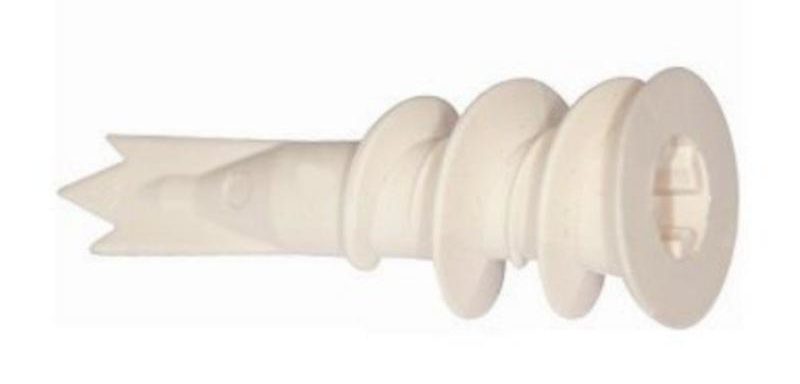
On a dowel-butterfly
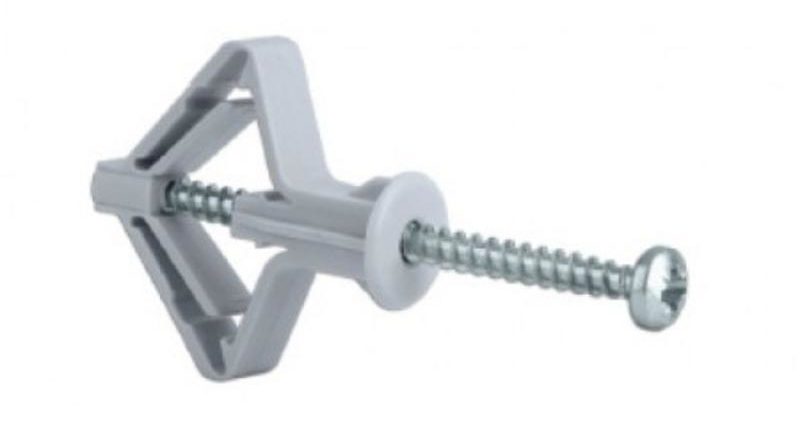
It is a fastener designed to fix structural elements on plasterboard sheets. Suitable for installing a chandelier directly on the plasterboard, or on a mortgage. It happens like this:
- A hole of the required diameter is drilled.
- The dowel is placed in it until it stops, so that only the plastic cap protrudes.
- Attached to it is a mounting plate with fixed bolts for fastening to the chandelier.
- Mounting is done with a screw.

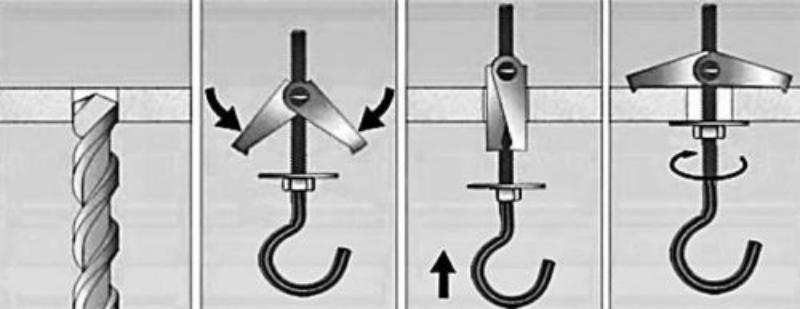
Anchoring
It is most often used to install a hook, less often - a mounting plate, since the degree of fixation allows holding heavy structural elements weighing over 10 kg. Despite the apparent complexity of the fastener, the algorithm for its installation is simple:
- A hole is drilled in the concrete floor according to the diameter of the anchor.
- The bolt or hook with the spacer bolt screwed on and the collet inserted so that the collet is flush with the ceiling surface.
- By turning the hook, the expansion bolt wedges the anchor in the hole.
How to hang a chandelier if the ceiling is already sheathed
All the methods described will be much more difficult to apply if the drywall is already fixed on the profiles. If the dismantling of the GKL does not seem appropriate, then the easiest option is to mount the lamp directly on it. To do this, it is better to choose lightweight models, weighing no more than 3 kg. In this situation, there are several mounting options.
for plank
With the help of a dowel-butterfly. In this case, it will be successful if the holes or part of them are made at the places where the GKL is attached to the metal profile. An ordinary magnet is used to detect this area. The profile can also be used as a support for the dowel.
By means of a dowel-snail. Sharp feathers allow you to do without pre-drilling, but you need to avoid getting into the metal profile. A wide thread holds this dowel in drywall. An option less reliable than a butterfly, only suitable for small and light fixtures.
Dowel type "quick installation". To do this, a hole is drilled through the drywall with a long drill in the main concrete floor, then a self-tapping screw is selected along a length slightly less than the depth of the hole + the distance between the main and false ceiling. The dowel is inserted at the tip of the screw, driven to its full length, after which the screw is removed and screwed again through the attached bar. The method is complex, requiring honed skills and a good eye. However, if successful, heavy structures can be mounted on such fasteners.
Related video.
In the video presented, only the central “quick mount” in the cross plank is installed with this method, but this is enough to take the load off the drywall floor.
For hook
spring anchor. A hole is drilled in the GKL with a wide drill, into which the folded anchor is inserted. Once in the free space, the latches are straightened and pressed against the ceiling with a nut.
Standard mounting hook. To do this, a wide hole is drilled in drywall with a drill with a crown. A spacer is inserted into the connector in such a way that the central part with a bend hangs over the opening. A flat hook clings to this bend and is fixed with a plastic cover that closes the hole. An insulating cap is put on the lower end of the hook.
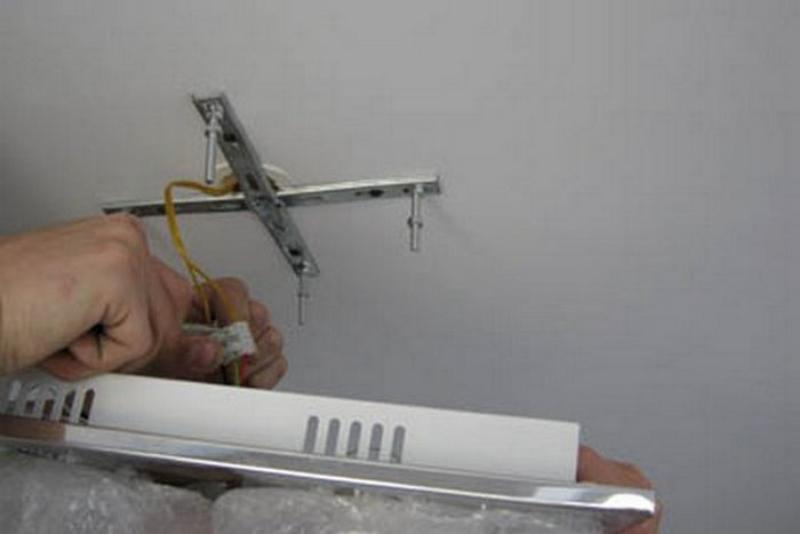
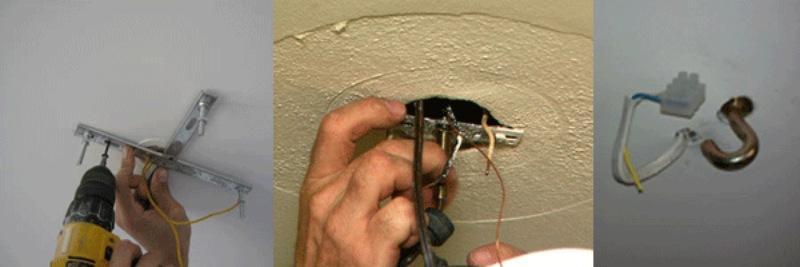
After fixing the lamp on the hook or bar, all wires are connected. It is better if special terminal blocks are used, since the use of twists is fraught with sparking.
Attention! If twisting the wires is unavoidable, it is necessary to use conductors of the same type of material.Combining copper with aluminum leads to overheating at the point of contact. This phenomenon is especially strong when connecting powerful lamps above 100 watts. Heat shrink tubing is recommended for insulation.
How to remove a chandelier from a drywall ceiling
The first thing to do before dismantling the lamp - turn off the power supply in the circuit breaker for the whole room. Since in the case of incorrect wiring in some buildings or the presence of autonomous emergency power sources, this measure does not guarantee safety, it is necessary to check the sockets in the room with an indicator screwdriver. To provide access to the chandelier, you will need a stable stepladder or a sturdy table. Further actions take place according to the following scheme:
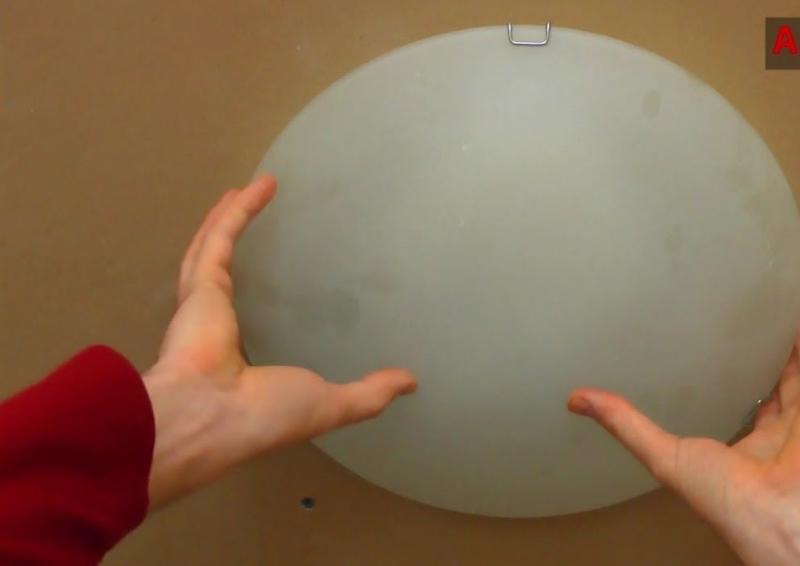
- The cover is removed - depending on the type of construction, it can be a plate, glasses or any other type of decorative diffusers. Such parts are removed most often by turning counterclockwise, unscrewing the fixing bolts and latches. If the ceiling does not interfere with access to the fasteners and does not greatly affect the mass of the product, it can not be dismantled.
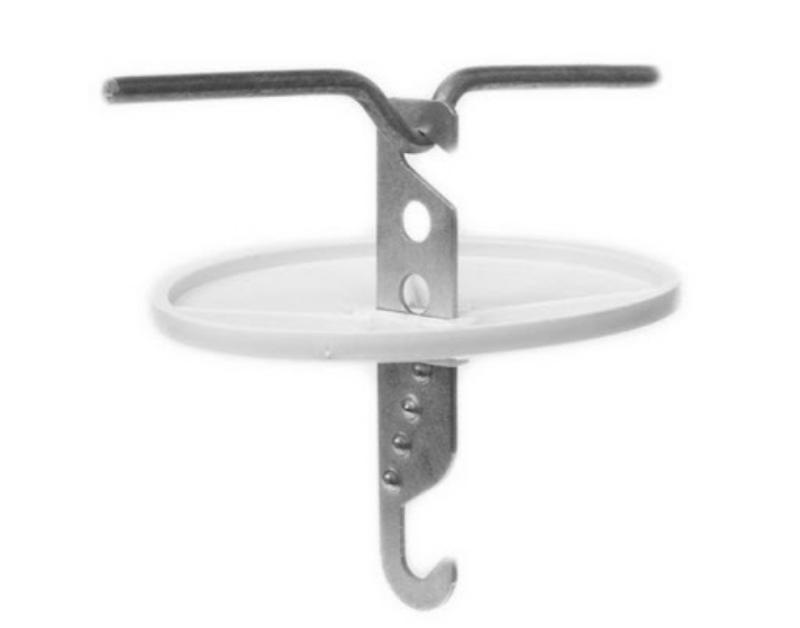
![How to hang a chandelier on a plasterboard ceiling]() If the chandelier is hanging on a hook, you must take off protective decorative cap. This is done by unscrewing the fixing bolt, after which the cap is lowered, exposing the junction with the hook and wires.
If the chandelier is hanging on a hook, you must take off protective decorative cap. This is done by unscrewing the fixing bolt, after which the cap is lowered, exposing the junction with the hook and wires.![How to hang a chandelier on a plasterboard ceiling]() If the chandelier is overhead and has the shape of a plate, to access the fasteners, you must disconnect the spring latches.
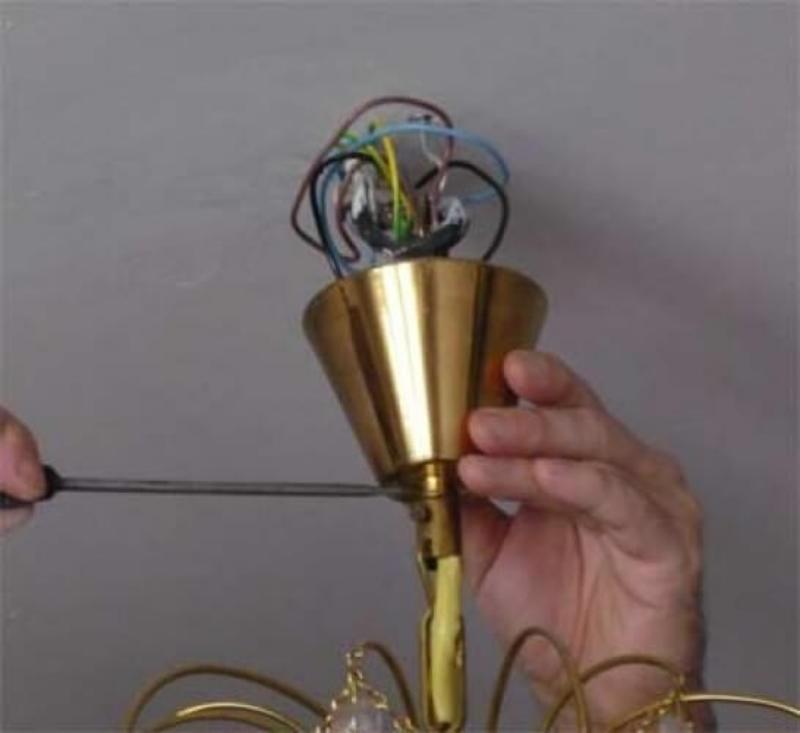
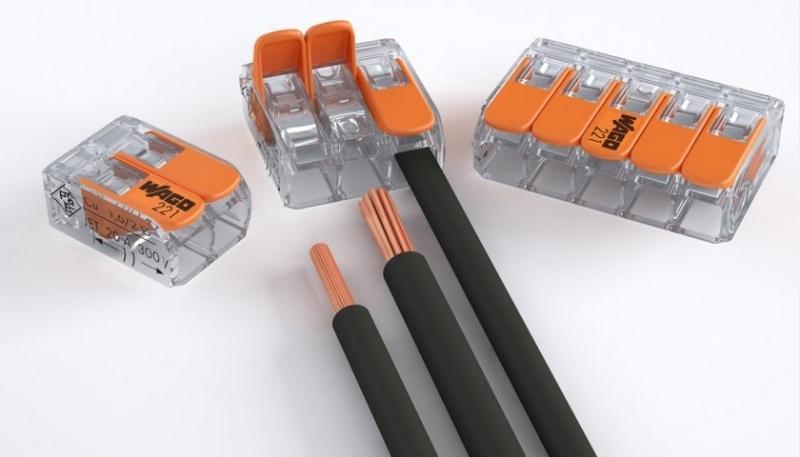
If the chandelier is overhead and has the shape of a plate, to access the fasteners, you must disconnect the spring latches. - Wiring is disconnected - the easiest way is if Wago type terminal blocks are used.
![How to hang a chandelier on a plasterboard ceiling]() You can even handle them with one hand, which is convenient if you have to work alone while holding the chandelier with your other hand.
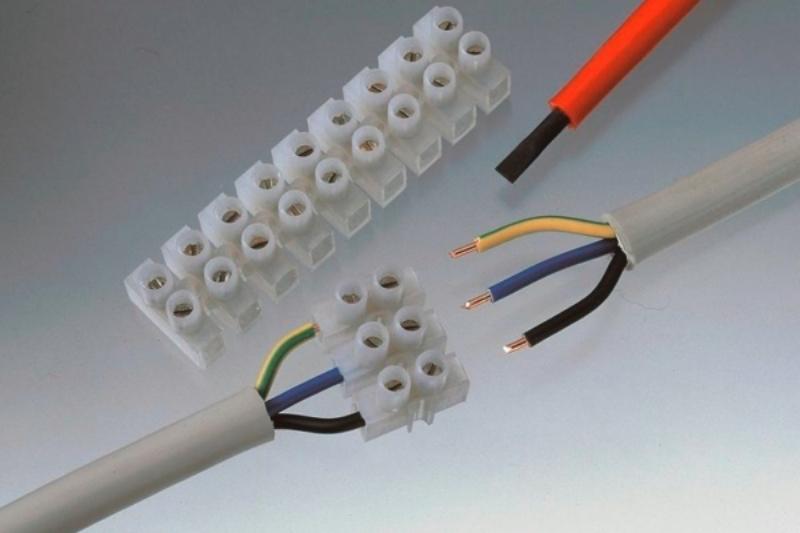
You can even handle them with one hand, which is convenient if you have to work alone while holding the chandelier with your other hand.![How to hang a chandelier on a plasterboard ceiling]() If these are screw-type terminal blocks, then the core is released by releasing the clamping bolts.
If these are screw-type terminal blocks, then the core is released by releasing the clamping bolts. - The device is removed hooked or unscrewed from the mounting plate for replacement or repair.
All work must be carried out with protective gloves and goggles, as accidental power failure or mechanical injury are not excluded.