Step-by-step instructions for making your own backlit mirror
It is not difficult to make a backlit mirror with your own hands if you have the necessary materials and tools at hand. The work does not require special knowledge and skills, everyone can figure it out. The main thing is to follow the step-by-step instructions and pay attention to the safety of the electrical part in order to eliminate any problems.
Backlight functions
Mirror with lighting around the perimeter is perfect for different rooms. This solution differs from the standard ones primarily in the presence of autonomous lighting, which performs several functions:
- Provides convenience of carrying out hygienic procedures. In this case, the mirror is most often placed in the bathroom. It is much more convenient than the standard version, and the backlight allows you not to put additional light sources on the wall or ceiling, which reduces costs and simplifies repairs in the bathroom.
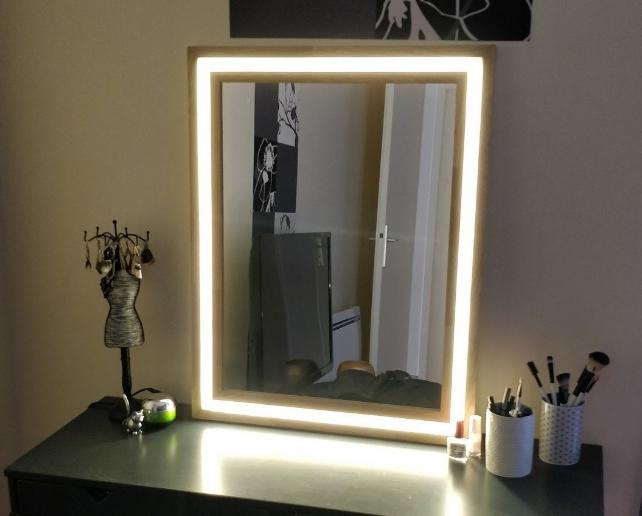
![Step-by-step instructions for making your own backlit mirror]() This option is not only convenient, but also attractive.
This option is not only convenient, but also attractive. - Allows you to evaluate your appearance before going out into the street. In addition, you can make up your lips or do something else that a person needs when he leaves an apartment or house.
- Provides optimal conditions for applying makeup. Due to the dispersion of the light flux, good visibility is ensured. With the right selection of light sources, all colors will be transmitted naturally, which is difficult to achieve when using general lighting, as a shadow falls on a person's face.
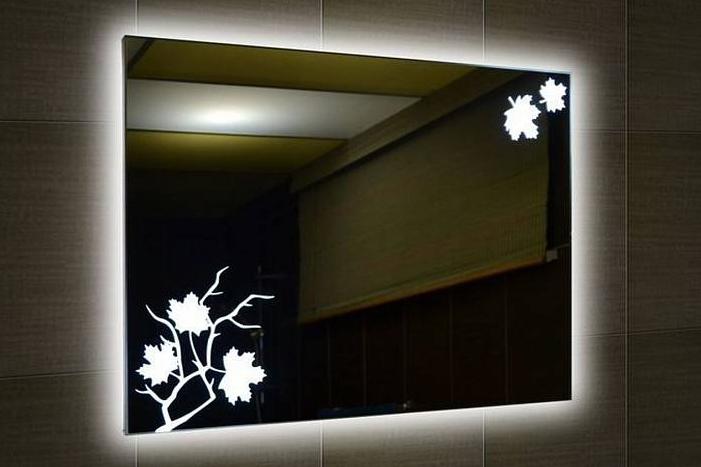
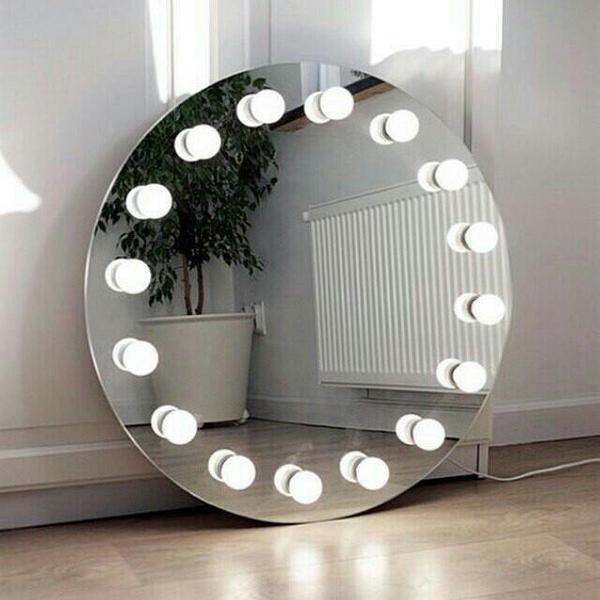
![Unusual option in the bedroom.]() Unusual option in the bedroom.
Unusual option in the bedroom. - The backlight can also be used for work, if you need to fill out papers at the table, many use this option for needlework, so it can be called universal.

Due to the concentration of light in a small area, general lighting is not needed. If you choose energy-saving light sources, electricity will be saved.
Mirror placement options

There are no special restrictions on the placement of a homemade mirror. But depending on the location, its size and configuration may vary. It is best to decide in advance where it will be installed in order to measure the space and determine the ideal length and width. Most often, illuminated mirrors are used in such rooms:
- Bedroom. Mounted or hung above a vanity, it's the perfect place for makeup and facials that rivals a salon. The most important thing here is the external component, the mirror must fit into the environment, so the color and style are selected for it.
- Hallway. There can be both a compact version and a full-length mirror, if space permits.Due to the backlight, you do not need to organize the perfect lighting of the room. You can complement the design with a shelf for useful little things or attach key hooks to it.
- Bathroom. Here this option will come in handy, since it is very convenient when carrying out hygiene procedures. But in this case, there are a number of requirements for safety and workmanship. Since the humidity in the bathroom is high and there is a risk of water splashing, it is best to use a mirror with LED strip. And the frame should be treated with a moisture-proof compound so that it does not deteriorate.
You can make a portable home version of a small size that is convenient to carry from place to place when necessary.
Video: Step-by-step production of an LED mirror in the bathroom.
You can make a portable home version of a small size that is convenient to carry from place to place when necessary.
Illumination implementation options
First of all, you need to choose the type of lamp, the quality of light and the design features of the mirror depend on it. There are several options, each with its own advantages and disadvantages:
- Incandescent lamps. The cheapest, but rarely used, as they get very hot during operation, which creates a risk of burns when placed around the perimeter. They also consume a lot of electricity and have a short service life. And during assembly, you will have to pay special attention to the electrical part, since it is important to make it reliable and safe.
- Halogen options are several times superior to incandescent lamps in terms of brightness and quality of light. But they also get very hot during operation, which can create inconvenience.For normal operation, the installation of special add-ons is required, which complicates the assembly.
- Fluorescent Lamps give good light and do not consume much electricity. Both linear and tubular products can be used to illuminate the mirror. But the appearance of this solution is not the most attractive, so it is also used infrequently. For installation, everything is similar to incandescent lamps.
- neon light sources come into fashion and are used on mirrors. They are expensive and therefore rarely seen. But if you need an unusual solution, neon is the best fit.
- LED equipment is used in the manufacture of illuminated mirrors most often. It is economical, safe to use and heats up slightly during operation. There are two options - light bulbs and LED Strip Light. The second solution is especially convenient, as it takes up little space and gives an even, bright light.

What lamp power to choose
There are no clear requirements in this regard, it is important to provide such a light that will give good visibility, but at the same time will not blind and create discomfort for vision. Typically, for small structures, a lamp power of 3.5 W is considered the norm, and for larger options, 5 W. Within these limits, light sources are most often selected.
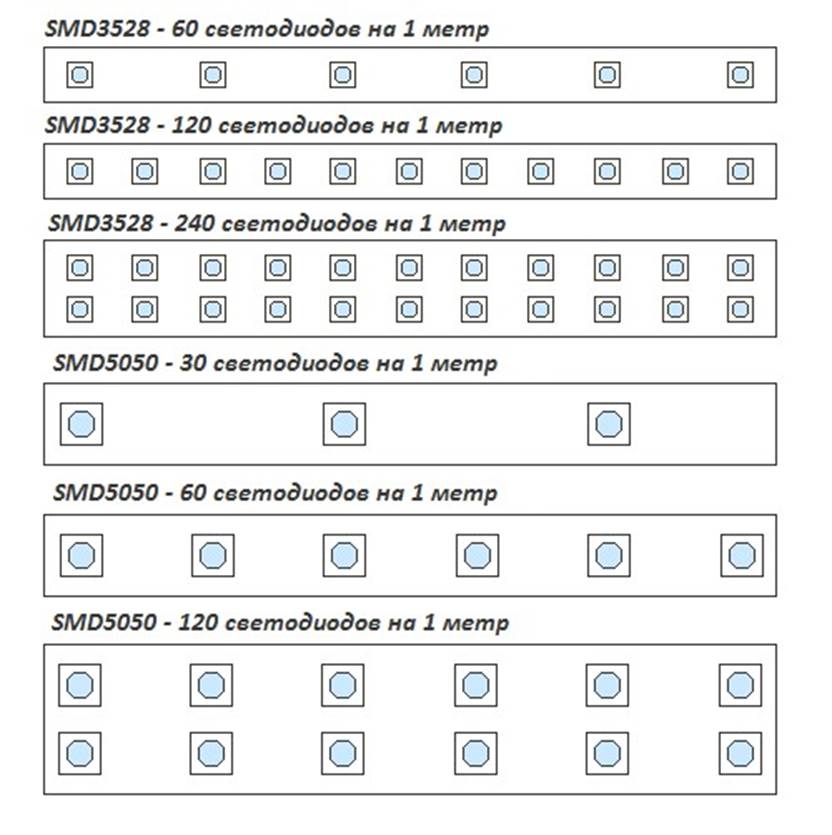
As for the LED strip, it is worth using only monochromatic options, they give better light. Choose products with the number of diodes per linear meter of 60 or more, this is the only way to achieve a good result.
In order not to change light bulbs, you should use a little trick. As a backlight, install LED lamps or tape and equip the system dimmer - it allows you to adjust the brightness. In this case, adjusting the light is not difficult, as it can be controlled in real time.
It is equally important to choose color temperature. For a mirror, a natural option is suitable, as it conveys colors best and does not create eye strain.
The benefits of making your own
Homemade options have a number of advantages over ready-made ones:
- You can make a mirror of any size. This allows you to adjust to the available space and choose the optimal parameters.
- The frame is shaped differently. It is easy to decorate to match the environment to get a good result. In addition, there are ready-made products or blanks on sale that are easy to assemble.
- The number of lamps is selected at your discretion, which is also important. You can use any light source, and in finished products, the system is made for a certain type of light bulbs.
The main plus is the price, the homemade version is much lower than the finished one. At the same time, the quality will be comparable, and often a self-assembled mirror is much more reliable and attractive.
Thematic video.
Manufacturing instructions
The easiest way is to use an LED strip in the manufacture, since this option is possible even for a person without experience. You can buy it in an electrical shop, there are other components that you will need. The process is divided into several stages to make it easier to understand.
Project, materials and tools
It is best to make at least an approximate drawing.If you have a ready-made mirror, you should start from it. If it will be bought, you can choose any width and length. It is worth drawing a simple sketch so that there are clear guidelines, this will simplify the work. You will need the following:
- Wooden casing or other element from which the frame will be made. The minimum width is 5 cm.
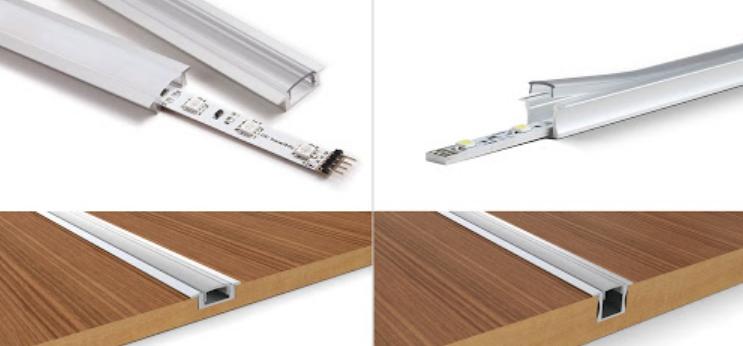
- Aluminum profile with diffuser. Sold in electrical and building materials stores.
- LED strip, length depends on mirror size.
- Power Supply and wires for connection.
- Manual milling cutter, screwdriver with nozzles and drills.
Frame assembly
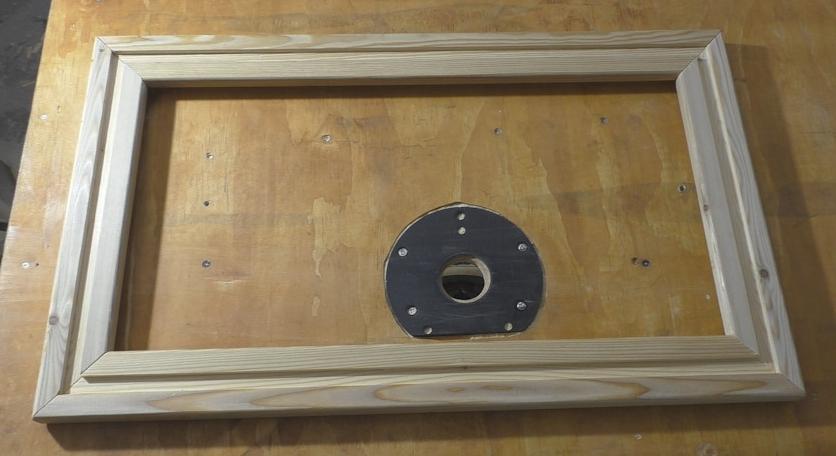
To begin with, a groove is cut in the middle of the solid workpiece according to the size of the aluminum profile, it should be recessed flush with the surface. The work is simple if you have a milling cutter with a nozzle on hand. On the back side, along the inner edge, a recess is made for installing a mirror.
Elements are marked and blanks for the frame are cut. This is done with a special saw or manually using a miter box. Then the surface is polished to perfect smoothness.
The frame is aligned and checked. It is necessary to drill holes in the ends for furniture tie screws, they should be located at the top and bottom, then the attachment point will not be visible. The surface is painted.
The structure is assembled, you can lubricate the joints with wood glue for additional reliability.
Wall mount and network connection
The easiest way is to buy eyelets that are placed in the back. To make the mirror firmly pressed against the surface, you can drown them so that the metal does not protrude.
Some fasten two rings on top and hang them on a rope, if it suits the design style.When installed on a table, it is better to fix the structure with small furniture corners, then it will definitely not tip over.
By the way! You can use mounting elements that are glued to the wall, and then easily removed if necessary.

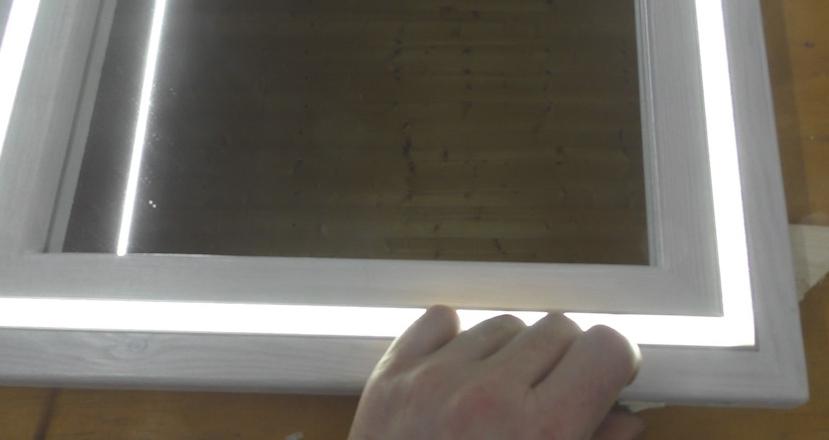
After assembling the frame, an aluminum profile is placed in it and an LED strip is glued, it must be fixed on the mirror around the perimeter. Wires are soldered to its end and connected to the power supply. He is selected diode power.
From the unit, you can connect directly to the network if the wire is out, or through a socket. In the second case, you need to put a plug. You will also need a switch so that the light does not burn around the clock, the easiest way is to choose the touch option. Correctly connect it will help the scheme, which is always included.
It is not difficult to assemble a backlit mirror if you have everything you need at hand. The main thing is to follow the safety rules when assembling the wiring and securely fix the structure to the wall.
Video instruction: A full cycle of making a homemade mirror with backlight.