How to properly install and connect a double switch
The switch with two keys is a widely used household electrical appliance. Its design, application, installation procedure is the subject of this review. Having studied the proposed materials, the home master will be able to complete all the preparatory work and connect a double switch for 2 bulbs on his own.
Device device with two keys
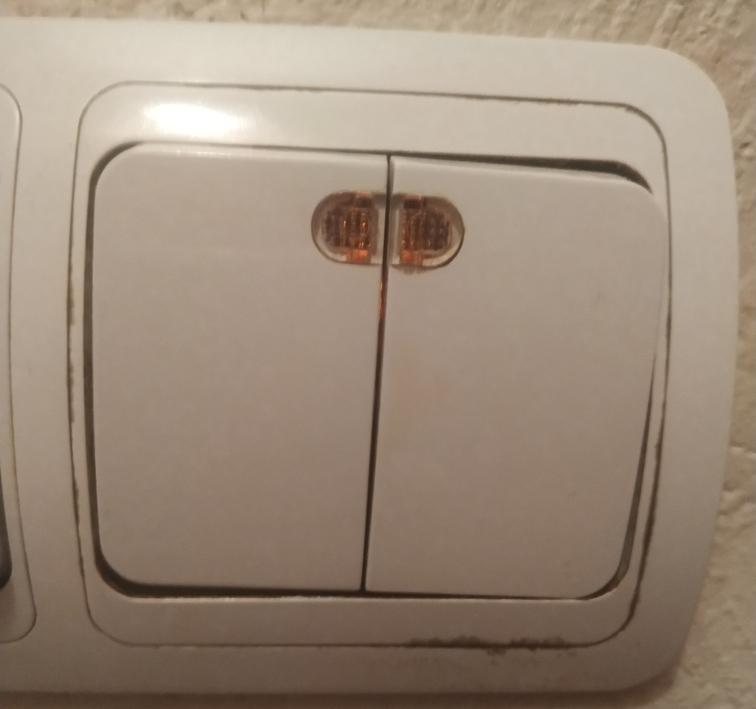
Corresponding to the name, the two-key device looks like an electrical appliance on the front panel of which there are two plastic buttons enclosed in a decorative frame. If the plastic parts are removed, you can see two movable panels that drive the contacts.
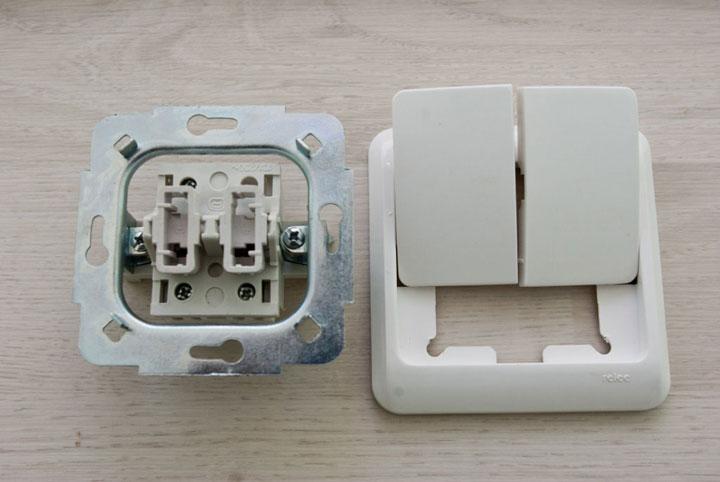
If you continue to disassemble the device further, you can see the contact group and a visual diagram of its connection.
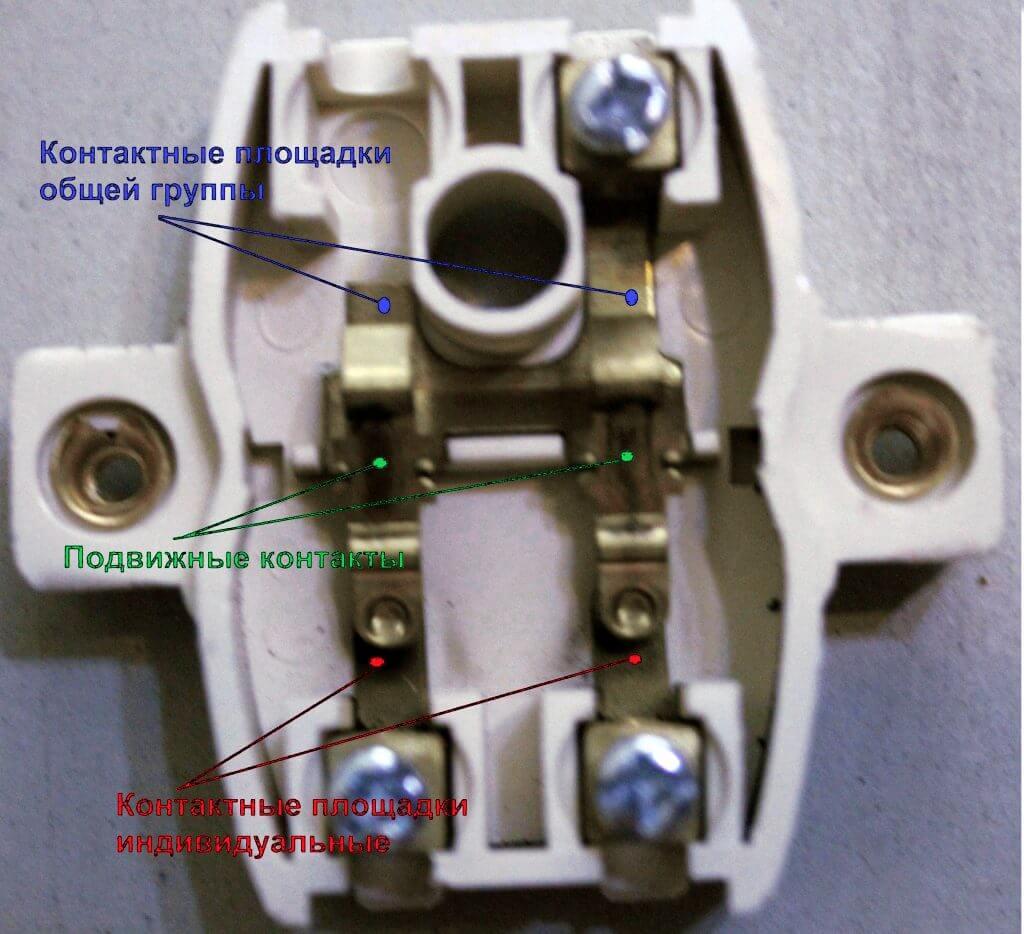
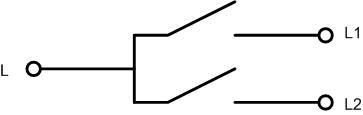
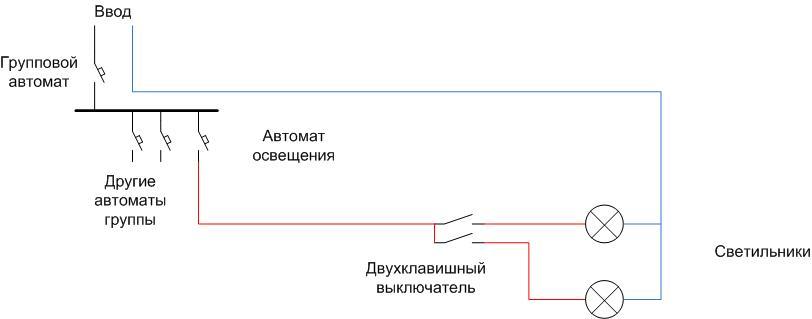
The electrical circuit of the twin consists of two switches. Their inputs are combined and brought to a common terminal.
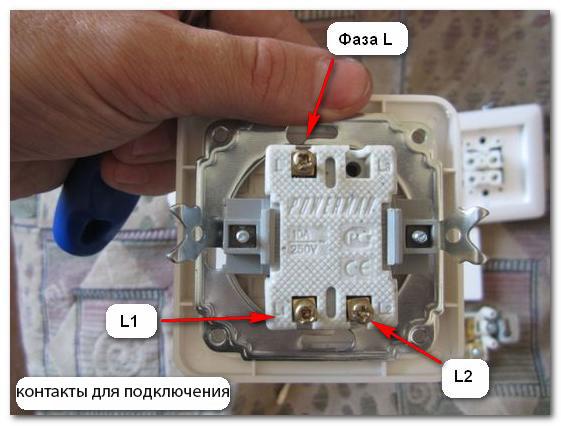
These terminals can be seen on the back of the device:
- common (it is often denoted by the letter L, in the same way, in many cases, the wire that is connected to this terminal is marked);
- two outgoing (L1 and L2), respectively, these terminals are equivalent and each is controlled by its own key.
Some devices are equipped with a chain for lighting. It is performed on the basis of an LED or a neon lamp.

In most cases, the backlight circuit is placed on only one pair of contacts. This must be taken into account, for example, when searching reasons for flashing LED lights.
Wiring diagrams
There are three main options for using a two-pin switch:
- turning on two different lighting fixtures in different rooms or areas;
- the inclusion of two different lighting systems in the same room;
- control of lamps or groups of lamps in multi-track chandeliers.

In principle, the connection diagram of a two-gang switch in both cases will be the same, but the laying of the wiring products will be different.
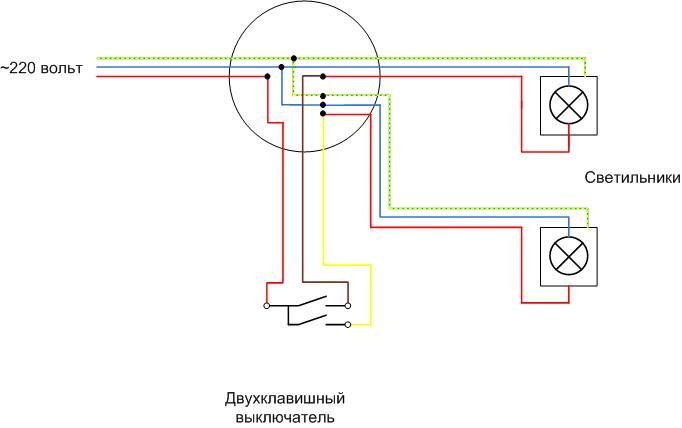
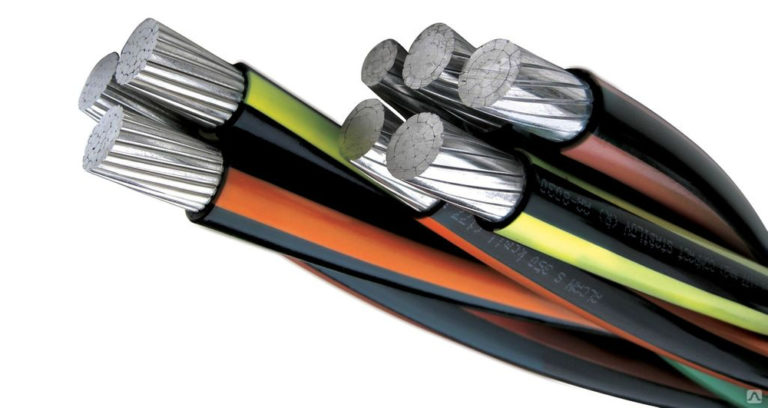
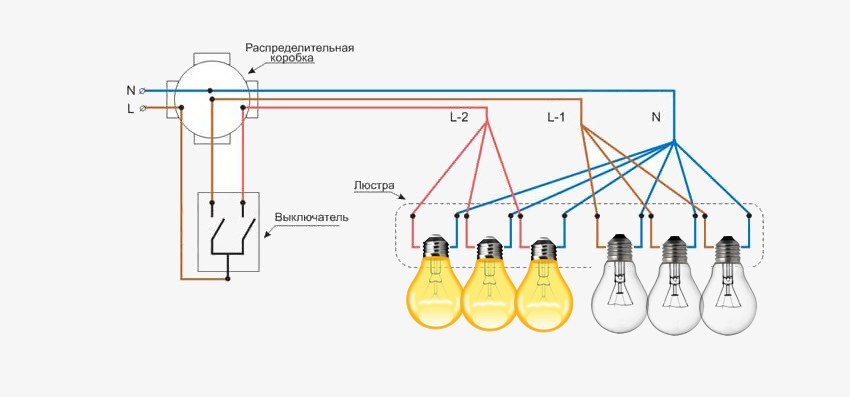
In the first two cases, a copper cable containing conductors is laid to each lamp:
- phase (L), marked in red in the figure;
- zero (N) - blue;
- protective (PE) - yellow-green.
Important! If incandescent lamps are used in the TN-S or TN-C-S lighting system, then the PE core is not connected on the consumer side (there is nowhere to connect it), but this conductor must be laid. In case the fixtures need to be replaced in the future.
You will also need a three-core cable from the switchboard to the box and a three-core cable to connect a two-button device.
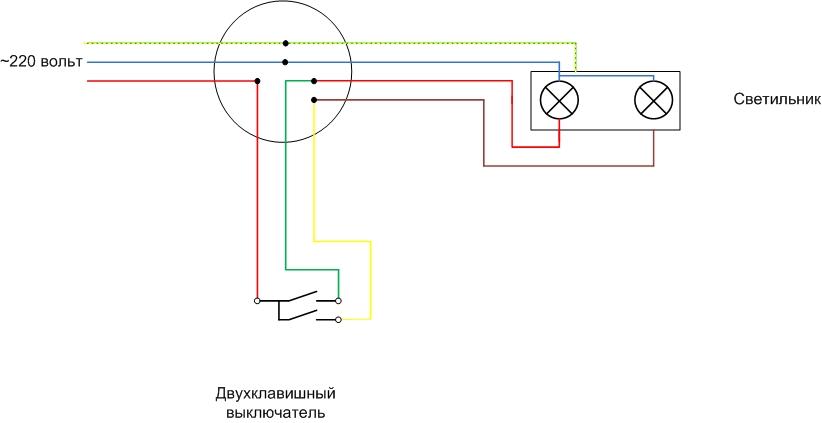
For a single luminaire with two groups of lamps, the following copper cable products will be required:
- three-core cable from the switchboard to the junction box (two-core in the absence of a PE conductor);
- four-core cable from the box to the lamp (three-core in the TN-C system);
- cable in three conductors from the box to the switch (regardless of the presence of a protective earth).
Cable products are recommended to be used with color-coded insulation or numbered cores. To connect the switch, it is advisable to use a cable without a conductor with yellow-green insulation, so as not to mislead repairmen in the future.
Installation instructions
Switch installation as part of the lighting system consists of several stages. Each stage must be considered in detail.
Selection and installation of the circuit breaker
Any lighting network, regardless of the design of the switching device and the number of keys, must be connected to the switchgear through an automatic switch. It performs the functions of a reusable fuse - it turns off the protected area (conductors and load) in case of overload or short circuit.The question of the principles for choosing the value of the machine is beyond the scope of the review, therefore it is only worth mentioning that for a network made of copper conductor products, the protective device should be:
- with a rated current of 10 A;
- with characteristic B or C (in the first case, the device will have a higher sensitivity and a lower shutdown time in case of overload).
In this case, the machine will work with a load of up to 2200 watts, which is enough to power any reasonable lighting network (especially with the general transition to LEDs). If the load allows, you can also put a 6 amp machine. In this case, guaranteed selectivity will be ensured - when a short circuit occurs on one outgoing line, only its own device will turn off, and not the common (group) one, and the remaining serviceable lines will remain in operation. But the feeder load should be no more than 1200 watts.
If the case is non-standard and an increased cross-section of the cable cores is used, the rated current of the machine can be selected from the table.
| Conductor cross section, sq. mm | Application area | Rated current of the protective device, A |
| 1,5 | Lighting networks, instrumentation circuits | 6 or 10 |
| 2,0 | Sockets, dedicated line for powerful consumers about 3500 kW | 16 |
| 4 | Single powerful electrical appliances (washing machines, ovens, etc.) | 25 |
| 6 | Electric stoves, electric boilers | 32 |
| 10 | Entrances to apartments and houses | 40 |

After selecting and purchasing a circuit breaker, it must be installed in the distribution board. Now all other types of installation have replaced the installation of electrical appliances on a standard DIN rail.
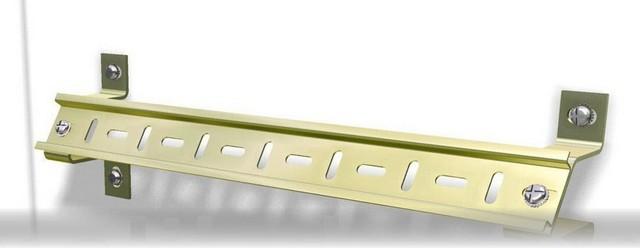
This method is the most convenient and fastest. The device snaps onto the rail with one movement.
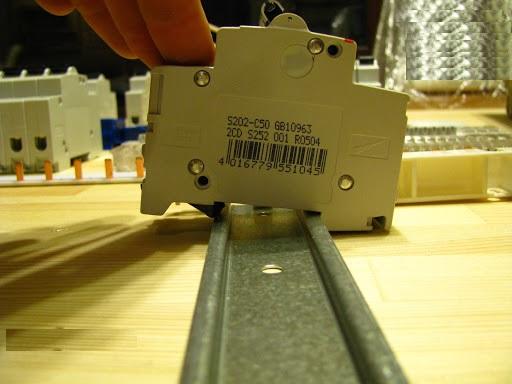
After installing the device or group of devices, clamps are installed on both sides.They prevent the devices from moving along the rail.
The machine is included in the gap of the phase conductor. It is customary to bring the supply end from above, and the outgoing end from below. If you do the opposite, then everything will work - the electromagnetic and thermal releases of the protective device do not care which way the current flows. But in the future, it will be more difficult to figure out the installation.
Important! It is impossible to break the neutral wire by installing a fuse, automatic machine or other switching device in it!
Selecting the type of wiring
Now you need to determine the type of wiring: open or closed. The main argument for closed wiring is the aesthetic component. There are also reasons in favor of hiding the wires in the wall:
- minimal risk of damage;
- in the event of a short circuit, a fire will not happen - the conductors will burn out inside the wall;
- such wiring will not interfere with cosmetic repairs in the future.
The main disadvantage is the complexity of wall chasing and the need for special tools and skills for this, as well as for subsequent embedding. Among other shortcomings, difficulties should be noted:
- with the determination of the location of the malfunction when it occurs;
- labor intensity and a large amount of work during repairs;
- Difficulty in diagnosing the state of insulation during its natural aging and leakage (important when using LED lighting).
All the disadvantages of hidden wiring are the advantages of open wiring and vice versa. The advantages of open cabling include:
- ease of laying cable products;
- simple diagnostics and simple repair if necessary.
The cons include:
- increased likelihood of mechanical damage;
- increased fire hazard (especially in wooden houses);
- problems with subsequent wallpapering, wall painting, etc.
And most importantly - the wires are in plain sight, which does not add aesthetics to the room.
The option is selected after comparing all the advantages and disadvantages in place.
Preparatory work
Preparation for the arrangement of the lighting system begins with determining the installation locations of the switch, junction box, lamps. After that, cable laying routes are outlined. Further work depends on the selected type of wiring.
Hidden laying is carried out before finishing the walls. Channels are made along the marked lines for laying cables - strobes. The most convenient way to do them is with a special tool - a wall chaser. Channels made by a grinder or a perforator also work well. In extreme cases, you can use a hammer and chisel.
Important! It is impossible to make horizontal strobes in the supporting structures of the building! Other restrictions are in SNiP 3.05.08-85.
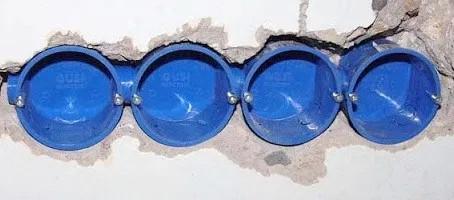
Then you need to make recesses for sockets and boxes for wiring - this is done using a special cutter (crown).
If plastic boxes are attached to a plasterboard partition, boxes of a special design must be used.
Open wiring is carried out after final finishing. For laying cables, plastic gutters or racks are used (if the wiring is done in the “Retro” style). To install switches and boxes, you need to fix the lining.
Video: Installing the socket block in the level.
Installation of fixtures
There is a great number of lamps lots of, and their fastening to the ceiling and walls depends on their design and the execution of the plane on which they are mounted.For proper installation, you must study the instructions for the lighting device and follow it.
It is advisable to make the connection before installing the lamps (they will interfere and there is a risk of damaging them). If the luminaire is designed to use only incandescent lamps, then phasing is not required. In other cases (LED-lamps, energy-saving devices), you must follow the connection order:
- the phase wire must be connected to terminal L;
- connect zero to terminal N;
- the protective conductor is connected to the PE terminal (often marked with the earth sign).
Failure to comply with the phasing may lead to inoperability of lighting.
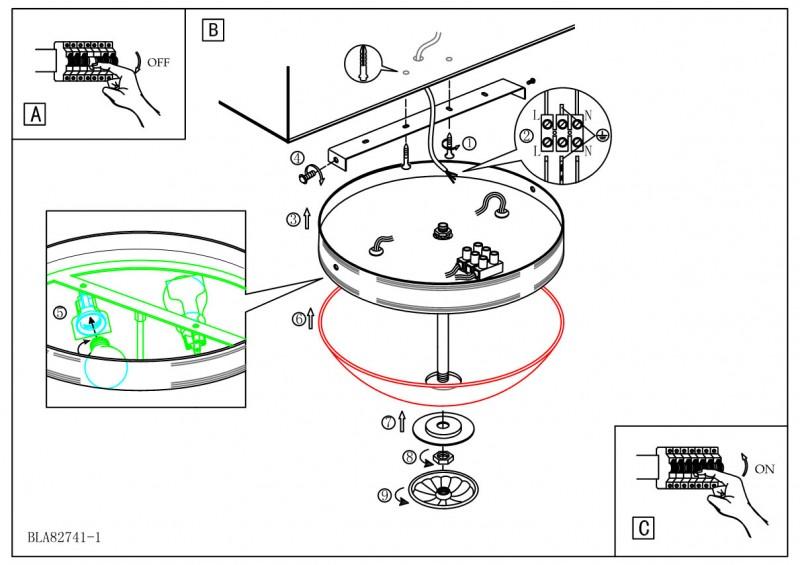
Double installation
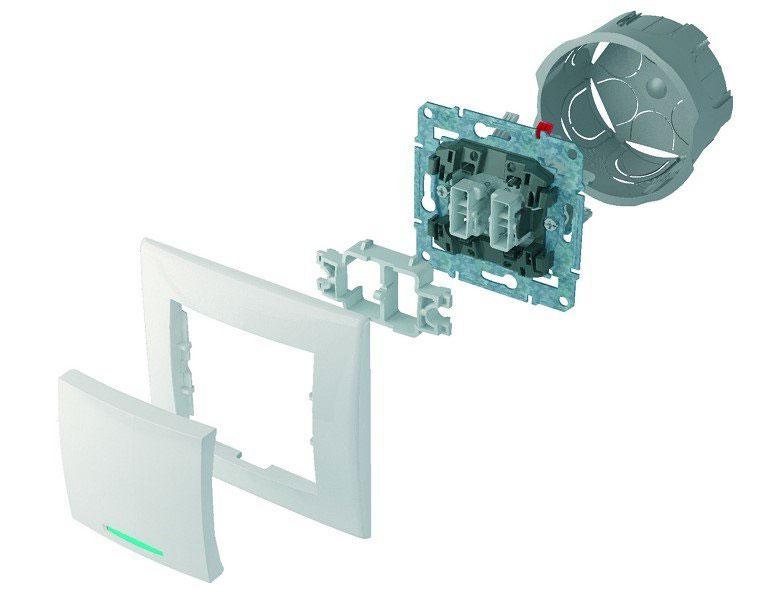
Before installing a two-button device, you must partially take apart – remove the keys and the decorative plastic frame. Next, connect the wires according to the selected colors. It is advisable to connect a red wire to the common terminal (if there is one in the cable), which is connected to the phase conductor of the incoming cable in the junction box - this is less likely to confuse the ends. Wires of any color can be connected to the outgoing terminals. If it turns out that it is more convenient to control a certain lamp with a certain key, transfer the wires for a short time during operation.
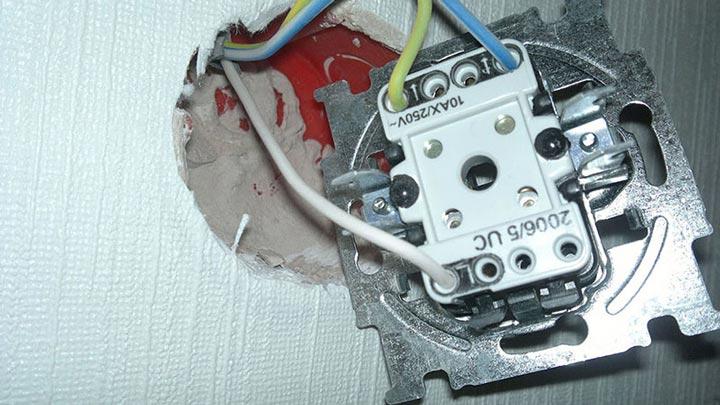
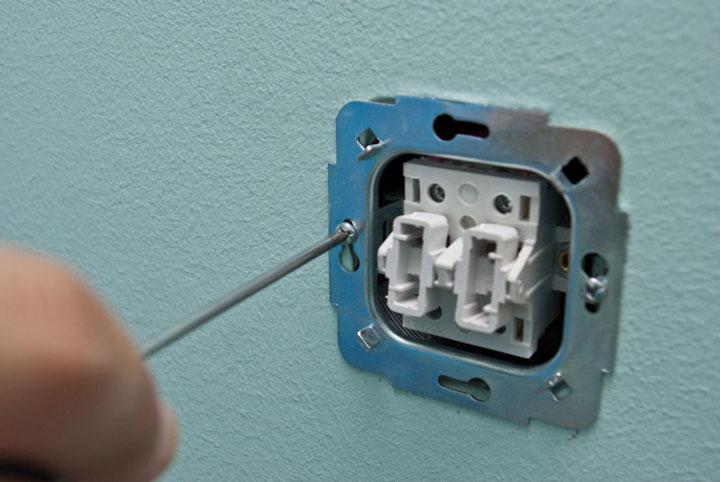
After connecting, the switch must be placed in the socket, open the petals, fix the metal panel with self-tapping screws.
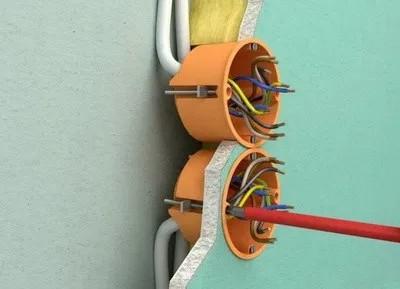
Making connections in the junction box
Cables brought into boxes for desoldering must be cut:
- shorten to a reasonable length (so that after the installation is completed, the box can be closed) - this is done with the help of wire cutters;
- remove the upper shell - a fitter's knife will help;
- strip the wires from insulation by 1-1.5 cm - with a fitter's knife or a special stripper.
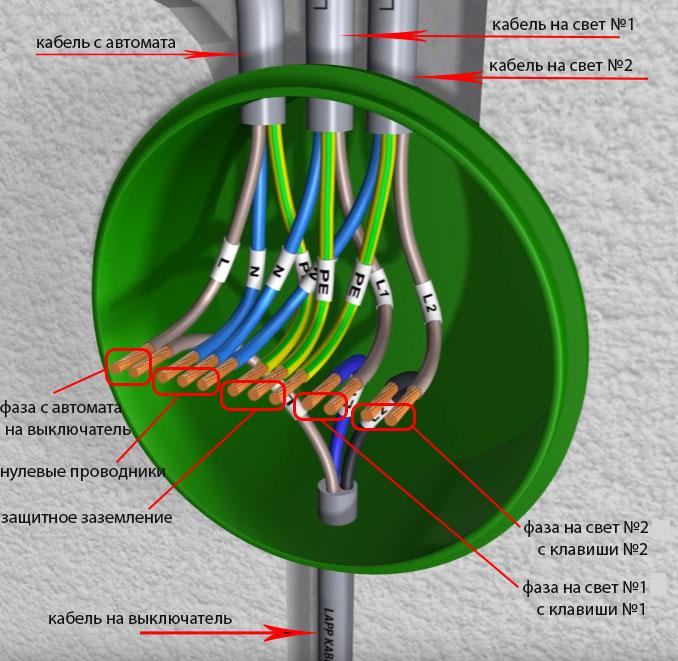
Next, you need to connect the cores according to the scheme:
- PE and N conductors go through the box in transit and are simply connected to each other in groups;
- the phase conductor from the switchboard is connected to the phase conductor going to the common terminal of the switch;
- the conductors from the switch contacts are connected to the supply conductors of the outgoing cable to consumers according to the diagram.
It is convenient to make connections using clamp terminals. But for reliability, it is better to use screw terminals, although mounting in this case it gets a little more complicated. You can simply twist and unsolder the conductors, but after that they must be insulated.
Completion of installation work
To complete the installation work, it is necessary to completely plaster the strobes with open wiring, close the cable trays with open wiring. For any type of installation, close the desoldering boxes with regular plastic covers. Then you can install in place the plastic frames and movable keys removed before mounting the switch and proceed to check the operability of the lighting system.
Video block: Wiring diagram for a two-gang switch for two light bulbs.
Checking the performance of lighting
You can check the correct assembly of the wiring diagram for a double household switch by checking the installation with a multimeter or by reconciling the circuit according to the colors of the wires. If the lighting system is not already connected to the circuit breaker, you can simulate the operation of the circuit using a battery.
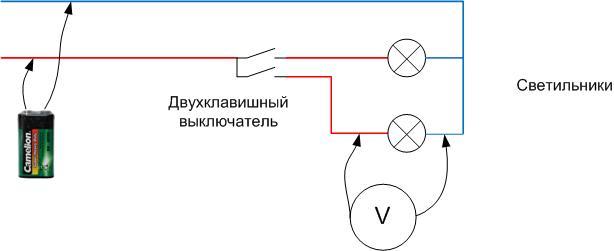
To do this, you need to connect a battery to the input of the circuit (preferably 9 volts), and to the terminals of the lamp - a multimeter in voltmeter mode (you can use a test lamp that is guaranteed to light up at 9 volts). By turning on and off the corresponding key of the switching device, you can check the appearance of voltage on the lighting device. By controlling the polarity of the incoming DC voltage, it is easy to determine the correct phasing. The advantage of this method is that in case of wiring errors, the battery will not produce enough current to overheat or damage the circuit elements.
Labor protection rules for electrical installation
To ensure safety when working in an electrical installation, work must be carried out with the voltage removed. To do this, connect the lighting system to the circuit breaker as a last resort.
The switchboard is considered to be an operating electrical installation, therefore, when working in it, several technical measures must be taken:
- turn off the group (introductory) switch;
- temporarily connect the power bus of the machines to the PE conductor (if any);
- check the absence of voltage on the power bus.
All work must be carried out with dielectric gloves and insulated hand tools. Also, safety rules require the use of dielectric mats.
Clear step by step video: Connecting the switch during repair.
Analysis of typical errors
With careful connection of wires, especially with color-coded cores, the probability of error is minimized. But if the conductors are not labeled or the installation was carried out in a hurry (with the deadline for delivery of the apartment), then it is possible to connect the phase wire not to the common two-key terminal, but to one of the outgoing clamps. Outwardly, it looks like this:
- when one key is manipulated, one lamp turns on and off in the normal mode;
- when manipulating another key, the second lamp does not turn on;
- When two buttons are on, both lamps are lit.
If such behavior of the lighting system is detected, it is necessary to find out the phasing using an indicator screwdriver and rewire.
But in general, the organization of a lighting system with the connection of a household light switch with two keys is a responsible matter, but with a thoughtful approach and an average qualification of the master, it is quite real. Everything can be done independently from scratch. The main thing is that every action must be conscious.