How to install a light switch - indoor or outdoor
When overhauling premises, the question may arise - where to install light switches and how to do it in the best way. The performance of this work is not difficult and is within the power of a medium-skilled master familiar with the basics of electrical engineering. But first you need to study the materials and follow simple but mandatory rules.
General installation principles
The main (and in most cases the only) task of the switching element, in addition to the aesthetic function, is to close and open the circuit, applying voltage to the fixtures. Therefore, the general principles boil down to two points:
- safety;
- convenience.
In general, the implementation of these principles for various types of devices is similar, but there are some features - depending on the design of the devices.
What are the types of switches
Switches can be classified according to various criteria. So, according to the installation method, they can be divided into two classes:
- for internal installation (installed in "glasses" recessed into the wall, the main area of application is rooms with concrete or brick walls);
- overhead (mounted on a flat surface - walls and partitions made of wood, plywood, drywall).
According to the degree of protection, devices can be divided:
- for indoor installation in dry rooms;
- for installation in damp rooms (IP not less than 44);
- for outdoor installation.
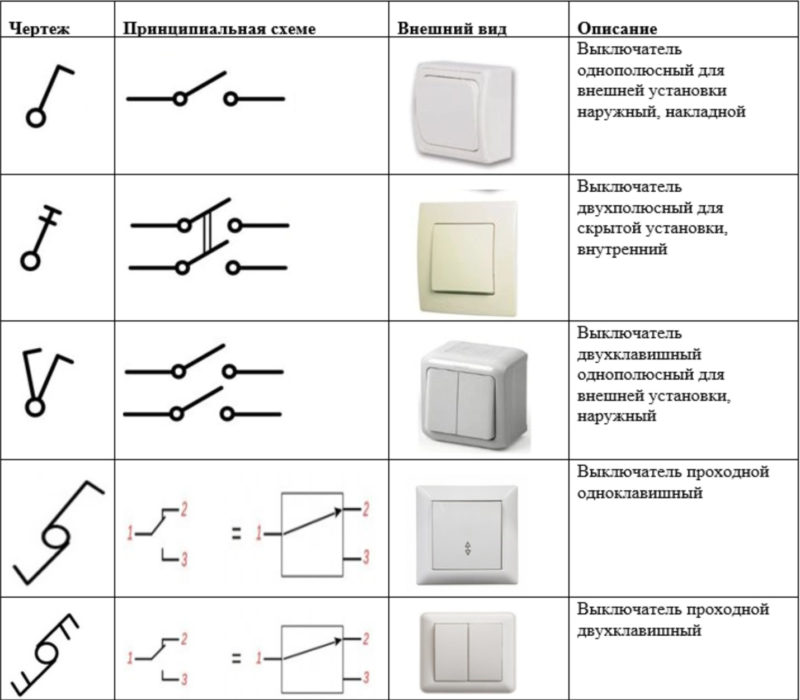
According to the method of influencing the state of the contact group, switches can be categorized into:
- keyboards (in turn, they are divided into single-key, two-key and three-key);
- push-button (switched by pressing a button);
- rotary (controlled by turning the handle);
- sensory (react to touch);
- wall rope (with cord);
- combined with dimmers (dimmer);
- acoustic (react to a sound signal);
- remotely controlled (switched on from the remote control - infrared or radio frequency).
Pass-through and reversing switches can be distinguished into a separate category - they are used for independent lighting control from several points.
Selecting an installation location
The installation location of any electric light switch is regulated by the Electrical Installation Rules (PUE). Paragraph 7.1.51 recommends installing these electrical appliances at a height of 1 m at the entrance to the room from the side of the door handle. There are no specific indications for the height and location of switching devices in apartments and houses, except for one thing - the distance to the gas supply pipes must be at least 50 cm.Otherwise, you can be guided by considerations of personal convenience (in many cases, 1 m from the floor is just the most comfortable). But if we are talking about children's institutions, then the Rules are strict - the installation of the switch must be carried out at a height of at least 1.8 m.
Important! Paragraph 7.1.52 of the PUE prohibits the installation of light switches in wet rooms (bathrooms, showers, etc.). The exception is washbasins and zones 1 and 2 in accordance with GOST R 50571.7.701-2013. They can put switches under the ceiling with a cord.
| Zone 0 | Zone 1 | Zone 2 | Zone 3 |
| Inside the tub and shower | Height boundaries - below the floor, above - a plane parallel to the floor at a height of 2.25 m. | ||
| Vertically - by the outer vertical plane of the bathtub or shower tray or a vertical plane at a distance of 0.60 m from the shower head (for a shower without a tray). | Vertically - by the outer surface of zone 1 and a vertical plane parallel to it at a distance of 0.60 m. | Vertically - by the outer surface of zone 2 and a vertical plane parallel to it at a distance of 2.40 m. | |
Step-by-step installation of household switches
The quality of installation is initially determined by the use of tools. To install switching devices you will need:
- two Phillips screwdrivers (one smaller, the other more powerful);
- wire cutters;
- screwdriver-indicator for checking the presence of voltage;
- fitter's knife for stripping wires (even better - a special insulation stripper).
You may also need other small tools.
Step 1 - Power off
The first thing with which the installation of the switch begins (and the dismantling of the old one) is to relieve the voltage. It is necessary to find where the voltage comes from to the switching element and to the entire lighting system.Usually this is a switchboard. A scheme hangs in it, or each machine is supplied with the signature of the consumer.

After turning off the corresponding machine, it is necessary to check the voltage directly at the workplace - there may be an error in the marking in the switchboard.
Step 2 - Checking the phasing
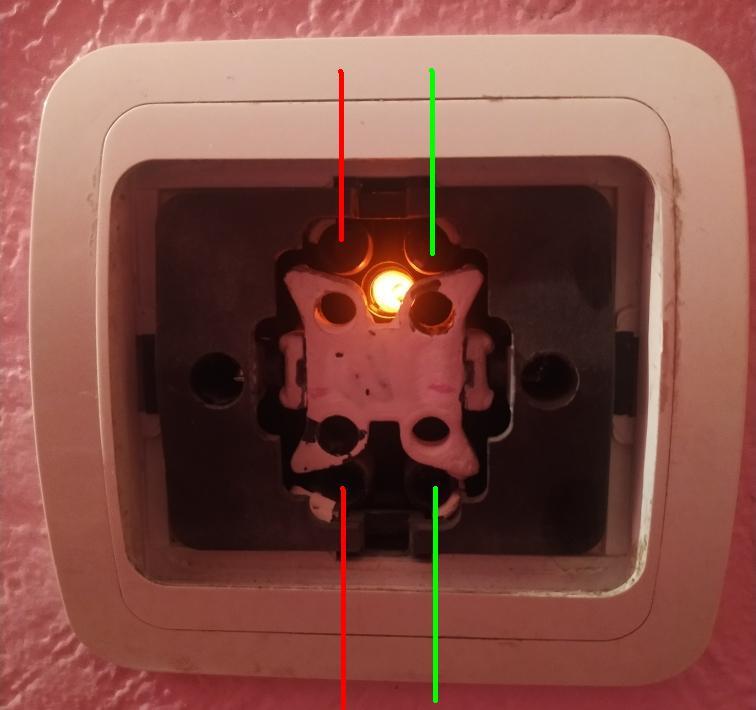
If the old switching device is being replaced with a new one, then to check the phasing it is necessary to remove the switch keys and gain access to its terminals. For old-style devices, it is necessary to remove the front panel by unscrewing the screws.
Next, you should briefly turn on the voltage from the switchboard, use an indicator screwdriver to check the presence of voltage at the input terminal. In most cases, the power cable is fed from below.
If a new lighting system is being installed, it is necessary to strip the supply wire with a fitter's knife or an insulation stripper. After a short power supply, make sure that nothing is messed up. In both cases, if a phase wire is connected to the installation site, there will be a long work to rework the installation. This is especially true for hidden wiring.
Step 3 - Dismantling the old machine
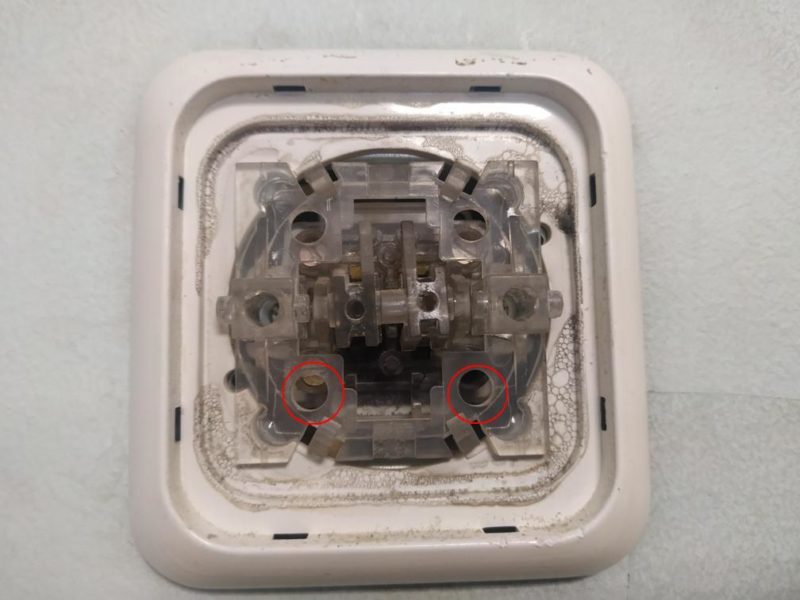
Next, you need to turn off the voltage supplied to check the phasing, and dismantle the old switch. To do this, you need to loosen the terminals, unscrew the fasteners (if the device is equipped with expanding petals, they must also be loosened as much as possible). After that, the device must be carefully removed.
The video shows the disassembly of 4 main types of switches.
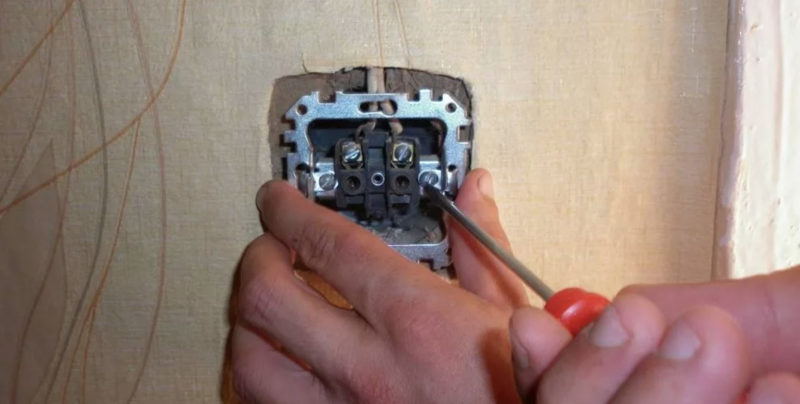
Step 4 - Installing the new appliance
Before installation, carefully inspect the wires.If you are replacing an old device with a new one, most likely you will not have to do anything. It is only necessary to make sure that the conductors are not oxidized (otherwise, the metal must be cleaned) and their length is sufficient to continue work. If a reconstruction or a new installation of the lighting system is being carried out, the conductors must be shortened, the insulation must be stripped.
After that, you need to make sure that the number of outgoing wires is equal to the number of switch keys. If there is one supply wire and one outgoing one, and the switch is single-key, then the supply wire is connected to the lower terminal, and the outgoing wire to the upper one. If a single switch has one key and has a pair of input and a pair of output terminals (this is done in production for reasons of manufacturability), then any pair of contacts can be used.
If you need to switch one load, but there is two-gang switch, then it can be used in such a situation. There are two connection options. The first time any key is activated. The second one is not involved in the switching process.
And you can turn on both channels in parallel. Then you can turn on the light with any key, and you will have to turn off both.
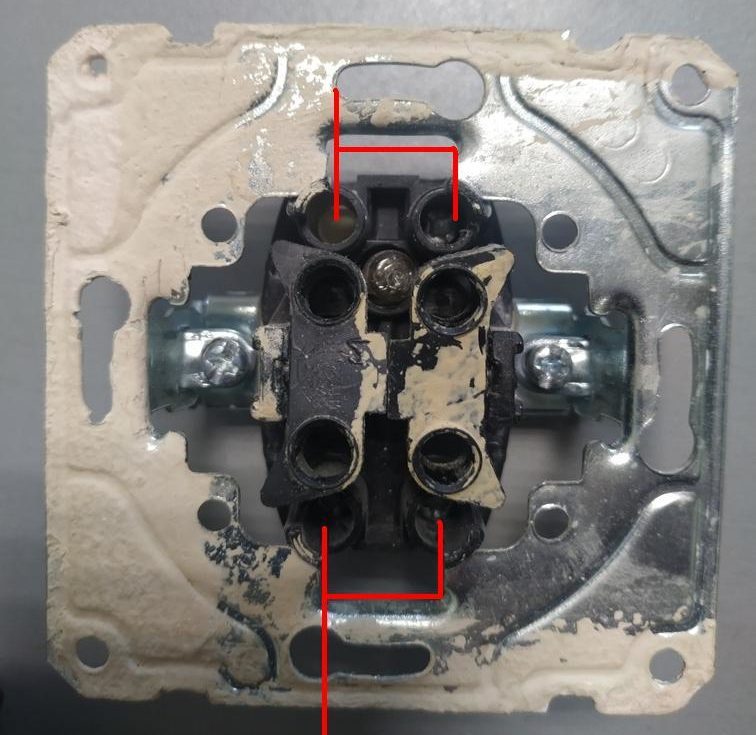
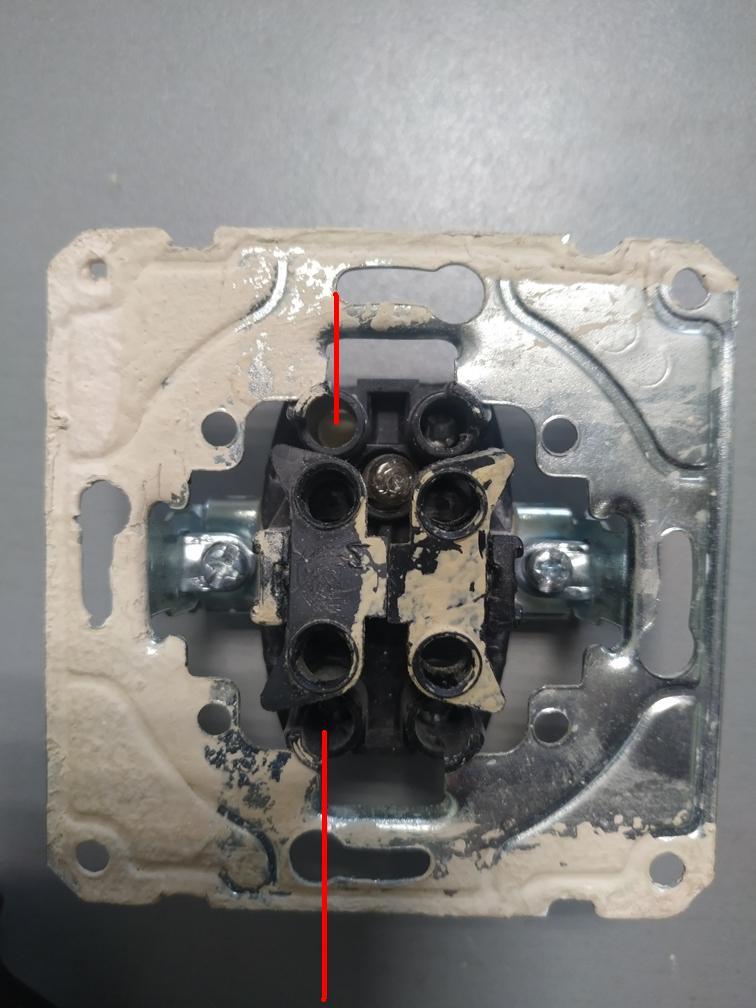
If you need to switch two loads independently, then the device with two keys can be used for its intended purpose.
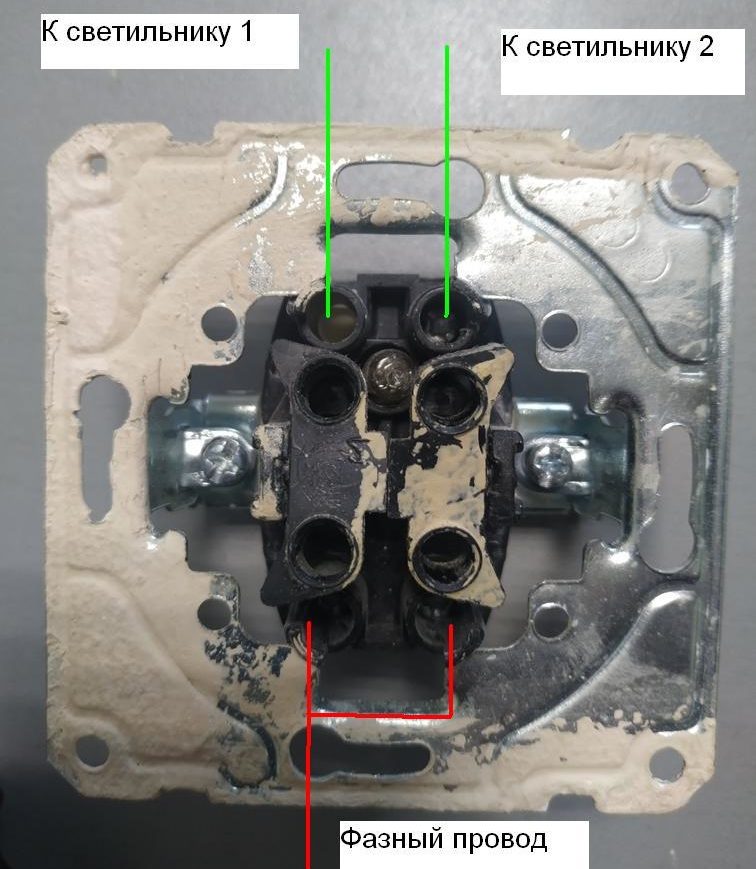
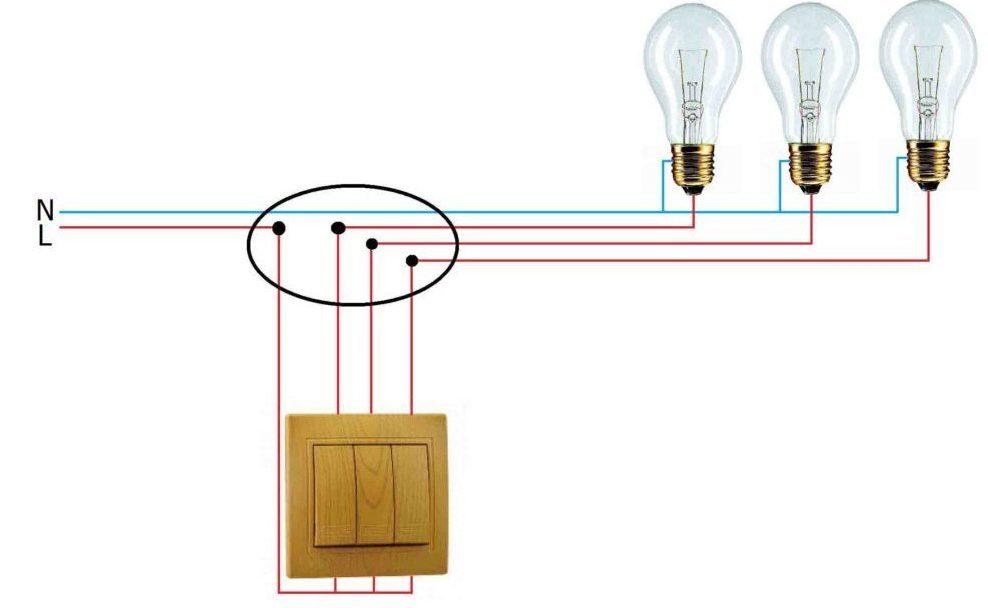
If there are three outgoing lines and there are also three loads, then a three-key device will be needed. The connection diagram of such a device is shown in the figure.
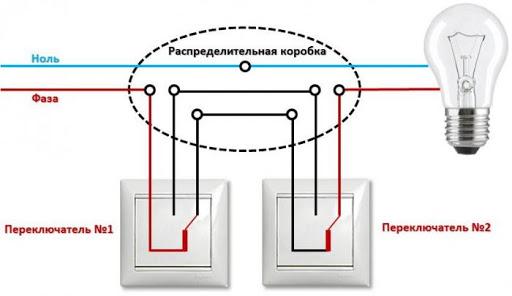
If there are three outgoing wires, and there is only one load, it may turn out that there should be a pass-through switch in this place for independent control of the light from two or more places. First you need to find out this question. If you really need to mount a pass-through device, then it is connected like this:
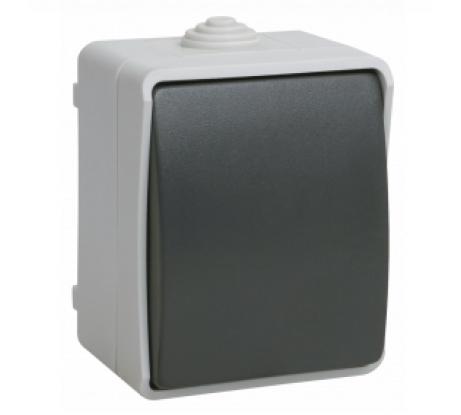
After that, you can insert the device into place, fix it, as provided by the design. Next, you need to check the tightening of the terminal screws and finally assemble the wall switch by installing the keys or the front panel. After that, you can apply voltage from the switchboard and try to turn on the lighting. The installation of an external switch has no fundamental differences, but you need to make sure that the degree of protection allows you to operate the device in unprotected conditions.
Video tutorial: A simple way to install a switch on a diode light.
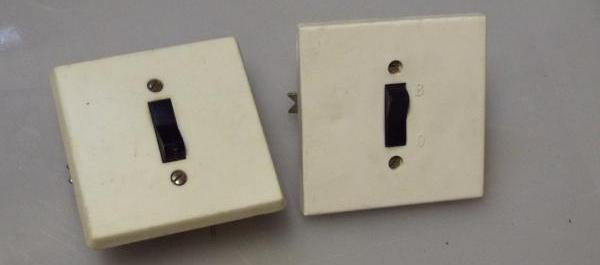
Features of installation of hidden and overhead types
According to the installation method, switches are divided into internal (hidden) and external (overhead). Although the principles of their installation and operation are the same, there are differences in the approach to installation.
Installing an internal switch
Such devices are more aesthetic, they are recessed into the wall, but they require the arrangement of a special recess in the surface and the installation of "glasses". Therefore, they can only be mounted in a wall that has sufficient thickness. Devices of this type are used in conjunction with hidden wiring.
Related video.
Installing an external machine
These devices have shortcomings, mainly of an aesthetic nature. They perform their function of opening and closing the circuit no worse than internal ones. But their installation is easier - you do not need to equip the socket box, you only need an overlay on the surface.Also a plus is the ease of mounting on plasterboard walls and partitions. Overhead devices are used in conjunction with external wiring, but can also be used for hidden ones - you just need to bring the ends of the wires outward near the installation site of the device.
Rules for the safe performance of work
The most important guarantee of safety when performing work in an electrical installation is to perform all actions with the voltage off. To do this, turn off the voltage in the entire lighting system. It is even better to create a visible gap - disconnect the outgoing wire from the power supply for the time of installation. This will eliminate the possibility of accidental voltage supply by unauthorized persons. Power can only be applied for a short period of time - to check the phasing. Increase safety during work and the use of insulated hand tools (nippers, screwdrivers), dielectric mats, as well as dielectric gloves. Compliance with these simple rules will help to avoid unpleasant (and even tragic) consequences and will subsequently allow you to operate the light switch comfortably for many years.