Installing LED lighting in the kitchen
[ads-quote-center cite='Lev Nikolayevich Tolstoy'] "You have to be like a lamp, closed from external influences of wind, insects, and at the same time clean, transparent and burning hot."[/ads-quote-center]
Proper planning and installation of lighting devices is the key to home comfort and coziness, and modern technologies are our helpers. Installing lighting in the kitchen will not only decorate your set, but also serve as an excellent additional lighting for the work area and countertops. The average person who prepares food spends an average of 15 years of their life in the kitchen. We will tell you how to properly install the LED strip in the kitchen.
Benefits of LED Lighting
The rate of human use of LED products already significantly exceeds the use of incandescent lamps. This is primarily due to low power consumption and reliability. LEDs. The average life of the LED reaches 25,000 hours of continuous operation. Note additional benefits:
- different colors - white, blue, red, green, orange, pink and others;
- safety - LEDs operate from a 12 V DC network;
- durability;
- high brightness;
- environmentally friendly goods;
- easy to mount and connect to proximity switches.
Application in the kitchen
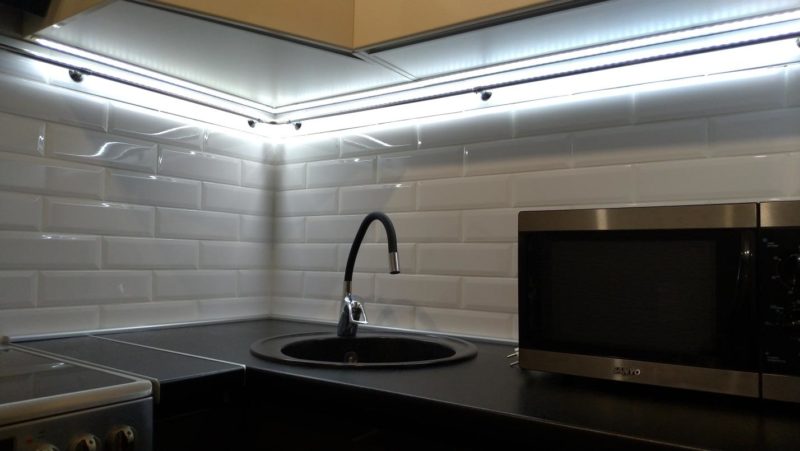
LED lighting for the kitchen is a convenient and stylish solution. Its uniqueness lies in its convenience. installation and low power consumption. It not only has a large uniform brightness of the luminous flux, but also does an excellent job of illuminating small areas and, in general, makes up a significant share of the overall lighting of the kitchen.
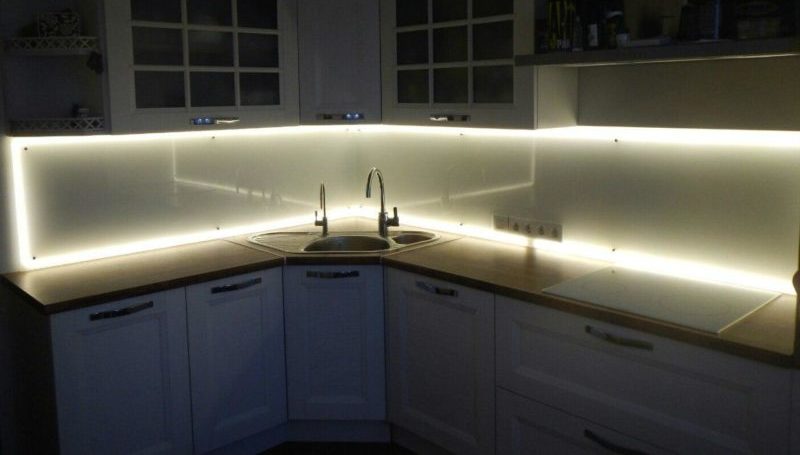
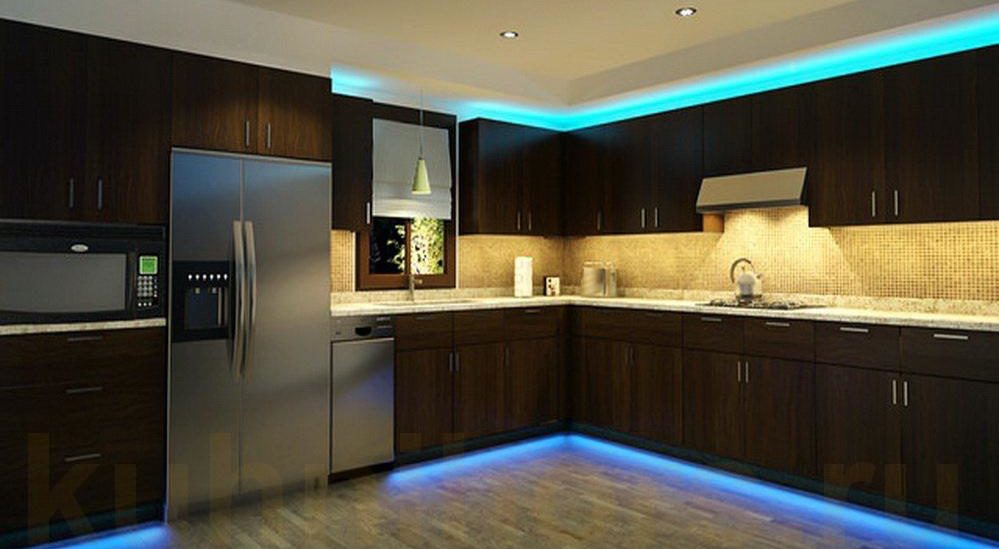
For example, by installing lighting in cabinets with transparent doors, we will get drawer lighting and excellent night lighting. The LED strip is also mounted at furniture bases - it adds a chic look to the room in the evening. So the bar counter or the illumination of the ceiling, countertops and work area can be decorated. There are many options - the choice is yours.
Do-it-yourself LED lighting for the working area of the kitchen:
Nuances
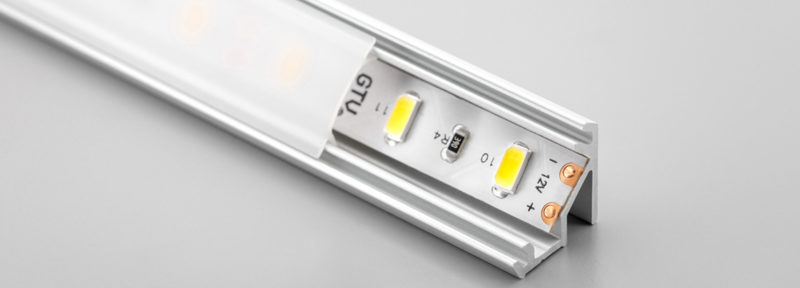
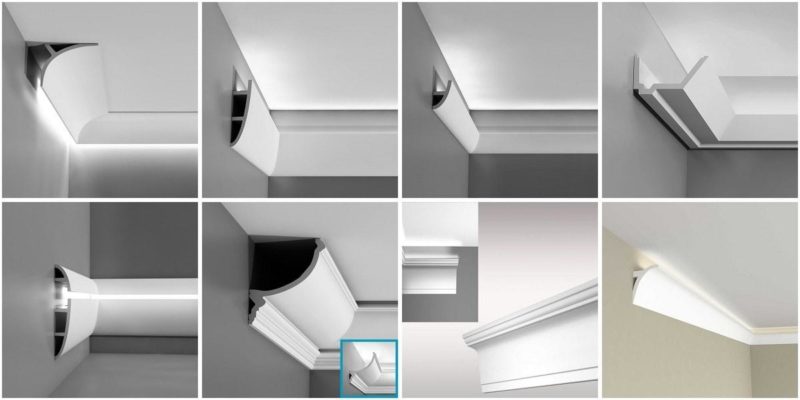
Lighting should be comfortable and not blind to the eyes. If installation is carried out at eye level, special corners with a diffuser are used. They are mounted on fasteners, the LED strip has a sticky base and is inserted inside the corner, which is closed with a diffuser. Due to it, the light becomes uniform. Thanks to the corner, the LED strip is protected from external factors (water, dust).
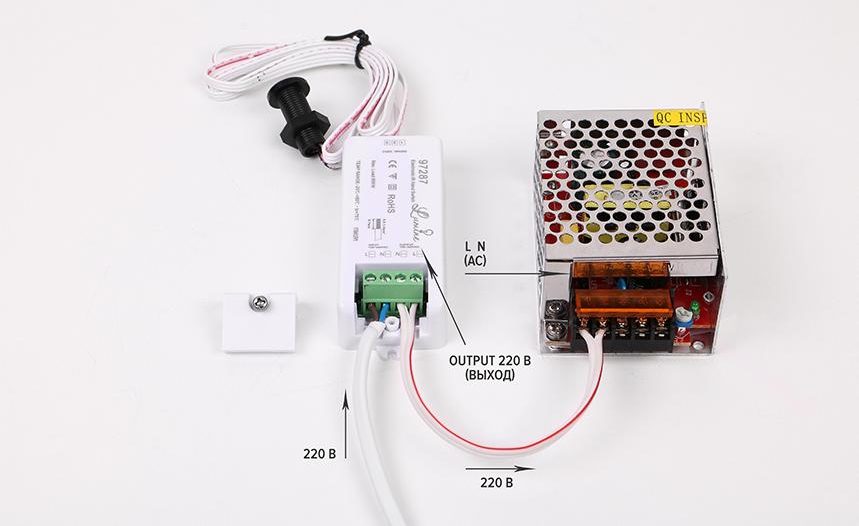
All low voltage LED strips are powered by a power supply. Think of a place where it will be placed. Nearby there must be a power source - AC 220 V, where the unit will be connected.
Such lighting can be supplemented with a smart switch - a motion sensor. Its connection will give convenience in everyday use. You don't have to press a key to turn the light on or off. It is mounted in a convenient place, as a rule, in the upper cabinet or in the wall near the sink. The switch also has a small control box, which is located next to the power supply.
What to look out for
Installing LED strip in the kitchen in the first place should solve the problem of lighting the work area. Under the working area, you can mean a part of the kitchen, separated from the dining area, but we are not interested in everything. Particular attention should be paid to:
- food storage area;
- sink;
- stove;
- the place where you cut or butcher food (worktop).
First of all, you need to illuminate those places where you are most of all, since there your attention is most concentrated, and the load on your eyesight is maximum. Proper lighting will give convenience and comfort.
Options and installation locations
To properly install, you need to understand the wiring diagram of the electrical circuit. On the reverse side, the LED strip has a sticky part - this allows you to mount it without much difficulty on vertical, sheer surfaces.
You can mount it anywhere, for this they use corners with diffusers, which we talked about earlier, skirting boards, panel niches, headsets. Areas where it is not possible to make a smooth bend - solder or connect connectors.
Video tutorial - “How to solder LED strip”
Here is an example of mounting LEDs in a plinth; it can be installed not only under the ceiling, but on the floor and a working false panel.
The easiest option mounts LED strip - fix it on double-sided tape around the perimeter of the kitchen, on the bottom of the hanging cabinets. In this case, it is better to choose products with increased power, which will be an excellent auxiliary lighting for your kitchen.
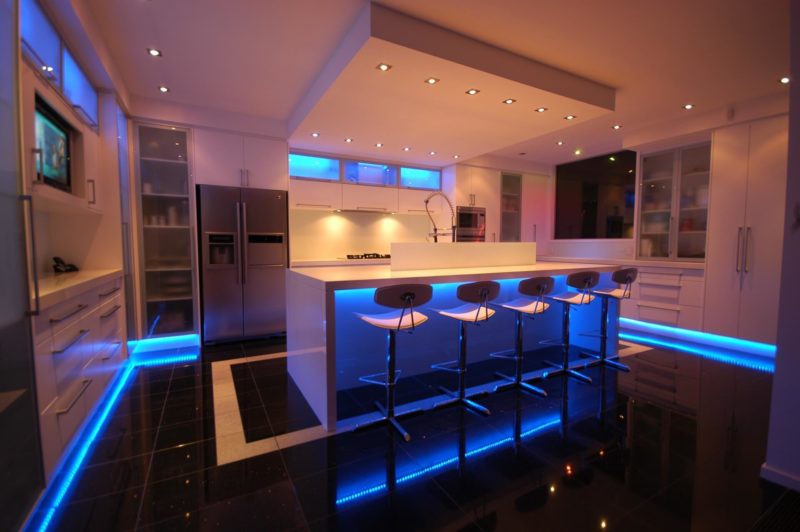
LED lighting serves not only as a source of light, thanks to it you can create a mood, a lot of color solutions will help you with this. In addition to the main one, lighting can be combined - it divides the room into different zones and serves to:
- Highlighting a kitchen apron;
- Highlighting decorative elements of the interior;
- Allocation of niches and cabinets.
Equipment Selection Tips
[ads-quote-center cite='Madeleine Vionnet']“We are not that rich to buy cheap things.”[/ads-quote-center]
When choosing equipment, you need to know important points, this will protect you from unreasonable spending:
- When choosing white, pay attention to glow temperature. It is better to choose from 3000 K (warm tone) to 6000 K (neutral tone). In this range, the color is favorably combined with the organs of vision and does not distort the color rendition. Choose an average value - 4500 (daylight shade).
- Power - the more the better.Low power tapes are used for decorative lighting. Take the value of the luminous flux of 1000 Lm / m, just perfect for the main highlight. For decor, it can be weaker.
- Use diffusers (we talked about them before). They perform two functions: the aluminum case removes heat well from the tape, this will favorably affect its service life; distribute light evenly. Diffusers are made not only with corners, there are also straight slats.
- The power supply costs select depending on the load in the chain. Take with a margin, do not save on it. Weak power supplies heat up and fail quickly. 5 meters of luminous coil create a load of 1 to 7 amperes. It is measured by the serial inclusion of an ammeter in the circuit, or by the formula I=P/U, check this parameter when buying. The reserve is 20% of the power consumed. For example, for 10m of tape, you will most likely need a 12A power supply.
How to connect the LED strip
To avoid incidental situations, follow the basic safety rules during installation. Do not short the contacts of different wires. Do not plug directly into an outlet. Observe the polarity and do not bend the tape at an acute angle, it is based on a printed circuit board. So let's get started with the installation:
- All work must be carried out with a completely disconnected power supply.
- Make a plan for your work so as not to be distracted by unnecessary trifles.
- It is necessary to remove the coil from the package, carefully unwind it and make sure that there are no mechanical damages and dirt on it.
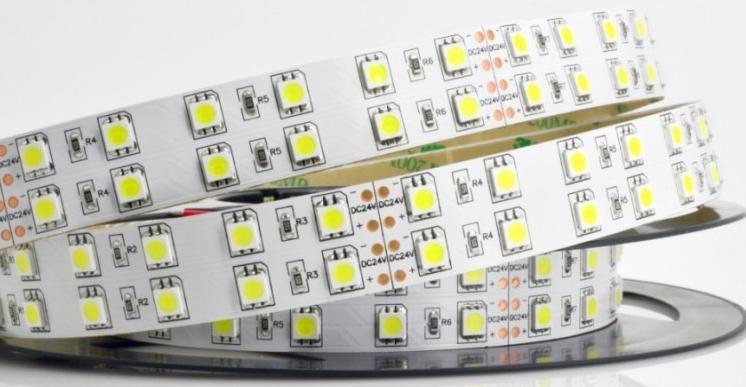
- Make sure that the power supply capacity matches the power consumption (check when purchasing). The current in the network section is calculated: I \u003d P / U, where P is the power, and U is the voltage. Based on Ohm's law, it follows: LED strip SMD 5050 has 60 LEDs in one meter, the power consumption of the meter, according to the table, is 14.4 W, from here 5 meters consume 5*14.4=72W, and the current I= 72/12= 6 A. Therefore, we need a power supply that can withstand a load of 100 watts at a current of 6 A.
- Before installation, connect the tape and make sure that all LEDs are lit evenly.
- The LED strip is cut only at the points of connection of the contacts (risk in the middle of the copper plates).
Note! You can not connect the tape to the tape! Proper installation is carried out as follows: 5 meters is the estimated length, so each tape must be connected to the power supply with a separate wire and in no case successively. This will disable the first section.
![Installing LED lighting in the kitchen]() Correct connection of two or more consumers.
Correct connection of two or more consumers.- Don't use twists. All connections are made using connectors or soldering, this is the only way to achieve good contact. After working with a soldering iron and solder, do not forget to rinse the soldering area with alcohol. Do not use acid solders.
- An excellent example and instructions on how to use a soldering iron, link below.
- Be sure to review the material how to solder LED strip and twists, it describes in detail how to use a soldering iron and connectors.
- Use only high quality insulation.
- Pay attention to the decoding of the power supply terminals:

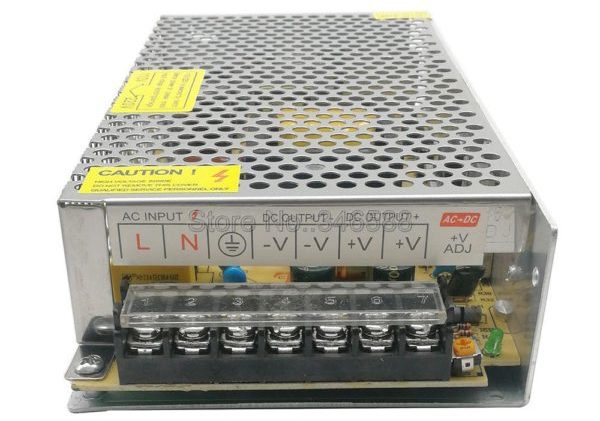
Terminal 3 - ground;
Terminals 4 and 5 - minus DC voltage 12 V;
Terminals 6 and 7 - plus DC voltage 12 V.
Two tapes can be connected to such a power supply at once without additional connections. Attach the tape with the sticky side to a clean surface.
Video lesson - “How to solder twists”
Video tutorial - “How to solder LED strip”