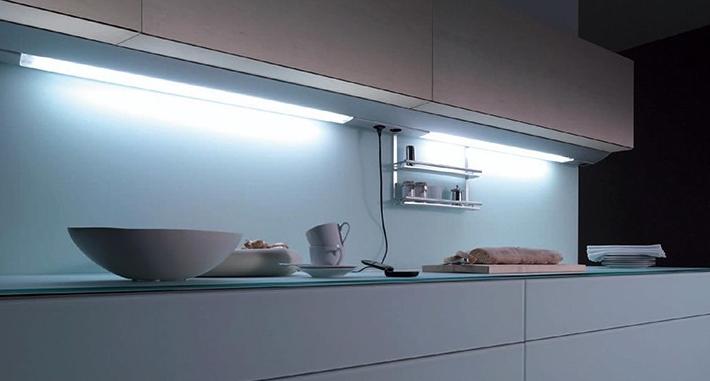
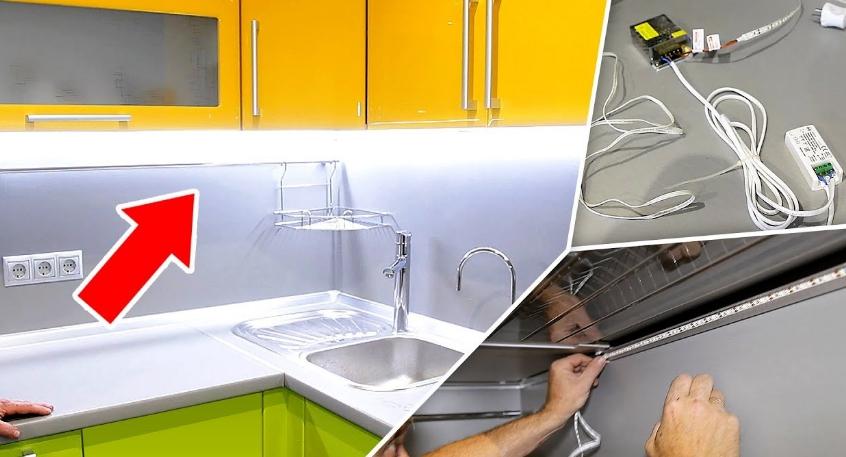
Installation of lighting in the kitchen under hanging cabinets
Illumination for the kitchen under cabinets simplifies cooking, highlights the work area and serves as an element of interior design. With its help, you can highlight the area in the room or focus on a beautiful apron that closes the space under the cabinets. For installation, you do not need to call specialists and spend extra money, work is within the power of any person who has basic skills in soldering and connecting wires.
The purpose of the backlight and the main mounting options
This type of lighting has been used relatively recently due to the fact that earlier lamps and fixtures were too bulky and took up a lot of space, which is unacceptable when mounted under kitchen cabinets.With the development of technology, new, compact lamps have appeared that take up little space, while well illuminating the space and can have different color temperatures. This allows you to choose the light intensity that is comfortable for your eyes.
Initially, the backlight was used for practical purposes and illuminated the work area, which made cooking more comfortable. At the same time, it was possible to save on general lighting, since earlier it was made more powerful so that there was enough light on the working surfaces. But a common chandelier or spotlights on the ceiling do not provide high-quality lighting, as they are far away and a shadow constantly falls from the body and hands of a person.
After the advent of small lamps and LED strips, it became possible to separate the working area separately. This has made cooking and other tasks in the kitchen much more convenient. As for the purpose, the main goals of the backlight are:
- Ensuring quality lighting in the kitchen when cooking. This is important for those who make confectionery, decorate dishes and spend a lot of time near the work area.
- The design of the room and the creation of a light accent that attracts attention and highlights the kitchen set against the general background.
- Apron lighting, if it is beautifully decorated or glass skinals are used, which are the central element of the decor.
There are several installation options, each has features depending on the mounting method and the equipment used:
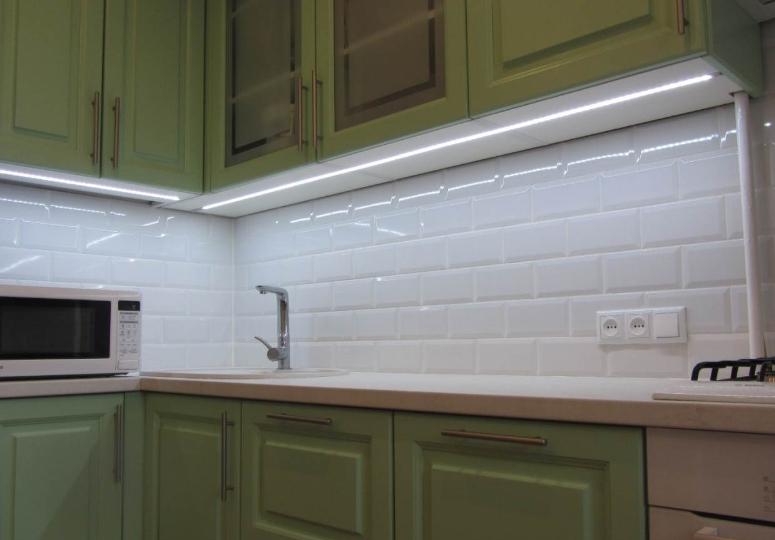
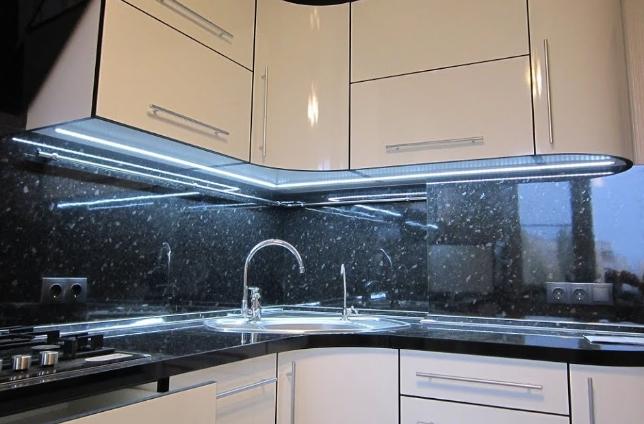
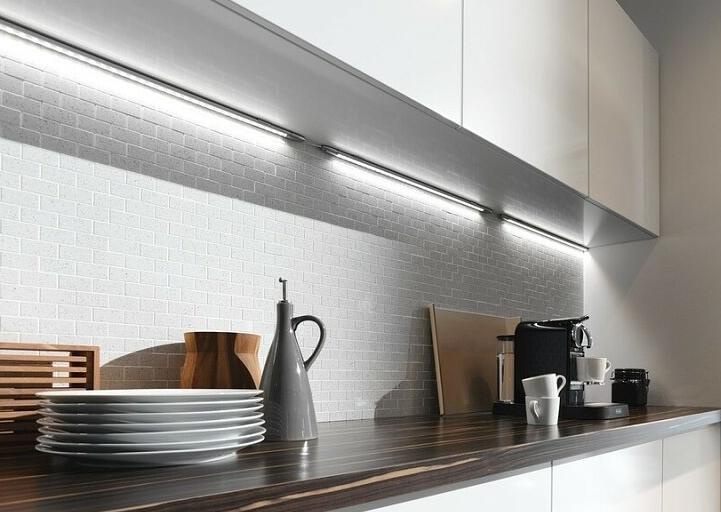
- Fastening the LED strip along the outer edge of the wall cabinets.Suitable for most kitchens, it allows you to fully illuminate the work area, as it falls approximately in the middle of the countertop. No matter what kind of kitchen - straight or corner, you can adapt to any conditions.
- Installation of tape in the middle or back of the lockers. It is used as a utilitarian light or a decorative element that highlights the work area. Often they put two tapes on the outside and inside, they can be included either together or separately.
![Option to install tape or lamps in the corner between the cabinets and the wall.]() Option to install tape or lamps in the corner between the cabinets and the wall.
Option to install tape or lamps in the corner between the cabinets and the wall. - Installation of mortise lamps. The method is not well suited for kitchen cabinets due to the fact that you need to cut a through hole and the back of the cabinet will stick out inside the furniture. Often in such cases, a niche is made at the bottom of the cabinets, which is closed after connecting the equipment so that dishes can be placed inside.
- Mounting overhead lights is a good solution for the kitchen, as now they are different sizes and are of small thickness. It could be like point models, and oblong options along the length of the locker. It is worth choosing lamps with soft diffused light.
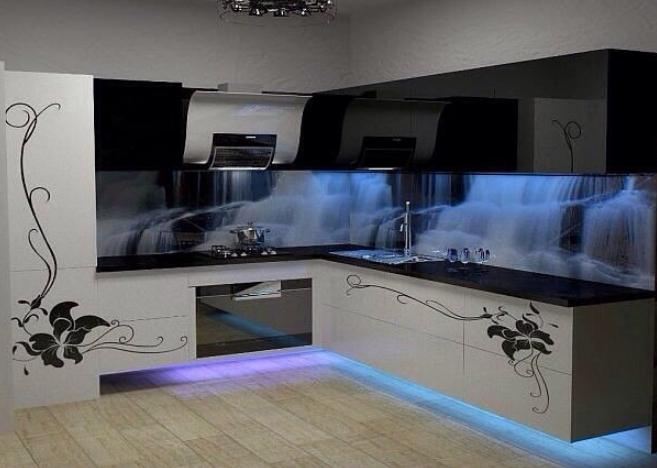
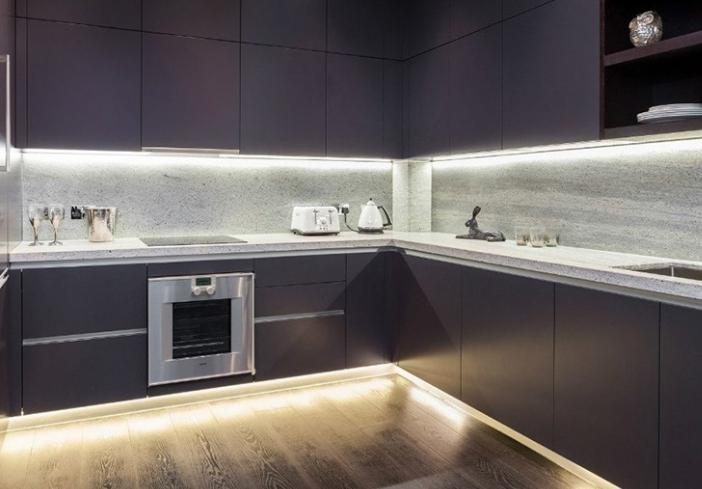
- If the “floating kitchen” type option is used, when the cabinets are fixed on the walls or the legs are moved away from the edge and are invisible, the backlight can also be made from below. This will further enhance the effect of floating furniture and give the kitchen an unusual look.
![Installation of lighting in the kitchen under hanging cabinets]() Due to the illumination below, floating kitchens look much more spectacular.
Due to the illumination below, floating kitchens look much more spectacular. - Can be used and installation on the upper end of the locker, it has a decorative function.
Some install equipment without drilling through the bottom of the cabinets, but making a recess in it, but this option is difficult to implement without a milling cutter.
Varieties of light sources
Several basic options can be used. When choosing, it is worth considering the pros and cons of each:
- Halogen lamps give a bright uniform light, most often placed in spotlights, which can be built-in or overhead. The resource of work is small, and the energy consumption of this option is the highest, so it is not suitable for the kitchen in the best way. During operation, the surface becomes very hot, which causes burns when touching the lamp.
- Fluorescent lamps can be in the form of long flasks or with socles for standard cartridges. They give a good bright light, consume little electricity, the service life is long, but there is a risk of failure when turned on when the loads are high. Due to the fact that there are mercury vapors inside the flasks, if the lamps are damaged, they evaporate into the room, and this is unsafe.
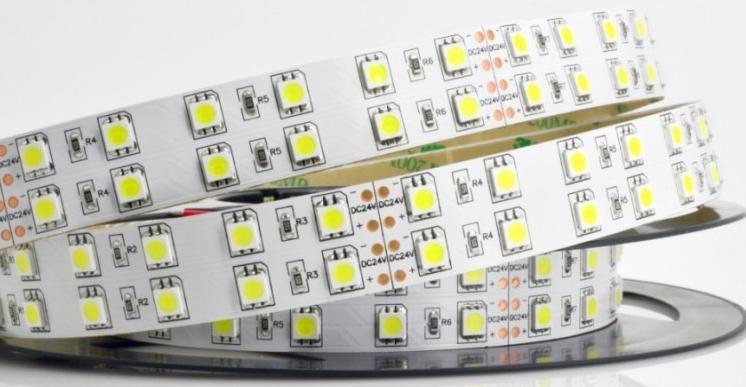
- LED lamps and fixtures - the most economical, while the service life is up to 50,000 hours. Diodes give an even bright light that does not change the spectrum over time, does not flicker and comes in different color temperatures. It is also possible to adjust the brightness if you install a dimmer. They do not heat up during operation, which is also important.
![LED lights]() LED lamps are compact in size.
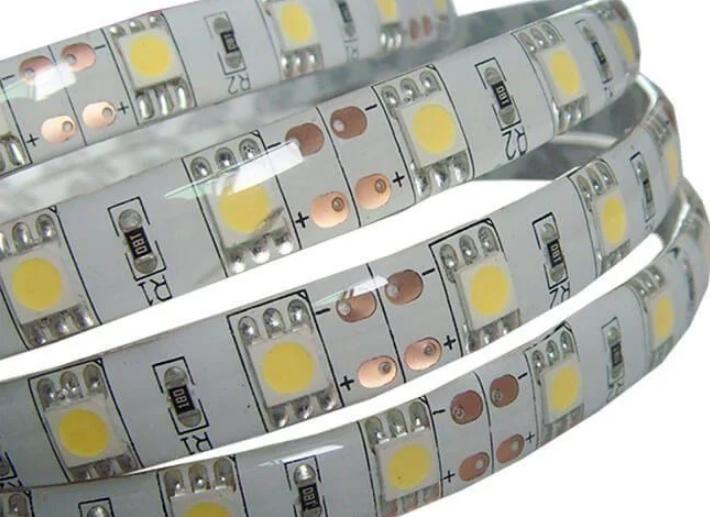
LED lamps are compact in size. - LED strips are considered the best solution for illuminating the working area in the kitchen. They take up a minimum of space, are easy to install and fasten, and are safe for humans, as they operate on 12 V voltage. Another plus is the ability to install RGB strips that change colors, so you can achieve any decorative effect.
If you order LED strips or lamps from China, you can save.
Selection Criteria for LED Equipment
LED lighting in the kitchen under the wall cabinets is best, so you should choose this option. But to ensure long work and create comfortable conditions, you need to remember a few tips:
- Do not use standard LED strip and fixtures designed for living rooms. In the kitchen it is worth installing equipment with protection class IP65 or higher, only this option can withstand adverse conditions and will not fail due to changes in temperature and humidity. The indicator is always indicated on the fixtures, it is written on the packaging or in the connection instructions. As for the LED strip, waterproof options are easy distinguish on a silicone sheath.
![Silicone coated options]() Options in a silicone shell are not afraid of water, but they heat up much more strongly.
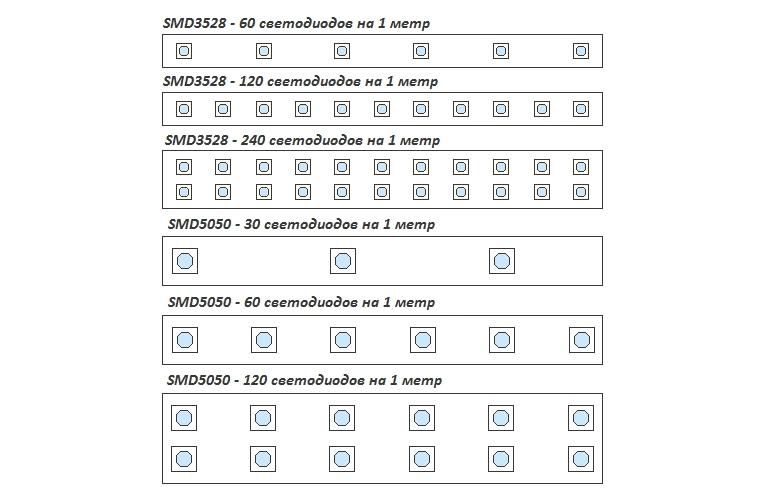
Options in a silicone shell are not afraid of water, but they heat up much more strongly. - Consider the norm of illumination, per square meter of space should be from 150 to 200 lux. If everything is simple with a lamp, since it has a total power, then with a tape it is a little more complicated. To calculate the required number of diodes, you need to know the power of one and how many elements per linear meter. There can be from 30 to 120, so choosing the brightness is easy.
- Better to use SMD LEDs, DIP options take up more space and produce less uniform light. More often they sell the first option, so there will be no problems with buying it.
- Buy a power supply, it is selected for specific conditions. You need to know the total power consumption of the LEDs used. Give preference to equipment from well-known manufacturers, do not take the cheapest products, as their quality is not very good. The power of the block should be at least a quarter more than what the lamps or tape consume.
- Working voltage. On sale there are options for 12 and 24 V. The first type is more common, so it is used more often. There is not much difference, but a 12 V unit is easier to find and it costs less.
![Installation of lighting in the kitchen under hanging cabinets]() LED equipment operates on a voltage of 12 V, which means it does not pose a health hazard.
LED equipment operates on a voltage of 12 V, which means it does not pose a health hazard.
By the way! If you need a bright light, you can buy a strip with two rows of LEDs. It can have 120 elements per meter, so they shine much stronger.
When buying in a store, it is worth inspecting the tape or lamp and assessing the quality of workmanship. If the surface is damaged, flaws and poor soldering are visible, it is better to look for another option.
How to choose the color of lighting in the kitchen
Illumination of kitchen cabinets with LED strip or a lamp is also good because you can find any color temperature. When choosing, you can stop at one of the following options:
- Natural white light is a comfortable option for cooking and decorating, as it provides good color rendering. It can be both yellowish and light, there are many shades, it is worth choosing at your discretion.
- Warm white light. Gives yellowness or may be completely yellow. Creates a cozy atmosphere and promotes relaxation. You can use it both for decorative purposes and for cooking, if you like this option more.
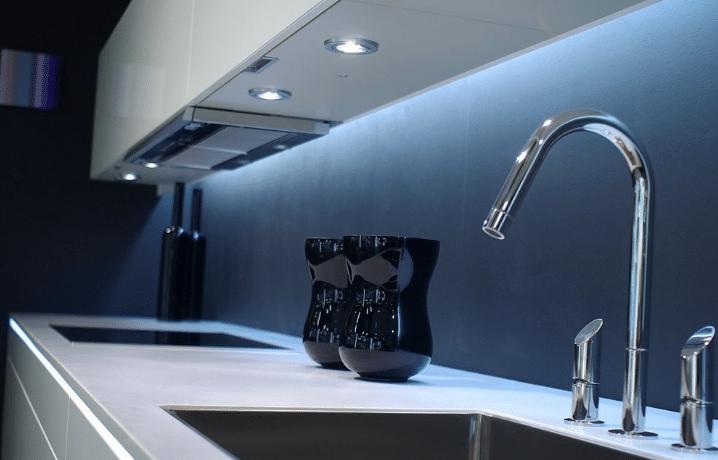
- Cold white light. Suitable for modern high-tech headsets with steel or silver fronts. Provides good visibility, sets in a cheerful mood, but may distort colors.
![Cool colors in the kitchen]() Cold shades are best suited for modern interiors.
Cold shades are best suited for modern interiors. - Colored lighting is used for decorative purposes, it comes in different shades, so choosing the right one is easy. By adjusting the brightness, you can also adjust the tone.
- Iridescent ribbons allow for an unusual effect and can change colors at different speeds depending on the settings.
colored ribbons RGB they can also give white light of different shades, but its quality will be lower than that of monochromatic options.
Do-it-yourself LED strip installation
It is not difficult to carry out the work if you understand the process and prepare everything you need for installation. Pick up the tape in advance, calculate the amount according to the size of the lockers, but always keep a small margin just in case.
Materials and tools
Lighting in the kitchen under the cabinets with LEDs is done in an hour or two, if you prepare everything you need in advance. In addition to the tape, you need the following:
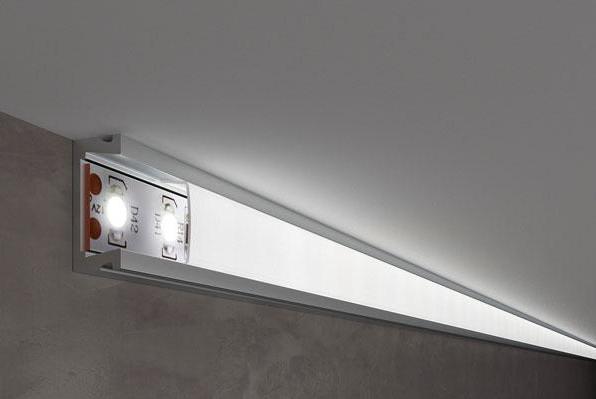
- Aluminum profile, tape is glued to it. This element protects the backlight and serves as a radiator that removes excess heat. On the profile, LED strips work much longer than without it. You can choose an option with a diffuser, it is more expensive, but it gives a more even light.
![Profile]() The profile for the LED strip greatly simplifies installation.
The profile for the LED strip greatly simplifies installation. - Small self-tapping screws or strong double-sided foam tape. It can be bought at an auto shop, where the quality of the tape is higher and it withstands adverse effects.
- Screwdriver with a set of drills and nozzles for self-tapping screws, if such fasteners will be used.
- Tape measure and pencil for measuring and marking.
- Cable for connecting the LED strip, select the section according to the power of the equipment. Usually 0.74 mm is used.
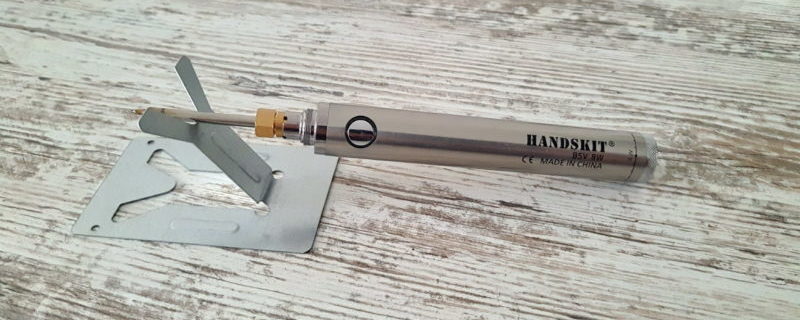
- A soldering iron with a small tip, as well as solder and rosin.
![Soldering iron with usb charger]() Soldering iron with a thin tip and usb charger
Soldering iron with a thin tip and usb charger - Insulating tape, heat shrink tube of suitable diameter.
- Scissors or construction knife.
Sometimes double-sided tape is not needed if there is a high-quality adhesive layer on the back of the tape. But if it does not inspire confidence, it is better to use an additional commit element.
Ribbon Installation
It is important to make all connections airtight to protect them from moisture and damage. Therefore, the work should be carried out taking into account a number of recommendations:
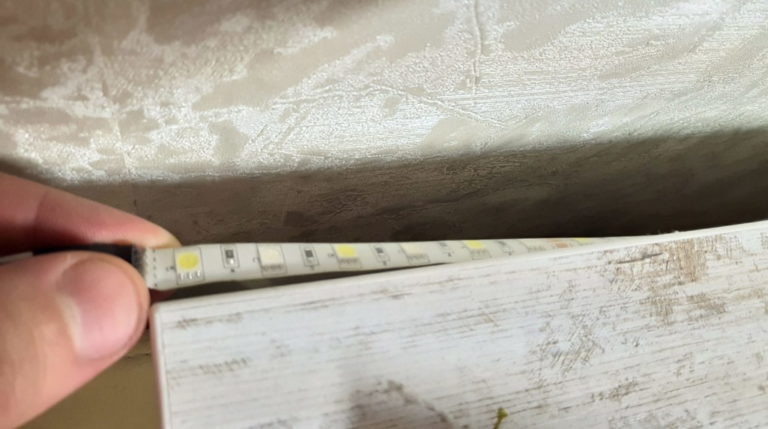
- Take measurements to accurately determine the length of the LED strip pieces. Cut it is possible only in certain places, so the length of the elements must be selected taking this moment into account. Cut along the line where there are pins to connect.
- Determine the location of the power supply and control unit. More often they are placed inside one of the cabinets or placed upstairs near the wall so that the equipment is not visible from below. After taking measurements to cut off pieces of wire for connection, they must be with a margin, since they must be connected.
- Connect power cable. It is better not to occupy the outlet, but to bring out a separate input, you can be powered both from the junction box and from one of the outlets, for example, from the one that is connected to the hood.
- Solder contacts to the ends of the tape. To do this, remove the insulation by 1.5 cm, strip the ends of the cable and attach it to the contacts in a quality manner. After the connection has cooled down, put on a heat shrink tube 2-3 cm long and warm it up so that it shrinks to the desired size.
- Attach the aluminum profile to the lower ends of the cabinets. If it is too long, cut with a hacksaw.You can use self-tapping screws for installation, or you can use double-sided tape. The main thing is that the profile is held securely.
- Drill holes for wiring, if necessary. Or stretch them behind the back wall of the cabinets, it all depends on the connection point. Gently press the cable to the surface and fix it with special holders.
- Connect all elements of the system. Install a switch, it can be either a standard option or a touch switch that turns on when a hand is raised or a remote switch that lights up when a person approaches. Check work.
You can connect the tapes to the wire connectors, but soldering is more suitable for the kitchen as a more reliable method.
In conclusion, the video: LED lighting built into the handle of kitchen cabinets.
Installing lighting under kitchen cabinets is easy if you use LED strip and follow simple guidelines. The main thing is to choose the light of the desired brightness so that the work area is well lit.