Features of the repair of Armstrong LED lamps
Today, LED lights are found in almost every home. Due to their low power consumption and high luminous flux, their popularity is growing every day. The Armstrong ceiling light has become a favorite in the office industry. Thanks to him, millions of office spaces are comfortably illuminated. Let's see how it works, what causes of malfunctions may occur during its operation, and we will repair the Armstrong LED lamp.
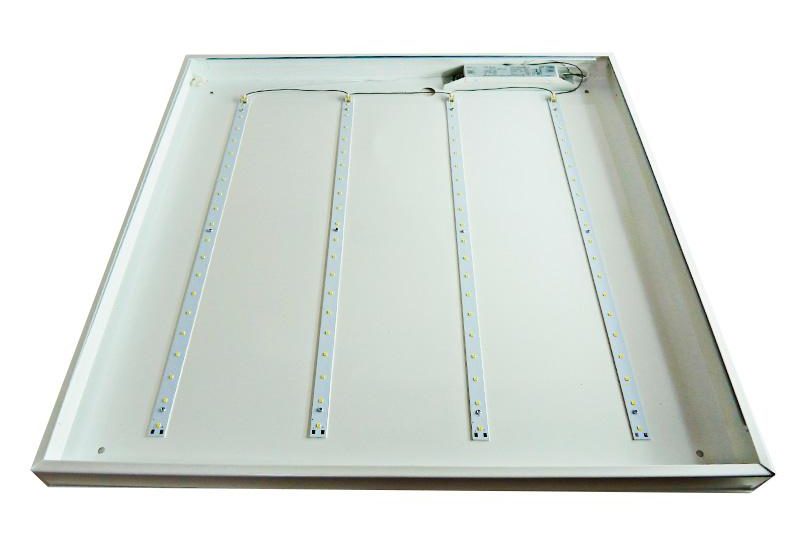
Luminaire design

Ceiling LED lamp Armstrong has a size of 600x600 mm. It is installed in the corresponding type of false ceiling profile. The design and appearance may differ, but this does not affect the principle of operation. Design:
- metal body of the lamp (it is also a radiator of the LED strip);
- protective screen (diffuser);
- LED strip (differs in the type of LED mounting);
- power supply (driver or 12 volt power supply).
Fixture repair
Repair of the Armstrong lamp should begin with a short introduction on theory. To repair the lamp, you need to know what differences lie in them. The reason for the differences is in the large market of manufacturers. Each company uses the equipment that they have, does what is convenient for them and focuses on the end user. Someone saves on materials, someone chooses a design that is more profitable for them. We should understand this and know everything in order to avoid misunderstandings.
Theory
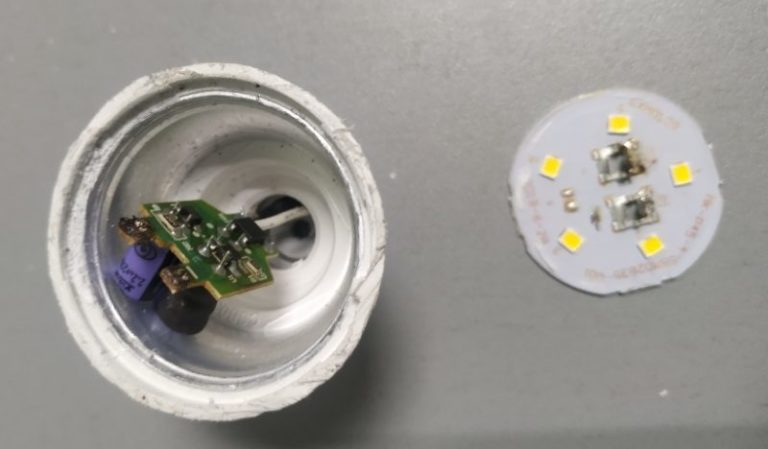
In the luminaire design section, we explained what a luminaire consists of. We are interested in its electrical part: power supply, wires and LEDs, which are mounted on a flexible printed circuit board. Consider an example in the photo:
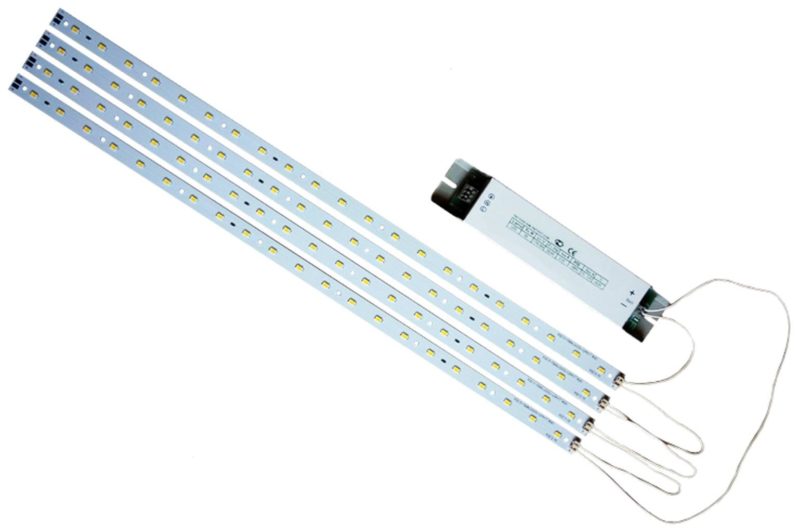
The first thing to pay attention to is the power supply. It contains technical specifications. From them it immediately becomes clear what kind of power source is used. There are only two options:
- Driver - type of power supply, designed to power the LEDs with a given current. On such a source, its power and output current are indicated. The voltage is indicated in the range and does not have a constant value. It is due to the fact that the output voltage is not fixed, but varies in a given range and the desired load current is set. Such a power supply will in no way give out more current into the circuit than it is designed for. If used incorrectly, it simply goes into protection and does not start the circuit.
![Features of the repair of Armstrong LED lamps]() LED driver: power 37W, output voltage 64-106V, maximum current 350mA.
LED driver: power 37W, output voltage 64-106V, maximum current 350mA. - The 12-24V power supply is an AC/DC converter that has a fixed output voltage.
![DC power supply 12 volts.]() DC power supply 12 volts.
DC power supply 12 volts.

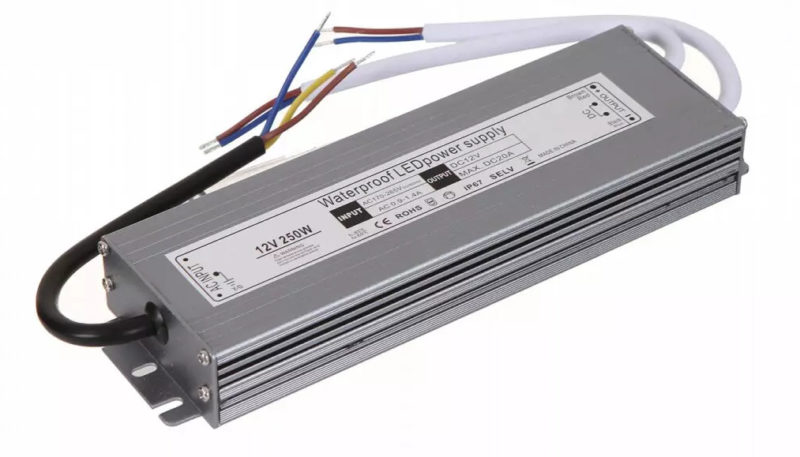
The type of power supply you use will also determine how the LEDs are mounted on the PCB. For 12-24 volt power supplies, LEDs are mounted in modules of three pieces in one. Each module has a resistor.
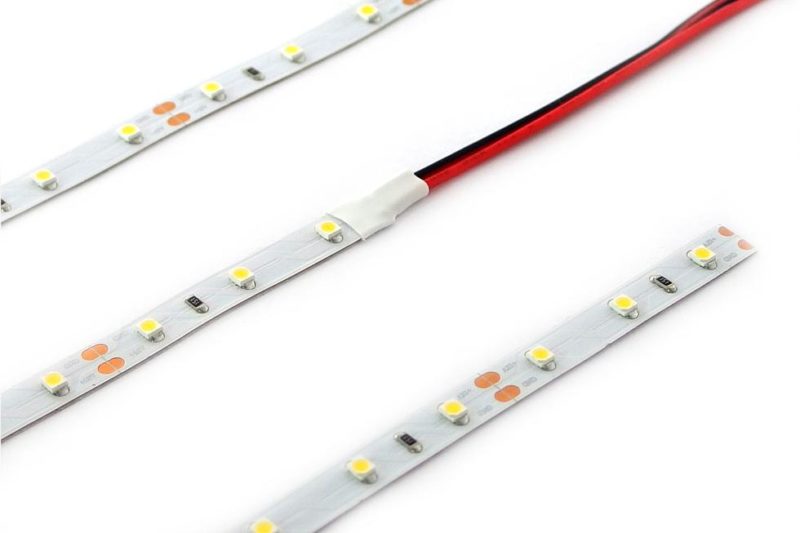
For power supply from the resistance driver is not used. The tape module is selected depending on which LEDs are used, based on their current and power. The module can include from one to ten LEDs.
What to do if Armstrong LED light is not working
We found out and figured out what are the main design differences that ceiling lights can have. Fixture repair Armstrong starts with his autopsy. It is necessary to find and unscrew the screws that hold the diffuser. After we need a device for measuring voltage. We list further operations in a sequential list:
- Visually inspect the luminaire for traces of burning.
- Check the input voltage of the power supply network - the power cable may be damaged;
- Check the output voltage of the power supply - to do this, set the device to the DC current measurement mode:
- for power supplies of 12-24 volts, the output voltage must be stable and show a value not less than the declared one. If it is missing, replace the power supply or repair it (we will consider later);
- for the driver, the test conditions are similar - the lack of power at the output indicates its malfunction. The output voltage should not jump from zero to the maximum value, this phenomenon is caused by a lack of load and may indicate a malfunction in the LED circuit.
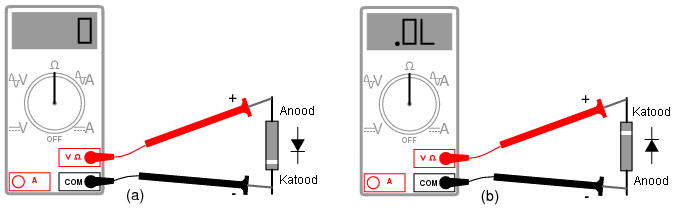
- Check the LEDs - To do this, set the device to the continuity mode (minimum resistance). The common probe is black, it acts as a positive contact. Red is minus. Touch the probes to the contacts of the LED on both sides, changing the polarity. A working LED will definitely light up, and the entire module will glow with it. Thanks to this check, you can find all the burned-out LEDs. Mark them with a marker.
![continuity with a multimeter]() Checking the LED or continuity with a multimeter. Information on the display - O - the diode is working, the current is flowing; OL - the diode is working, no current flows.
Checking the LED or continuity with a multimeter. Information on the display - O - the diode is working, the current is flowing; OL - the diode is working, no current flows. - Replace burned-out LEDs with their counterparts. Use only the type of LED used. It is forbidden to mount other models, as they have a different load current and will fail on their own or disable the entire circuit.
- The general circuit diagram of the lamp. The figure shows a diagram with tapes connected successively to the power source. Their number may be greater. The order does not change.
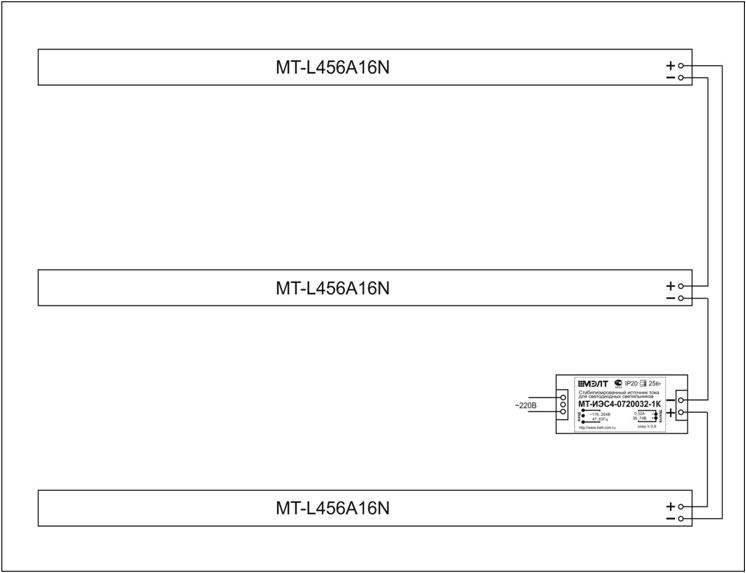
Thanks to the use of modules, their connection to the power source is carried out by the method of series-parallel connection, therefore, if one of the series-connected LEDs fails, the entire circuit stops working, and a certain section of it burns out.

Power supply repair
At home, you can check power supply and repair it if the capacitor has failed (a breakdown has occurred) or a fuse. First you need to disassemble it and make an external inspection of the board.. You may see characteristic burn marks. The cause may be a burned-out transformer, most likely such a unit will have to be replaced.
The fuse is tested by ringing. If it fails, after replacing it and connections power supply to the circuit, make sure there are no shorted tracks on the LED PCB, it may be oxidized and shorted.
In this video, the author quickly repairs an Armstrong office lamp.
Conclusion
The LED can burn out from prolonged overheating, so when assembling the lamp, pay attention to the fit of the LED strip to the body. If part of the tape does not fit snugly, place it so that its back side adheres to the metal evenly - this will increase heat transfer and, accordingly, service life.
Note that all work must be carried out with the power turned off. Follow the safety rules - this will save you from accidents. All repairs must be done step by step.