How to repair LED lamp drivers
LEDs are economical and durable. But a chandelier or lantern often stops burning, although all elements are intact. To restore the performance of various devices, it is necessary to repair the LED lamp driver. In most cases, it is the main cause of the malfunction.
Driver repair (LED) lamp
Sometimes the light source refuses to work at the most inopportune moment. This may be due to its improper operation or the fault of the manufacturer (this often happens with Chinese low-quality products).
The simplest driver for a 220 V LED lamp is often performed on ordinary elements (diodes, resistors, etc.). In this circuit, one or more LEDs immediately fail when a capacitor or one of the bridge diodes breaks down. Therefore, these radio components are first checked.
Instead of LEDs, a regular 15-20 watt light bulb (for example, from a refrigerator) is temporarily connected. If all the parts except the LED are intact, it is weakly lit.
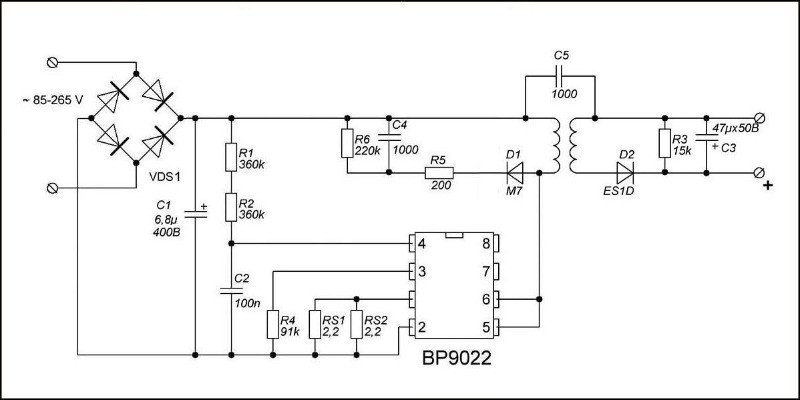
The second option is a rectifier with a voltage divider, a switching regulator on a microcircuit and an isolation transformer. In the event of a chandelier malfunction, all elements are checked sequentially. The scheme may differ from the one shown, but the search algorithm is the same.
We recommend reading: Do-it-yourself LED lamp repair
How to repair:
- First, they check whether voltage is supplied to the LED matrices. If it is, look for faulty LED parts and change them. If everything is in order with the voltage, check the bridge diodes and input capacitors.
- If they are also intact, measure the supply voltage of the microcircuit (4th leg). If it differs from 15-17 V, this element is most likely defective and should be replaced.
- If the microcircuit is intact and there are pulses on its 5th and 6th legs (check with an oscilloscope), then the transformer and its circuits are “to blame” - a capacitor or diodes connected to it.
Replacement of electrolytic capacitors in the driver for LED lamps.
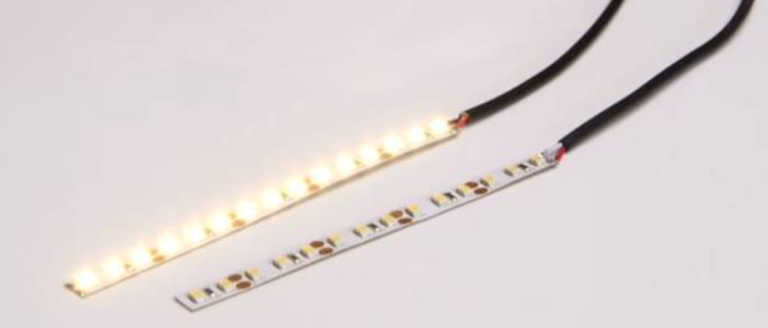
Many people purchase long strings of LEDs mounted on flexible substrates. These are LED strips.
There are two options for these sources:
- only LED fixtures without additional parts;
- products with resistors soldered to each element or chains of 4-6 LEDs, which are designed so that at a voltage of 12-36 V and a rated current, the lighting elements do not burn out.
In both cases, drivers are often used, which have already been discussed above. But sometimes the power supply of the second version of LED strips is carried out using a module, which is a transformer power supply.
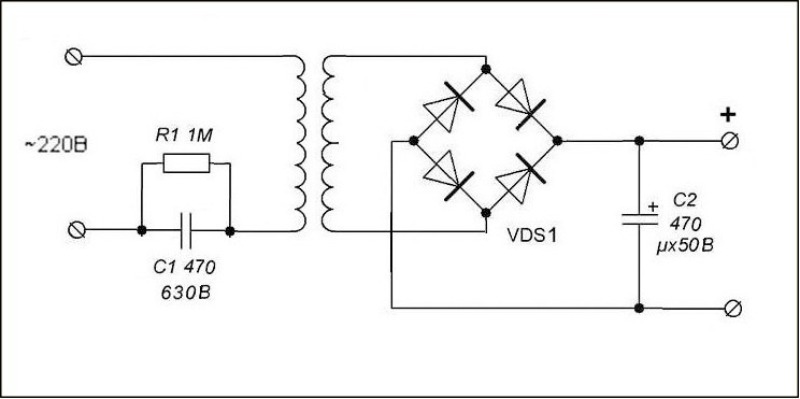
When repairing a 36 watt LED lamp driver, if not a single LED or chain is lit, first check the transformer for an open circuit. Then the diodes and the rectifier capacitor. Parts R1 and C1 in such a scheme deteriorate very rarely.
If at least one or more elements are lit, the supply voltage is supplied. In this case, check the LEDs and change them.
It will be useful to read: Driver repair for LED strip 12V 100W.
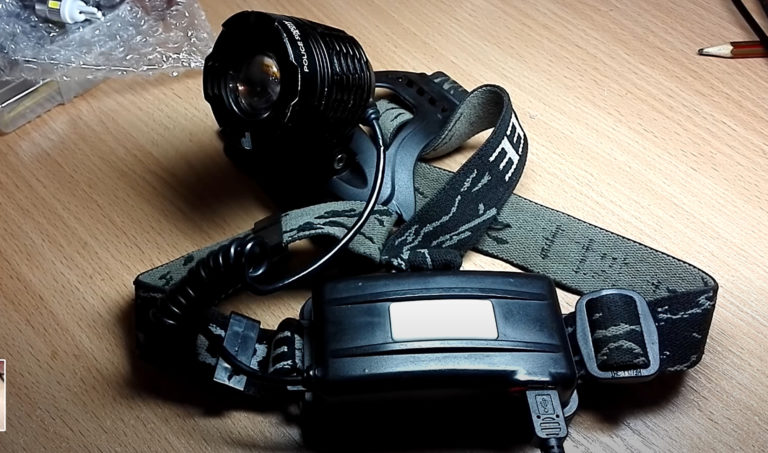
Driver repair (LED) lights
Repair of a portable light source depends on its circuit design. If the flashlight does not light or shines weakly, first check the batteries and change them if necessary.
After that, in drivers with batteries, they check the details of the charging module with a tester or multimeter: bridge diodes, input capacitor, resistor and button or switch. If everything is OK, check the LEDs. They are connected to any 2-3 V power source through a 30-100 Ohm resistor.
Consider four typical lamp circuits and the malfunctions that occur in them. The first two are powered by batteries, they have a charging module from the 220 V network.
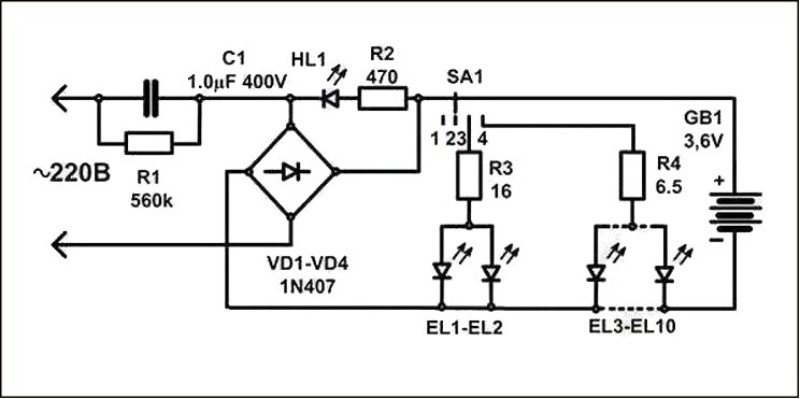
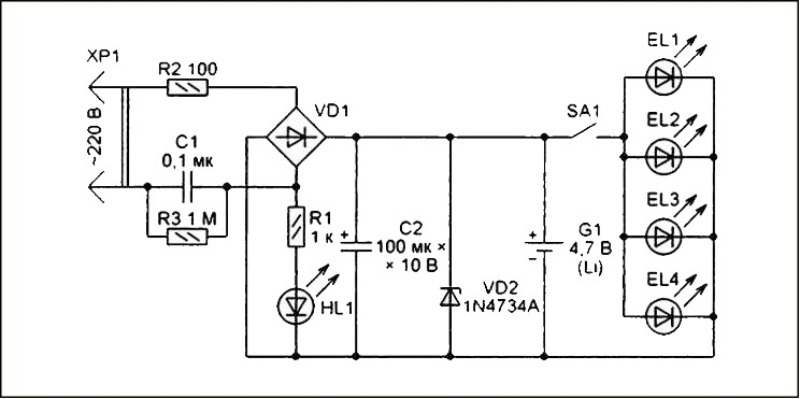
In the first two options, LEDs often burn out both through the fault of consumers and due to incorrect circuit design. When removing the flashlight from the socket after charging from the mains, the finger sometimes slips off and presses the button. If the pins of the device have not yet been disconnected from 220 V, a voltage surge occurs, the LEDs burn out.
Video: How to make a powerful light driver.
In the second option, when the button is pressed, the battery is connected directly to the LEDs.This is unacceptable, as they can fail the first time they are turned on.
If during the check it turned out that the matrices had burned out, they should be replaced, and the lights should be finalized. In the first option, it is necessary to change the connection scheme of the LED, indicating that the battery is charging.
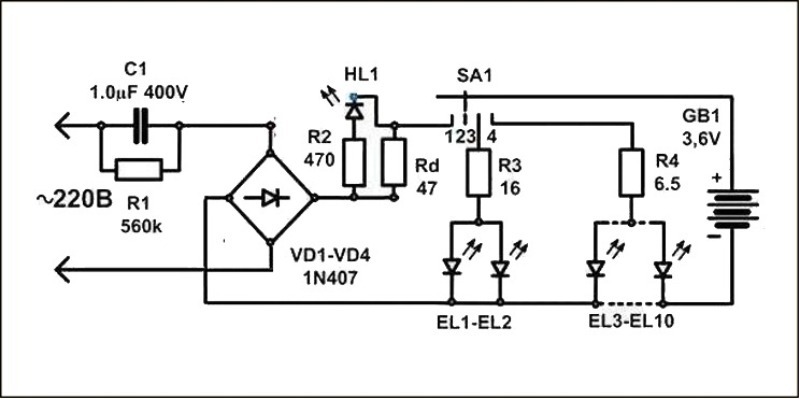
In the second option, instead of a button, you should install a switch, and then solder one additional resistor in series with each light source. But this is not always possible, since often an LED matrix is \u200b\u200binstalled in the lanterns. In this case, one common resistor should be soldered to it, the power of which depends on the type of LED elements used.
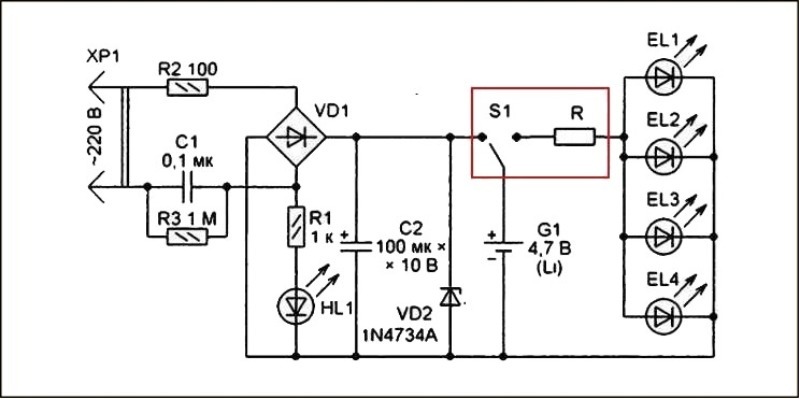
The rest of the lights are powered by batteries. In the third variant, the LEDs can burn out during the breakdown of the diode VD1. If this happens, it is necessary to replace all defective parts and install an additional resistor.

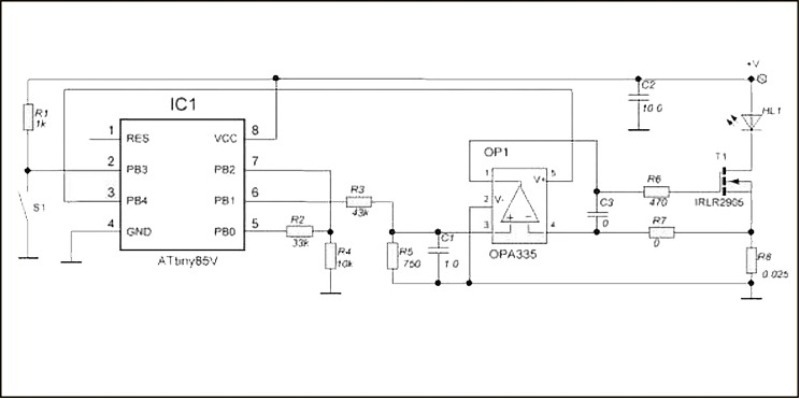
The main elements of the latest version of the flashlight (microcircuit, optocoupler and field effect transistor) are difficult to verify. This requires special devices. Therefore, it is better not to repair it, but to insert another driver into the case.
Driver repair (LED) lamp
In stores, you can find LED lighting fixtures with an adjustable flow of light. One part of such devices has a separate remote control. But almost all table lamps have a manual regulator, and it is built into power driver.
The basic scheme of these lamps is almost no different from the rest. To repair the LED lamp driver, it is necessary to act according to the already indicated algorithms.
Recommended for viewing: Repair LED lamp ARMSTRONG