Do-it-yourself floor plinth installation with lighting
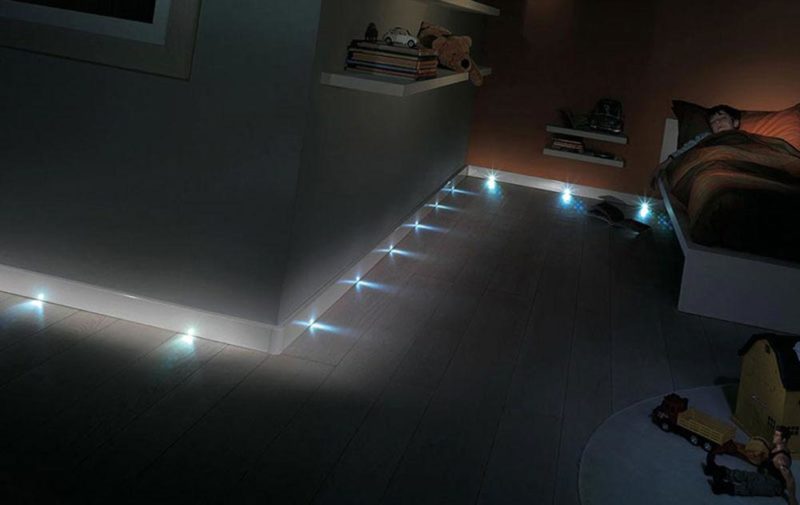
This idea came to our house from public places. In order to save light and ease of movement, floor lighting was first used at metro stations and train stations. A luminous baseboard on the floor allows you to confidently proceed to your destination, with minimal risk of stumbling upon something unwanted. In home use, he did not change his purpose, but on the contrary, he even acquired a new one - he created additional soft lighting for the room. By connecting led strip paired with a motion sensor, you will get a night light with automatic switching on. Read on for more details.
Floor lighting with skirting boards
There are many ways floor lighting. use neon tubes, luminous built-in elements, spotlights and the like. It is installed without problems at the stage when you are doing a comprehensive repair.
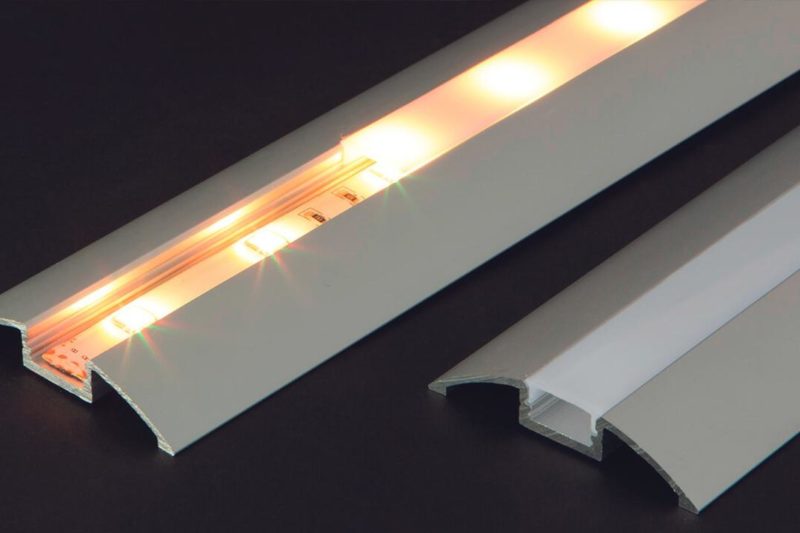
The plinth under the LED strip remains the favorite.Ease of installation, accessibility of the electrical part, protection against mechanical damage of the LED strip are the main advantages. The disadvantages include only the household part - you have to clean it every day. Floor lighting shows its cleanliness.
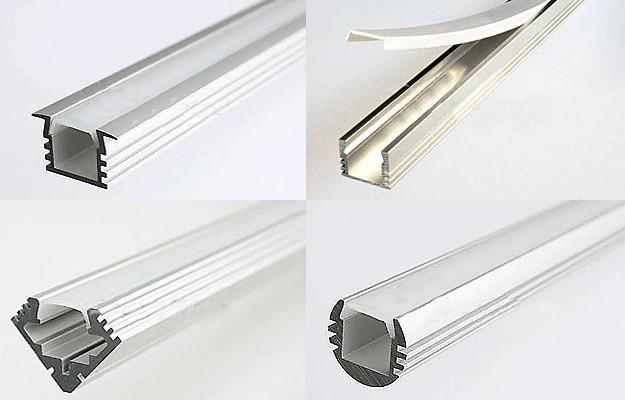
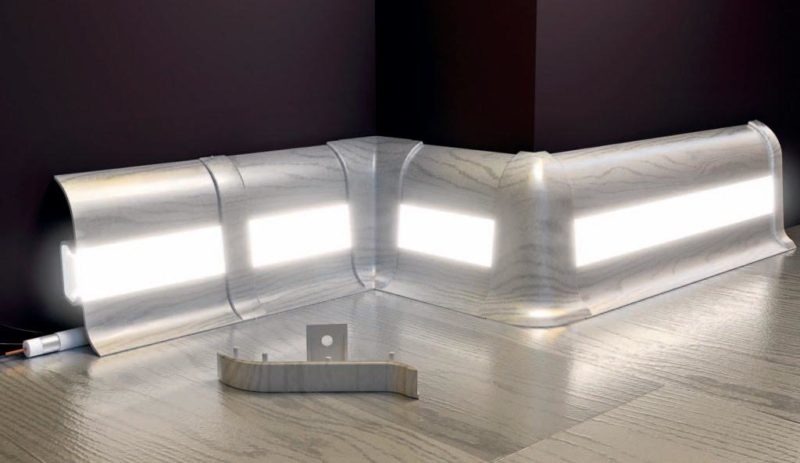
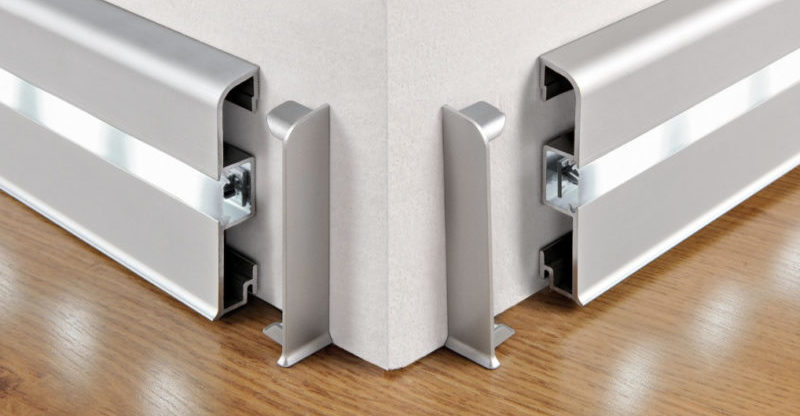
When choosing a plinth, pay attention to its design. Plinth comes in different versions: straight, corner, large corner, seam. There are two types of skirting boards - plastic and aluminum. The price is somewhat different. Aluminum plinth is more expensive.
In walk-through rooms, it would be wiser to install an illuminated aluminum skirting board, because the risk of damage in these rooms increases. An example is a corridor, shoes or household items can damage the structure.
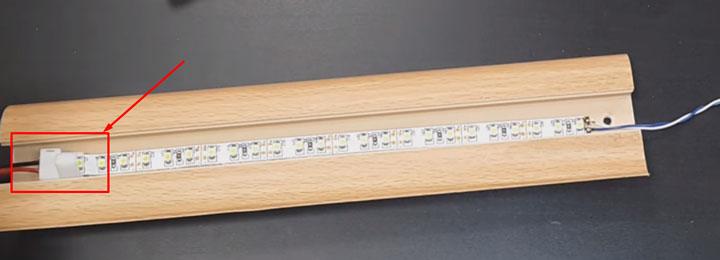
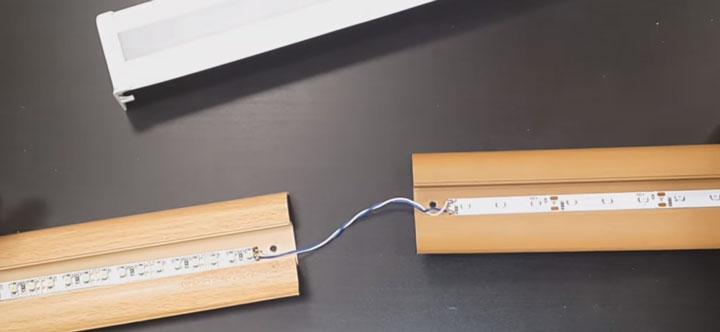
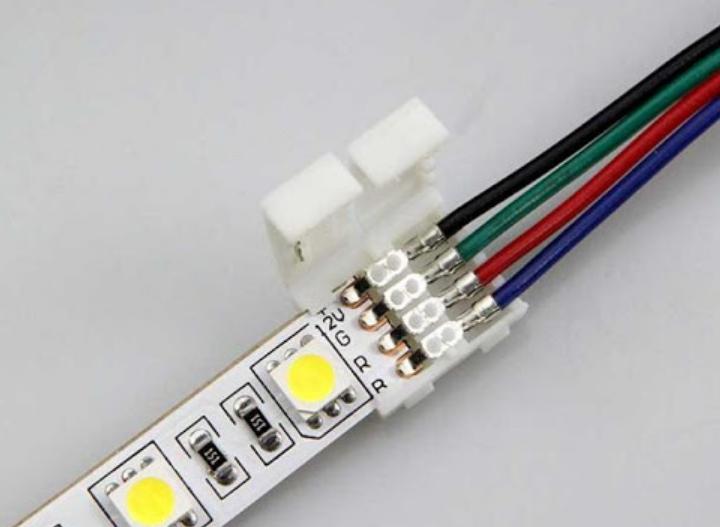
Connecting the tape to the power source is done in only two ways - soldering and connector. On the left, a red square - connection using a connector.
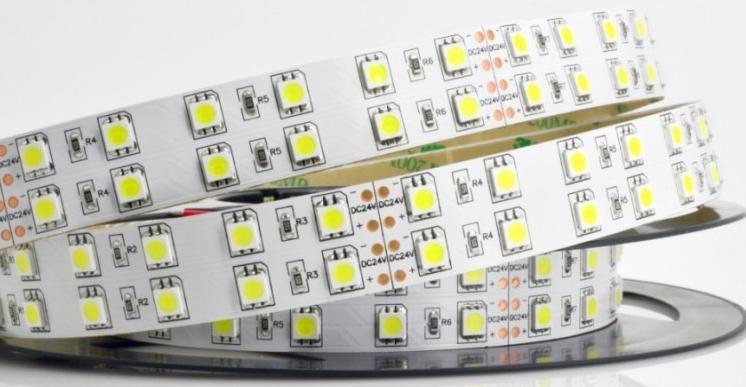
Selecting a Light Source
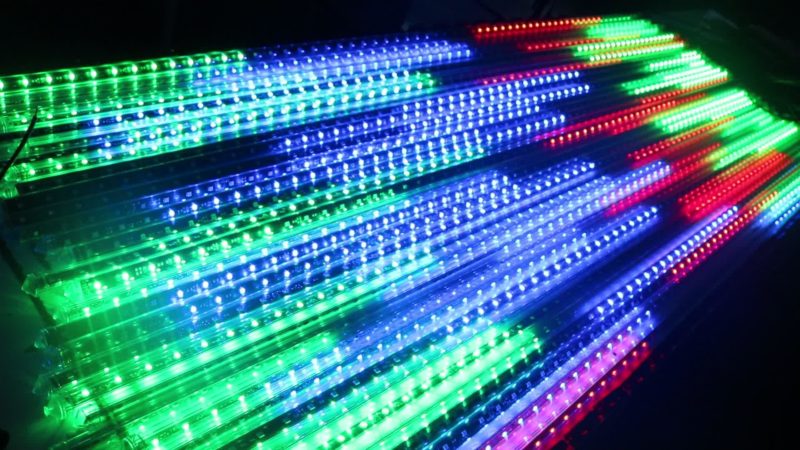
Thanks to a wide range of LED strip colors, you can create any atmosphere in the room, and a universal strip with a control unit will allow you to combine several lighting options at once.
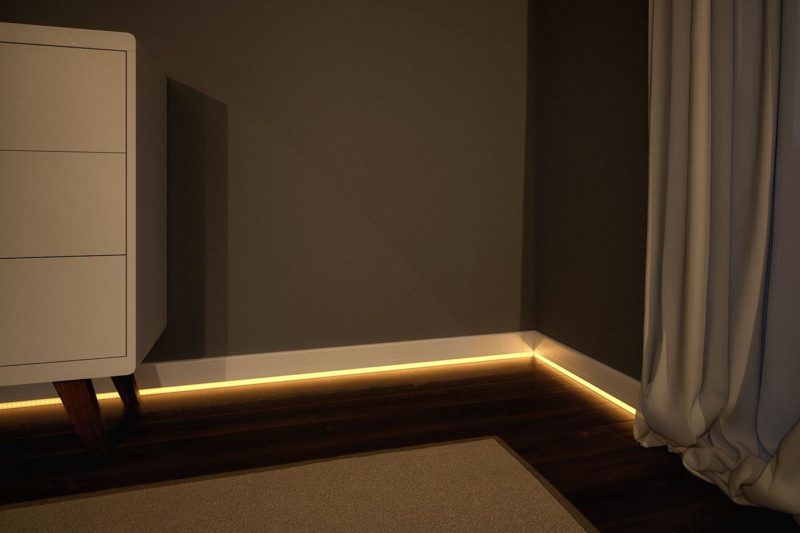
To illuminate with a white LED strip, you need to know glow temperature. Choose warm white light. With prolonged exposure, it favorably affects human vision and does not have the effect of fatigue. The temperature of such light ranges from 4000 to 5000 K.

White or yellowish light is recommended to highlight the rooms in which you are most of all, and this is the bedroom, living room and office. The illumination of such rooms, as a rule, works constantly, and since the influence of light is a topic that has already been revealed to us earlier, it becomes clear why this is so.
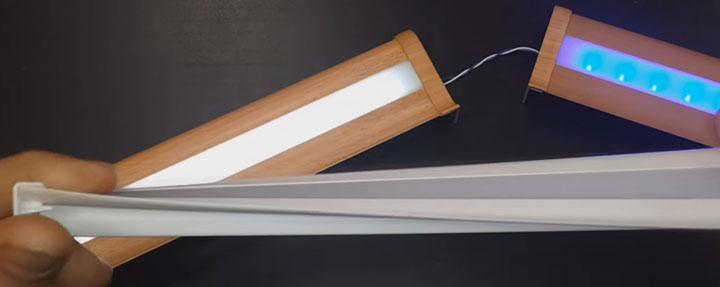
In rooms such as a corridor or vestibule, an LED strip is installed in tandem with a motion sensor. This solution is convenient when visiting rooms at night. The illuminated aluminum skirting board perfectly emphasizes the features of the interior and provides reliable protection of the light source. In the corridor, you can install a tape with a bluish tint.
Mounting the plinth under the LED strip

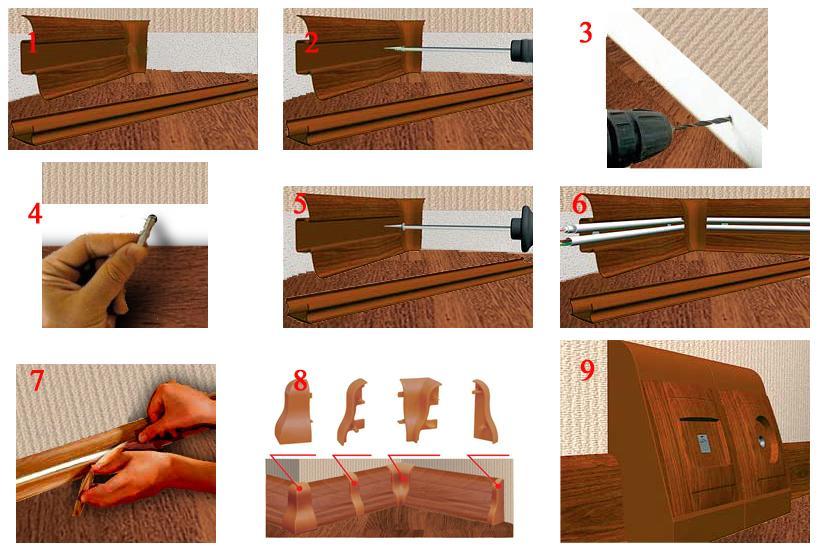
Installation of the plinth should be carried out on a flat surface, free from dust and dirt. All corner joints for accurate joining are sawn with a miter box at an angle of 45 degrees. It is carried out in two ways:
- By attaching to plastic dowels.
- Sticking.
Video instruction: How to cut a skirting board at 45 degrees.
The first method is more reliable, but for it we need an electric drill or a screwdriver, a miter box, a good screwdriver, a tape measure, a pencil and a hacksaw. Take measurements first. Then cut the plinth with a hacksaw. The plinth is attached to the wall or floor. The plinth must be fixed in disassembled form.
Remove the diffuser of the LED strip, attach the cut plinth to the wall, mark the location of future fasteners and drill holes.Next, drive the dowels into the walls and screw the plinth to the wall with screws.
next step mounted LED strip. For this it is necessary cut off the desired pieces are a multiple of the length of the plinth, subtracting 5 cm from it. All corner joints are made using a connector or soldering. Do not bend the LED strip, it is based on a printed circuit board, if the integrity of the strip is violated, it will fail.
In the case of gluing the skirting board, use a high-performance adhesive mixture, attach the skirting board to a bare wall. In case of poor fixation, use the first fixing method. The plinth must be mounted with high quality, because it is based on the electrical part of the lighting.
Useful video: How to properly solder the tape.
Next, perform the operations connection tape on the places of its bend, then glue it into the seat of the plinth. Please note that it is impossible to solder in one row (in series) and connect a tape longer than five meters to the power supply. In this case, you will have to lay a separate cable for the new section.
Connecting the LED strip
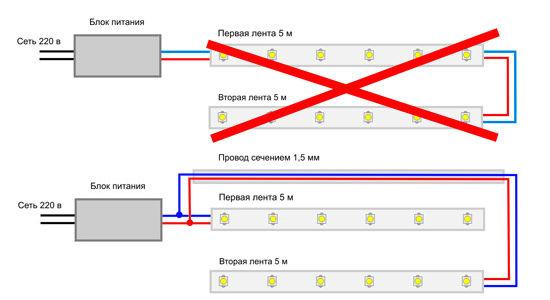
When buying an LED strip, it is necessary to calculate its power and choose the right power supply. If this is not found, two power supplies are installed. Each five meters of the tape is connected separately to the power supply, this type of connection is indicated below (the case for two power supplies). Do not connect more than five meters of tape in series.
This is caused by the resistance of the conductive core: all subsequent LEDs will become dimmer and most likely this will lead to burnout of the printed circuit board, or failure of individual modules. The cross section of the cable should be two cores of 0.75 mm.
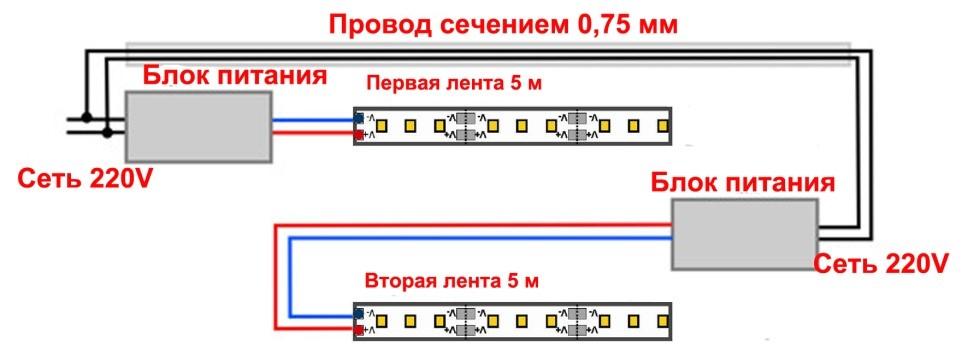
For decorative purposes, you can use two types of LED strip in one room, this will add zest to the night illumination of the room. Constant voltage LED strips have their own load resistance in the module, so it is possible to connect different types of LEDs in series to one power supply.
In case of application drivers special calculations are required. Therefore, choose a 12V DC power supply.
Motion sensor connection
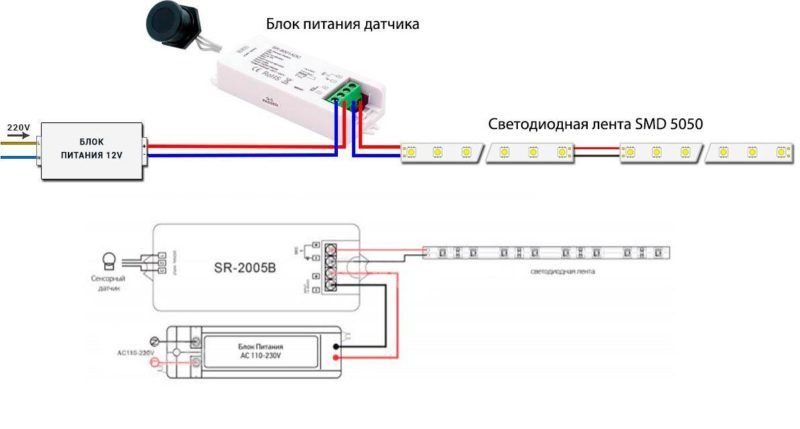
The motion sensor can be installed in any previously installed structure. The infrared sensor is mounted in a break in the power circuit. Instead of a tape directly connected to the power supply, an infrared switch block is placed, and the tape is already connected to it. The infrared sensor is small, in size does not exceed two centimeters in diameter.
Night illumination should light up on the way to the target, and since the sensor is remote, this will help us fix it in the right place. It does not require additional power. Three wires are connected to the infrared switch, which come with the control unit of the infrared device. The sensor can be installed in a plinth. He will not be on public display, but this will not prevent him from coping with the task.
Installation is desirable to be carried out at arm's length from the place where you will pass. The visibility range of such a device is from one to three meters, consult when buying.
Conclusion
Note that the installation of a luminous baseboard on the floor is a useful and competent solution. Due to the simplicity of the design, you can install it at any time. The motion sensor will perfectly perform the function of a night guard and will be waiting for your visit, and the ability to connect a light sensor to it will prevent the sensor from working in the daytime. The skirting board under the LED strip will not only create lighting-related conveniences in your home, but also fill the room with soft light. To avoid misunderstandings, choose only high-quality equipment and follow our instructions.