Ceiling lighting with LED strip under the plinth
Illuminated ceiling plinth is a modern solution that gives the room an interesting look. It is suitable for all types of ceilings - from stretch and plasterboard to suspended and multi-level. It can be used both as a decorative light and as a complete addition to the main lighting. But the most important thing is that you don’t need to invite an electrician for installation, it’s easy to do the work yourself, if you understand the nuances of installation.
Features of the organization of LED lighting with a plinth
This option has a number of features that are worth exploring before deciding to install it. It differs from other solutions in a number of ways:
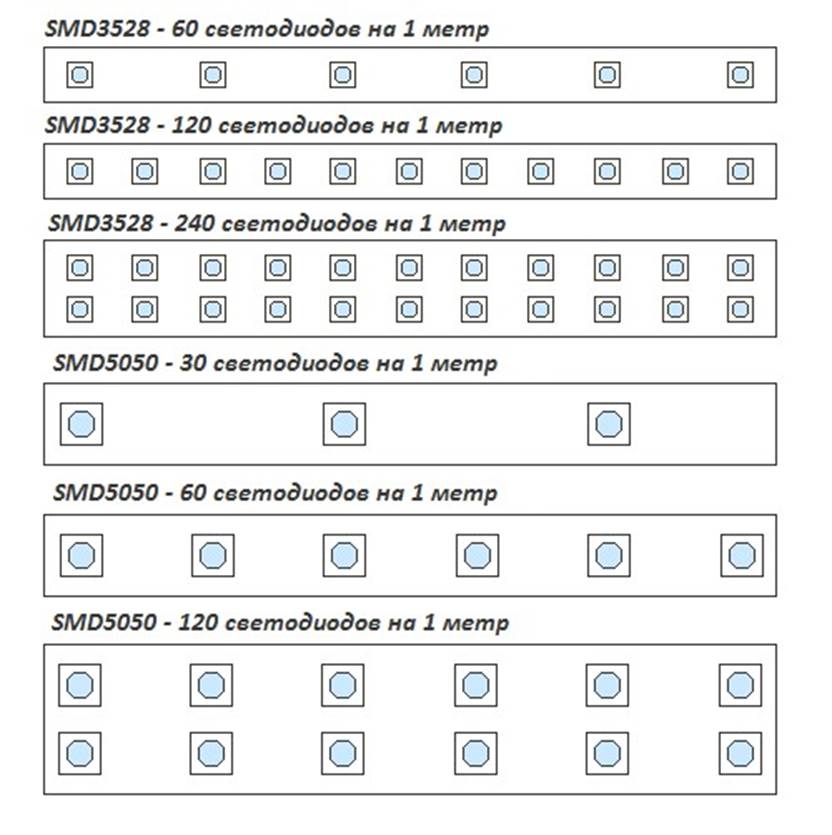
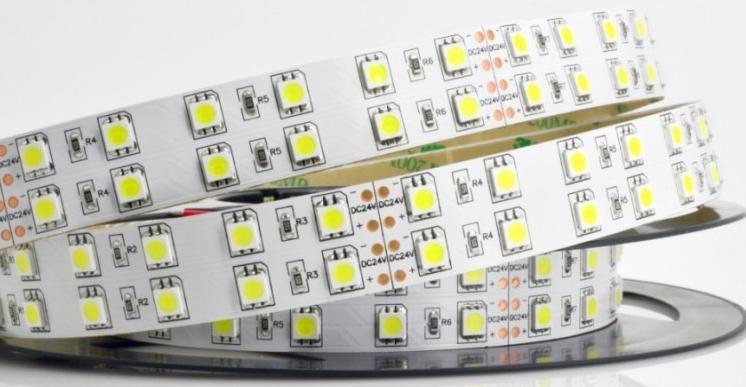
- Used as a light source LED Strip Light. This is a printed circuit board up to 3 cm wide, on which diodes are installed in one or two rows at equal distances.They can have different power and color, which allows you to choose what is more suitable for a particular room. For rooms with high humidity, it is better to take a tape in a silicone sheath, which is not afraid of dampness. For decorative lighting, options with a number of diodes from 30 to 60 per meter are suitable, for functional lighting - from 120 to 240.
![Ceiling lighting with LED strip under the plinth]() Examples of placement of LEDs with different density and number of rows.
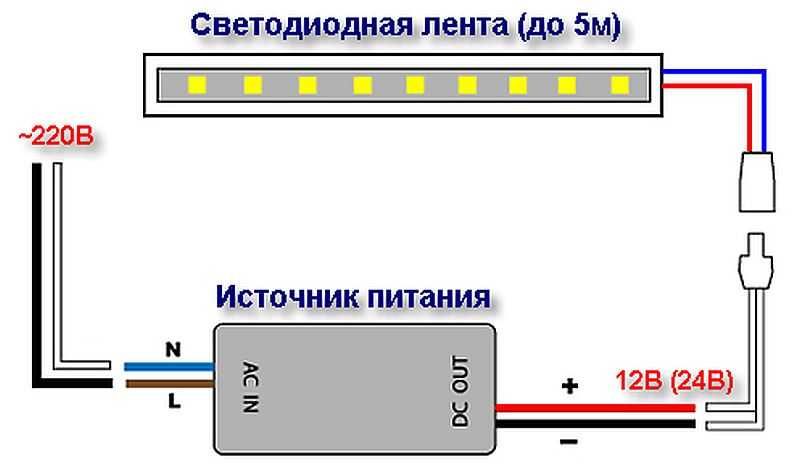
Examples of placement of LEDs with different density and number of rows. - Most often, the system works from power supply at 12 V. This makes it completely safe for humans and eliminates electric shock if the wiring is damaged. LEDs do not get very hot during operation, so there is no need to think over the cooling system, most often they are glued directly to the base, but it is better to use an aluminum profile that serves as a heat sink.
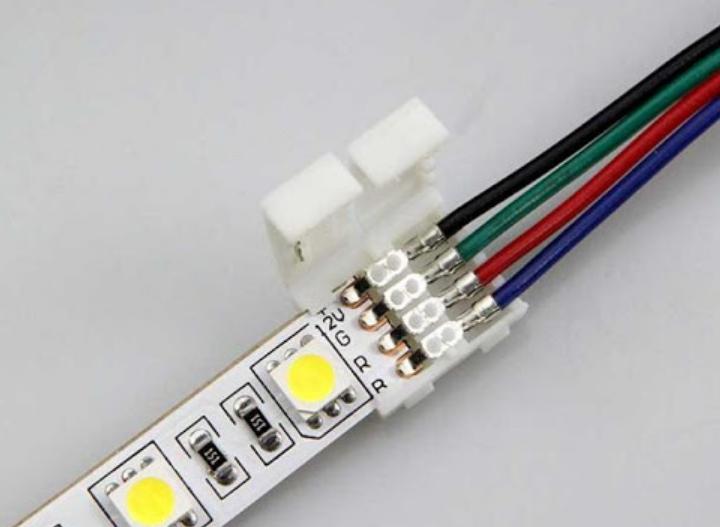
![Ceiling lighting with LED strip under the plinth]() Connecting the LED strip to the power supply.
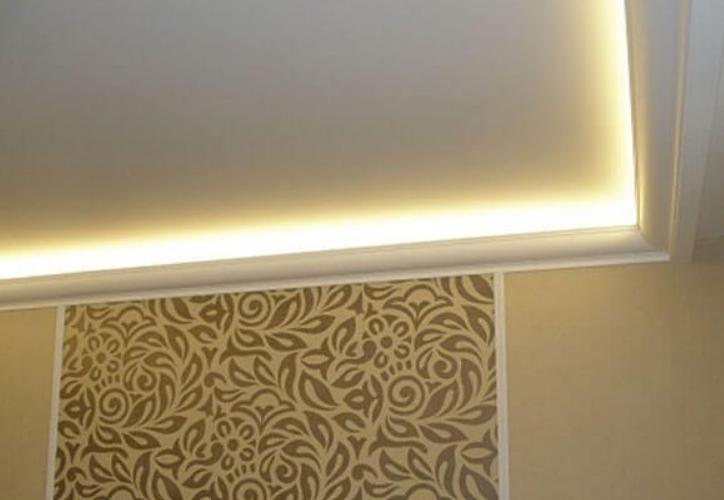
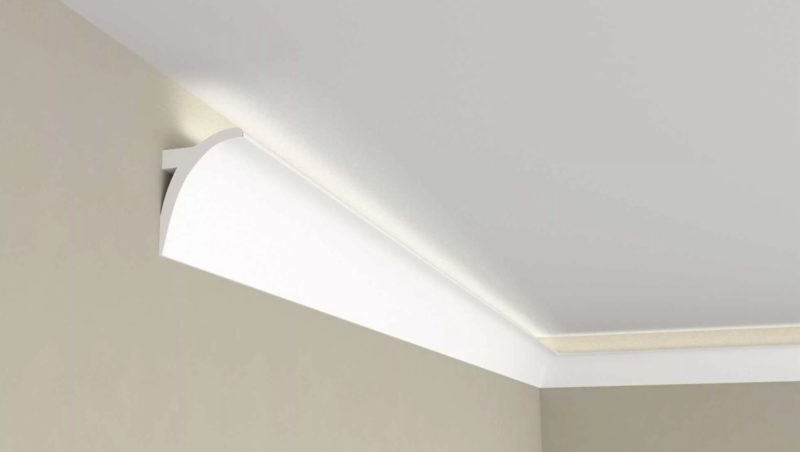
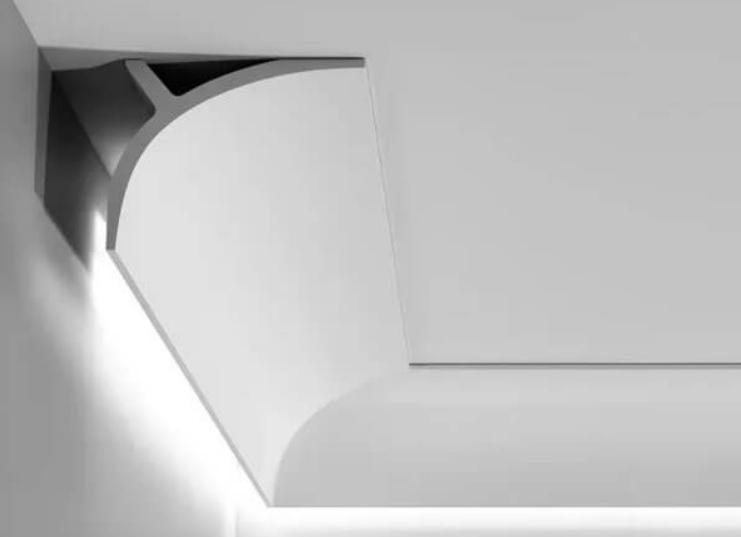
Connecting the LED strip to the power supply. - A plinth for an LED strip on the ceiling is needed in order to scatter light and distribute it evenly. If you do not cover the tape, then the diodes will simply shine with dots, which is not very attractive and does not give normal light quality. Due to the plinth, the luminous flux is reflected and scattered, a uniform illumination is obtained.
![Ceiling lighting with LED strip under the plinth]() Due to the use of a plinth, the luminous flux is uniform.
Due to the use of a plinth, the luminous flux is uniform. - For brightness adjustment it is better to install a dimmer, then it will be possible to achieve the desired intensity in a matter of seconds. Power supply power is selected based on the characteristics of the tape and the length, which can be up to 5 meters. If you need to lay more, then 2 or more pieces are used, unite parts are not worth it, as the brightness will suffer from this.
![Ceiling lighting with LED strip under the plinth]() The LED strip controller with power supply is small in size. Thanks to the use of the controller, you will have a remote control for the lamp.
The LED strip controller with power supply is small in size. Thanks to the use of the controller, you will have a remote control for the lamp. - It is best to use the backlit option by perimeter. But it is also suitable for highlighting one or two walls, if such a solution looks appropriate.
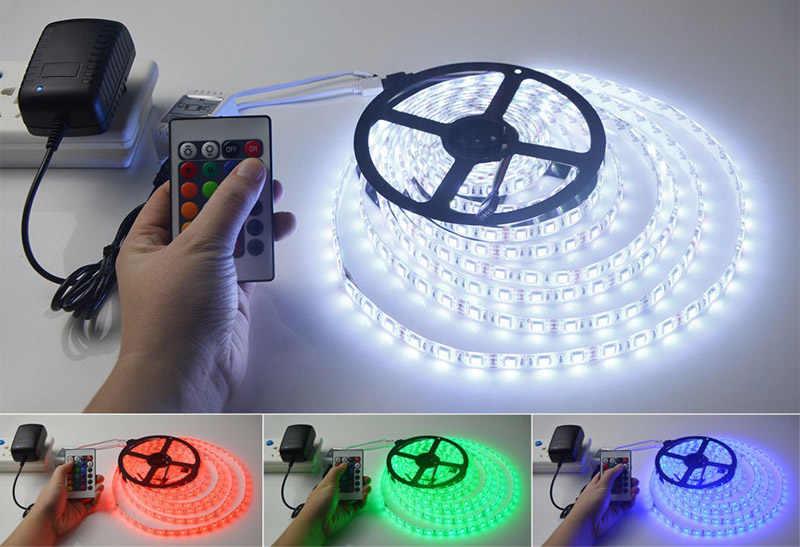
By the way! There are both single colors and multicolor ribbons, which significantly expands the possibilities of illumination. It can be adjusted to your liking.
Which plinth to choose
Baguette under the LED strip is easy to find. There are many options, each with its own characteristics. It is worth choosing primarily for the interior, since the plinth should be combined with the decor and organically fit into it. The most commonly used solutions are:
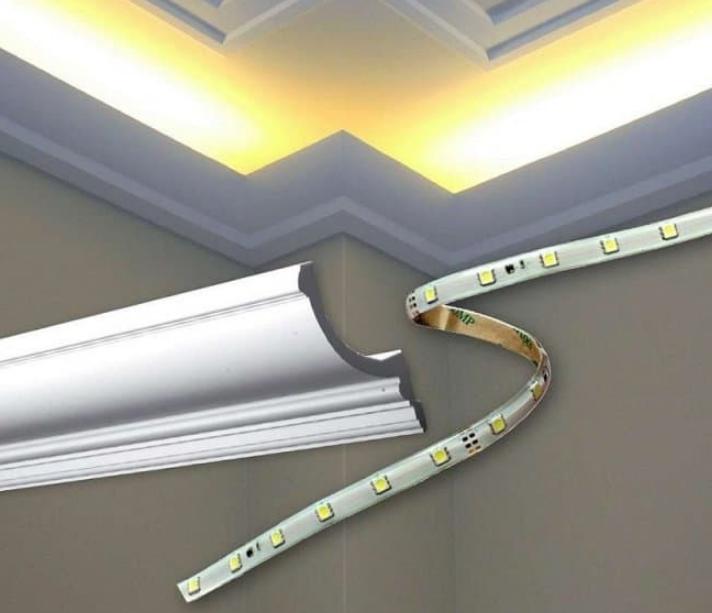
- Cheap foam board. Not designed for backlit use. But on sale you can find options for a suitable configuration inside which there is a cavity where the LED strip is placed. It is important to find a model that will provide the correct distribution of light. The tape cannot be glued to the foam, it is always installed on other surfaces.
![Ceiling lighting with LED strip under the plinth]()
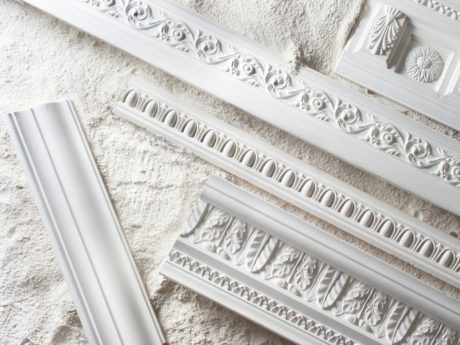
- The polyurethane options are much stronger than the foam ones and look better. You can adapt both ordinary models and find a baguette profile specially designed for installing backlighting. When choosing, the size of the protrusion must be taken into account, it is selected individually for the room, the style of execution must also be taken into account. There are also flexible elements, which is important for non-standard rooms with semicircular or other ledges.
![Ceiling lighting with LED strip under the plinth]()
- Duropolymer is a separate type of material.The plinth is formed due to high pressure, so it is durable and well resists adverse effects. Well suited for use with lighting, there are many models that initially provide for the installation of tape.
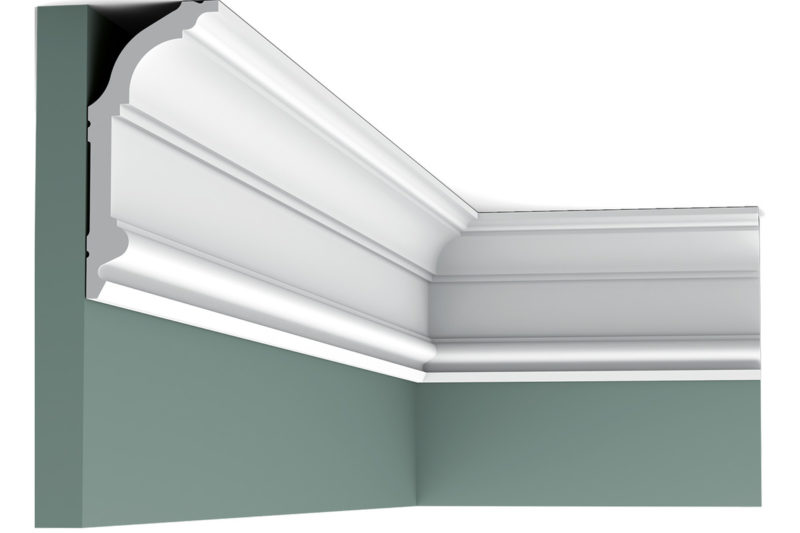
![Ceiling lighting with LED strip under the plinth]() Cornice KD 202.
Cornice KD 202. - Ceiling plinth with illumination for stretch ceilings. A special type that combines the function of a standard wall baguette, but at the same time has a niche for the tape along the wall. This is an installation, since the frame is installed when the canvas is pulled, and then you only need to glue the LED strip into the recess.
![Ceiling lighting with LED strip under the plinth]()
- Aluminum baguette. A modern solution that is suitable for high-tech style and other similar trends. Differs in durability and durability. If a glue tape on aluminum, it will serve as an additional heat sink, which will extend the life of the backlight.
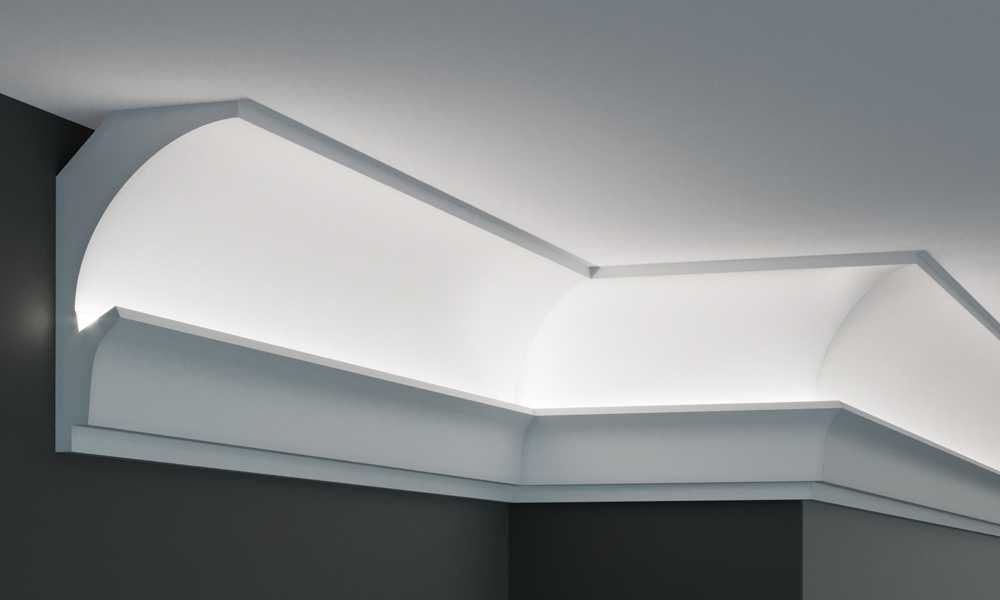
![Ceiling lighting with LED strip under the plinth]() It looks like a special plinth for stretch ceilings.
It looks like a special plinth for stretch ceilings. - Aluminum profile with niche for LEDs and diffusing insert. This option provides diffused light and can be used for both decorative and practical purposes.
When choosing the size of the skirting board, you need to remember a simple rule: massive options are suitable for large rooms with high ceilings. If the room is small and the ceiling is low, it is better to choose models of medium and small width.
Installation of plinth for LED strip
The work can be done with your own hands, the process is not difficult, but requires accuracy and accuracy. It is worth understanding all the nuances in order to understand in what sequence to install the plinth and what points you need to pay special attention to:
- The ceiling must be completely finished, since after attaching the plinth it will be difficult to paint or finish the surface around the perimeter. Therefore, if it needs to be painted, it is done in advance. Next, the optimal location of the plinth is determined. To make sure it looks good, it's best to attach the bar and see the result.
- Electricity is supplied. Since the tape is powered through the block, its location is selected in advance. If the skirting board is large, it can be placed inside. In other cases, it is worth hiding the equipment so that it is not visible. If you do not lay the cable in advance, then you have to spoil the finish.
- The bottom line of the plinth is marked. In order not to draw on the walls, it is worth using a laser level. A line is projected onto the surface, after which a masking tape of small width is glued along it. It is better to use the automotive version, as it is easily removed and there are no traces of glue left on the surface.
![Ceiling lighting with LED strip under the plinth]()
- The surface to which the baguette will be glued must be prepared. First of all, it is cleaned of dust, after which a primer is applied if the base strongly absorbs moisture. It is better to use a penetrating primer to strengthen the surface and improve the bonding of the elements.
- If the tape will be mounted on a wall or ceiling, it is better to do this in advance. Then the process will become more complicated due to the plinth. Everything is simple here - you can draw a line, since it will not be visible anyway. A tape is glued on it, for this a protective film is removed from its back. A terminal is pre-installed on the contacts or a wire is soldered. Be sure to check the performance of the system.
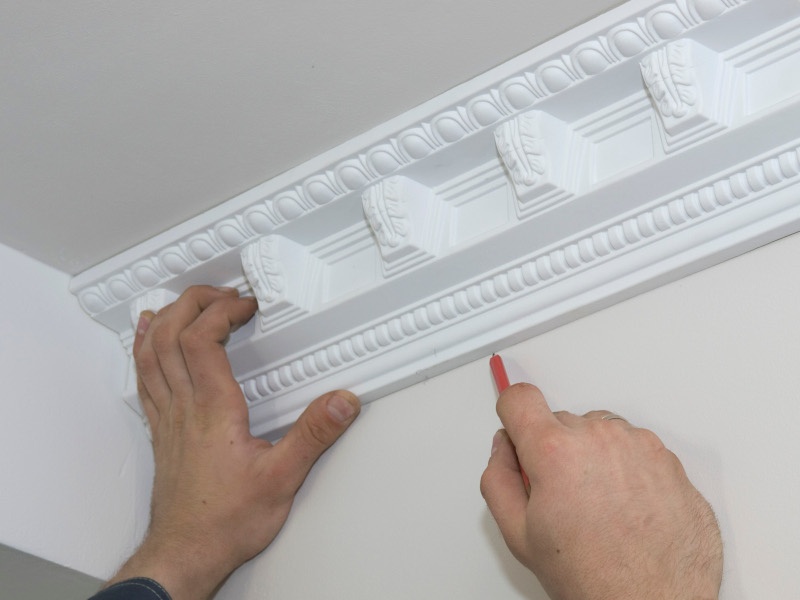
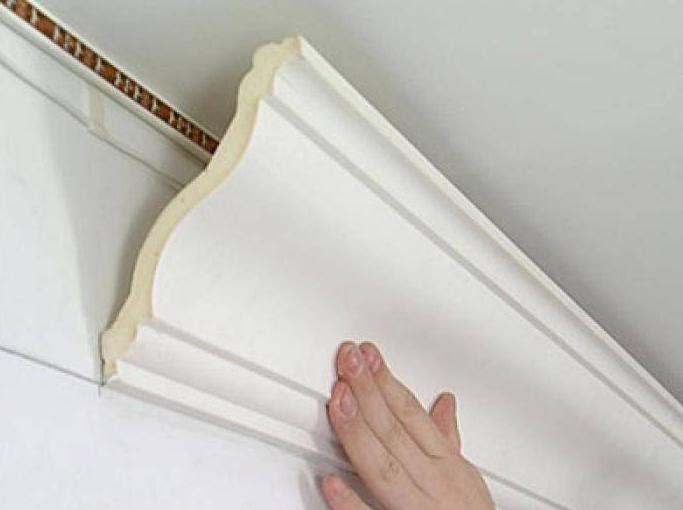
- The plinth is glued around the perimeter. The location of the elements should be selected so that there are as few joints as possible in prominent places.Glue is applied to the part of the baguette that is adjacent to the wall or ceiling. You do not need to put too much composition so that it does not crawl out when pressed. Usually the element is aligned along the line, gently pressed and fixed for 30-60 seconds, it all depends on the glue.
![Ceiling lighting with LED strip under the plinth]() When gluing, the surface with glue is firmly pressed against the wall.
When gluing, the surface with glue is firmly pressed against the wall. - To connect the elements in the corners, a miter box is used. This tool allows you to perfectly cut the ends at an angle of 45 °. The main thing is to make accurate measurements so that later there are no gaps between the pieces.
If the plinth is painted, the joints can be additionally puttied, then the surface will be perfectly flat.
If a special plinth is used for a stretch ceiling with lighting, then you just need to carefully insert it into the groove of the profile around the perimeter. The main thing here is to make sure that it becomes even and exactly docked in the corners.
Thematic video: Installation of a light baguette.
The optimal distance from the skirting board to the ceiling
There are no clear parameters, you can choose the indentation at your discretion. Depending on the purpose of use and the desired effect, the following recommendations can be distinguished:
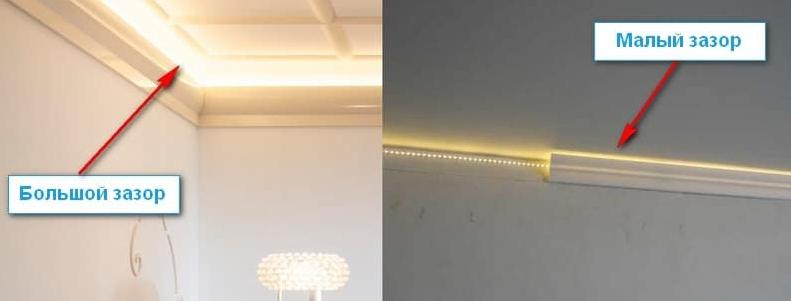
- If the backlight will serve only as a decorative element, the baguette is located close enough to the ceiling. A gap of 5 to 20 mm is enough to form a uniform light strip. In this case, the light flux will be more directional, so it will add expressiveness.
- To use the LED strip as the main or additional light source, the plinth must be lowered by at least 10 cm. But usually the distance is about 15 cm. In this case, several rows of tape are glued, and a diffuser of a suitable size can be installed outside.For such systems, only a massive wide plinth is suitable.
In ready-made strips for lighting, the location of the tape cannot be changed, keep this in mind.
LED strip placement options
The effect that will be created depends on the location of the light source. There are three main options, each of which has features:
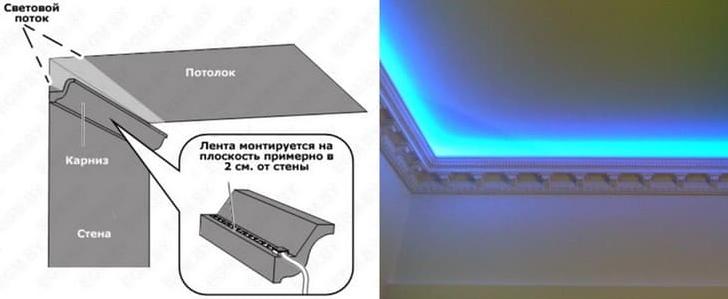
- Gluing to the skirting board directs the luminous flux to the ceiling. Due to this, a clear line is formed that fits perfectly into modern rooms.
- If you fix the light source on the ceiling or baseboard downwards, it will illuminate the surface of the wall. Most often, this solution is used in baguettes for stretch ceilings.
- The variant with gluing to the wall is the most common. The flow is distributed over the surface of the ceiling, providing soft lighting or full-fledged main lighting.
It is not difficult to make a backlight in the plinth, since it does not require special tools and fixtures. The main thing is to choose the type of baguette, determine the location of the tape and carry out the work according to simple instructions.