Scheme of connecting two lamps to one switch
When designing lighting networks, it sometimes becomes necessary to control two lamps with one switch. Technically, this task is not so difficult, but the lighting equipment market offers a wide range of devices that can solve this issue. To choose the best method, how to connect two light bulbs to one household switch, you need to understand some issues and nuances.
Schematic diagrams for connecting switches
In practice, connection schemes may vary. The differences depend mainly on the type of switch.
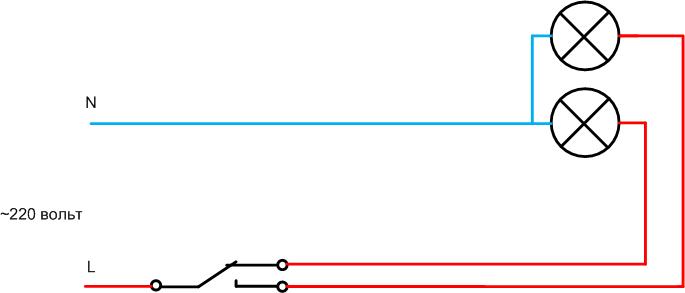
Single key
This switching device has only one contact group for closing, so it can only control two lamps at the same time, regardless of whether it is turned on.
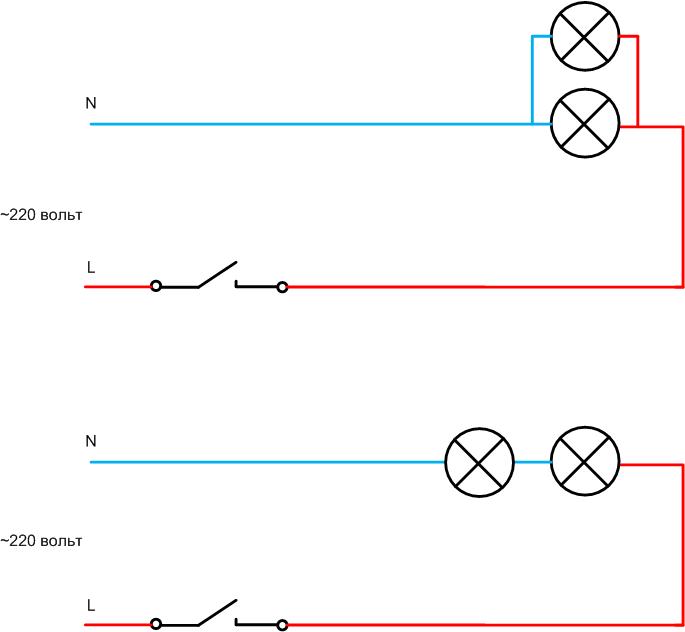
The switch when connected in parallel must be designed for the total current of two lamps, and when connected in series - for a current not exceeding the current of a less powerful device.
Hereinafter, the sequential circuit is shown mainly in theoretical terms, without the prospect of practical use.
For a more detailed wiring diagram for a switch with one key, read this article.
Two-key
A two-button switch can control two lamps separately, so a series circuit is not practical here, even theoretically.
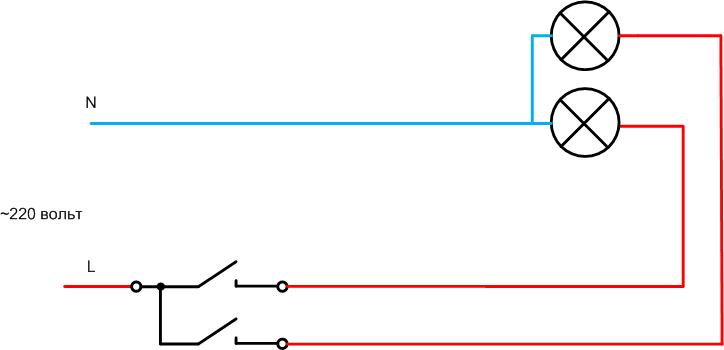
When two buttons are closed at the same time, the lamps turn on in parallel. The contact group of the circuit breaker must be designed for a single load.
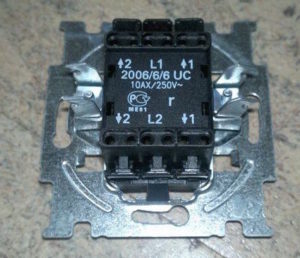
checkpoint
Devices of this type can be two-key and one-key. The wiring diagram will vary.
Pass-through single-key
A single-key pass-through device can be used as a regular key, while one terminal will not be used.
There is little practical sense in this, because such a switch is more expensive than usual. But if there is no other at hand, then this method can also be used.
Another option for using a changeover contact group is to control two lamps with alternate ignition. Depending on the position, only one lamp will be lit. The problem with this circuit is that it is impossible to turn off both lights without additional elements. Therefore, the actual application of such an inclusion is doubtful.
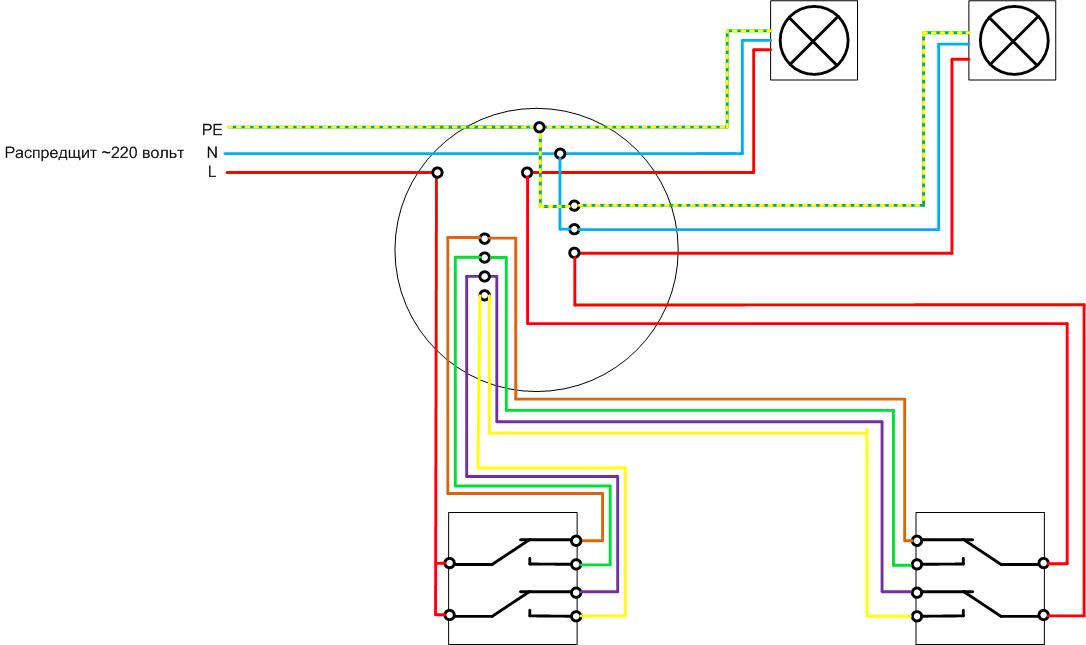
Two-gang through passage
With the help of two two-button walk-through switches, it is possible to organize separate control of two lamps from two different points.
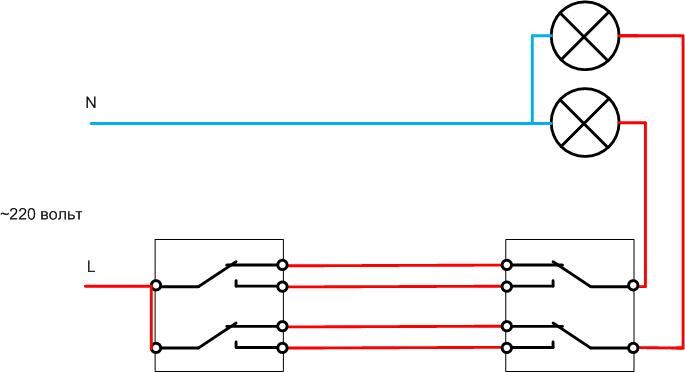
This can come in handy when lighting a long corridor or a large room, when you have to choose between full brightness or half brightness. Also, such a scheme is useful in bedrooms - when you need to turn on the light at the entrance, and turn it off next to the bed. And you can choose between spot and main lighting.
Other Connection Methods
There are other methods of connecting two lamps to one switch. Some of them are not very widespread, but they should be considered.
Via voltage converter
Local lighting is often performed on low-voltage spotlights or halogen lamps, designed for a power supply of 12..48 volts. To power them, you need a high voltage to low voltage converter.
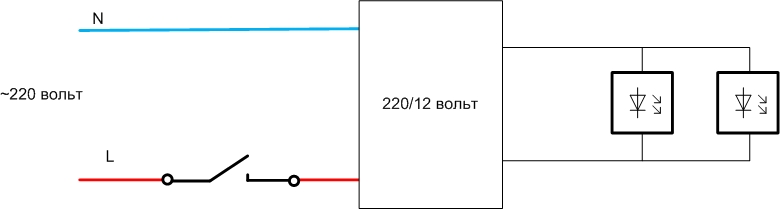
It is advisable to connect both lamps to one transformer of sufficient power - this will be cheaper than installing two separate transformers.
The light switch must be installed on the side of 220 volts. From the low voltage side with the same power, the switching currents will be higher, this can lead to a decrease in the service life of the contact system of the switch. In addition, specialized converters may have a voltage supply algorithm to initiate the glow, for example, of halogen lamps. This algorithm is worked out when a 220 volt power supply is applied to the converter, and when switching from the low side, the lamps may simply not light up. Therefore, if it is necessary to turn on the lamps separately, it is often necessary to install two power supplies.
| Lamp | Type of | Supply voltage |
| D.I.M. Halostar Osram | Halogen | 12 V |
| Halogen lamp Novotech GY6.35 | Halogen | 12 V |
| Varton 6,5W 4000K | LED | 24, 36 V |
| IN HOME LED-MO-PRO | LED | 12.24V |
| UNIEL LED10-A60/12-24V/E27 | LED | 12.24V |
Connection from an existing outlet
There are situations when it is necessary to equip additional lighting in an already installed power supply system. To minimize labor costs, you can connect the fixtures from an existing outlet. N and PE conductors must be taken directly from the socket terminals and laid to the fixtures. The phase wire is taken from there, but there will be a gap in it, in which it is necessary connect light switch. A wire will go from the switch to a lamp or two.
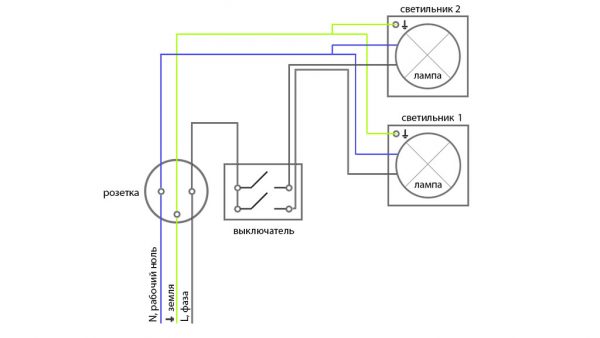
As an example, a diagram with a two-button switching device is shown.With a single-key, the same principle applies, only one wire goes from the switch to the lamp.
Mounting with junction box
If the lighting system is mounted from scratch, then the wiring must be done using a junction box. This is a professional solution. The specific option depends on the chosen scheme, but the general principle is as follows:
- a three-core cable with conductors L (phase), N (working zero) and PE (protective conductor) is brought from the switchboard into the box - it may not be;
- N and PE go to the fixtures in transit (if necessary, they branch into a number of branches equal to the number of fixtures);
- the phase wire has a break into which the switch is connected; for this, a two-core cable for a single-keyboard or a three-core cable for a two-key device is lowered from the box.
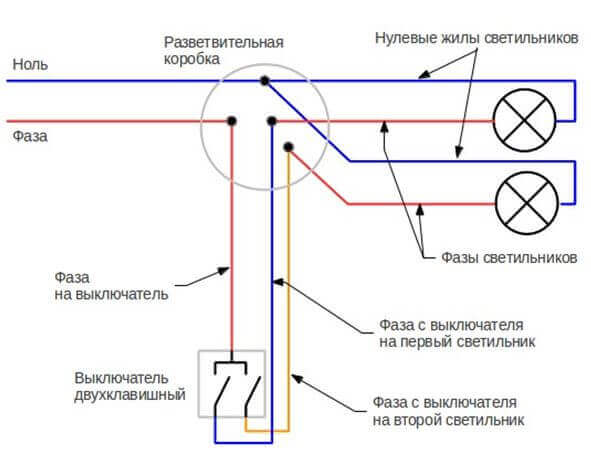
The implementation of this principle is shown in the diagram for the case of a two-gang switch. If two pass-through devices are used, then installation becomes more complicated, especially if there is a PE conductor.
To simplify work and reduce the risk of errors, you should:
- apply cables with marked conductors (color or numbers);
- use a junction box of increased diameter;
- if possible, the connections between the feed-through switches should be made with a cable, without going into the box.
It is impossible to ignore the PE conductor gasket, if present.
Thematic video.
Installation instructions
Installation of switches is carried out in several stages. Each of them has its own characteristics.
Wall preparation
It is possible to lay cable products open or closed way. This step depends on the type of wiring selected.
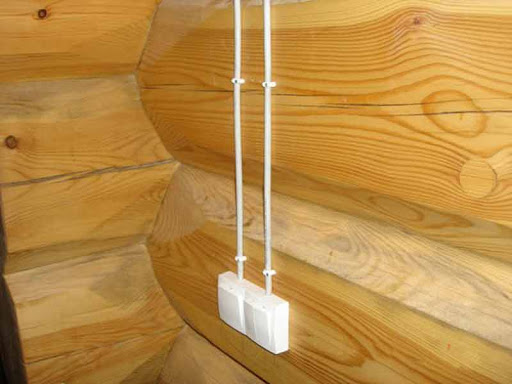
If an open method is chosen, it is necessary to determine the places for attaching distribution boxes, sockets and switches (in this place it is necessary to mount platforms for installation), to outline cable routes. The cable can be attached:
- on plastic staples;
- on supports (wiring in the style of "Retro").
It is also possible to lay conductor products in cable ducts.
If hidden wiring is chosen, then, after determining the installation locations of electrical appliances, it is necessary to make channels (strobes) in the walls for laying the cable and recesses for installing plastic boxes. After laying the wiring products and outputting the wires to the junction boxes and socket boxes, the strobes are plastered and work on the interior arrangement is carried out.

Junction box connections
The wires brought out to the junction box must be prepared - shortened, removed the common sheath and stripped the ends by 1-1.5 cm. This can be done using a fitter's knife.
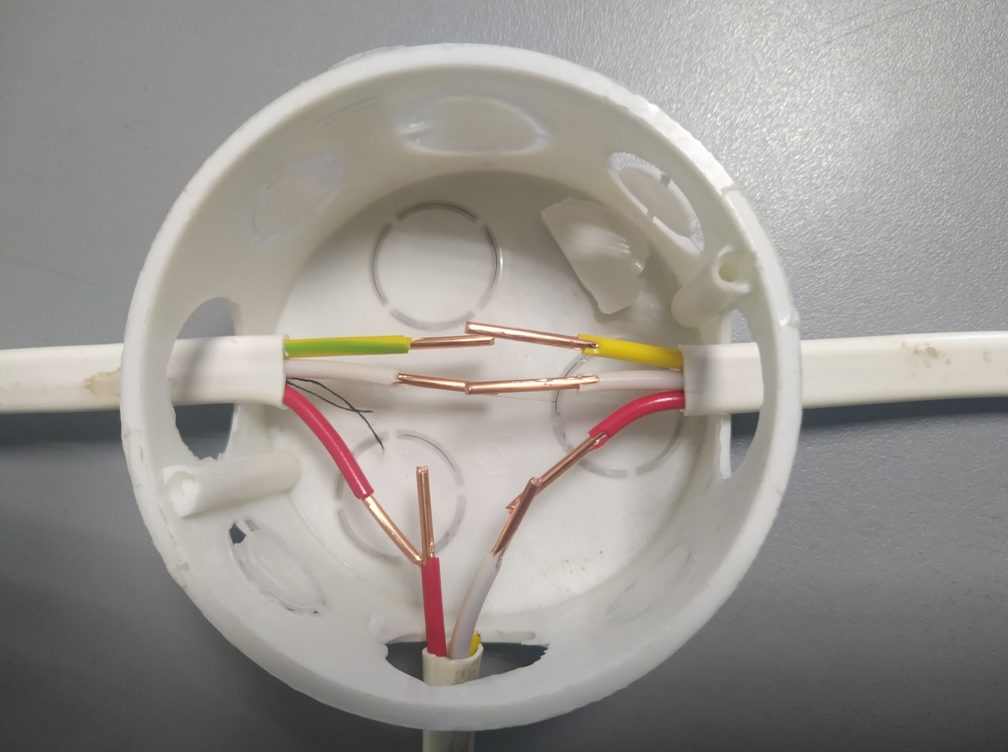
Next, you need to perform the connection of conductors according to the selected scheme. You can connect the cores by twisting (preferably, followed by soldering). After that, the ends must be insulated. You can also use modern clamping terminals.
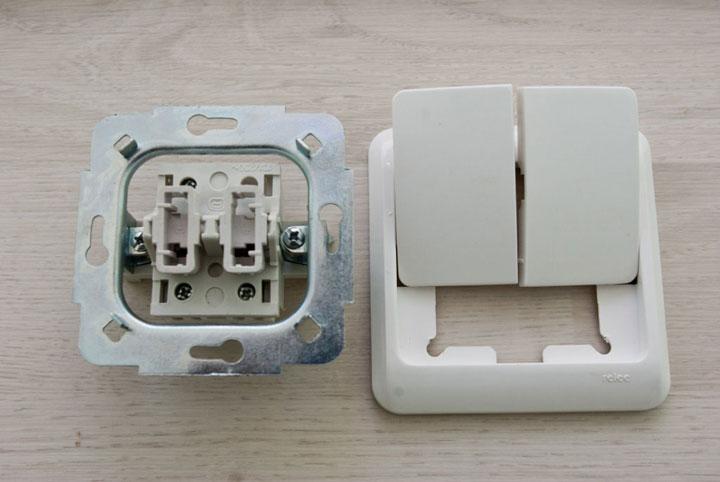
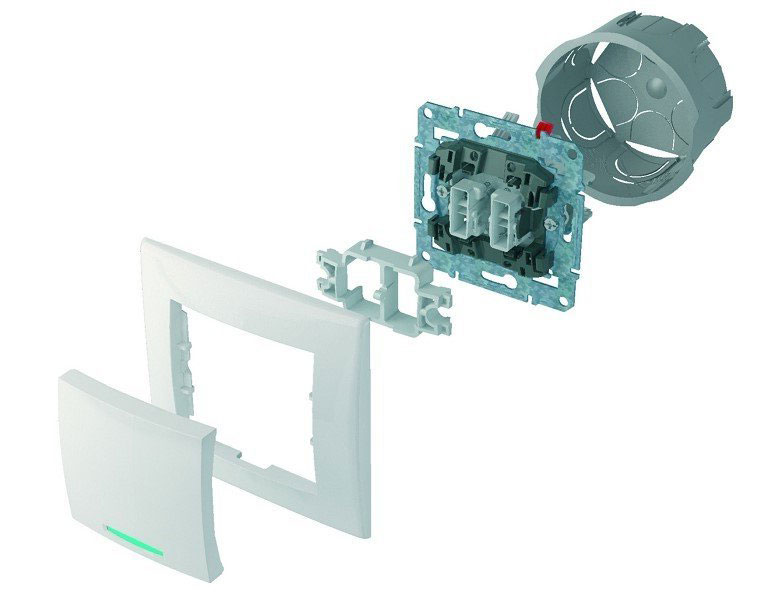
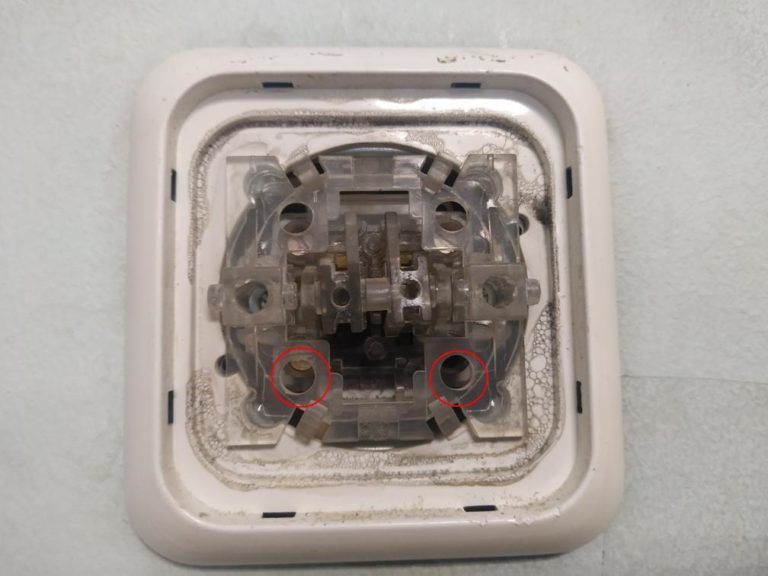
Switch installation
The installation of the switch, regardless of its design (consignment note or internal), also begins with shortening and cutting the cable.
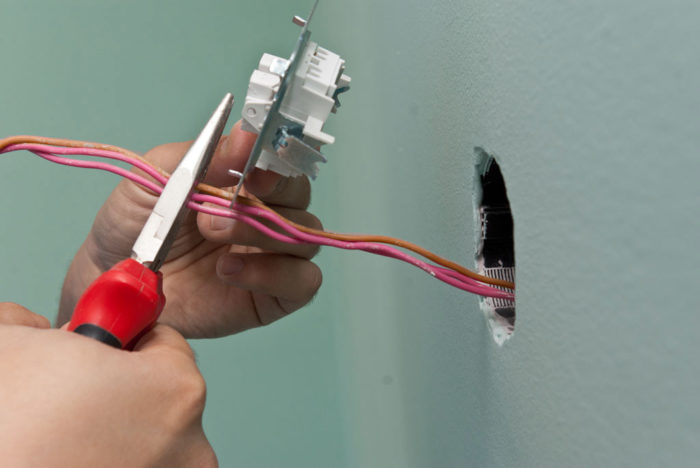
Then the switch must be partially take apart – remove the keys and the decorative frame. The next step is to connect the wires to the switch terminals. Screws must be securely tightened in the clamping terminals. The spring clamps will clamp the wire themselves.
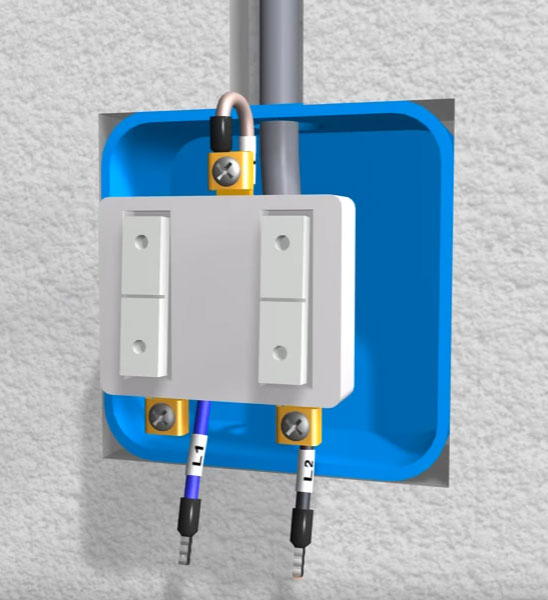
Then the switch is installed in place, fastened according to the design, decorative plastic parts are installed.
Connecting two lamps
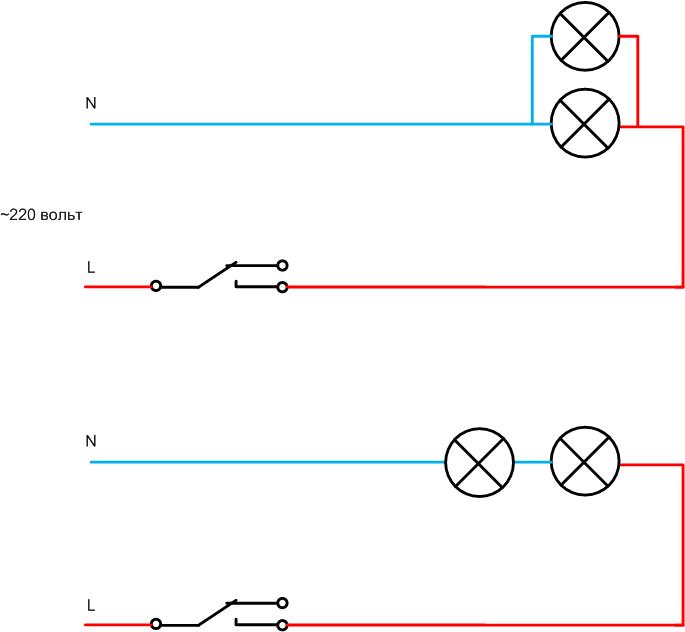
There are only two options for connecting light bulbs to one switch:
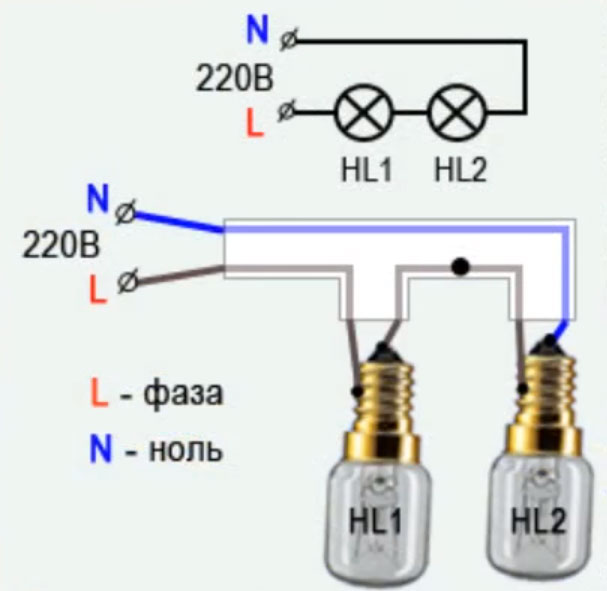
- sequential;
- parallel.
When mounted in series, the lamps are connected to each other by a wire, and the power cable is connected to the remaining free terminals - as in the diagram. In some cases, phasing may be required. Then a phase conductor is connected to the input L of one lamp, the input N is connected to the input L of another lamp, and the neutral wire is connected to the remaining free terminal N of the second lamp.
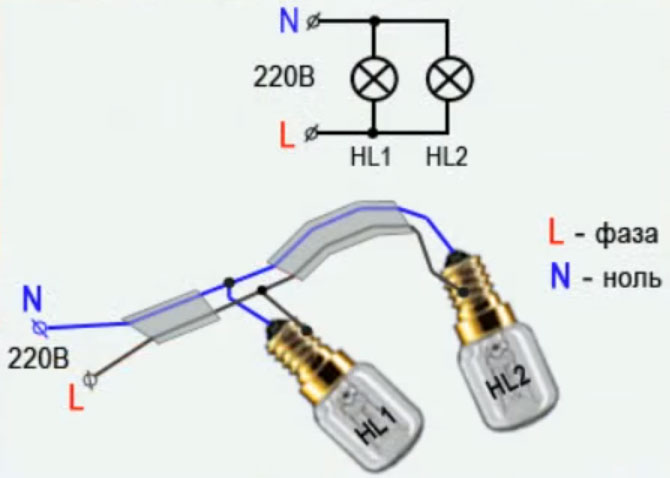
If it is required to connect two lamps in parallel, then the conductors L and N are connected to the terminals of the first lamp, the second piece of cable is connected to the same terminals, forming a loop. The second end of the loop is connected to the L and N terminals of the second lamp, etc.
Conclusion and Conclusion
A feature of connecting two devices to one switch is that you need to have a clear idea of how the parameters of the electrical circuit will change as a result. Where the current will increase or decrease, how the voltage will be distributed between the lamps, what kind of illumination will result, etc. And this assessment must be made before the start of installation, and even before the purchase of materials. Drawing a diagram and counting parameters on paper takes time, but is inexpensive. It will be more expensive to change the installation of a ready-made, but ill-conceived network.But a thoughtful approach will help achieve the expected result, and the lighting system will last a long time.