How to connect spotlights correctly
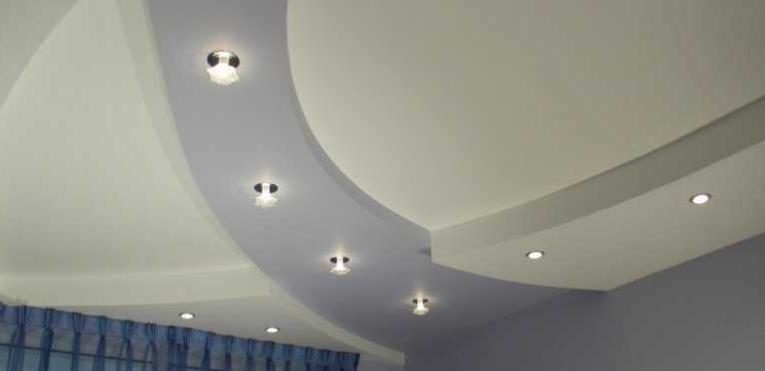
Spot lighting is convenient to use, it is used as the main and additional lighting. For normal operation of the equipment, it must be properly installed and connected. The process requires accuracy and care, but if desired, it can be performed by anyone, there is nothing complicated about it.
Features of installation in different types of ceilings
Ceiling lights are connected after their installation. Since the body is hidden under the surface, such models can only be used in hollow structures. Most often, work is carried out on PVC ceilings, drywall, as well as in tension systems. Each type has its own characteristics, so it is worth exploring the option that is needed in order to properly install the fixtures.
Stretch ceiling
In this case, part of the work must be carried out before stretching the canvas, since then it is impossible to do this. First you need to find out how much the ceiling level will drop in order to assemble racks for mounting lamps or install ready-made ones. Work instructions:
- Make a diagram with the wiring and the location of the fixtures on the ceiling. This will help calculate the right amount of cable and fasteners, as well as corrugated hose, if needed.
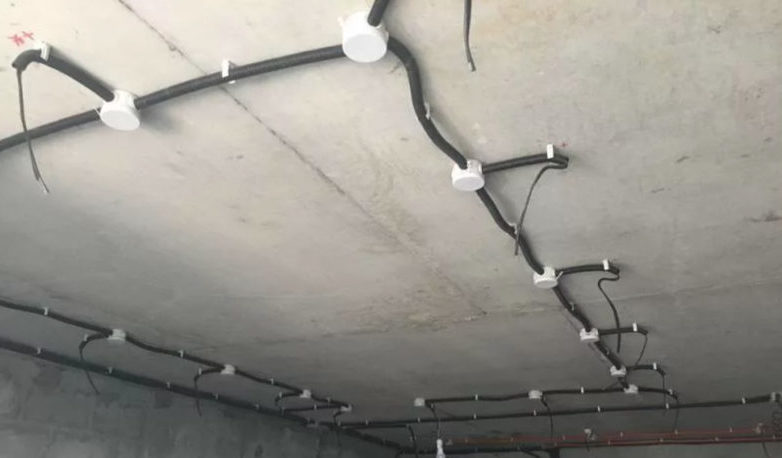
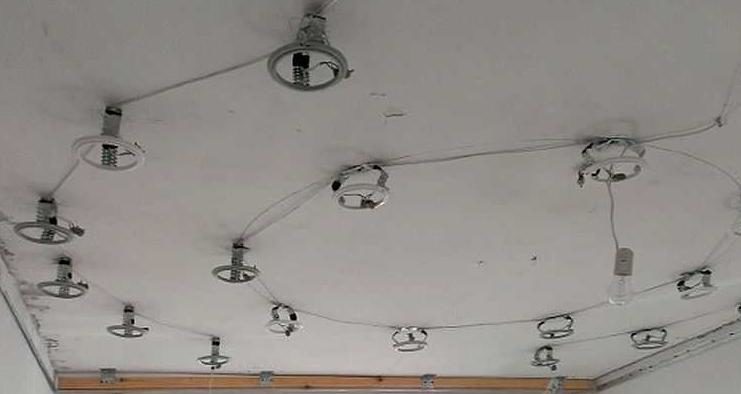
![How to connect spotlights correctly]() Electrical wiring in a corrugated sleeve.
Electrical wiring in a corrugated sleeve. - After measuring, put marks on the ceiling where the lamps will be. Conduct wiring with a margin, so that later it is convenient to connect, the wire should hang below the surface of the stretch ceiling by at least 10-15 cm. Fasten with special clamps.
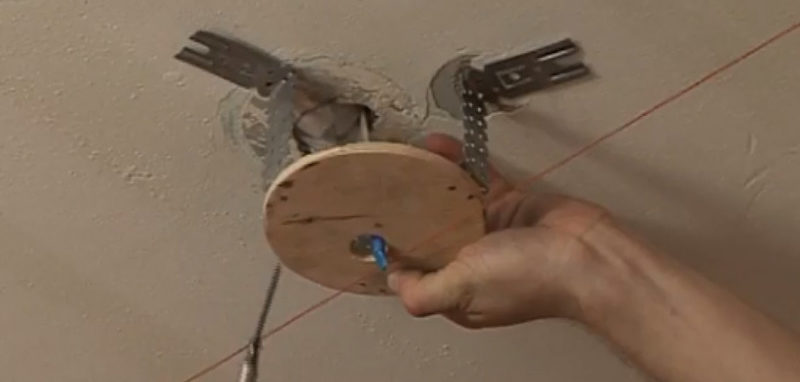
- Place a stand for mounting the lamp housing. The easiest way is to buy a ready-made version with the ability to adjust the height. But you can make them yourself from a plastic ring or a piece of plywood and drywall hangers. Fix the structure to the ceiling and press it to the surface so that it does not interfere.
![How to connect spotlights correctly]() Homemade plywood mortgage.
Homemade plywood mortgage. - When the ceiling is stretched, you can begin to install fixtures. Finding the location is easiest by touch - lightly press on the surface in the right place and find the center of the hole in the rack. Then grease the mounting ring with glue and glue it from the outside. The glue will dry in 3-5 minutes.
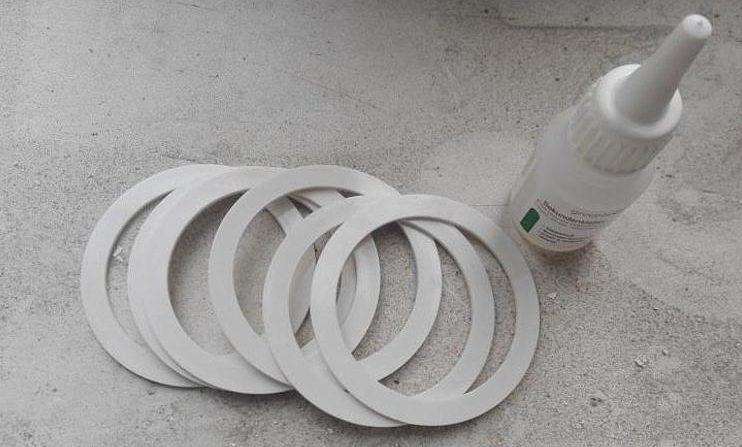
![Rings and glue for stretch ceiling.]() Rings and glue for stretch ceiling.
Rings and glue for stretch ceiling. - Carefully cut out the canvas inside the ring. Adjust the stand so that it is flush with the surface, pull out the cable. The ends of the wires on the lamp should be stripped, then connected to the cable using a block.
- Gently press the latches, insert the lamp into the hole. Check if the light turns on.
Note! You also need to connect overhead point options. But they may have a different type of attachment, so check this in advance.
For normal installation, there must be a distance of at least 5 cm between the ceiling and the lamp, and a little more is better. Please check when buying hull heightso that later it does not turn out that he rests on the ceiling.
It is described in more detail in a separate article.
Plasterboard ceilings
Mounting lamps on drywall is convenient if you prepare correctly and do not miss a single important nuance. Here you also need to carry out part of the work before installing the sheets, since then it is inconvenient to do this. Follow the simple instructions:
- Make a diagram with the location of the equipment, think over the connection. Calculate how much cable and other materials you need, buy everything you need.
- Fix the wire to the ceiling with any suitable fastener. If necessary, lay it in a fire-resistant corrugation. Do not just put the cable on the frame, this is wrong.
- Bring the ends to the places of future installation of fixtures. Leave a margin of about 20 cm to make it convenient to connect. After that, you can attach drywall to the frame and putty it.
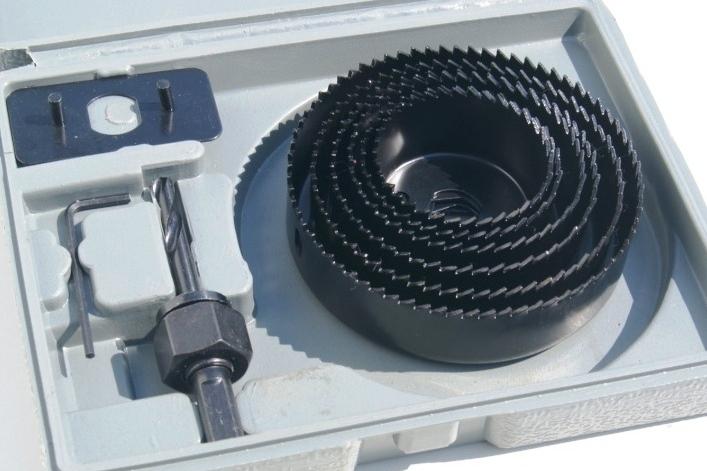
- Holes are best made with a crown on drywall or wood. The diameter must correspond to the size of the lamp. Finding the wire is easy - you need to put your hand in, feel and pull it out.
![How to connect spotlights correctly]() Crowns for wood or drywall are also suitable for plastic.
Crowns for wood or drywall are also suitable for plastic. - Connect the luminaires with blocks to the cable. You can check their operation before installation in drywall by turning on the power supply.If everything is fine, you can continue.
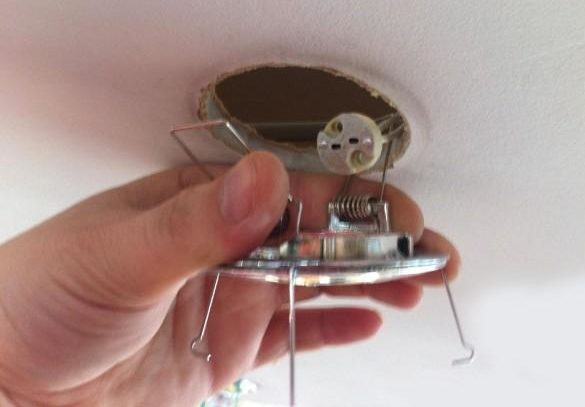
- Insert the housing into the hole, holding the clamps with your hands. After the lamp enters to the end, they will open and hold. It is even easier to do the job if the outer ring is removable and can be pre-installed.
Similarly, furniture lamps are connected, only there you need to drill holes not in drywall, but in chipboard or other material. It is best to use models with LED bulbs, as they consume the least amount of electricity and almost do not heat up even during long use.
PVC panel ceilings
Before connecting to a false ceiling made of plastic panels, a number of preparatory work must be carried out. This option has its own characteristics that need to be considered. The wiring diagram is done in the same way, the installation of the cable is no different, so it makes no sense to disassemble this part of the work. As for the installation of fixtures, you need to follow simple tips:
- Work should be carried out simultaneously with the fastening of the panels. When the turn has come to the element in which you need to make a hole, put it on the ceiling, mark the center of the future location of the lamp, at the same time make sure that the wire is connected correctly and its length is enough.
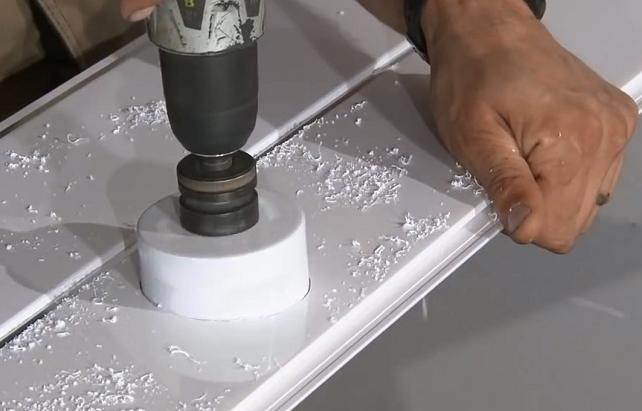
- It is better to draw a circle with a compass so that there is a guide. The easiest way is to cut through wood or drywall with a drill with a crown, the work will take a few seconds. If there is no crown, then first carefully cut through the upper part around the perimeter with a construction knife, then cut out a circle. Do the job carefully, do not go beyond the outlined line.
![How to connect spotlights correctly]() The crown makes a perfectly shaped hole in seconds.
The crown makes a perfectly shaped hole in seconds. - Put the panel in place, pull the ends of the cable through the cut hole. Fix the element, and then connect the wires with a block (twisting is undesirable).
Note! In narrow panels it is better to make holes at the joints, in wide panels - approximately in the middle.
Connect all lights in the same way. PVC can deform when heated, so spotlights with incandescent and halogen options cannot be placed in a plastic ceiling. LEDs work best.
Read more about installation in a plastic ceiling. here.
Wiring diagram when connected to a 220 V network
This is the easiest way and does not require the installation of converters. Most modern fixtures are designed for a voltage of 220 V, so there will be no connection problems. It is necessary to choose the appropriate scheme, since there are two main options and each has its pros and cons.
Sequential option
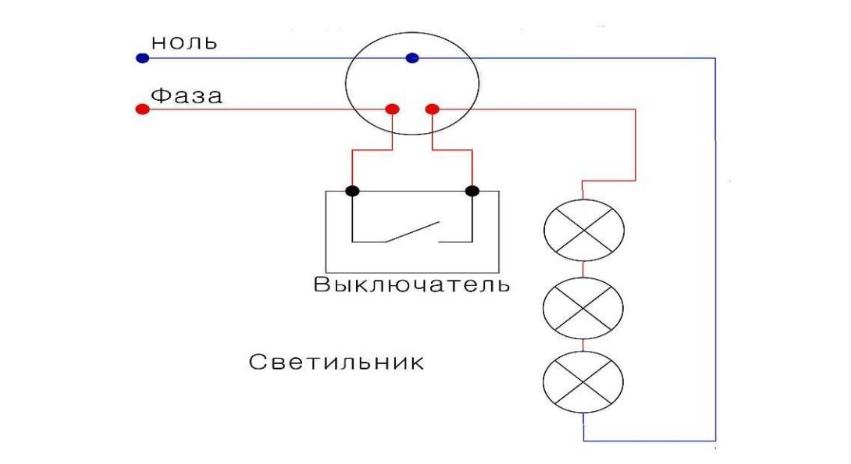
Connecting spotlights in this way is simple and has the lowest cable consumption. But at the same time join in consistent chain costs no more than 6 lamps, otherwise the wiring will be subjected to high loads and the risk of overheating will increase significantly. You should connect like this:
- Start the phase on the switch, stretch from it to the first lamp. Connect it to the next and so on until the last element.
- Zero must be led directly to the last lamp and connected only there. As a result, when the light is turned on, the circuit will close and all the bulbs will light up at the same time.
- If there is grounding, then it is fed to the corresponding contact of each lamp.You can connect the ground from the nearest switch or socket.
- It is best to use not a cable, but single-core wires, since one goes directly to the last lamp, and the second is constantly broken. That way you can save.
Since the energy is distributed to all the bulbs when connected in series, the light may be dim. But if you put LED options, then there will be enough voltage and there will be practically no difference in brightness.
Remember! If one bulb burns out in a series circuit, then all of them will stop working. You will have to remove them in order to find the failed one and replace it.
Parallel connection
This connection scheme assumes a separate connection of each lamp, which allows all lamps to work with the maximum possible power. The option is the most popular, it is used almost always. Suitable for any number of built-in luminaires. The first type is a daisy chain connection, the features are as follows:
- The method is quite simple and involves the supply of wire to the first switch, from it to the second, and so on until the very end. The phase goes through the switch, and zero from the junction box. It also connects to all lamps in series.
- If a two-button switch is used, then the circuit becomes more complicated due to the larger number of wires and the connection of two independent circuits. At the same time, the principle of operation remains the same.
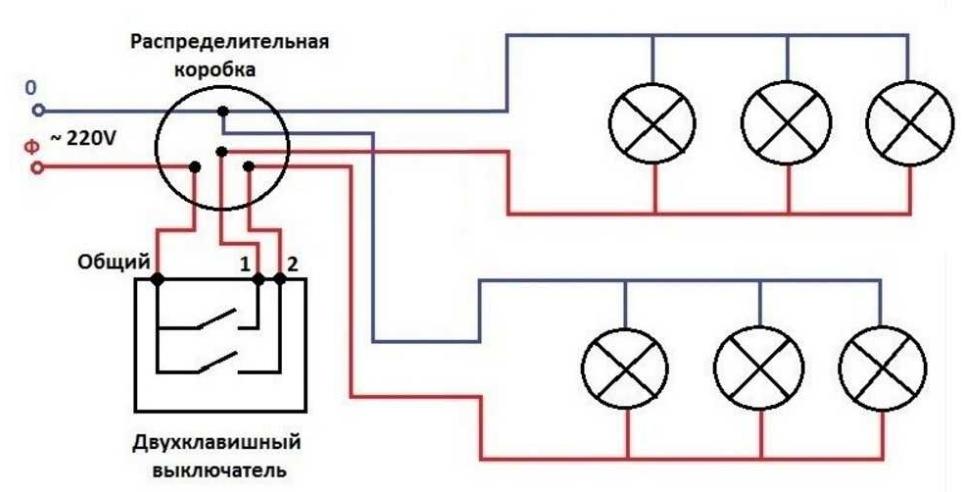
If one light bulb burns out, then everything behind it stops working. Therefore, it is very easy to determine the burnt element.
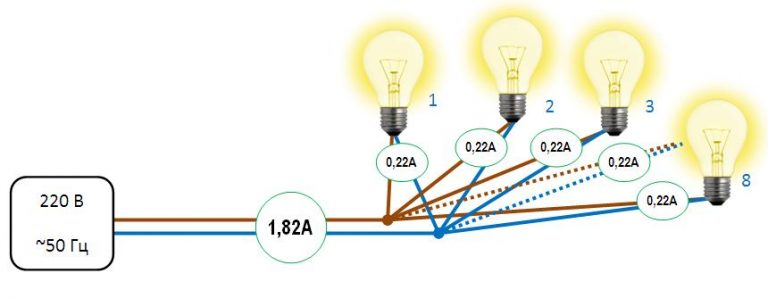
Beam connection is the most difficult, but also the most reliable and practical.In this case, the most cable is consumed, since it is led to each lamp separately. Before starting work, you need to bring the supply core to the middle of the room so that there is approximately the same distance to all the lamps. Remember the following:
- Run a separate phase and zero wire to each lamp separately. The layout is similar to the rays of the sun, hence the name.
- The main thing is to make a reliable connection, since a large number of wires can be connected to the supply core. To do this, you can use soldering, buy a special block or adapt a standard screw block as shown in the photo below.
- Due to the complexity and large amount of cable, the method is used less frequently than a daisy chain connection. The main problem is a reliable connection of several wires.

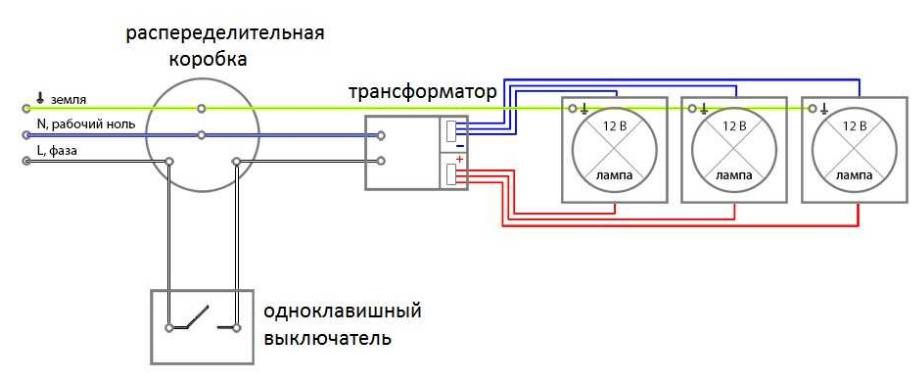
Connecting 12 V spotlights
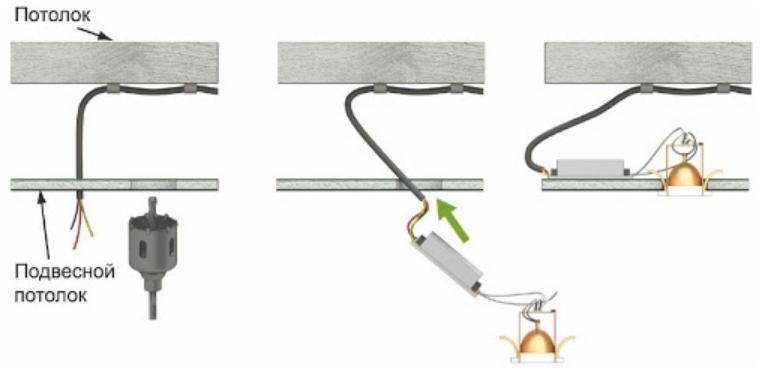
Connecting recessed fixtures with 12 V LEDs differs from the usual version in that there is a converter in the system. It lowers the voltage and supplies it to the lamps.
The phase wire must first be brought to the switch, from it to the converter. Zero should be brought directly into the block, and from it already distributed among the lamps, do the same with the phase. The earth is led directly to the equipment, it does not go through the block.
If you need to connect the light through a double switch, you need to use 2 converters. If you need to implement several modes, it is better to put a dimmer.
This video shows you how to properly wire your spotlights.
How to choose a transformer
In order for LED spotlights to work properly, you need to correctly determine the power drivers. To do this, you first need to sum up the indicators of all lamps. Add about 20% margin to the result. For example, if the total power of the fixtures is 200 W, then the transformer must be set to 240-250 W.
If there are a lot of lamps and a powerful converter is needed, it is easier to distribute the load between two drivers. It will come out cheaper than one, but powerful. In addition, you will save space, as the size of the case increases greatly with increasing power.
Connecting spotlights on your own is not difficult if you figure out how to install them and choose the right scheme. The main thing is to use a quality cable and make the connections as reliable as possible.