Installing a chandelier on a stretch ceiling
The stretch fabric greatly complicates the installation of lighting fixtures, and without knowing some of the nuances, most ordinary people who try to work with it on their own make unforgivable mistakes. However, you can not involve specialists from outside, if everything can be done independently. Before hanging a chandelier on a stretch ceiling, it is enough to study the materials presented in the article and simply follow the instructions.
How to choose a chandelier for a stretch ceiling
The first difficulty faced by consumers is the choice of model. Spot lighting in the form of spotlights is most often used for stretch ceilings, but as time has shown, classic chandeliers have remained in trend and are perfectly combined with spots. Since the canvas deforms when heated, the only nuance that must be taken into account when choosing a model is the maximum temperature emitted by the device at its peak.Accordingly, if it is planned to use incandescent or halogen lamps in the chandelier that give out more than 200 ° C, then you need to choose such samples, the cartridges of which are located at a distance of at least 30 cm from the ceiling. In this case, pendant-type lamps are suitable.
Temperature restrictions do not apply to relatively cold LED or fluorescent light sources, and fabric fabrics are most often subject to burnout, although in this regard it all depends on the manufacturer.
LED chandeliers are now the best solution for stretch ceilings. They are available in two options:
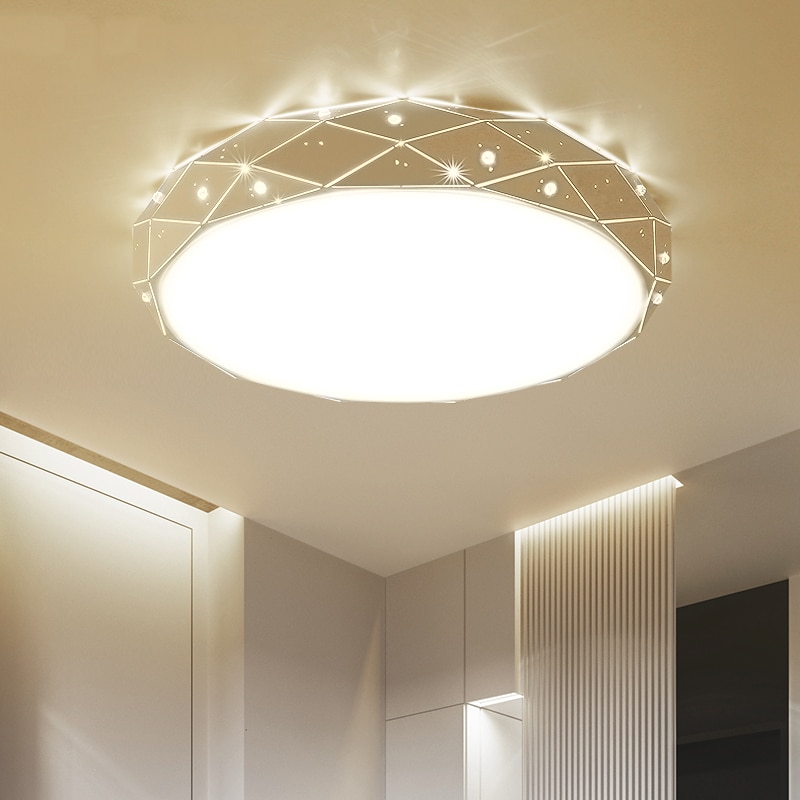
- invoices, in the form of a plate or any other flat figure - when the chandelier is fastened close to the stretch ceiling, and the bulbs are located directly on the base of the lamp.
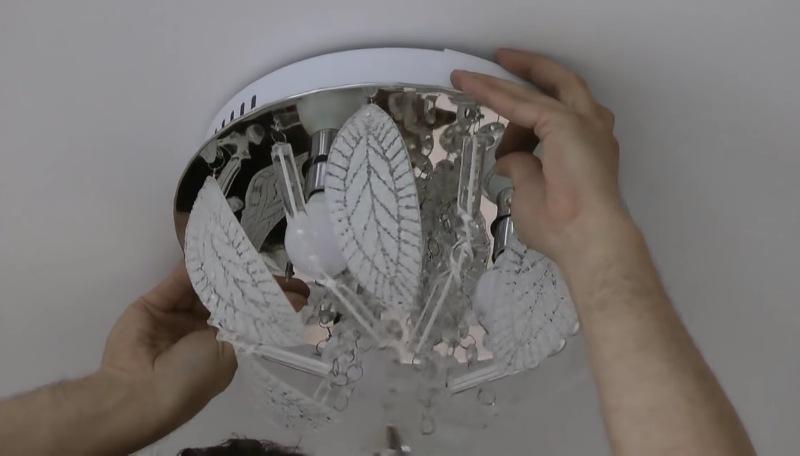
![Installing a chandelier on a stretch ceiling]() Suitable for rooms with low ceilings, and given that the gap between the canvas and the main floor reduces the already limited space, this type is the most common in such cases.
Suitable for rooms with low ceilings, and given that the gap between the canvas and the main floor reduces the already limited space, this type is the most common in such cases.![Installing a chandelier on a stretch ceiling]() From an aesthetic point of view, plates are more suitable for decorating styles such as modern or high-tech.
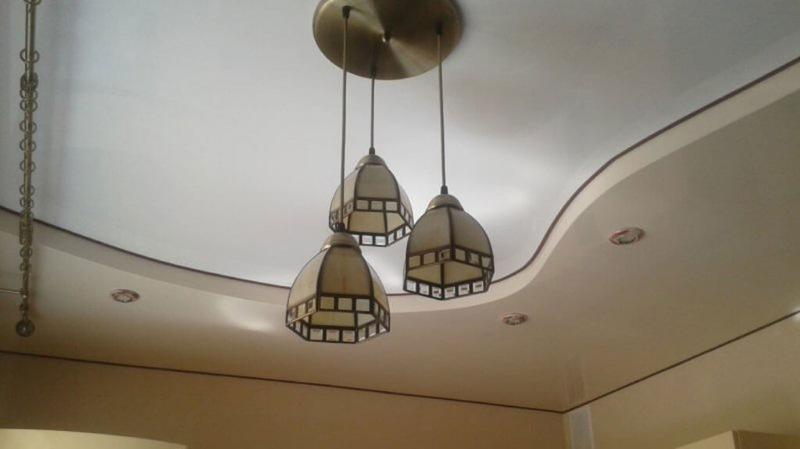
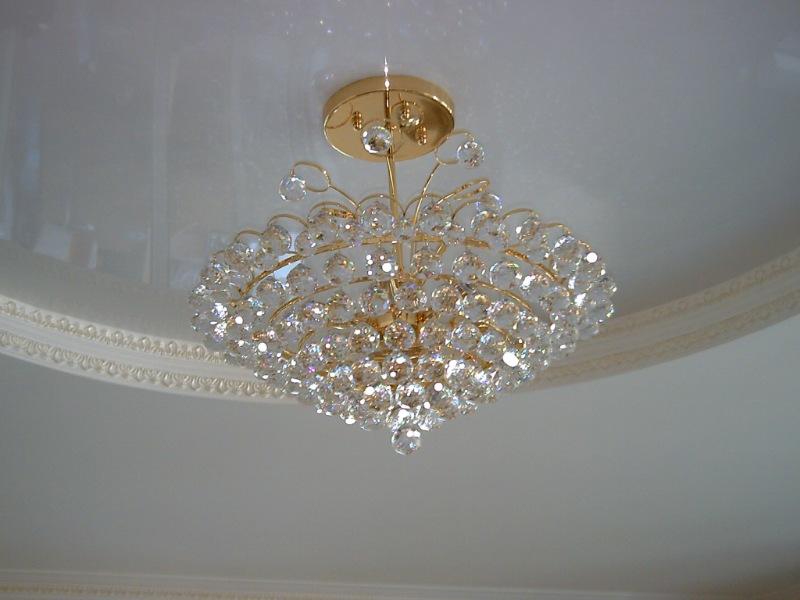
From an aesthetic point of view, plates are more suitable for decorating styles such as modern or high-tech. - suspended - when the ceiling or a group of them is attached to the base by means of a rod, flexible fittings, chains and cords.
![Installing a chandelier on a stretch ceiling]() Suitable for both classic and ultra-modern design applications, depending on the execution of a particular model.
Suitable for both classic and ultra-modern design applications, depending on the execution of a particular model.
Fluorescent lamps are also practiced, but their range is not replete with variety, and is represented mainly by flat chandeliers.
Chandelier installation process
Training
The principle of fastening is partially or completely described in the instructions for the device.However, firstly, not all aspects are clear to a simple consumer, without experience in installing such electrical appliances, and secondly, these manuals say little about safety. Regarding the latter, three main rules must be considered:
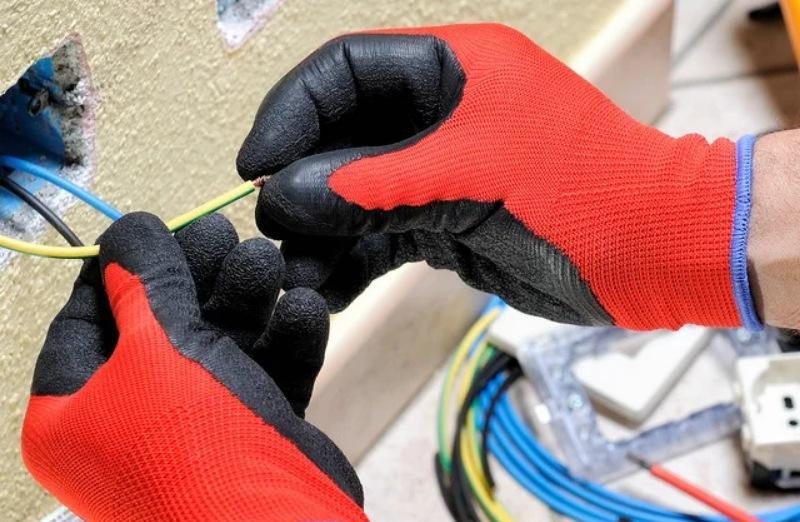
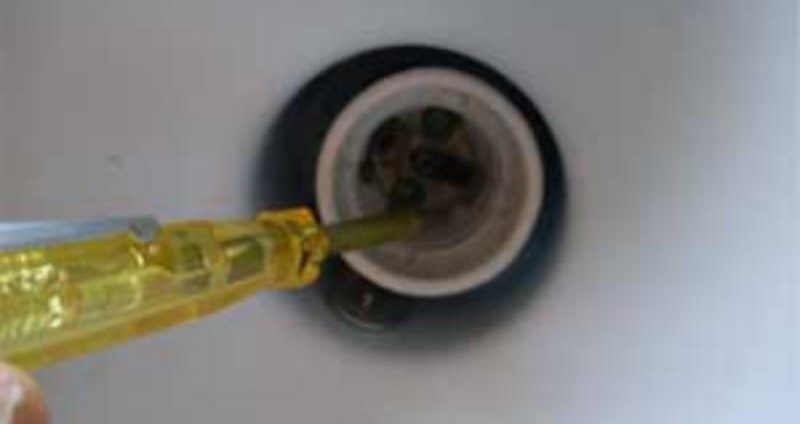
- All manipulations with electrical wiring are carried out in protective rubber gloves and a construction mask. The fact is that when laying the power grid, gross violations could have been committed, or the building was connected to emergency power supply bypassing the circuit breaker. In these cases, electrical injury is inevitable.
![Installing a chandelier on a stretch ceiling]() Protective equipment can be purchased at any hardware store.
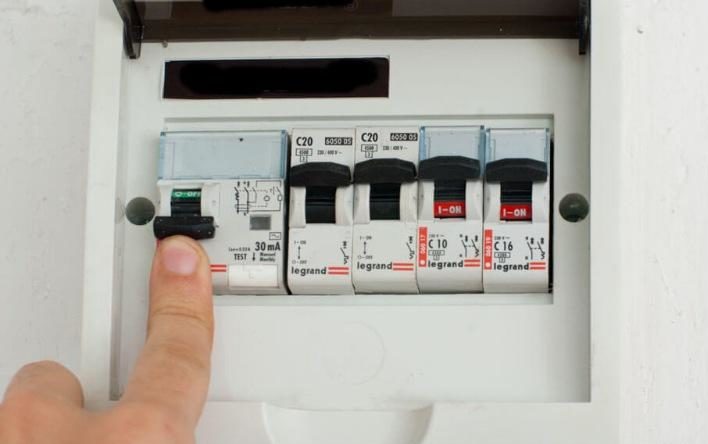
Protective equipment can be purchased at any hardware store. - Even with the use of dielectric gloves, in order to avoid a short circuit, in any case, it is necessary to turn off the electricity supply toggle switch on the meter.
![Installing a chandelier on a stretch ceiling]() The method is relatively reliable, but for the operation of electrical tools such as a drill or a hammer drill, you will have to run an extension cord to your neighbors or an independent power source.
The method is relatively reliable, but for the operation of electrical tools such as a drill or a hammer drill, you will have to run an extension cord to your neighbors or an independent power source. - If you plan a long-term repair with intervention in the electrical wiring, then it is better to turn off a separate room in the junction box. In this situation, temporary lighting and electrical tools are connected by carrying from the next room, and all work with the cable, including its replacement, can be carried out without fear. In any case, before work make sure there is no voltage in the network with an indicator screwdriver or any household electrical appliance plugged into the outlet.
![Installing a chandelier on a stretch ceiling]() Disconnecting a room is best left to a specialist.
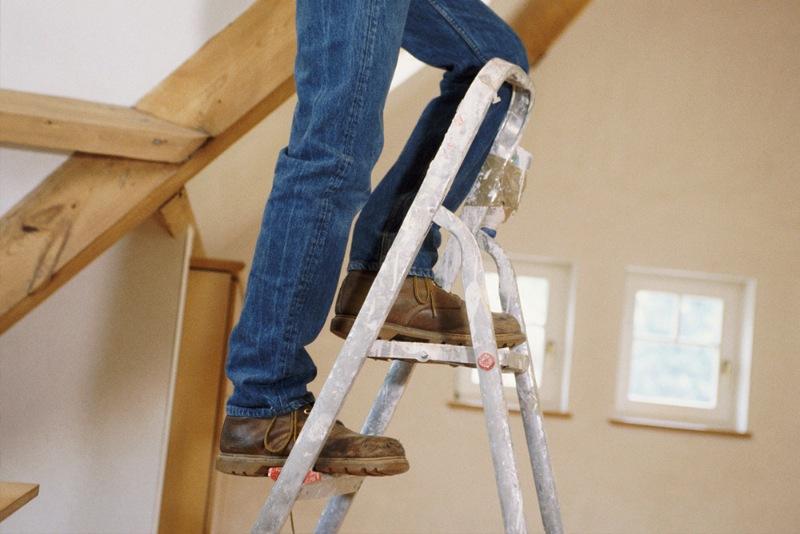
Disconnecting a room is best left to a specialist. - If you need a stepladder to access the lamp fixture, then it is placed so that you can move the center of gravity forward, resting your knees on the upper steps.It is better if a second person holds it, to whom tools and parts can be supplied.
![Installing a chandelier on a stretch ceiling]() When a table or chair plays the role of a ladder, then, accordingly, the most stable and durable piece of furniture is taken.
When a table or chair plays the role of a ladder, then, accordingly, the most stable and durable piece of furniture is taken.
If the upcoming work is related to the perforation of load-bearing structures and the main concrete floor, then you need to familiarize yourself with the floor plan and find out exactly where the strobe with the electric cable passes. Damage to the electrical wiring with a drill, even when the power is off, is fraught with the replacement of the internal wiring section.
Tool selection

To install almost any chandelier on a stretch ceiling, you will need:
- wire cutters;
- knife;
- indicator screwdriver;
- crosshead screwdriver;
- pliers;
- impact drill with a drill for concrete or a hammer drill;
- fasteners corresponding to the situation - self-tapping screws, dowels, anchor, hook, etc.;
- soldering iron with tin and flux;
- dielectric rubberized gloves, mask or goggles;
- additional cable;
- ladder.
Read also: Assembly and connection of the chandelier
Before installation, you must select a mounting location for the lighting fixture. Most often, the chandelier takes place in the center of the room, which is determined by using two painting threads stretched diagonally between the corners or between the midpoints of the sides. The crosshair point is considered the center of the room.

Having prepared the tools, you need to install a ladder and turn off the power to the building or room.
Although the rules require you to turn off the circuit breaker, many are limited to a switch, since ideally it breaks the phase, thus de-energizing a further section of the wiring. However, if the wiring is incorrect, the zero is broken with the switch key, and one contact on the chandelier remains energized.
Mounting options
Before stretching the ceiling, a laying platform is installed at the installation point. Its presence is mandatory for most types of fastening systems.

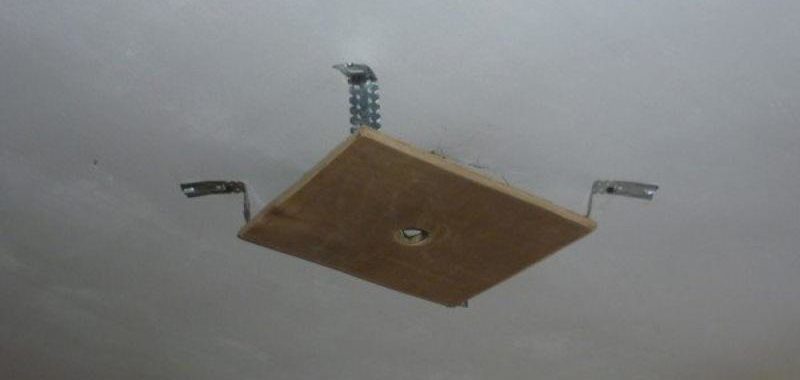
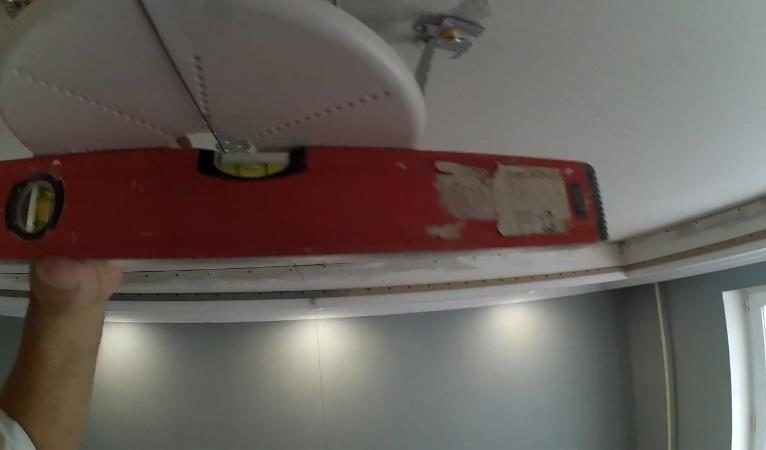
The platform is fastened by means of U-shaped metal profiles screwed to it with self-tapping screws 10–15 mm long. By bending the U-shaped bars, the height of the mortgage is adjusted, which is determined using a paint thread stretched between opposite walls under the ceiling. At the same time, the ends of the thread are installed under the lower border of the profile to which the stretch ceiling is mounted, and the platform must adjoin the thread closely, but in no case go beyond its borders, otherwise the canvas in this area will bulge.
The thread in this case passes in the same place where the ceiling fabric will be located. Thus, the gap between the canvas and the platform should be minimal. The inclination of the mortgage plane is adjusted by pushing or pulling the U-shaped fasteners to the center. In this case, it is necessary that the profile be level in two horizontal planes, otherwise the canvas in the center will be skewed along with the chandelier.
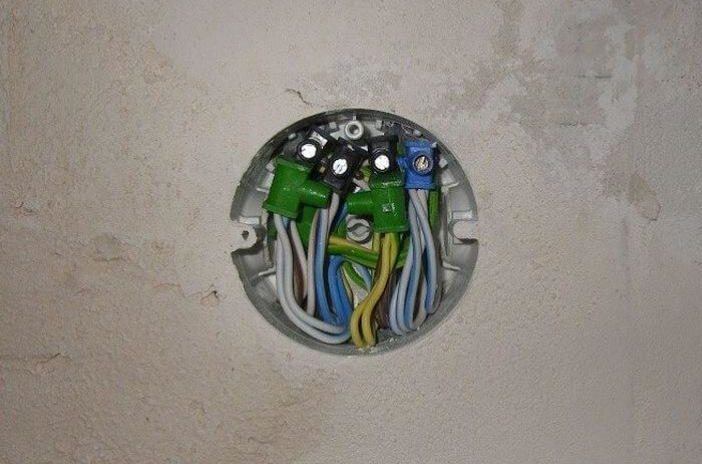
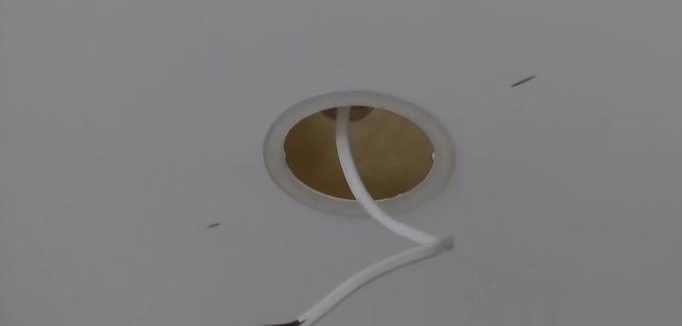
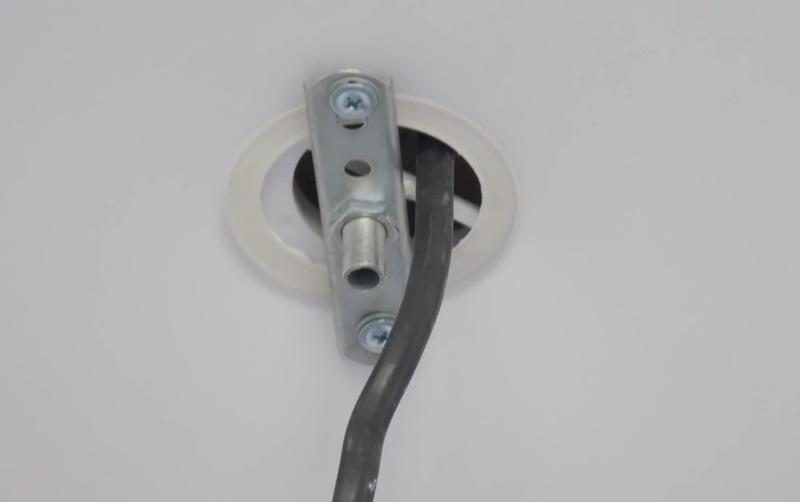
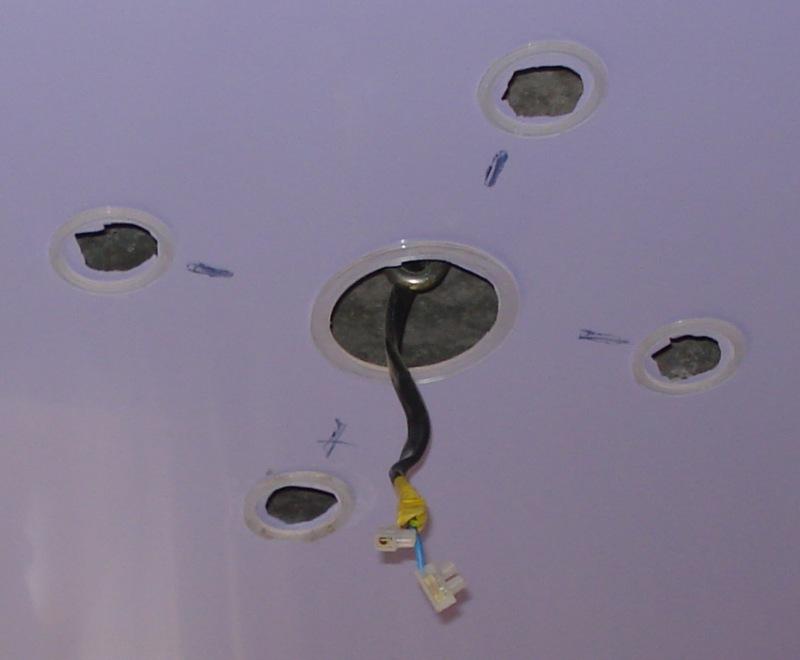
Having outlined the attachment points on the concrete, you need to drill holes in them for plastic dowels of the “quick installation” type and fasten the platform with screws. The cable should be pulled through the central hole and hang down with a margin of 25–30 cm.Before stretching the ceiling, all wires are rolled up and laid on the platform.
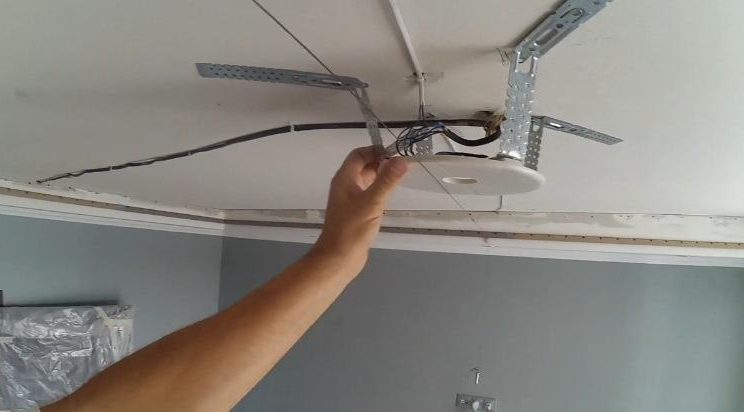
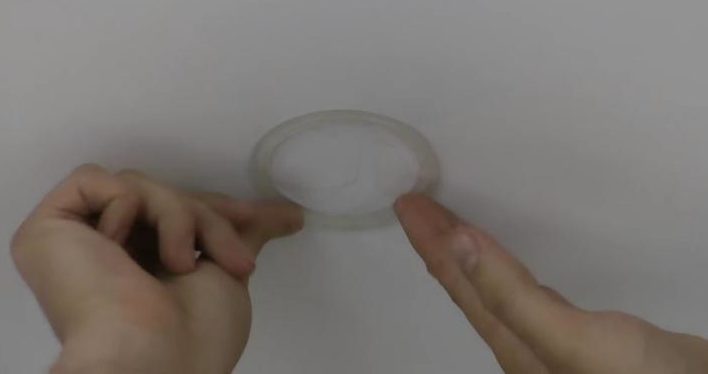
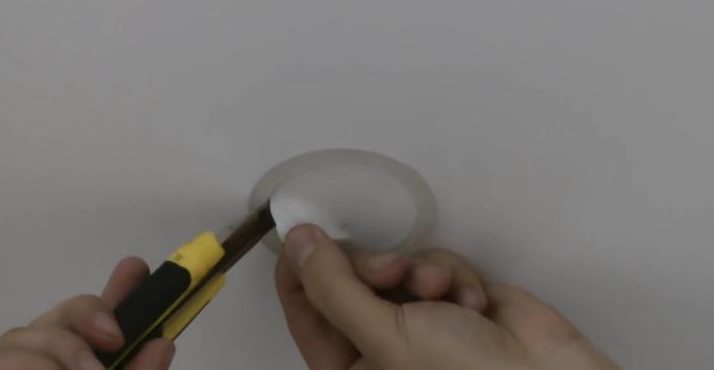
After installing the mortgage and mounting the web, it is necessary to cut a hole for the wiring and fasteners in it. This is done in the center of the mount, which is determined by touch.
The procedure is necessary because the blade, which is in a somewhat uneven state of tension, can give a long break arrow when a cut occurs at the point of displacement. This fact also indicates the need to be extremely careful when working with a stretch ceiling so as not to accidentally damage it with a sharp object.
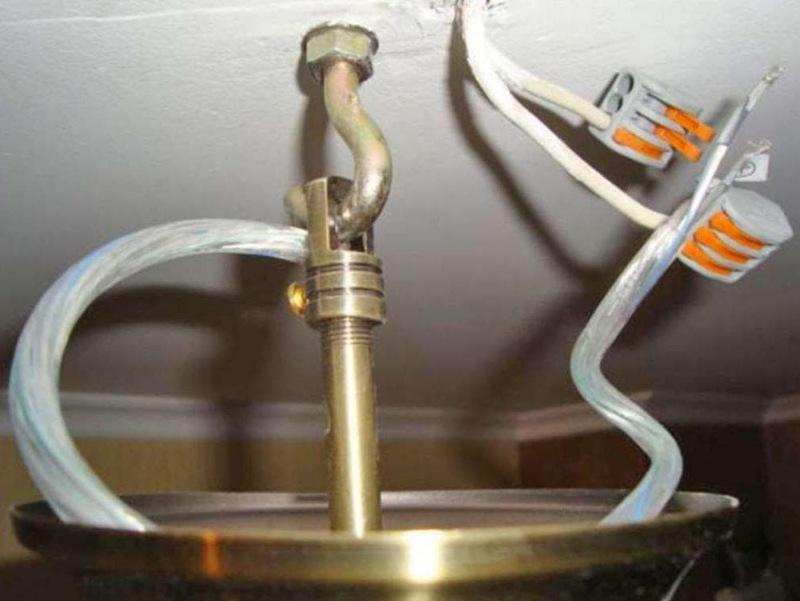
The ceiling is sensitive to the slightest point load and eventually sags under the weight of objects lying on it. In this regard, it is necessary that the cable is attached to the main ceiling. Additional elements of the lighting fixture circuit, such as chokes, ballasts, transformers are laid on the inner surface of the site.
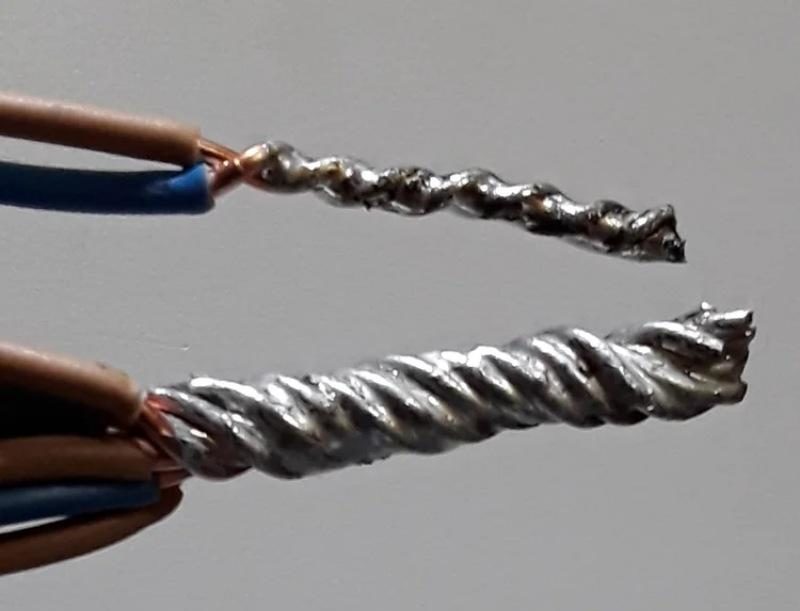
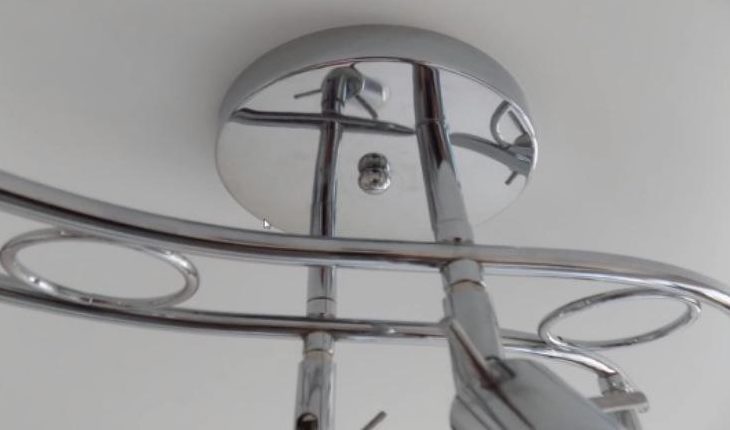
Before attaching the lighting fixture, you must connect the wires.
These measures will help prevent overheating of the connection due to poor contact.
Hook fastening
There are several types of hook fixtures for chandeliers:
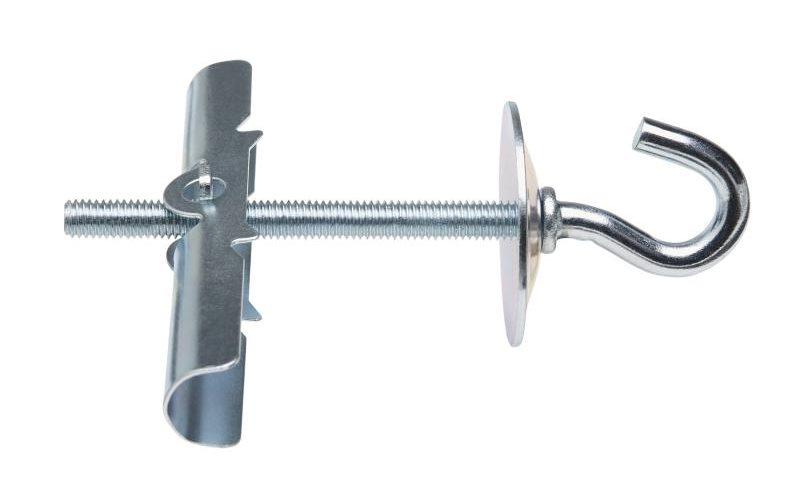
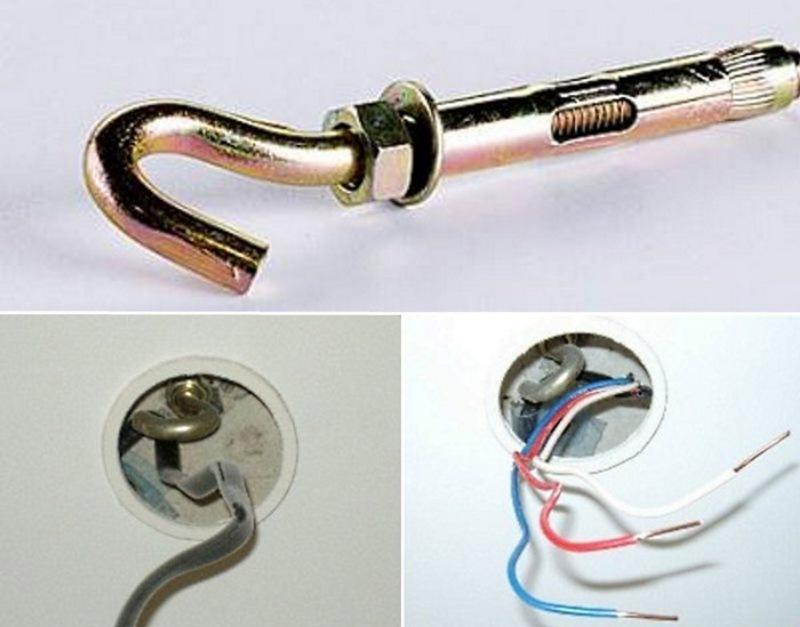
- standard mounting hook - most often comes with the device.
![Installing a chandelier on a stretch ceiling]() The pin is inserted onto the inner surface of the mortgage in such a way that the concave part with the hook hangs over the hole.
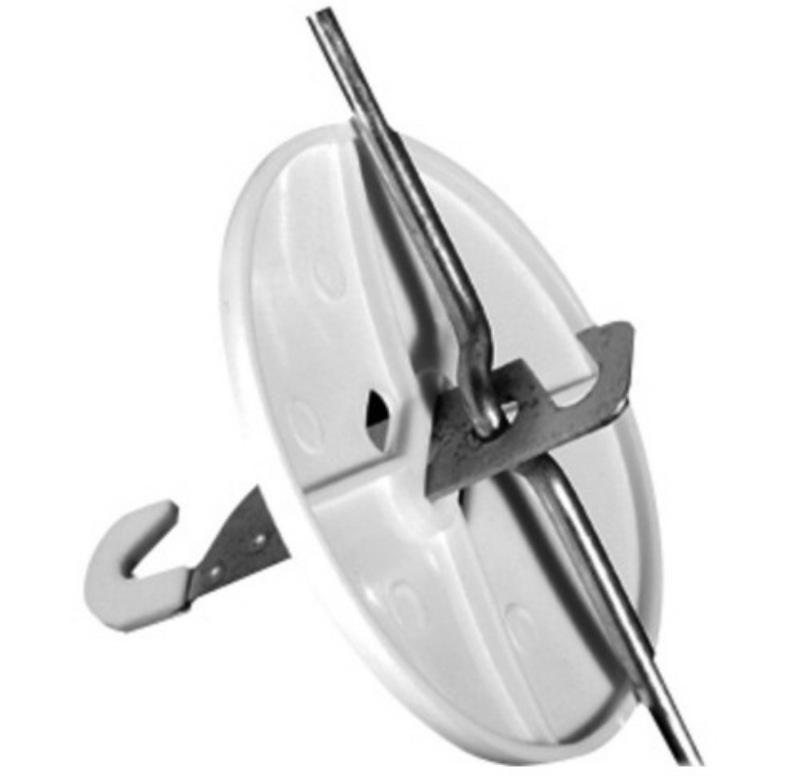
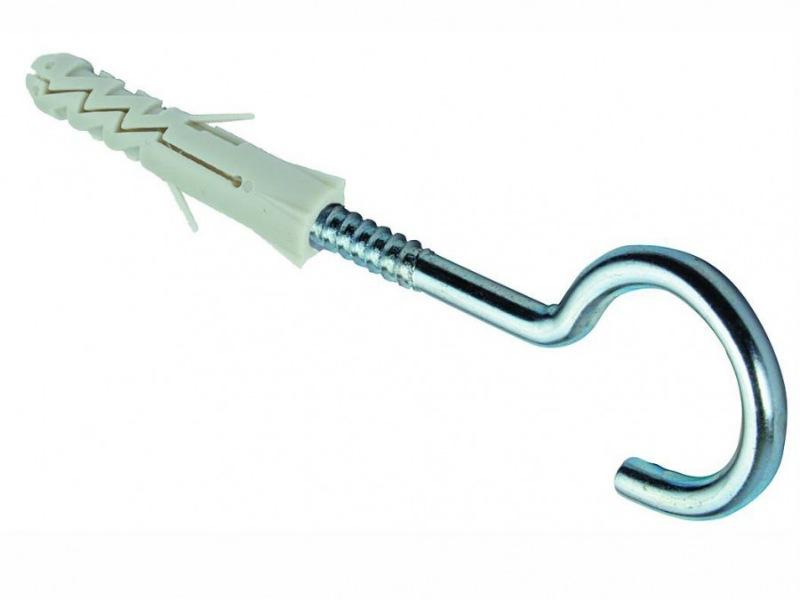
The pin is inserted onto the inner surface of the mortgage in such a way that the concave part with the hook hangs over the hole. - folding spring hook - mainly used for plasterboard structures, but also used for stretch ceilings.
![Installing a chandelier on a stretch ceiling]() The folded springs are wound into the mortgage hole and straightened out in free space.
The folded springs are wound into the mortgage hole and straightened out in free space.![Installing a chandelier on a stretch ceiling]() From below, the hook is pressed against the platform with a nut.
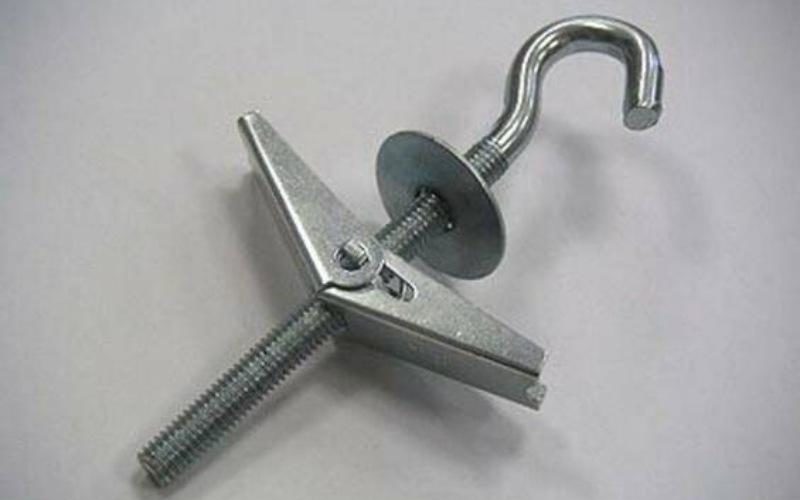
From below, the hook is pressed against the platform with a nut. - hooks on anchoring and dowel.
![Installing a chandelier on a stretch ceiling]() The anchor is fixed by unscrewing the wedge-shaped tip, which expands the side clips inside the hole.
The anchor is fixed by unscrewing the wedge-shaped tip, which expands the side clips inside the hole.![Installing a chandelier on a stretch ceiling]() The dowel is installed according to the standard quick installation scheme and is fixed by wedging plastic clips with a screw with a hook at the end.
The dowel is installed according to the standard quick installation scheme and is fixed by wedging plastic clips with a screw with a hook at the end.
They do not need a platform, as they are mounted on the main ceiling, in which a hole of the appropriate diameter is drilled with a perforator.
On a longitudinal mounting plate

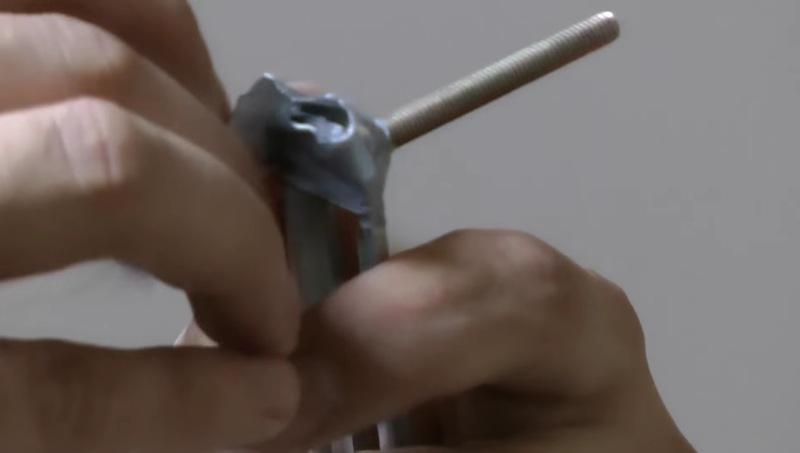
Before installing it, you need to set the distance between the bolts in the mounting holes, corresponding to the distance between the holes on the base of the chandelier. It is also necessary to protect the canvas from tearing by gluing a reinforcing tape in the places of the alleged puncture with self-tapping screws and wrap the sharp edges on the bar with tape.
The position of the chandelier depends on the position of the bar, so its installation must be planned taking into account the fastening.
For slats with one central bolt, this is not critical.
On a cross bar
Fasteners as a whole are similar to the single version, but are attached at four points.

The rules and features of installation are the same.
Through mount
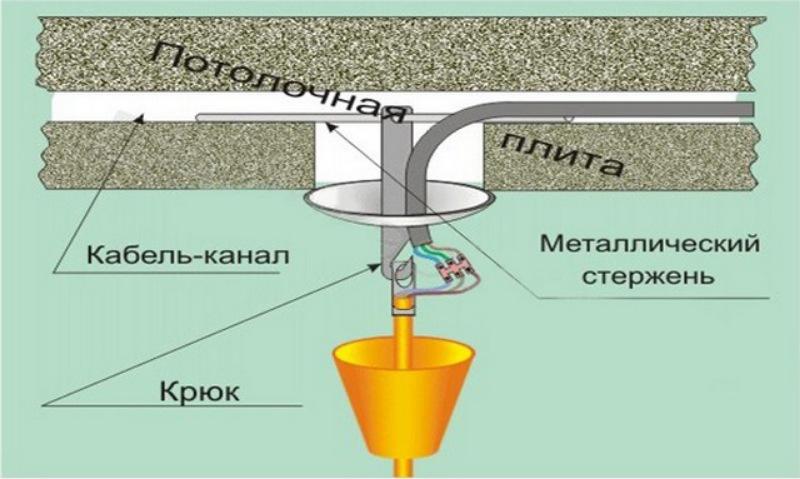
It is a hole made by a perforator in a concrete slab. For this, internal structural cavities in the floor slab are used. A hook pin or springs are placed in this cavity. This method is used when it is planned to hang extremely heavy chandeliers, weighing several tens of kilograms.
How to hang a chandelier on a mounted canvas
If the ceiling is already stretched, and there is no embedded platform, then to mount the luminaire, it is necessary to cut a hole inside the tread ring according to the previously described scheme, drill a hole for the dowels for the plank or the anchor for the hook with a perforator, and then install the mount.
The only difference is that the bar will not be pressed against the platform, but will hang on the heads of the screws. The base of the invoice or the cap of the pendant chandelier will be pressed only to the canvas, without bilateral fixation. The degree of pressing is adjusted by changing the height of the bar by turning the screws or the hook in the dowel. The method is not so reliable, but it allows you to do without dismantling the ceiling.

Decoration of attachment points
If it is a pendant lamp, then most often decorative caps that come with the lighting fixture are used for these purposes.
In the case of overhead chandeliers, or those with a flat plate-shaped base, it is customary to recess them under the canvas in such a way that only the ceiling protrudes outward. Everything else is hidden in the space between the main concrete floor and the tension web.