How to connect a fluorescent lamp correctly
Fluorescent lamps remain popular lighting devices despite the spread of LED lamps. This is due to their power, efficiency and excellent color rendering. When connecting fluorescent devices, it is important to take into account the features of the equipment.
The device of fluorescent lamps
The wiring diagram for a conventional fluorescent lamp is significantly different from a similar one. scheme incandescent appliances. They consist of the main components:
- control board that regulates the flow of current;
- electrodes;
- a glass tube or flask coated with a phosphor.
Inside the flask is a mixture of mercury vapor and inert gases, and electrodes. The input voltage causes the particles to move, giving rise to ultraviolet radiation. However, it is invisible to the human eye.It is converted into visible light by a phosphor, which covers the inner surface of the bulb. Changing the composition of the phosphor changes the hue and color temperature of the light.
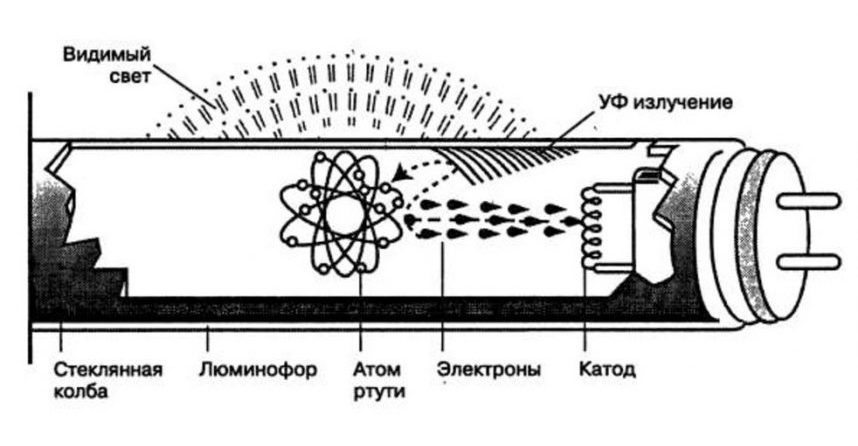
The processes are controlled by a starter and a ballast that stabilize the voltage and provide a uniform glow without pulsations and flickering.
How to connect a lamp
A fluorescent lamp can be connected in several ways. The choice depends on the operating conditions and user preferences.
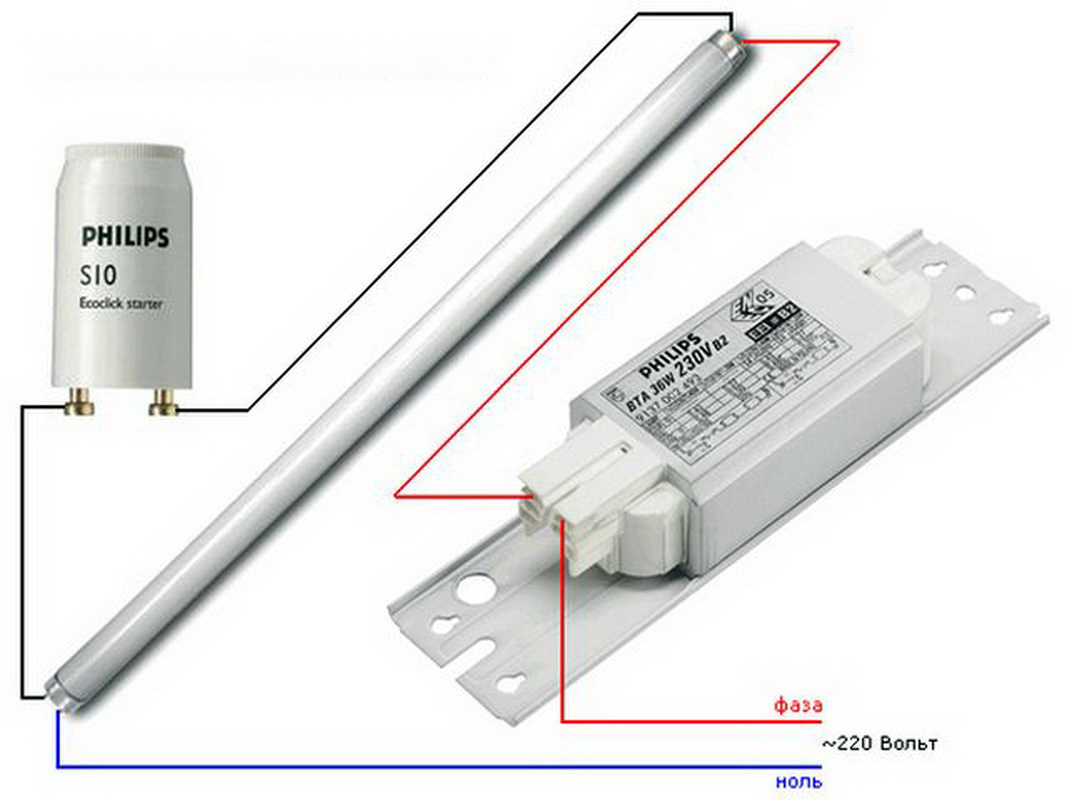
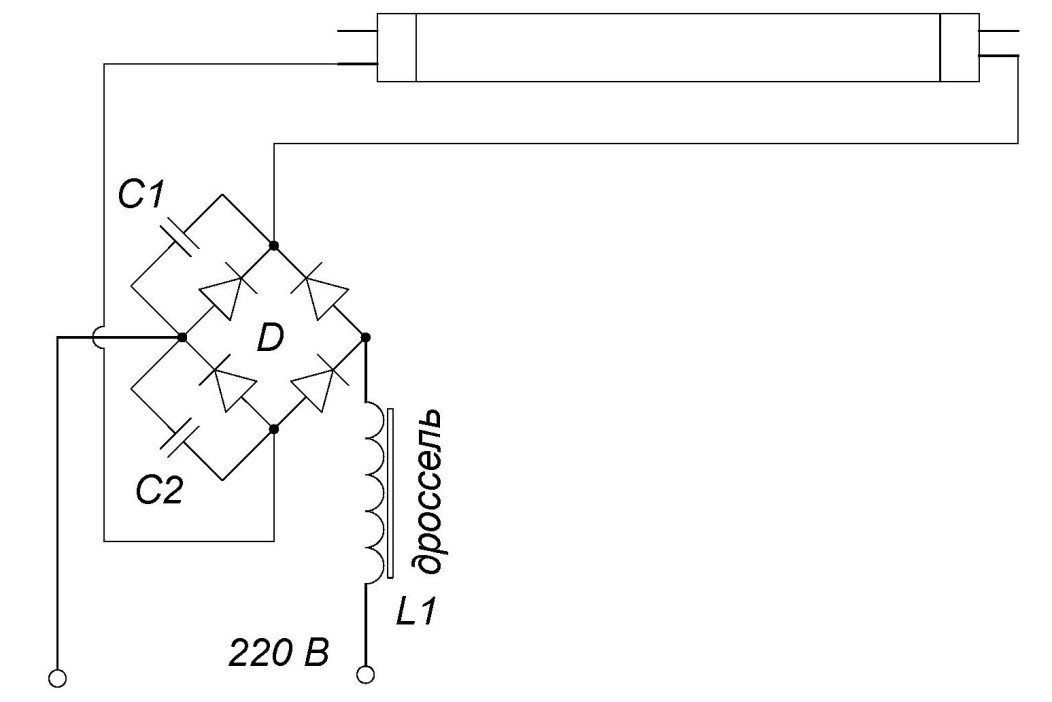
Connection using electromagnetic ballast
A common connection method using a starter and empra. Mains power starts the starter, which closes the bimetallic electrodes.
The current limitation in the circuit is carried out due to the internal choke resistance. The operating current can be increased almost three times. The rapid heating of the electrodes and the appearance of a self-induction process cause ignition.
Comparing the method with other fluorescent lamp connection schemes, we can formulate the disadvantages:
- significant power consumption;
- long start, which can take 3 s;
- the circuit is not able to function at low temperatures;
- unwanted stroboscopic flashing that adversely affects vision;
- Throttle plates can make a humming noise as they wear.
The scheme includes one throttle for two light bulbs, the method is not suitable for a single-lamp system.
Two tubes and two throttles
In this case, loads are connected in series with a phase applied to the resistance input.
The output through the phase is connected to the contact of the lighting device. The second contact is routed to the desired starter input.

From the starter, the contact goes to the lamp, and the free pole goes to zero of the circuit. The second lamp is also connected. The throttle is connected, after which the flask is mounted.
Wiring diagram for two lamps from one choke
To connect two lighting fixtures from one stabilizer, two starters are required. The circuit is economical, since the inductor is the most expensive component of the system. The circuit is shown in the figure below.

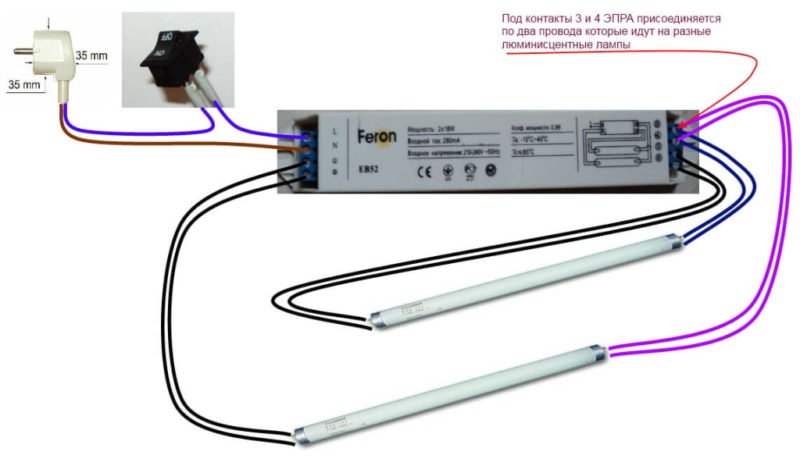
Electronic ballast
The electronic ballast is a modern analogue of the traditional electromagnetic stabilizer. It greatly improves the start-up of the circuit and makes the use of the lighting fixture more comfortable.
Such devices do not hum during operation and consume much less electricity. Flicker does not appear even at low voltage frequencies.
The current supplied to the load is rectified through the diode bridge. In this case, the voltage is smoothed out, and the capacitors guarantee a stable supply of electricity.
The transformer windings in this case are turned on in antiphase, and the generator is loaded with high-frequency voltage. When a resonant voltage is applied inside the bulb, a breakdown of the gaseous medium occurs, which generates the necessary glow.
Immediately after ignition, the resistance and the voltage applied to the load drop. Starting with a circuit usually takes no more than a second. Moreover, you can easily use light sources without a starter.
Using Voltage Multipliers
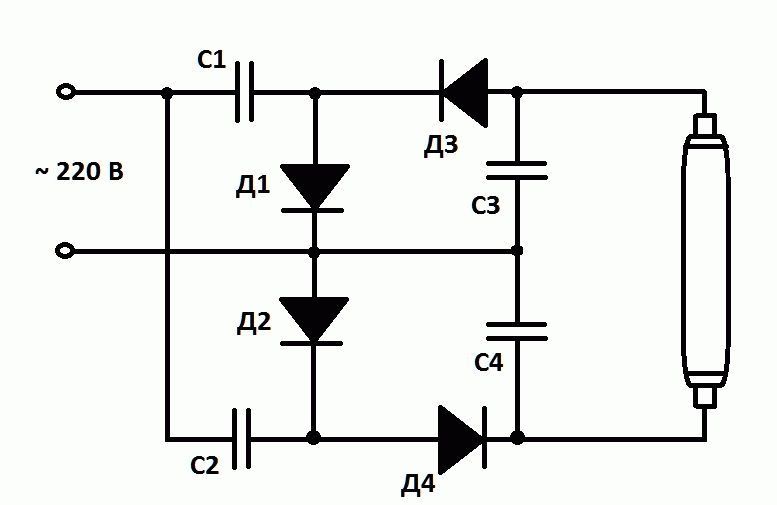
The method helps to use a fluorescent lamp without electromagnetic balancing.In some cases, it is the most effective and prolongs the service life of the apparatus. Even burnt-out devices are able to work for some time at powers not exceeding 40 watts.
The rectification circuit provides significant acceleration and the ability to double the voltage. Capacitors are used to stabilize it.
Thematic video: Details about the voltage multiplier
It is important to remember that fluorescent light bulbs are not designed to operate with direct current. Over time, mercury accumulates in a certain area, which reduces the brightness. To restore the indicator, it is necessary to periodically change the polarity by turning the flask over. You can install a switch so as not to disassemble the device.
Connection without starter
The starter increases the warm-up time of the device. However, it is short-lived, so users are thinking about connecting lighting without it through secondary transformer windings.
On sale you can find devices with the RS marking, which indicates the possibility of connecting without a starter. Installing such an element in a lighting device helps to significantly reduce the ignition time.
Serial connection of two light bulbs
The method involves the operation of two lamps with one ballast. Implementation requires an induction choke and starters.
Required for each lamp connect the starter, observing parallelism connections. Free circuit contacts are sent to the network through a choke. Capacitors are connected to the contacts to reduce interference and stabilize the voltage.
High starting currents in the circuit often cause sticking of the contacts in the switches, so choose high-quality models that are not greatly affected by network performance.
How to check if the lamp is working
After connecting check the functionality tester diagrams. The resistance of the cathode filaments should not exceed 10 ohms.
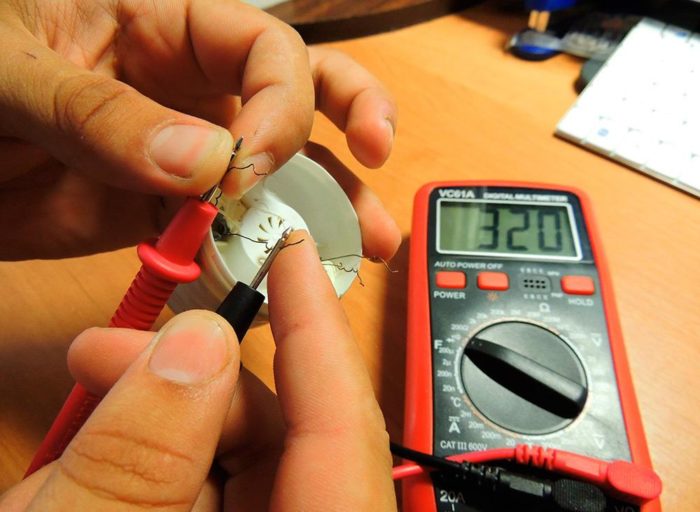
Sometimes the tester shows infinite resistance. This does not mean that it is time to throw away the lamp. The device can be turned on with a cold start. Usually, the starter contacts are open and the capacitor does not pass direct current. However, after several touches with the probes, the indicator stabilizes and drops to several tens of ohms.
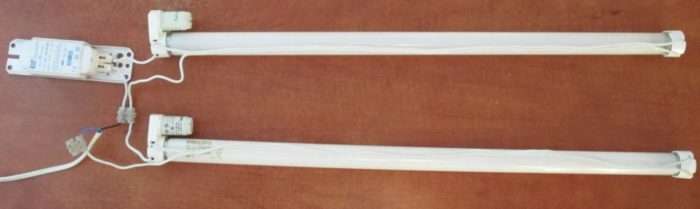
Lamp replacement
Like other light sources, fluorescent devices fail. The only way out is to replace the main element.
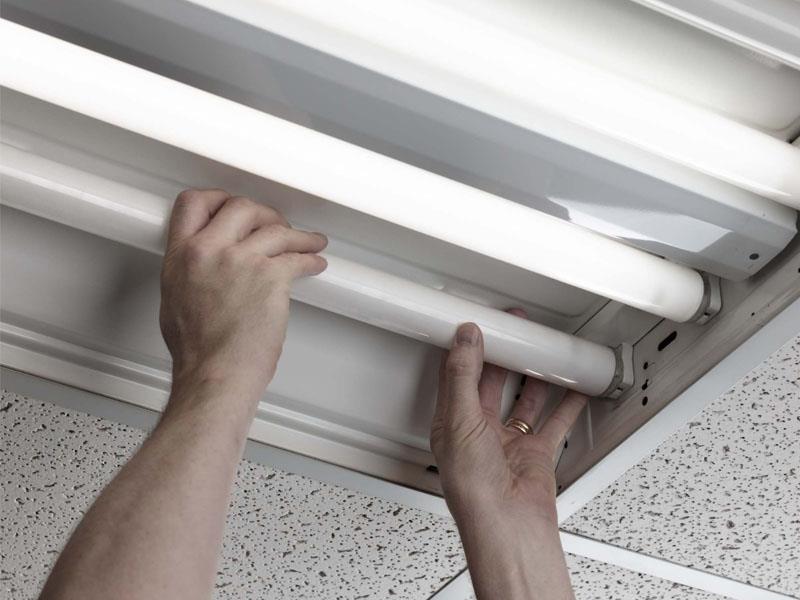
The replacement process using the Armstrong ceiling lamp as an example:
- Carefully disassemble the lamp. Taking into account the arrows indicated on the body, the flask rotates along the axis.
- By turning the flask 90 degrees, you can lower it down. The contacts will shift and come out through the holes.
- Place a new flask in the groove, making sure that the contacts fit into the corresponding holes. Turn the installed tube in the opposite direction. Fixation is accompanied by a click.
- Turn on the light fixture and check if it works.
- Assemble the body and install the diffuser cover.

If the newly installed bulb burned out again, it makes sense to check the throttle. Perhaps it is he who supplies too much voltage to the device.