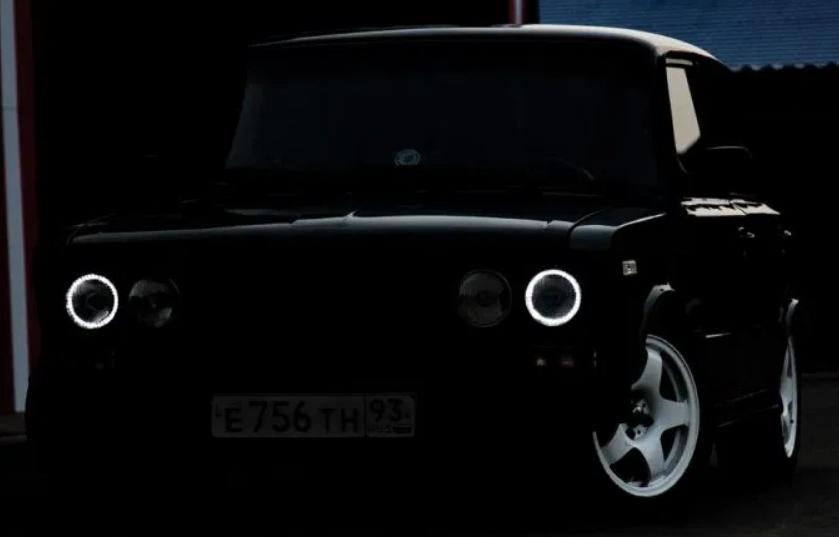
Installation and connection of angel eyes
Making angel eyes in the headlights is not as difficult as it seems at first glance. But at the same time, you will have to spend a lot of time for preparation and installation, especially if home-made devices are used. There are different options for carrying out work, the easiest way is to assemble the system on your own, using materials that are easy to find.
What you need to make "angel headlights"
First of all, you need to prepare the necessary materials and tools. The list looks like this:
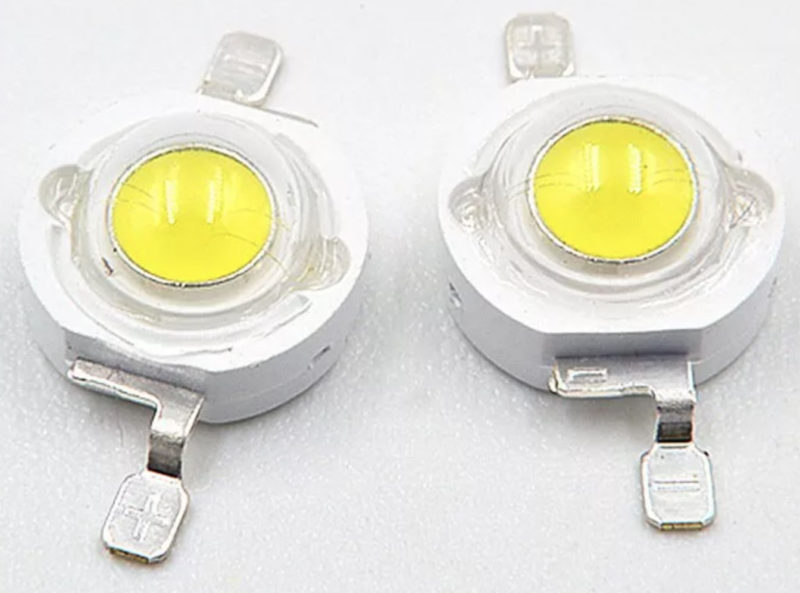
- White LEDs with a diameter of 5 mm - 2 pcs. for each headlight. The brighter they are, the better, but electronics stores most often sell standard options without specifying power.
![Installation and connection of angel eyes]()
- 2 resistors, one for each element. It is best to use the MLT-330 Ohm-0.25 W model. If it was not possible to find just one, the store will recommend analogues with similar characteristics.
- Connection wires all elements of the system and its connection to the vehicle's on-board network.The length depends on the characteristics of the connection, you can take the option with three braided cores so that after laying the wiring looks neat.
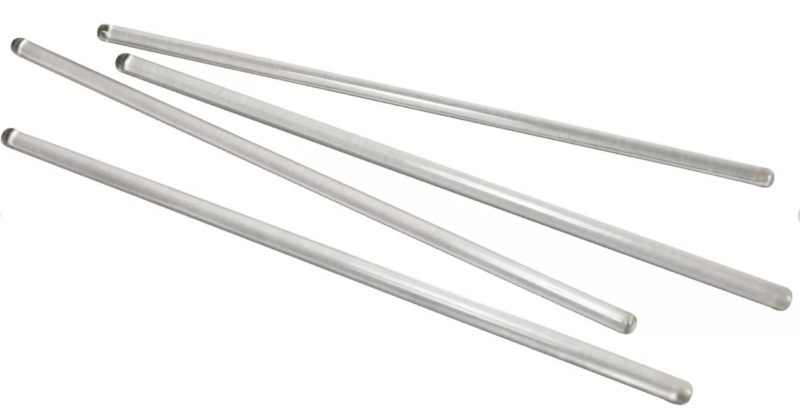
- Transparent rod with a diameter of 8-10 mm. It can be made from both plexiglass and modern polymeric materials. Most often, such items are sold in curtain stores or in places where there are goods for needlework and decor.
![Installation and connection of angel eyes]()
You will also need a set of tools and devices for the work:
- To form a ring of a suitable diameter, you will need a jar or any other container of the right size. It must be selected according to the situation, the main thing is that the diameter matches the headlights and the “angel eyes” fall into place without displacements and distortions.
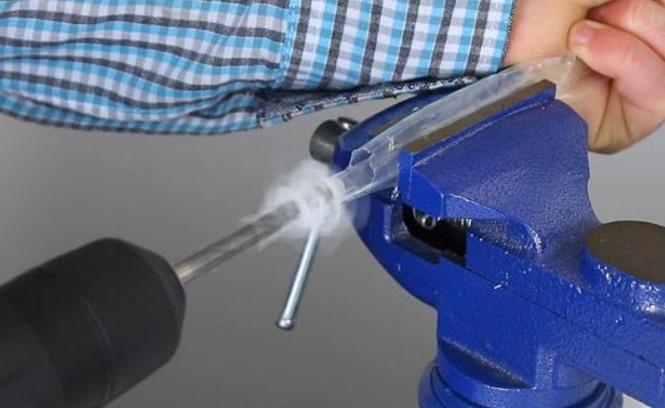
- To drill a hole, you will need a screwdriver or a small drill and a metal drill with a diameter of 6 mm. To fix the rod, it is worth using a vice, otherwise it is difficult to ensure its stationary position.
![Installation and connection of angel eyes]() When drilling holes in the ends, accuracy is important.
When drilling holes in the ends, accuracy is important. - Attach the wires with a soldering iron, so have it on hand too.
- To bend the rod, it is convenient to warm it up with a building hair dryer, this is the easiest way. If you don't have a hair dryer, you can use the microwave or hot water.
The rods can be taken in different diameters to experiment and find the one that will look best.
Read also: Tinted taillights: which film to choose and how to tint correctly
How to assemble the "eyes"
The work requires accuracy and precision, here you can’t do everything in a hurry, this will have a bad effect on the appearance. Therefore, it is worth preparing the workplace and doing everything without haste, excluding damage to the elements. Assembly instructions:
- First, the diameter of the headlight is measured to determine the size of the tube and cut off a piece of the desired size. It is most convenient to do this with a hacksaw for metal, the plastic does not melt and the cut is perfectly even.
- Holes with a diameter of 6 mm and a depth of about a centimeter are drilled at the ends. LEDs should freely enter them, this is an important point.
- The prepared rod is well warmed up with a building hair dryer until it becomes plastic. After that, it is necessary to form a ring of suitable diameter from it around a pre-prepared jar. The element adheres for about a minute, after it cools down, it will hold its shape.
- Wires are carefully soldered to the legs of the diodes, their length should be sufficient to lead them out of the headlight. It is best to use copper conductors, they bend well and do not break even with a sufficiently strong deformation effect.
- Solder a resistor to one of the LEDs. Next, the circuit is assembled so that it turns out consistent connection of two diodes and a resistor. Everything is simple, you can figure it out even without experience in assembling electrical systems. Close the soldering and joints with a heat shrink tube, it is much more reliable than electrical tape.
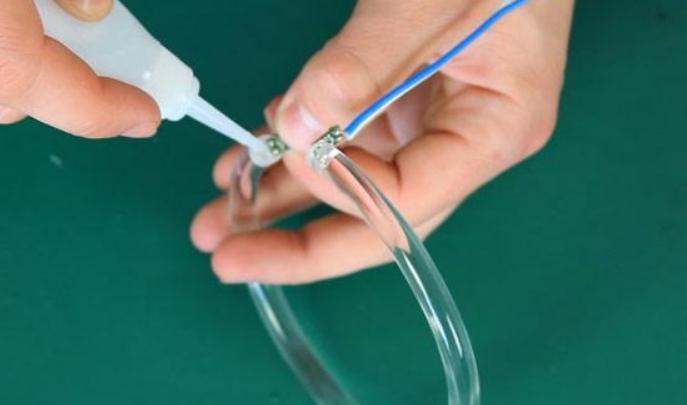
- The LEDs are carefully inserted into the holes and aligned, after which they are filled with superglue or nail polish. When the composition dries, the elements are ready for use.
![Installation and connection of angel eyes]() Diodes are filled with adhesive.
Diodes are filled with adhesive. - To improve lighting along the diameter of the ring, after 5-10 mm, you can make even notches with a dremel or any other device. Stripes will be highlighted when turned on dimensions, which makes the homemade version very similar to the factory one.
You can use only white diodes, the rest will be a violation of traffic rules and can be written out for them fine.
In the video, diode tape and silicone sealant are used for manufacturing.
Vehicle installation
Collecting “angel eyes” is only half the battle, more time-consuming and responsible work lies ahead. It is worth starting it after checking the performance of the assembled elements. If everything is fine, you need to follow a simple instruction:
- Headlights must be removed. To do this, read the instruction manual or find information on the Internet. Sometimes the work requires the removal of a bumper or front fascia, which complicates the process.
- Glass must be separated from the body, most often it is fixed with a polyurethane compound, it must be softened. It is more convenient to do this with a building hair dryer, heating the joint around the perimeter and carefully separating the elements with a flat screwdriver. Another option is to put the headlight in the microwave for a minute or more - see the situation. The glue will soften and the glass will easily move away from the case.
- Residues of glue must be completely removed from both the glass and the case; for this, any improvised objects are used. The work is easy but takes a lot of time.
- Installing angel eyes in the headlight is simple. The elements are set evenly, after which they must be fixed in a suitable position using a thermal gun or a special automotive double-sided adhesive tape. Then the wires are carefully brought out to the back of the headlights through the technological hole, it is important not to forget to do this at this stage.
- After fixing the elements, the glass is glued back. To do this, a special composition for headlights is purchased and applied strictly according to the instructions.It is necessary to fix the parts with adhesive tape and hold it for a while until the glue seizes.

After the composition has dried, the headlights are put in place, it is important not to knock down the settings so that you do not have to adjust the light again.
Correct connection
Connecting angel eyes can be done in different ways. Therefore, at first a suitable method is selected, and then work is carried out according to the instructions.
Connection to dimensions
This is the simplest solution that will take a minimum of time and ensure stable backlight operation. But even here there can be different connection methods:
- In cases where it is necessary for the “angel eyes” to work together with standard position lights, you need to connect the wire from them to the plus in the two-plug connector of the light bulb. Solder the wires to ensure reliability, twisting is used as a last resort, but this is undesirable. The negative wire is attached to any place on the car body, you can use an eye that is crimped and fixed with a bolt or nut.
- If it is necessary that the gauge does not work when the peephole is turned on, you need to remove the plug from the housing and remove the positive wire from it. A tap from them is connected to it with a connector or soldering. The minus, as in the previous case, is attached to the body, the place is selected according to the situation.
A clear way to install on the BMW e36.
Three-wire connection
The option with three wires is good because the “angel eyes” are turned off when the dipped or main beam is turned on. For operation, two additional PC 702 relays are required, which can be found in auto parts stores. The work is done like this:
- The wire to the plus in the size block is pulled out.
- From the minus, a wire is pulled to contact 87 of the relay.
- A positive wire is placed on terminal 30/51, which will power the eyes.
- From terminal 86, a ground wire is laid and mounted on the car body.
- Next, you need to find the low and high beam relays, in different models their location may differ. From pin 86, a wire extends from both elements, which must be soldered to the LEDs.
- The wires from the diodes are connected to terminal 85 of the PC 702 relay.
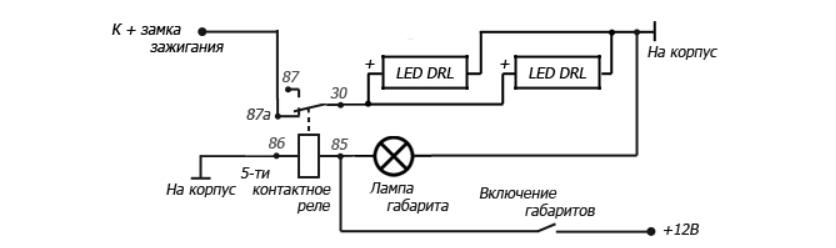
This option significantly extends the life of the LEDs, since most of the time they do not work.
It is not difficult to make and put “angel eyes” on the car yourself if you have everything you need at hand. The main thing is to carefully disassemble and assemble the headlights, as well as connect the wiring correctly.