Installation technology of a spotlight in stretch ceilings
Stretch ceilings are easy to use, they are installed in a matter of hours, but there are often problems with the installation of fixtures. If you do not immediately provide for all the features, then installing the equipment with your own hands will not be easy. If the technology is violated, you can spoil the ceiling canvas and you will have to order it again. To eliminate problems, it is necessary to follow the recommendations for the work.
Training
To carry out the installation with high quality, to ensure the safety and uninterrupted operation of the equipment, you need to act in a certain sequence. Some masters who install a stretch ceiling put lamps or a chandelier for free. But most often they take money for this, and a lot of it, so it makes sense to do the work yourself.
Basic moments
Do-it-yourself installation of fixtures in a stretch ceiling includes:
- Drawing up a project that indicates the location of lamps, switches, junction boxes. You also need to decide where the wires will be laid. If they can be fixed on the ceiling with brackets or clamps, then strobes will have to be planned in the walls to hide the cable. Therefore, preparation should be done in advance.
- Do not forget about additional elements - drivers (if any), auxiliary equipment. Often other communications pass over the ceiling, they should also not be overlooked.
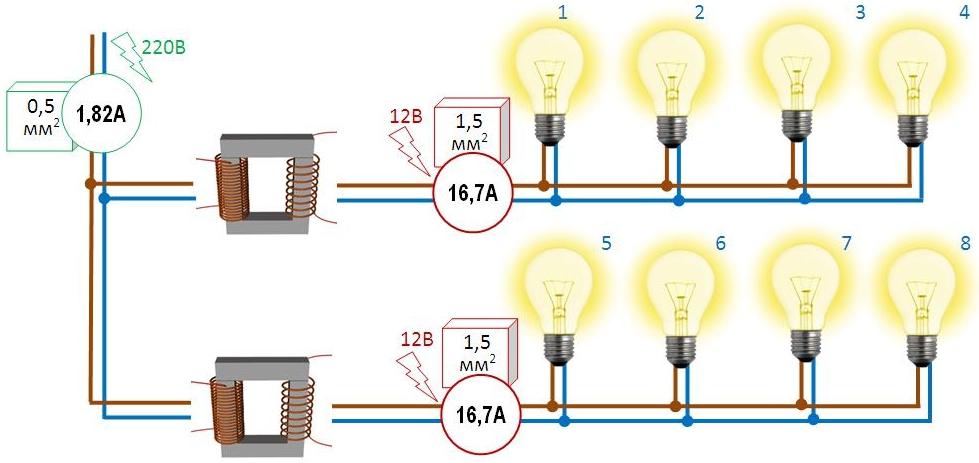
- Determination of the optimal characteristics of the cable to be used. The choice depends on the equipment - its power, type of light bulbs, etc. Also at this stage, the required amount of wire is calculated, it is best to purchase it with a margin, since the actual consumption is often more than the project.
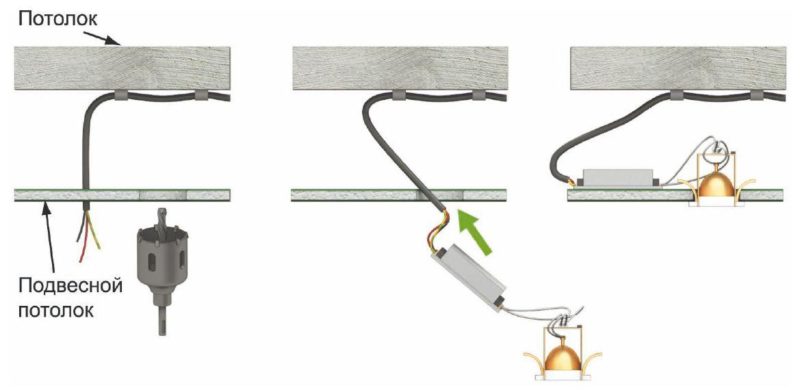
- Laying wires according to the prepared scheme. One of the most difficult stages, especially if electricity is not connected to the ceiling or a lot of wires are needed. It is important to consider fixing the elements on the ceiling so that over time they do not fall onto the canvas and do not have to redo the work.
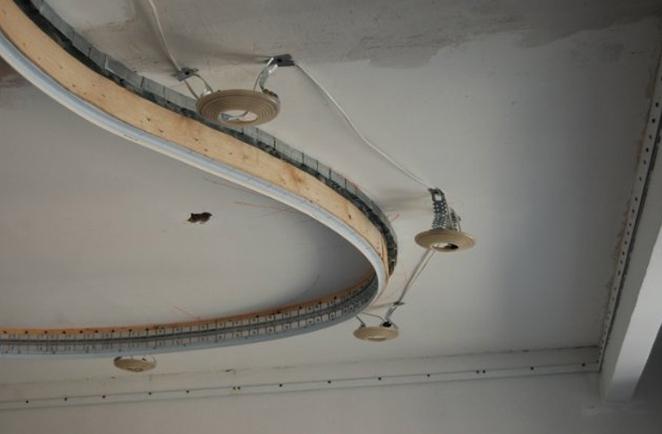
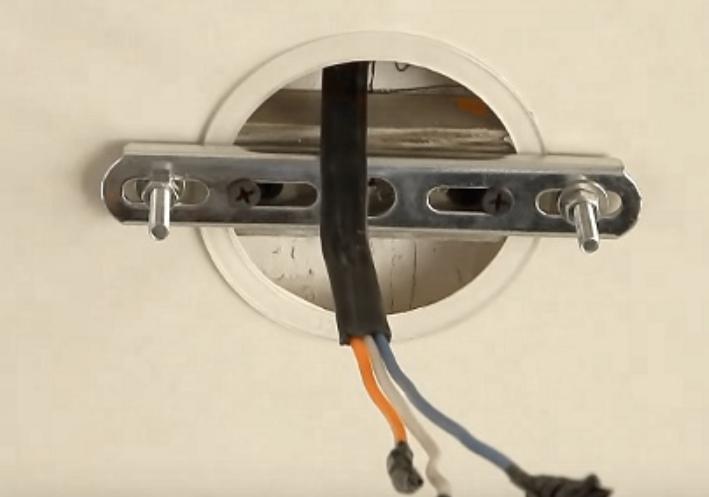
![Mounting wiring to the ceiling and cable outlet.]() Mounting wiring to the ceiling and cable outlet.
Mounting wiring to the ceiling and cable outlet. - Marking the location of fixtures on the ceiling and installing load-bearing elements, if needed. This is done before stretching the web, the work should be carried out using a laser level, the technology is described in detail below.
- Positioning of embedded platforms after laying the canvas. The process is responsible, but simple, you can figure it out in a few minutes. The main thing is to buy everything you need for work in advance and be careful in the process so as not to cut too much.
- Assembly of lamps at the location.It is impossible to give exact instructions, since the models differ in design, method of attachment and connection to wiring. There is always a diagram in the kit, according to it you can figure out the features of installation, pinout of wires and other nuances, if any.
- Install a chandelier if needed. This is a separate type of work that differs from the installation of recessed fixtures. The most important thing here is proper preparation, since the base under the stretch ceiling must be strong enough to withstand the load.
Important! If you have any questions and something is not clear, do not rush. It is better to consult with a specialist or read information on specialized resources.
If the wiring is laid, then you can skip individual steps. But most often you still need to spread the wires over the surface, so you have to connect to the network and lay out the cables so that you can then find the right option and connect it to the lamp.
Necessary materials and tools
Installation of fixtures in a stretch ceiling should only be started when you have everything you need at hand. The exact list depends on the characteristics of the room and kind installed equipment, but most often the following set is prepared:
- Table, stepladder or other structure that is convenient to work with under the ceiling.
- Cable of the required brand. Select the quantity with a margin, since the actual consumption is always greater than the plan.
- Corrugated hose for wiring, if the partition is wooden.
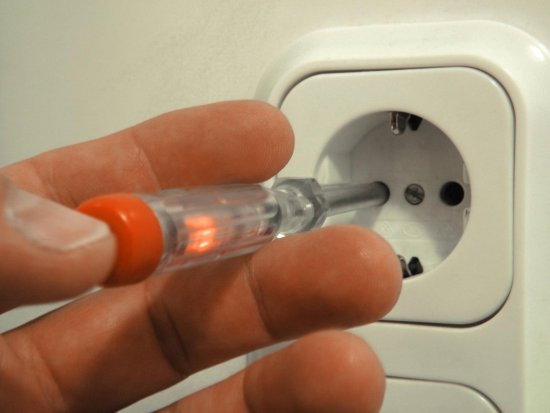
- Indicator screwdriver for checking voltage.
![Installation technology of a spotlight in stretch ceilings]() Checking the phase with an indicator screwdriver.
Checking the phase with an indicator screwdriver. - Fasteners for cable or corrugated sleeve.It is selected for a specific situation, it can be of different sizes and shapes.
- If the ceiling is concrete, you need a puncher with a drill, the size of which fits the fasteners. For wooden ceilings, use a drill with a drill or simply screw self-tapping screws into the surface.
- Laser level. With its help, even a person without experience can accurately determine the position of the lamps. You do not need to buy, the easiest way is to rent for a few days or borrow from friends.
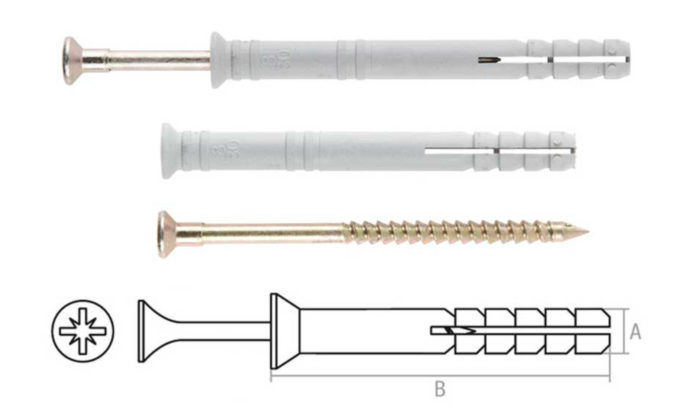
- To fix the cable fasteners, pick up a dowel-nails, the 6x40 option is best.
![Installation technology of a spotlight in stretch ceilings]() Dowel nail 6x40. Where 6 is the diameter, 40 is the length of the fastener.
Dowel nail 6x40. Where 6 is the diameter, 40 is the length of the fastener. - Small self-tapping screws for attaching metal plates and other parts, if required.
- Hooks if chandeliers will be installed. There are options for wood and for concrete. In the second case, they are combined with a spacer metal anchor.
- Rings for installation of fixtures in a stretch ceiling. Options are sold for specific lamps or universal models in which you need to cut a ring of a suitable diameter.
- To build a frame for a lamp, you can use drywall hangers or perforated tape 1 mm thick. You can buy a special stand with height adjustment, it is more expensive, but it will fit without alterations and additional measurements.
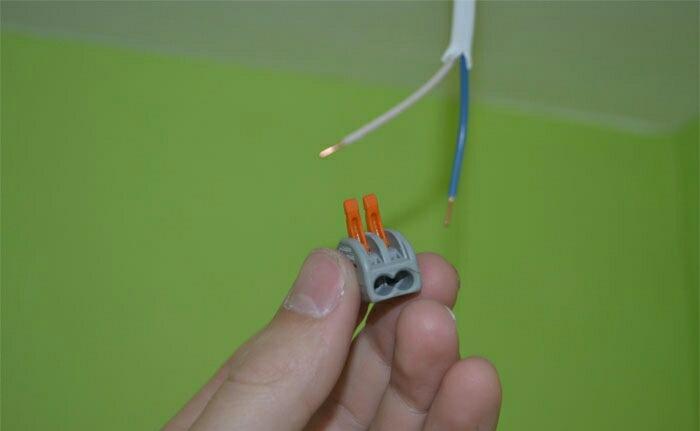
- Connectors for wires. It is most convenient to buy self-clamping terminal blocks, but standard models with screws can also be used. It is undesirable to use twists and electrical tape.
![Terminal block Vago.]() Self-clamping terminal block Vago.
Self-clamping terminal block Vago. - Pencil or chalk for markings on the ceiling and tape or masking tape for landmarks on the floor.
- Roulette length not less than 5 meters.
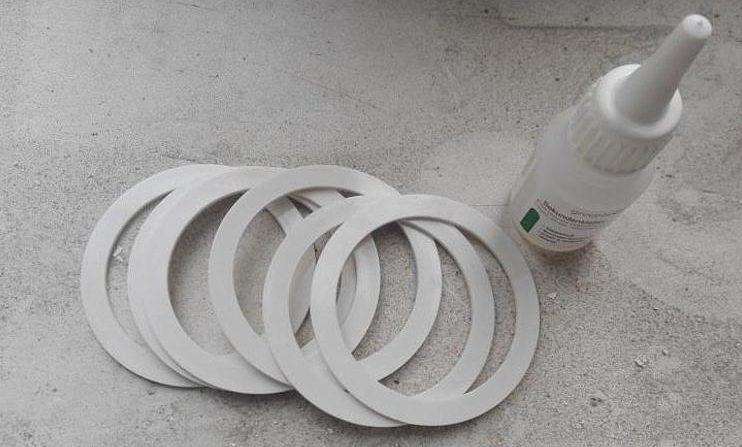
- Thermal rings that protect the stretch ceiling from overheating and melting.
![Rings and glue for stretch ceiling.]() Rings and glue for stretch ceiling.
Rings and glue for stretch ceiling. - Electrician's knife for stripping wires. If not, a construction knife with replaceable blades will do.
- Special adhesive for film and plastic. Cosmofen is perfect - it is sold in stores selling accessories for plastic windows.
- A set of screwdrivers of different sizes and shapes. They are used in the course of work for different purposes.
Advice! If there is not enough natural light in the room even during the day (for example, it is located behind the balcony), it is better to prepare a lamp or a carrier.
Marking the ceiling, how to draw up a wiring diagram and install racks
To begin with, make a diagram, without it you should not start work. Many do the work by eye, and then have problems with repairs and finding junction boxes. As for the scheme, when compiling it, use the following recommendations:
- The minimum distance from the lamp to the wall is 20 cm. Between the shades should be from 30 cm or more. If there are seams on the ceiling sheet, then you can not cut the lamp closer than 15 cm from them.
- Select the location of the junction boxes so that they are always accessible.
- Plan the wiring locations. It should run parallel or perpendicular to the walls. It is impossible to lay diagonally, just as it is impossible to allow intersections. If the wiring changes direction, then the angle must be right.
- Draw on a piece of paper indicating indents and distances. This makes it much easier to navigate the work.
The next step is markup. Previously, this work required special precision and attention, but with the advent of laser levels, everything has become much easier. The work is done like this:
- Marks are placed on the ceiling where lamps or chandeliers will be installed. After that, the location of the points is transferred to the floor with the usual construction plumb line.
- On the floor, it is better to glue masking tape or electrical tape. You should not draw with chalk, as it can be accidentally erased and then there will be problems with determining the exact place.
- Mounting platforms are installed at the mounting points, which are selected according to the type of luminaire. You can buy special brackets, or you can assemble them from a drywall profile and a ring that is cut from a universal platform according to the diameter of the lamp.
- If a chandelier will be hung, you need to fix the hook.
At the measurement stage, clarify the indentation of the canvas from the ceiling. This will help set the platforms at the right level.
Ceiling mounting
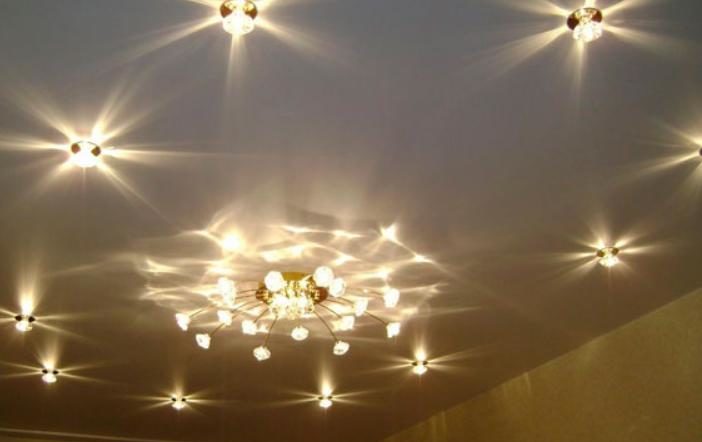
When installing fixtures in a suspended ceiling, you must select them in advance, the installation method depends on this. Most often, point overhead options, classic chandeliers and LED strips are used. Each of the solutions has its own installation features that you need to know.
Spot surface-mounted lamp
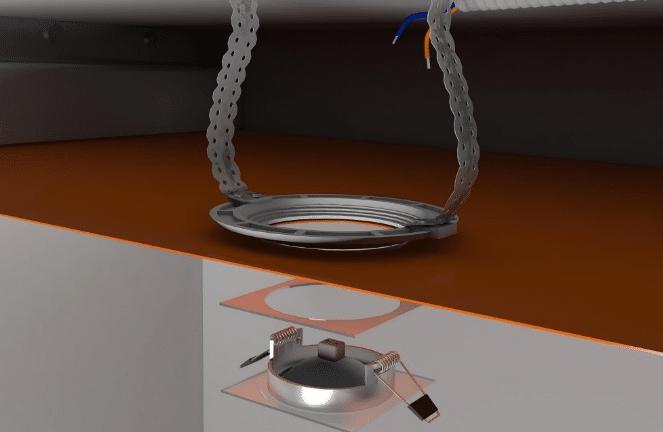
Before starting work, deal with the design of the lamp, see how the clamps work so that nothing is damaged during installation. You can strip the wires in advance, then you won’t have to spend time on this when connecting. Install spotlights in a stretch ceiling as follows:
- First set the laser level on the mark on the floor. A point is projected onto the ceiling, you need to leave the equipment in this position for a while.
- A special glue is applied to the thermal ring in a small layer. It must be set so that the laser mark is exactly in the middle, and pressed against the ceiling surface.The main thing is to be careful - you can’t move the ring along the canvas, as traces of glue will remain, you won’t be able to remove them.
- The glue will set in just a few minutes. Then, with a construction knife, you need to carefully cut the canvas inside the thermal ring. There is no need for great precision.
- The platform, which is located above the ring, should be tightened so that it is located exactly at the level of the canvas. If necessary, it is fixed in the desired position.
- Lead wires are pulled outward to make work easier. You need to connect the cartridge with the wiring with a block. For a voltage of 220 volts, the order of connection is not important. But if 12 or 24 Volts are supplied to the lamp, it is imperative to observe the color combination (blue - zero, red or black - phase).
- If there was no light bulb in the lamp, it should be inserted. Next, gently tighten the latches and put the case in place.
Note! Before installation, you need to choose a lamp in accordance with the indentation of the ceiling from the surface. If the distance is 35-50mm, only models with GX53 chuck will fit. When the niche is 5 cm or more, install any type of recessed luminaire.
Be sure to watch: Adding new fixtures to the stretch ceiling without mortgages.
The nuances of installing a chandelier
In this case, two mounting options can be used - a hook and a plate. Depending on the type of fastener, preparation for installation varies greatly. If you need to hang a model with a hook, remember the following:
- The type of fastener is selected in accordance with the material of the ceiling slab. For concrete, an anchor or dowel and a hook with a threaded part for screwing in are best suited (it is also convenient to use for wood).If the design is hollow, a “butterfly” will do, in which the spring-loaded petals open and hold the element.
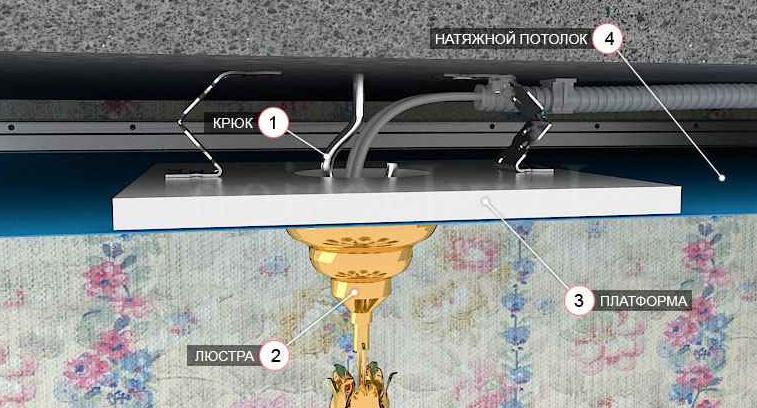
- You also need to make a platform that will be located above the canvas and serve as an emphasis for a decorative cap. The easiest way is to use plywood with a thickness of 5 to 10 mm. A square of approximately 25x25 cm is cut out, in the center of which a hole is made. Its size must be chosen so that you can hang the chandelier and connect the wires.
- The platform is best mounted on suspensions at four corners. Before installation, it is bent closer to the ceiling so as not to interfere with the tension of the canvas.
- Mark with a leveler. If there is no laser device, then find the plywood by touch and navigate by the location of the hole. Stick a plastic ring on top, which should match the cutout in the platform.
- Carefully pull out the wires and connect to the chandelier terminal. Then hang the chandelier on a hook, lift the decorative cap covering the attachment point and fix it with a screw.
Dangerous! Always turn off the electricity before starting work.
If you need to mount on a bar or two bars, then the installation method will be different. In this case, it all depends on the design and location of the fasteners. Installation instructions:
- If there is only one plate, then you need to cut a wooden block of a suitable length and fix it to the ceiling with drywall hangers, so that you can then set the level.
- For a cross-shaped bracket, you need to make a wooden base of the same shape. If the size is large and the attachment points are far apart, you can install 4 bars, the main thing is to accurately determine their position and check by attaching the bracket.
- After stretching the canvas, it is necessary to determine the installation location of the plastic ring (or several rings) and glue it to the surface. Then cut holes and connect the wires.
- Fasten with the nuts that come with the kit by inserting the studs from the bracket into the holes in the housing. Clamp evenly so that the chandelier does not warp.
For non-standard fastenings, the preparation of the base may differ. The main thing is to deal with this aspect in advance, mark the ceiling and put bars or plywood in the right places.
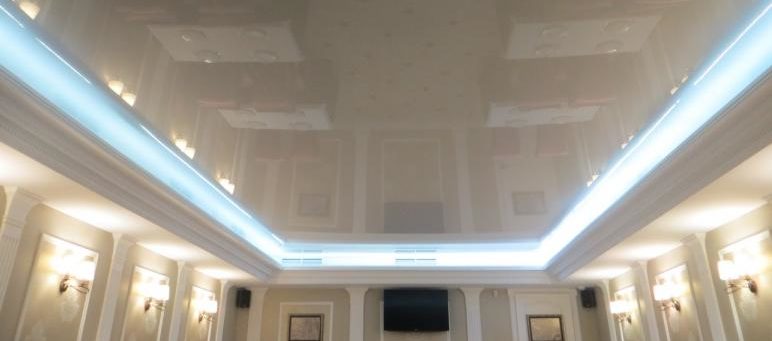
Features of mounting LED strip
LED strip is used to illuminate the surface and to create a cozy atmosphere in the room. You can attach it both above the canvas and below it, it all depends on the desired effect. First you need to bring the wires to the junction and think about where to install the blocks through which power is supplied to the tape. Do the job like this:
- When installing above the canvas, prepare the surface of the wall or ceiling: clean it of debris and prime it. The easiest way is to glue on a double-sided tape, in the premises it securely holds the diodes.
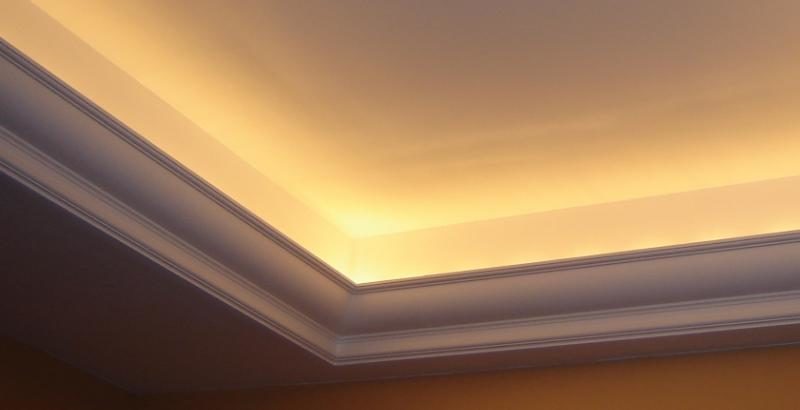
- If you need to make a backlight from the outside, then it is better to use a special baguette, which the installers attach when pulling the ceiling, it has a niche for the LED strip. Or you can make a drywall niche, but this is a difficult process.
![Installation technology of a spotlight in stretch ceilings]() You can fix a protruding baguette around the perimeter and glue the tape to it.
You can fix a protruding baguette around the perimeter and glue the tape to it. - It is best to select a profile with a diffuser, then the backlight will give a uniform light.
Installing ceiling lights is a simple process if their location is thought out, the wiring is connected and the installation sites are fixed. The main thing is to collect everything you need in advance and work with the canvas carefully so as not to damage it.