Heating the chicken coop in winter with an infrared lamp
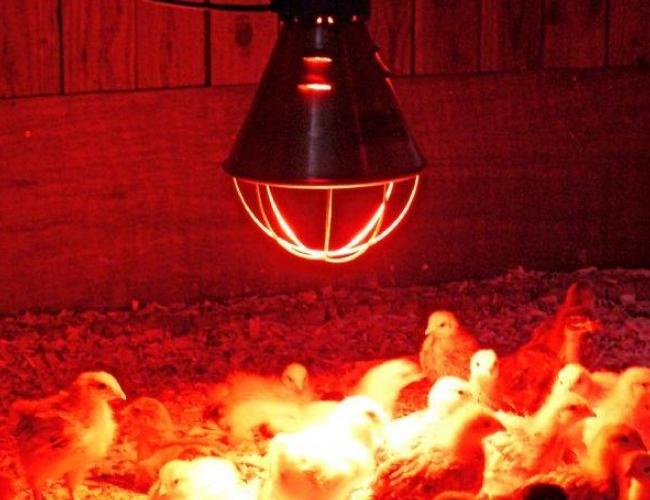
A red chicken coop lamp is a simple and effective solution that will help protect your bird from hypothermia in winter. Comfortable conditions for laying hens are created in the poultry house, they continue to lay even in cold weather, which cannot be achieved without the use of additional heating. But in order to do everything right and eliminate problems, you need to understand the topic.
What is a red light used for?
Many poultry farmers believe that there is no need to heat the chicken coop in winter, as the birds are already going through this period. But if you use additional heating, then the effect of it will be as follows:
- Chickens will not stop laying even in the coldest periods. And many farmers claim that in winter, under infrared light, laying hens produce even more eggs than in summer.This is due to the fact that a favorable microclimate is created inside the premises, a decrease in the number of eggs is observed only during periods of molting.
- Normal temperature is maintained inside, the birds do not freeze. If chickens are exposed to prolonged hypothermia, then they get sick much more often. At best, their body weakens and after the onset of heat, it takes more than a month to restore normal vital processes, and egg production also suffers from this.
- Infrared radiation has a positive effect on the health of birds and does not pose any danger to them. Moreover, with constant use, many pathogens and pests are destroyed. A favorable microclimate for the life of birds is created.
- Chickens survive the winter much better. They do not suffer from hypothermia, food is at a comfortable temperature, and drinking water never freezes.
By the way! In order for the lamp for chickens to have an effect, the chicken coop must be prepared before winter. To do this, the walls and floor in the room are insulated. A thick layer of bedding is also used, it will not only protect from the cold, but also accumulate heat.
Pros and cons of infrared heating
Like any other type of heating, infrared lamps have advantages and disadvantages. They must be studied when choosing in order to understand the features and make a reasonable decision.
Advantages
There are far more pros to chicken coop lamps than cons. Therefore, they are used so often in different regions, including those where frosts reach -40 degrees in winter.The main advantages are:
- This is the most environmentally friendly way to heat a poultry house. Lamps do not burn oxygen in the room, do not emit harmful substances, which allows you to create an ideal microclimate for laying hens. In fact, infrared heating provides the conditions in which the hens feel best, so even winter is not a hindrance to collecting as many eggs every day as in summer.
- The system works in different conditions with the same efficiency. No need to provide optimal humidity. Even if the air in the chicken coop is too humid, the lamp can be turned on without restrictions.. Over time, it will provide a decrease in humidity due to warming up the air and its optimal content, which is also important.
- Infrared radiation has a positive effect on the bird's immunity, increasing resistance to diseases. In addition, metabolic processes are normalized in chickens, the work of the gastrointestinal tract improves. The heat from the lamp is as close as possible to natural sunlight, which is why it is useful for laying hens.
- The efficiency factor is one of the highest. The lamp does not heat the air due to heat radiation, but heats all surfaces under it, the efficiency is an order of magnitude higher. It is the space that is nearby that is heated, the heat, according to physical laws, rises up and warms the chickens on the perch. This option is best suited for poultry.
- infrared lamps emit both short, medium and long waves. Therefore, surfaces are heated at different distances from the radiation source. This ensures high efficiency in rooms of different sizes and designs.
- Installing this type of heating is much easier than any other. It is necessary to bring the wiring and fix the lamps in suitable places. If you arrange water heating, you will have to lay pipes, making a stove is also much more difficult and expensive. The costs are low, which is also important, and you can assemble the system in a day.
- During the operation of the equipment, convection currents are not created, so dust does not circulate around the chicken coop and the microclimate is not disturbed. Also, it does not burn, so there are no foreign odors, and the air does not dry out.
- Lamps and heaters work silently, this is also important, as the bird may not respond well to a constant hum.
By the way! If necessary, the lamps can be removed in an hour. It is also important that they can be turned off at any time, this is not an oven that will cool down for a long time.
Flaws
This solution also has disadvantages that must be considered when choosing a heating method for a poultry house. There are not so many of them as pluses:
- The high price of lamps. They do not have a very large resource, so you need to change them periodically. But if you compare it with the price of water or stove heating, then the money saved will last for decades.
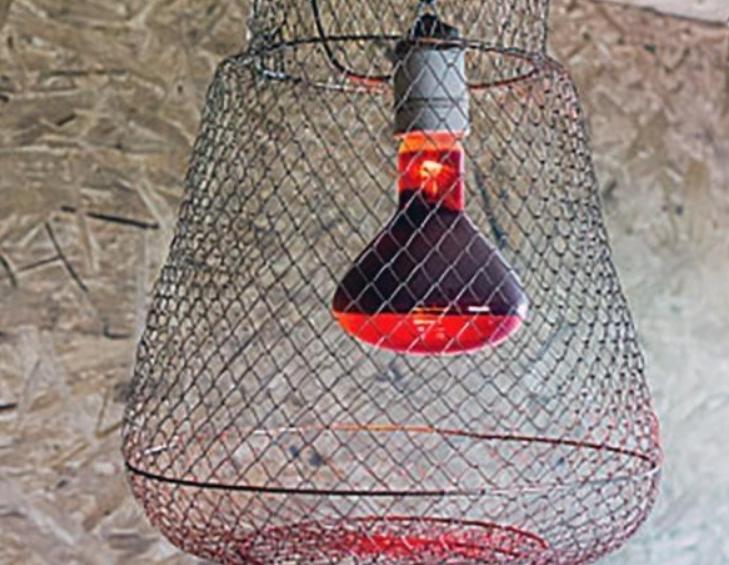
- The surface heats up to a high temperature. Therefore, the heat source must be installed in such a way as to prevent human or bird contact with the heater. You can do otherwise and put a protective wire frame to prevent accidental contact and protect the chicken coop from fire.

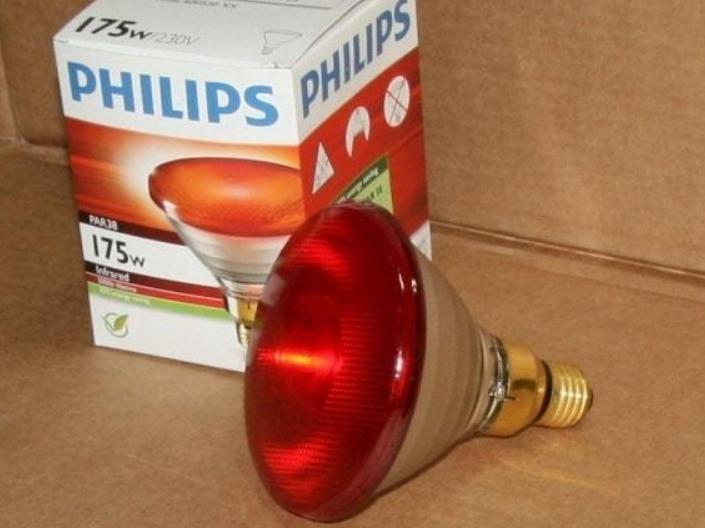
When buying, choose lamps and heaters from well-known manufacturers with documents and a guarantee. There are many low-quality options on sale, they do not heat the room well and do not last long.
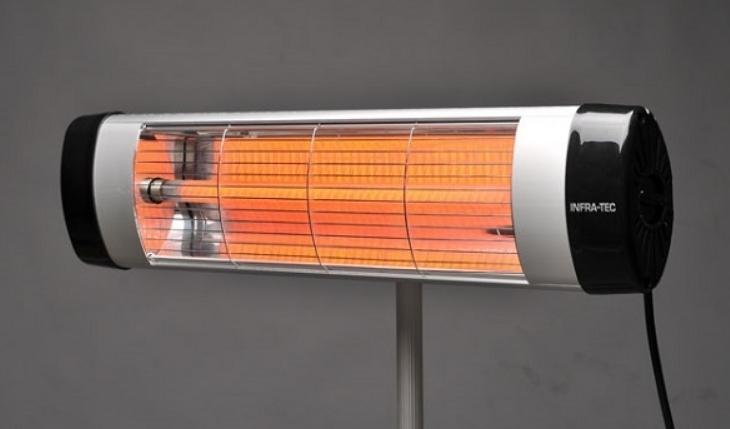
Comparison of two heating devices - an IR lamp and a ceramic heater.
Types of infrared heating for poultry houses
There are three main varieties that can be used in a chicken coop. Each has its own characteristics, so it is worth considering all the options before making a decision.
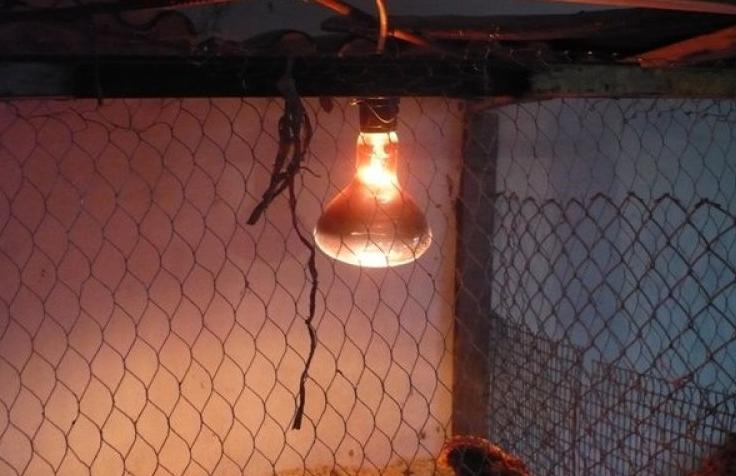
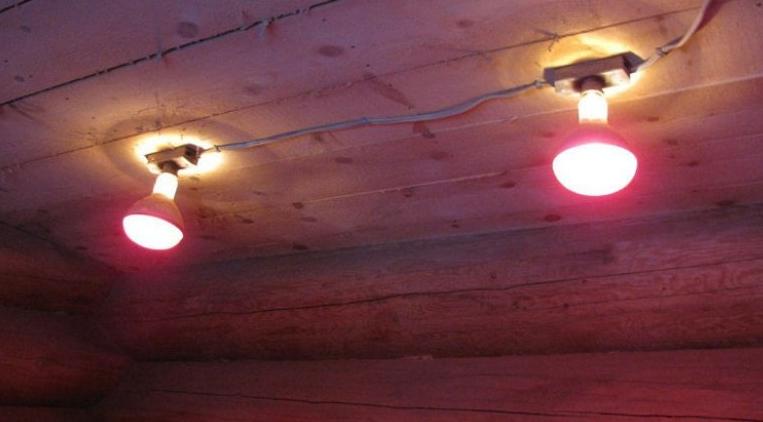
Lamp
The poultry heater lamp is most often used due to its simplicity and affordability. This option is also called an infrared mirror bulb due to the design features. Key Features:
- You can choose a suitable lamp for a room of any area, as the power is different. Based on the manufacturer's recommendations, usually for a 12 sq.m. 250W option required.
- The infrared lamp for heating the chicken coop has an efficiency of 98%. This means that almost all electricity is put to good use and its losses are minimal.
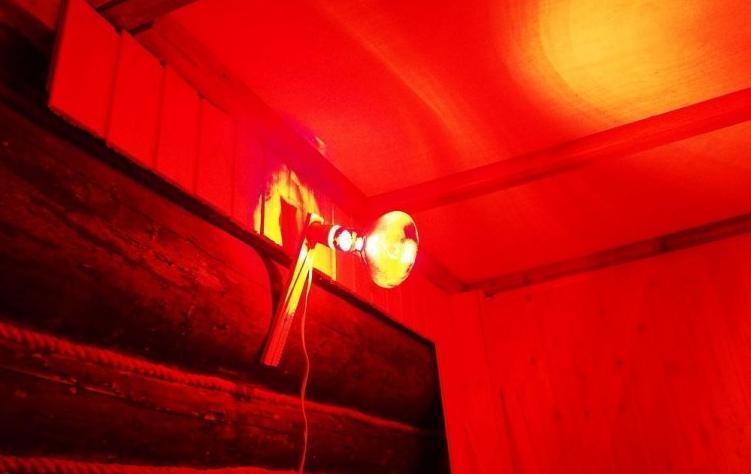
- The element not only heats, but also illuminates the room. It gives a subdued light, in which the birds feel good.
- You can place the lamp in any convenient place, it is not very large, so there are no difficulties with installation.
By the way! If necessary, you can put an additional lamp, remove the excess or reduce the heating intensity, replacing it with a lower power option.
shortwave heater
This solution heats surfaces well at a short distance from the heater.Therefore, it is suitable for small rooms with low ceilings. Features are:
- The heating coil is located in a glass tube, which heats up to 600 degrees during operation, which is unsafe. Therefore, the front part is always closed with a metal frame.
- It is necessary to fasten strictly according to the manufacturer's instructions, observing the minimum distances and ensuring the correct position.
- Shortwave radiation adversely affects humans. The bird tolerates it better, but if possible, it is also worth using other options.
When choosing such models, it is worth considering what wave spectrum they emit. Select for the poultry house, taking into account the installation location.
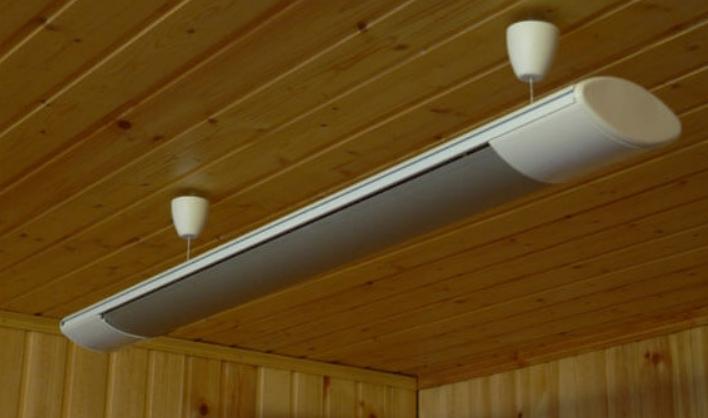
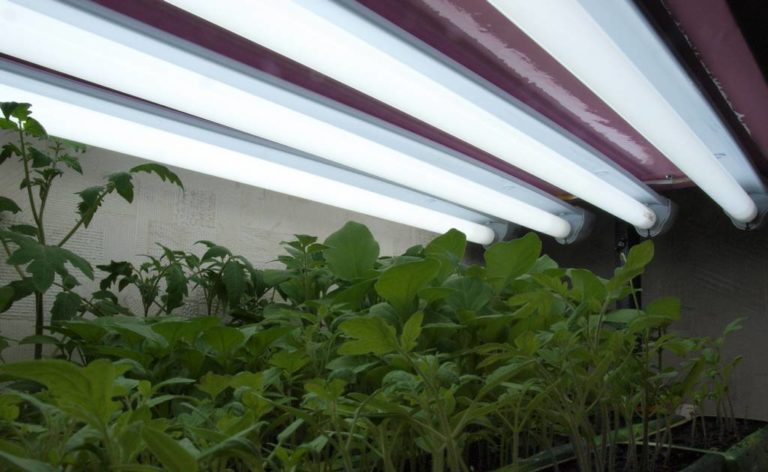
Medium and long wave heaters
They are considered one of the best solutions for both chicken coops and living quarters. They emit waves that are safe for humans and birds and create a healthy microclimate in which pathogens die. Features are:
- Most often, the heating surface is made in the form of a flat panel. It evenly radiates heat and distributes it to a certain area. The higher the ceiling, the larger the heated area.
- Many models have a minimum distance from the heater to the floor. It must be observed to avoid overheating.
- Since the heaters are placed at a high altitude, and the surface heats up to 230 degrees, it is not necessary to install the frame. It is used only if there is a danger of accidentally touching the panel.
Models should be selected according to the area and size of the room. If it is narrow and long, it is easier to put two small heaters instead of one powerful one.
How to install
A heated chicken coop light bulb is installed differently than heaters, so you need to disassemble these solutions separately. The process is not complicated, you can figure it out in a few minutes.
Training
This part of the work is the same regardless of what type of infrared heater will be used. It consists of the following steps:
- Choose the type according to the size of the chicken coop and its features. Buy a suitable model, study the installation recommendations in advance to make sure that you can properly position it in the room. It is best to put lamps and heaters on the ceilingso they work most efficiently.
- Get all the accessories you need. If there is no built-in thermostat in the kit, then it is better to buy it separately and install it. Then the lamp or heater will not overheat the room, because when the desired temperature is reached, the regulator will turn them off. This will ensure operation in an energy-saving mode and reduce electricity consumption by at least half.
- Install a separate machine for heating the chicken coop in the switchboard. This will ensure that the network is turned off during short circuits and overloads and will allow you to turn off the electricity supply in only one room without de-energizing the house.
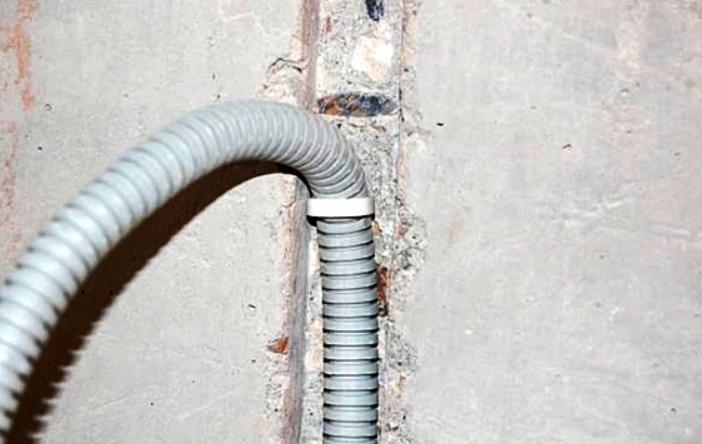
- Lay the cable in the chicken coop. You can choose a method depending on the conditions, you can use the air version or dig a trench and lay the wiring in the HDPE pipe, bringing it out already indoors.
- Lay the cable along the chicken coop in a special corrugation made of non-combustible material. Bring it to the place of the future location, leave a small supply of wiring for connection.
- It is better to use a switch in the system so as not to go to turn it on in another room.
Cable section selected depending on the power of the equipment used.
Lamp mounting
Before starting work, choose the location of one or more light bulbs and think over the mounting system. Do the job like this:
- Fix a hook or eyelet in the ceiling, on which the ceiling will be held. Choose an option of a suitable size, drill a hole in the ceiling with a diameter slightly smaller than the threaded part in the fastener.
- Connect wiring. It is best to use pads; twisting is undesirable. After connecting all the elements, check the operation of the system. Turn it on for a while to make sure everything is fine.
- If there is a thermostat, check its operation, set the minimum temperature to make sure that when it warms up to the set limit, the lamp turns off.
If you still have to connect the wires with a twist, then the joints are additionally soldered and closed with a heat shrink tube. Then, with changes in humidity, the contacts will not oxidize.
Installation of heaters
In this case, it is necessary first of all to study the installation instructions in order to determine what the minimum distance from the heating part to the surface should be. After choosing the installation location, follow the tips:
- Learn about attachment features. Most often you need to mount through holes in the brackets or plastic, self-tapping screws are included. You just need to set up the equipment and fix it on the ceiling.It is better to do the work with two people so that one person holds the heater.
- Connect the wiring, observing the polarity, to do this, follow the instructions from the diagram, which is always in the instructions. Ensure good contact.
- Check system operation. It's best to let it run at maximum temperature and make sure the surfaces don't overheat.

By the way! You can install a modern control system to check the performance or regulate the operation of the heater remotely via a smartphone.
Safety
Like any electrical equipment, infrared lamps and heaters must be operated in compliance with simple requirements:
- Lay the cable indoors only using non-combustible corrugations. This is especially important on wooden surfaces.
- Protect all contacts and connections from moisture and cover. Sealed pads work well. Or the twist can be placed in a heat shrink tube and put on top of a piece of corrugated sleeve, cut in the middle.
- Do not place a heater or lamp closer than 50 cm from the surface. This is dangerous both by overheating and by bird burns.
- If there is a risk that someone will touch the heater or lamp, be sure to protect the structure with a roll cage. It can be made independently from steel wire with a diameter of 4 mm or more.
- To install the lamps, use not a plastic, but a ceramic cartridge, as it tolerates high temperatures better.
- If the housing of the ceiling or heater is very hot, then the surface of the ceiling above it can be covered with a piece of tin or aluminum foil.
- The system should always have an RCD or an automatic device that turns off the heating in case of short circuits or overloads.
Video instruction to consolidate the information: Heating the chicken coop in winter.
It is not difficult to make infrared heating in a poultry house, it will take a minimum of materials, it will take several hours to work. Thanks to this, a comfortable temperature is always maintained in the chicken coop and chickens are laid all year round, which allows you to compensate for heating costs.