Making a night light at home - step by step instructions with photos
Anyone can make a night light with their own hands. There are dozens of interesting options using improvised materials. First you need to figure out what materials are suitable, what interesting ideas there are and study the detailed instructions.
What materials can a night light be made from?
Light light with interesting patterns can be a highlight of the interior. In addition, this solution will allow you to relax, tune in to sleep. And an important point - low electricity consumption. You can make a night light from almost any material, we will select the most interesting options.
From paper
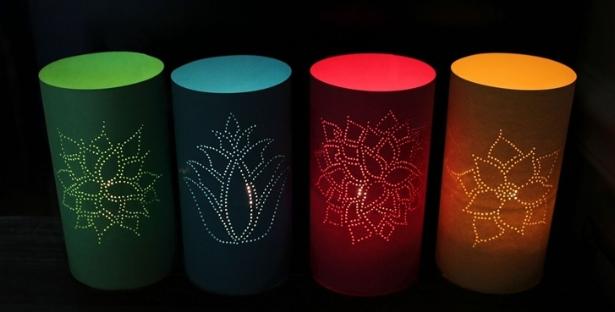
Paper is a material that can be shaped into almost any shape. An additional advantage is low cost and a variety of colors. A simple option - cylindrical with a pattern:
- On a sheet of paper you need to draw a picture, then make holes along its contour with an awl.
- Fold the sheet into a cone, fasten, put a light source in the middle.
from wood
To work with wood, you will need more tools, but the product will be stronger and more durable. A good option is to cut planks of the same width and height. Then it remains to varnish them. You can lay it alternately, this will create a lattice structure through which light will break through.

From the bank
A glass jar is a ready-made night light, and the easiest option is to place a Christmas tree garland inside. If you want to create a unique pattern, then you need to make an additional paper case for the jar with cutouts, for example, in the shape of stars.

From an old electrical plug
Such a light source will automatically turn on after inserting it into the outlet. In addition to the old plug, you will also need a small light bulb with a diameter approximately corresponding to the hole for the wire in the plug.
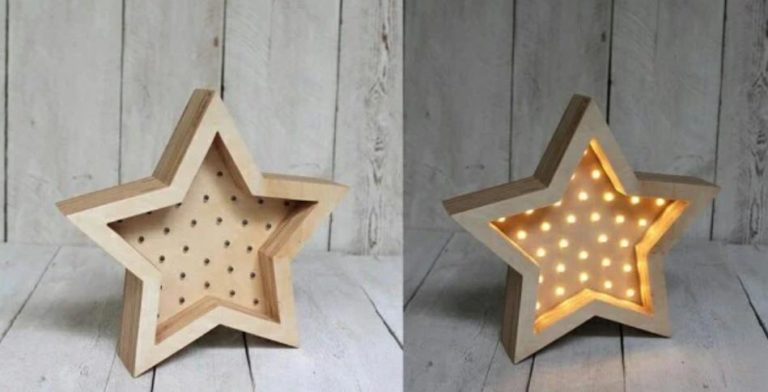
From plywood
From this material, you can make an LED wall lamp. It is necessary to cut out a figure of the desired shape, make a base for fastening, for example, wooden planks, fix the LED strip closer to the center. To improve the appearance of plywood can be painted.
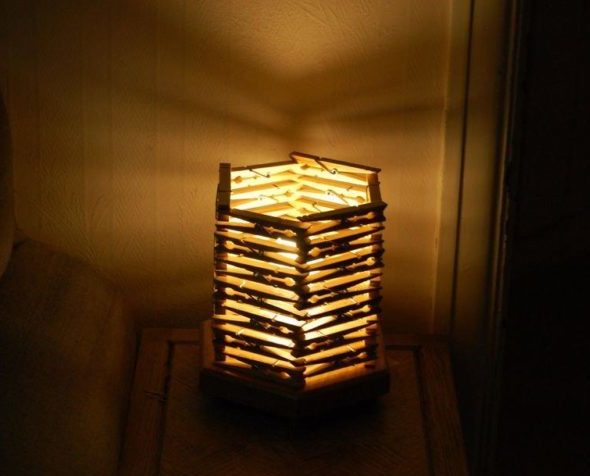
From clothespins
It is best to use wooden clothespins. For the construction of the structure, a wooden frame is required, on which the structure of the desired shape is already built from clothespins and glue. There are holes in the body of the clothespins, which allows you to stack them one on top of the other, the light will still break through.
Other materials
The choice of material for the case depends on the imagination. In addition to the above options, you can also use:
- Glass bottles;
- plastic cups;
- jute;
- carton boxes;
- balloons;
- glass.
Interesting ideas to create
In addition to the materials used in lamps, their shape is also important. A sphere with the effect of floating in the air or in the form of a cloud can surprise guests.
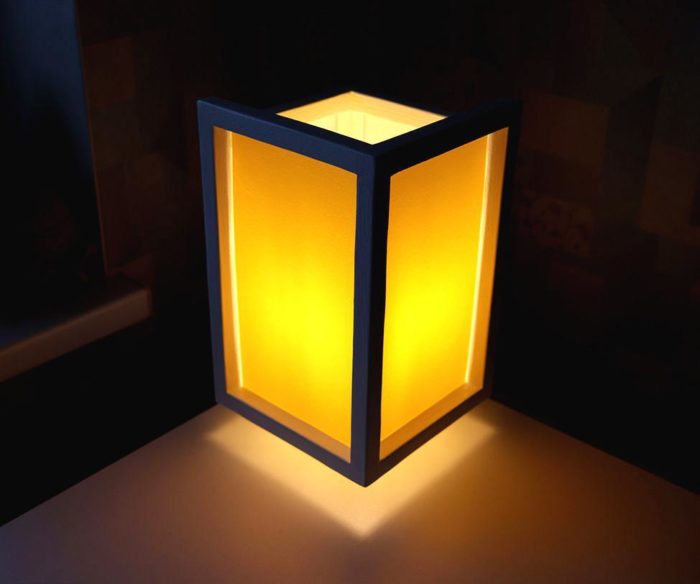
Soaring in the air
A feature of such a lamp is that its base is located in the corner of the product, which is hidden from the eyes. Additionally, the bottom can be illuminated with LED strip, it will seem as if the night light is hovering above the surface of the bedside table.
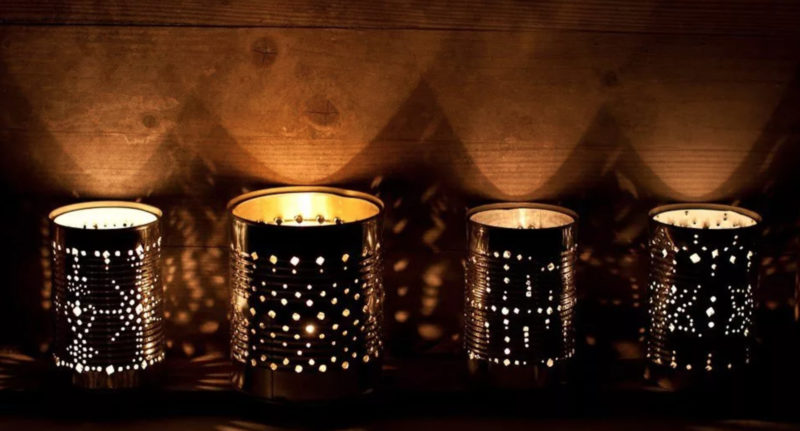
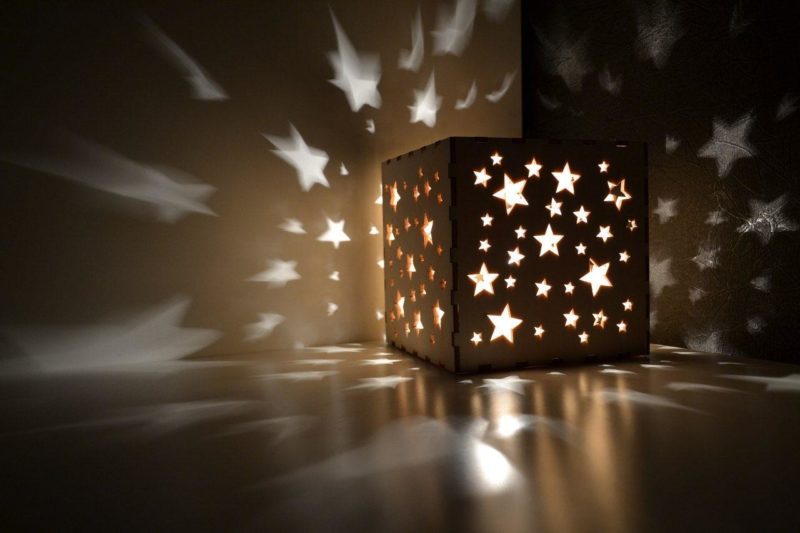
Beautiful night light with bright stars
For such a product, you can use different materials: plywood, cans, metal. It is necessary to make a structure in the form of a cylinder or a square (always with a top cover) and make holes in the form of stars of different sizes. Best of all, such a night light will look in the corner of the children's room, projecting stars onto the surrounding walls.
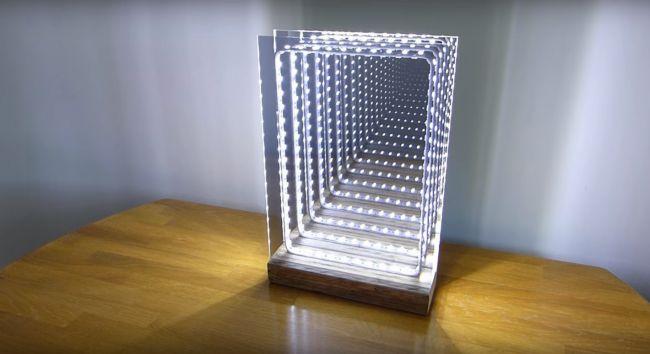
LED
An interesting option is the construction of a frame with glued around the perimeter led strip and installation between two-way mirrors.The result is an infinity effect, and dozens of its reflections are visible instead of one ribbon.
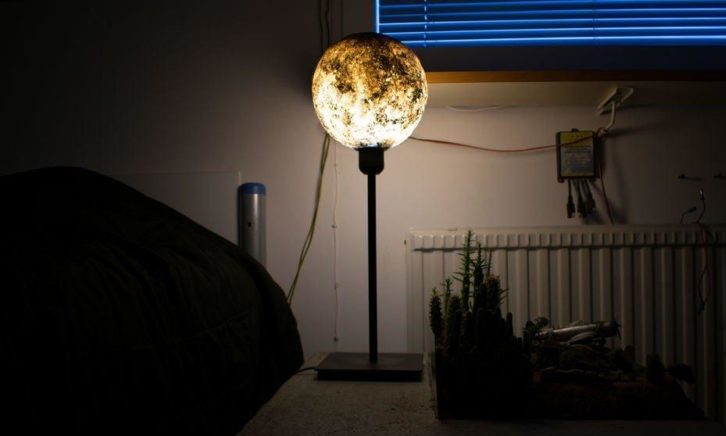
night light moon
A popular production option, but you can also do it yourself. This will require a round balloon, glue, paper towels. It is advisable to take a strong ball so that it does not burst in the process. It needs to be covered with glue, and then with paper towels. The last step will be processing with acrylic paints. After drying, the body of the "moon" will form, the ball can be pulled out of the structure.
night light-cloud
First you need a case in which the light source will be located. You can take a lampshade or make it yourself out of wire, pasting it with a thin cloth. Then pieces of cotton wool are glued onto the body to form a cloud shape.
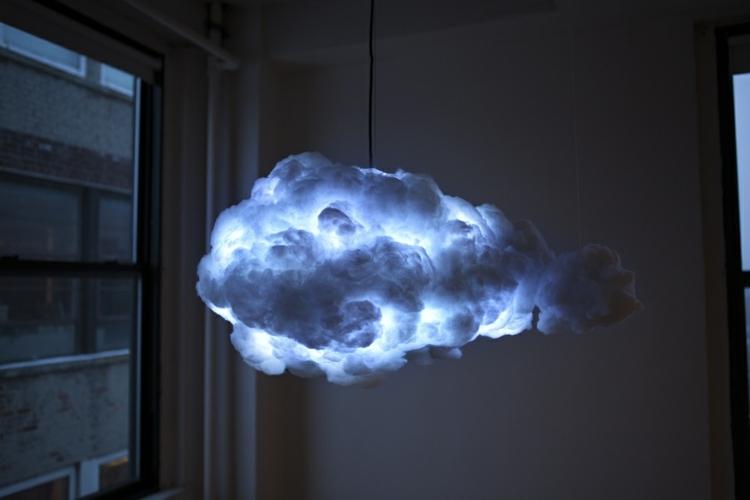
Important! Fire safety must be kept in mind. Incandescent light bulbs should not be used with flammable materials.
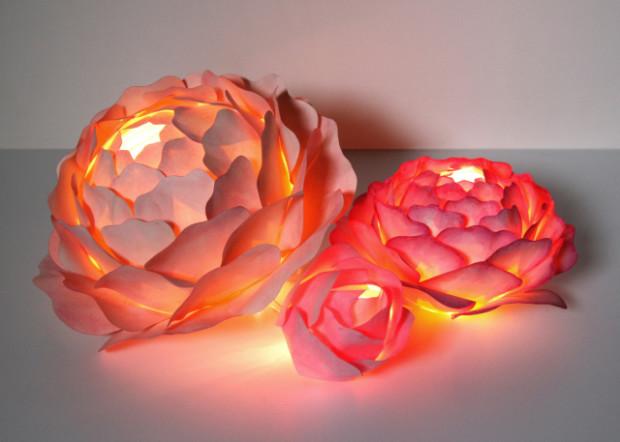
Night light in the shape of a flower
Another fun option for kids. Can you make it from paper, but choose a glow source that does not heat up, and it is advisable to equip an additional case for it. It is better to use thin paper so that the light easily breaks through.
Step-by-step instructions for self-assembly of a night light
You can make a good night light from different materials. One of the easiest options would be paper. It is practical, cheap, but with the right approach it looks really beautiful.
The product will require:
- Sheets of colored paper to create the case;
- a marker for creating a design;
- thick cardboard for the base of the lamp;
- bamboo sticks or toothpicks;
- cartridge;
- bulb.
Step-by-step instructions for performing work:
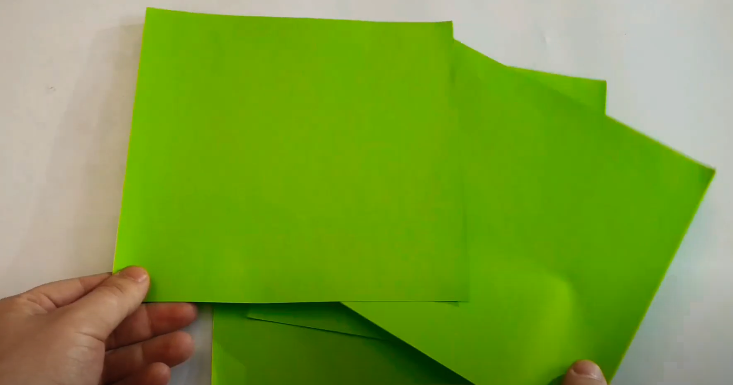
- Preparation of materials. You need to cut 5 sheets of paper for the walls and ceiling of the night light. They should be the same size, but should be cut with a small margin around the edges in order to bend and glue it.
![Making a night light at home - step by step instructions with photos]()
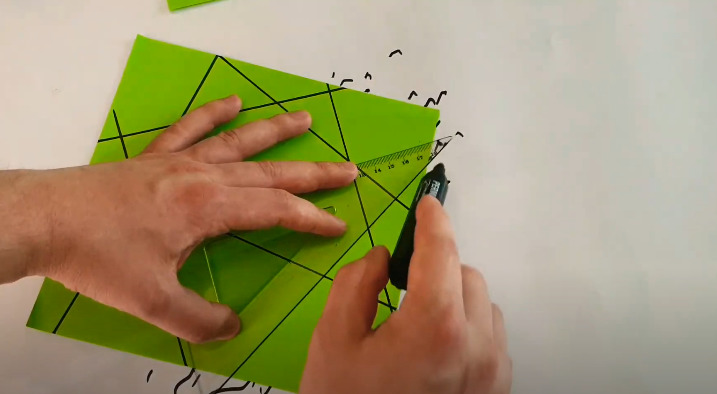
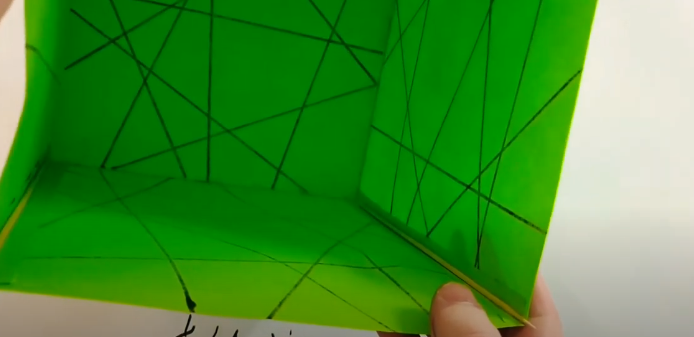
- Create your design. If a person knows how to draw, he can do anything, but if there are no such skills, then geometric patterns with lines will do. It always looks stylish and is easy to draw.
![Making a night light at home - step by step instructions with photos]()
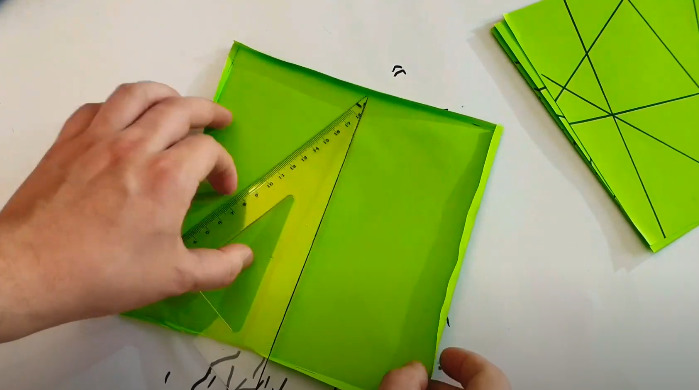
- Bend the edges of the sheets with a ruler.
![Making a night light at home - step by step instructions with photos]()
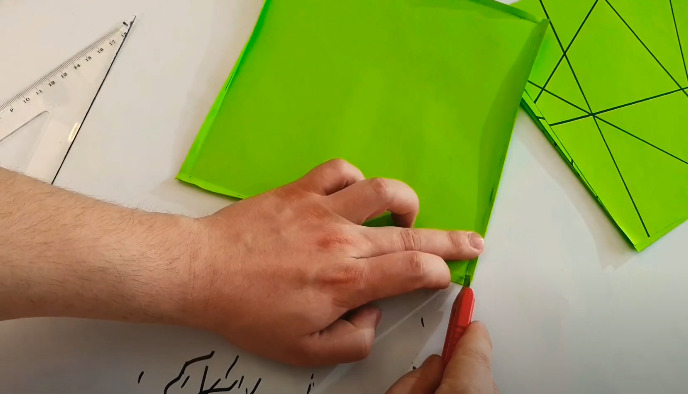
- Trim corners that prevent bending.
![Making a night light at home - step by step instructions with photos]()
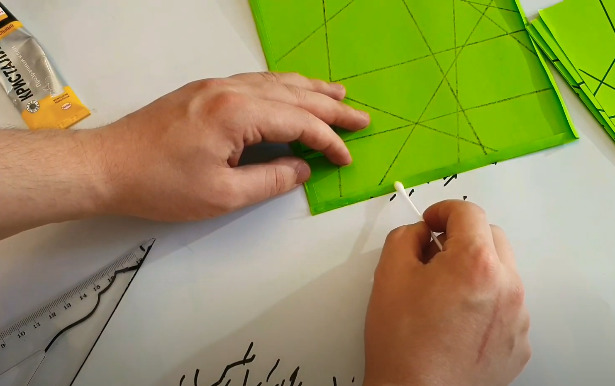
- Using a cotton swab, the bent tapes are covered with glue.
![Making a night light at home - step by step instructions with photos]()
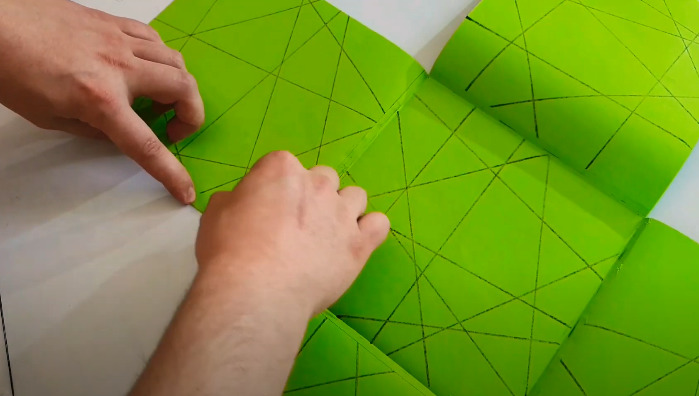
- All side walls of the night lamp are glued to the central sheet.
![Making a night light at home - step by step instructions with photos]()
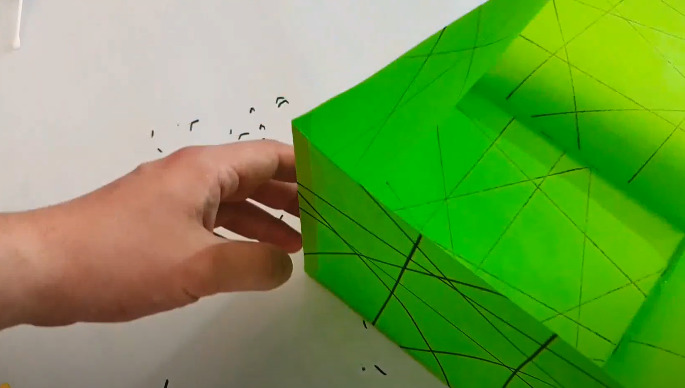
- The side walls are glued to each other.
![Making a night light at home - step by step instructions with photos]()
- Bamboo sticks will make legs. They should protrude slightly beyond the bottom edge of the walls.
![Making a night light at home - step by step instructions with photos]()
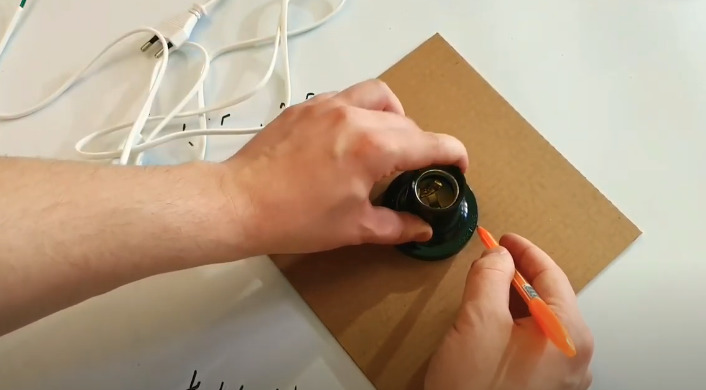
- Along the contour of the cartridge, it is necessary to draw its base.
![Making a night light at home - step by step instructions with photos]()
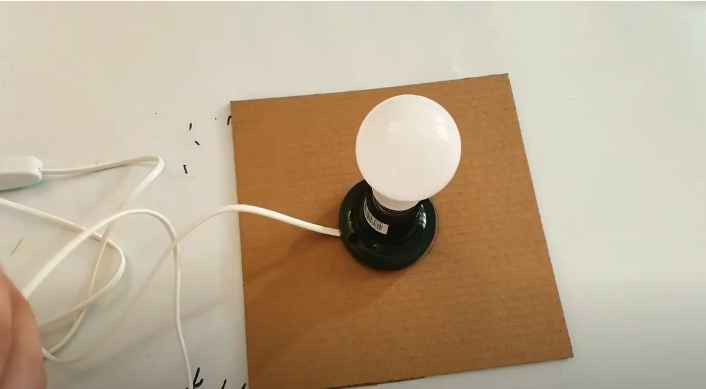
- Connect the cartridge to the wire.
![Making a night light at home - step by step instructions with photos]()
- Screw on the light bulb.
![Making a night light at home - step by step instructions with photos]()
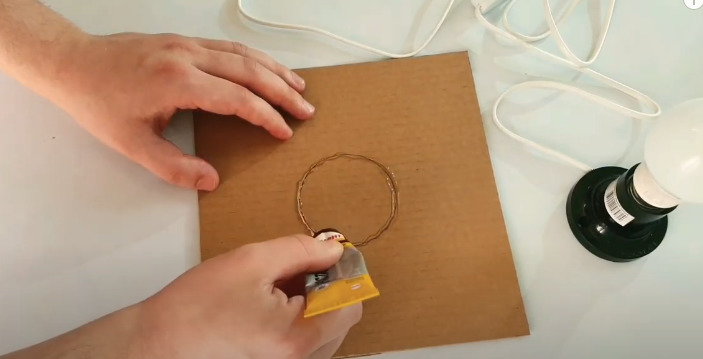
- Glue is applied to the previously marked contour, the cartridge is glued.
![Making a night light at home - step by step instructions with photos]()
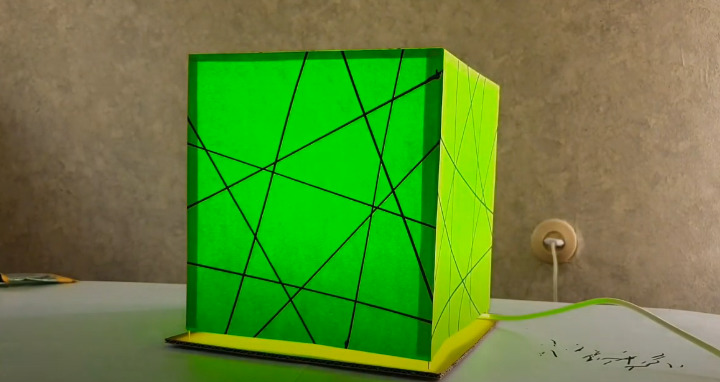
- After that, it remains only to put the case on the base, plug it into the outlet, and the night light will work.
![Making a night light at home - step by step instructions with photos]()

See the video for detailed instructions on making.
This is a simple but beautiful design that can be easily improved. Instead of bamboo legs, you can assemble a full-fledged wooden frame. Instead of paper, you can use fabric, and use plywood or the same tree for the base. It all depends on the skills and imagination of the master.