Features of replacing a lamp bulb in a false ceiling
Suspended and tension-type ceiling structures are equipped with various types of lighting fixtures. Most often, these are spotlights - small-sized spotlights of low power, arranged in a certain order. By distributing them over the area of the ceiling and walls, directing beams of light or scattering them, designers zone the space.
As a result, one square meter of space sometimes has 1-2 light sources that need scheduled maintenance or replacement in case of failure. It is difficult, but possible, to complete this task without knowledge of electrical engineering and the design of a particular model. The plasterboard ceiling, although fragile, still allows manipulation by a non-specialist with a minimum of damage to the structure, while the stretch fabric does not forgive mistakes, and in the event of a puncture or cut, it may burst along the rupture.The situation is complicated by differences in the design of fastening systems used by different companies, so it is necessary to consider the features of the main types and models.
How to remove a light bulb from a stretch ceiling
The easiest way is to unscrew a light bulb with a screw base from a suspended ceiling that can withstand the heat of incandescent and halogen lamps.
| Type of | Diameter (mm) | Name |
| E5 | 5 | Micro base (LES) |
| E10 | 10 | Miniature plinth (MES) |
| E12 | 12 | Miniature plinth (MES) |
| E14 | 14 | "Mignon" (SES) |
| E17 | 17 | Small base (SES) (110 V) |
| E26 | 26 | Middle base (ES) (110 V) |
| E27 | 27 | Medium plinth (ES) |
| E40 | 40 | Large plinth (GES) |
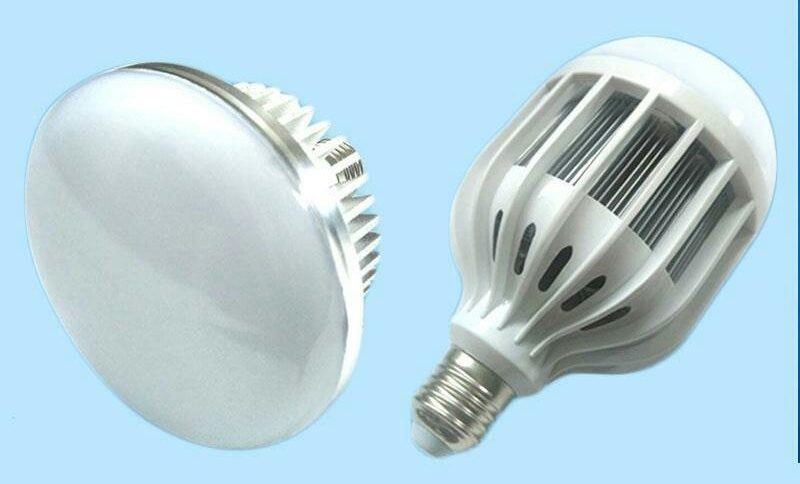
In soffits of tension systems, small-sized LED or halogen lamps with an E14 base are most often used, since heating standard E27 incandescent lamps deforms the plastic sheet. Such a base is unscrewed by turning counterclockwise. In some models, the lamp is protected by glass, which is mounted in a threaded ring screwed into the body of the spotlight. To access the light source, you must first unscrew the ring with glass, holding the housing frame with the other hand, and only then unscrew the light bulb. The standard E27 format implies the use of only LED lamps that follow the shape of an incandescent lamp.
Replacing lamps MR16, GU5.3
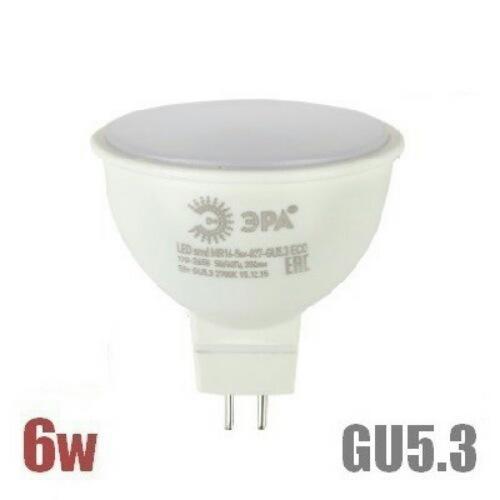
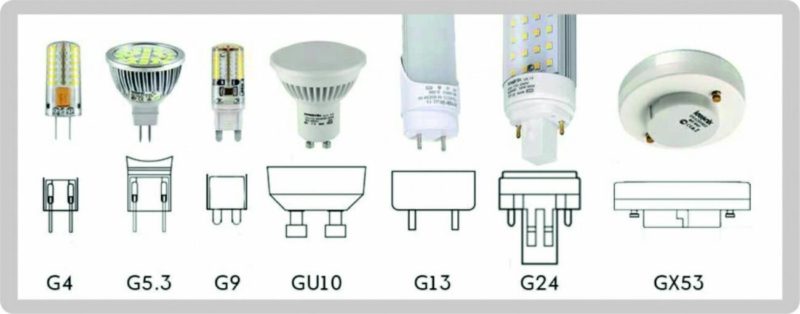
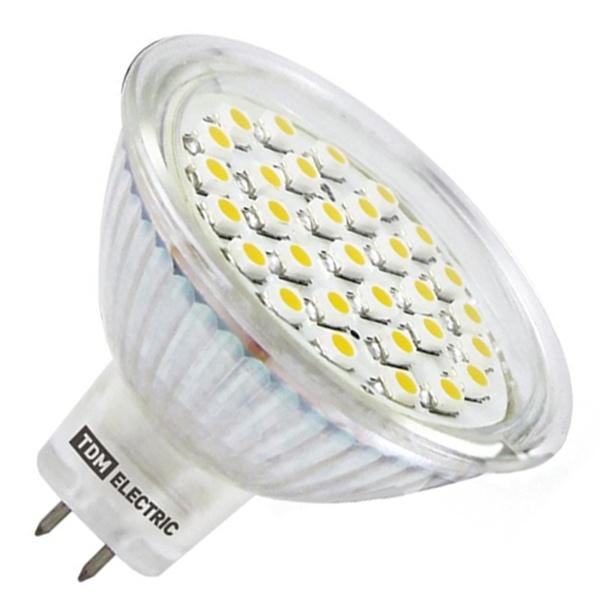
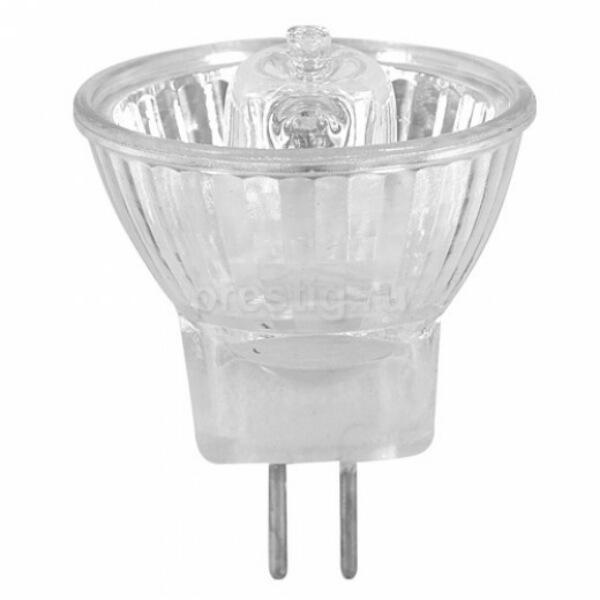
The 2" multi facet reflector of the MR16 lamp scatters light in individual beams or in a general beam in a specific direction. Initially, the design was developed for a slide projector, but later found application in studio and home lighting.Most often it is equipped with halogen bulbs for 12 V with a power of 20-40 W or LED for 6, 12, or 24 W. The MR16 modification for spots has a GU 5.3 pin base with a distance between contacts of 5.3 mm.
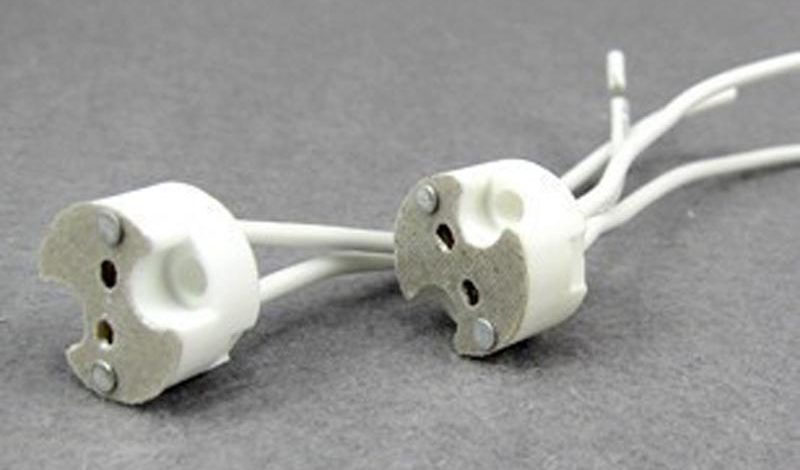
The GU 5.3 contacts are inserted into the ceramic socket.
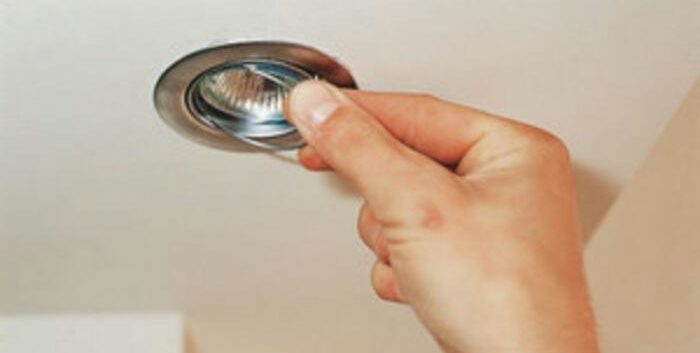
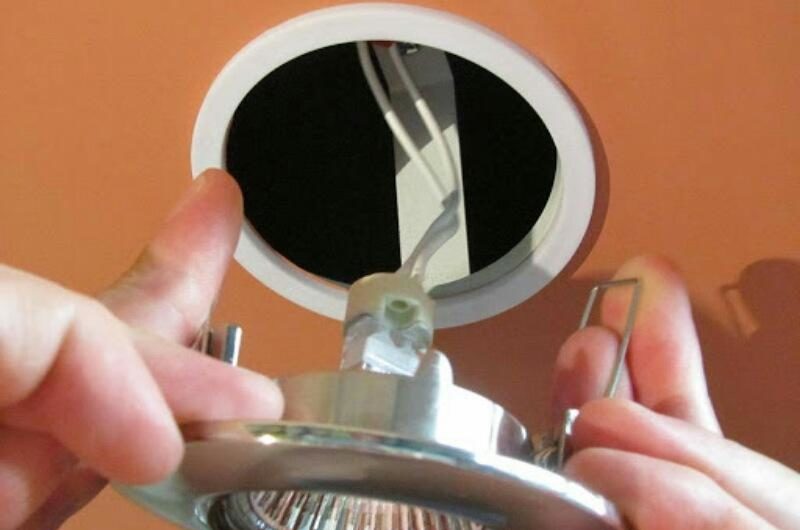
To replace an MR16 bulb in a suspended ceiling, it is not necessary to remove the entire luminaire. It is attached to the soffit body in two ways:
- By means of an internal locking metal clip.
![Features of replacing a lamp bulb in a false ceiling]() To remove the MR16, you need to squeeze the antennae of the bracket with your fingers or pliers and pull it down.
To remove the MR16, you need to squeeze the antennae of the bracket with your fingers or pliers and pull it down. - With hidden threaded ring.
![Features of replacing a lamp bulb in a false ceiling]() For ease of twisting / twisting, the ring is equipped with a notch.
For ease of twisting / twisting, the ring is equipped with a notch.
Replacing the light source without removing the lamp occurs in the following order:
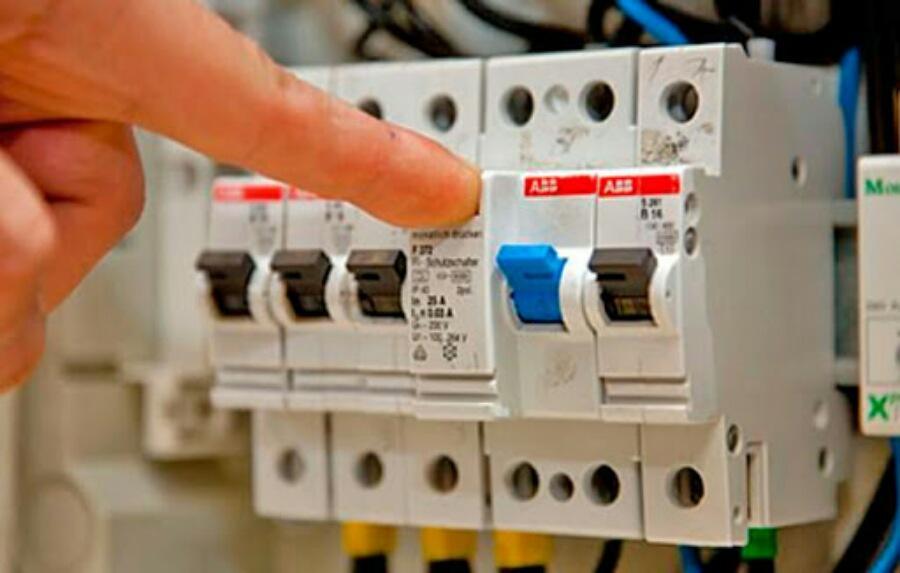
- The room is de-energized by unscrewing the plugs or turning off the toggle switch in the circuit breaker on the meter.
- To facilitate access to the device, a table, chair or stepladder is placed under it.
- Holding the soffit body with one hand, the locking bracket is removed with the other hand or the inner threaded ring is unscrewed.
![Features of replacing a lamp bulb in a false ceiling]() Removing the retaining ring.
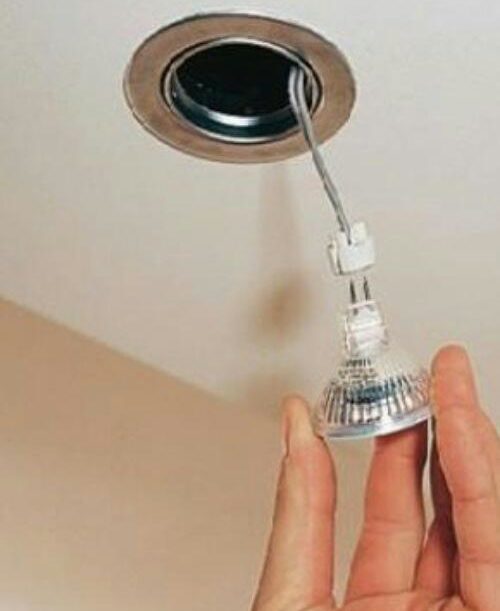
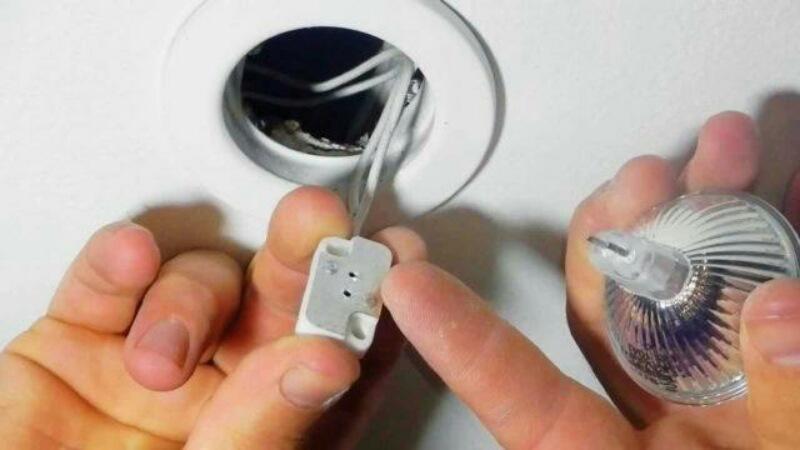
Removing the retaining ring. - Pull the base pins out of the socket. To do this, the MR16 must be pulled down while holding the ceramic connector with your fingers.
![Features of replacing a lamp bulb in a false ceiling]() The light bulb, having no support, falls down under its own weight, holding on to the wire, which has a margin of 20-30 cm.
The light bulb, having no support, falls down under its own weight, holding on to the wire, which has a margin of 20-30 cm.![Features of replacing a lamp bulb in a false ceiling]() Note! The fastening of the wire to the cartridge is unreliable, so you cannot pull on the wires.
Note! The fastening of the wire to the cartridge is unreliable, so you cannot pull on the wires. - The new light source is inserted with pins into the connector until it clicks.
- The light bulb is put into the seat, the wires are laid in the void on the platform.
- MR16 is fixed with a locking bracket installed in a special groove along the inner perimeter of the spot body or with a threaded ring.
If the groove for the bracket or the thread for the ring is blocked by the lamp, then you need to remove it and check if the wires have got between the body of the bulb and the spotlight.
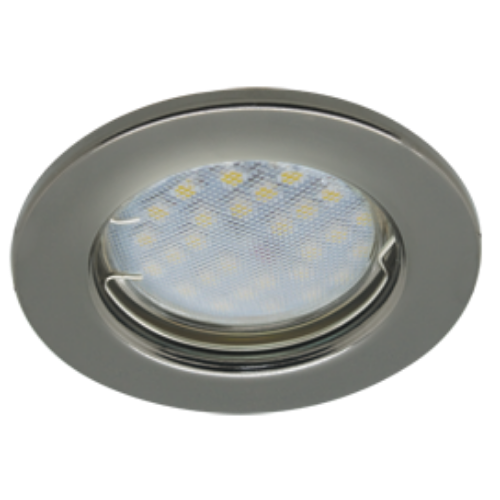
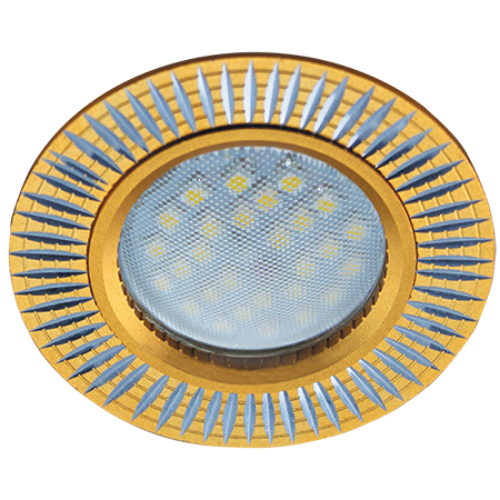
Replacement of lamps type GX53 (tablet)
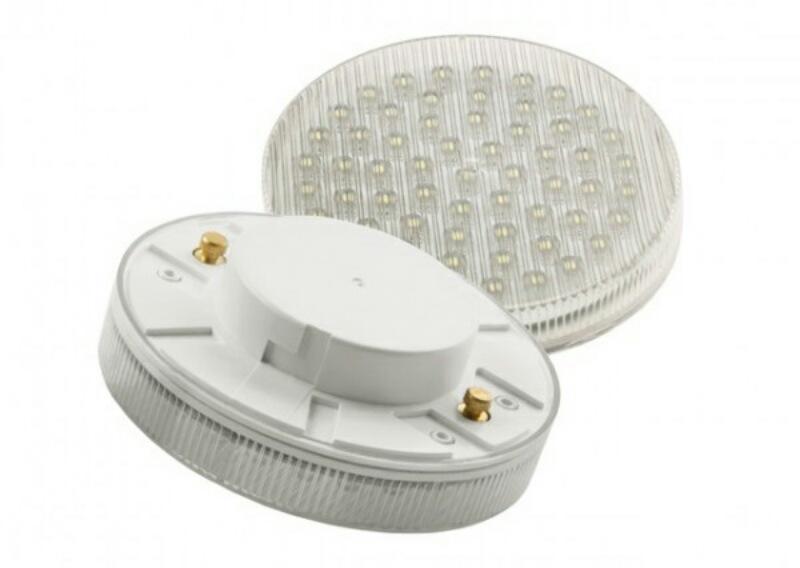
Tablets have a flattened shape, which allows them to be used in rooms where it is necessary to save space between the supporting structures and the false ceiling. As a light source in tablets, LEDs are used, for which a power supply is installed in the device case. GX53 is a pin base format with 53mm pin spacing. At the ends of the pins there are thickenings for fixing in the rotary slots of the connector.
The process for replacing a soffit with a GX53 base is similar day starter replacement gas discharge tubes.
In order to change a tablet-type light bulb in a ceiling lamp, you must:
- De-energize the room.
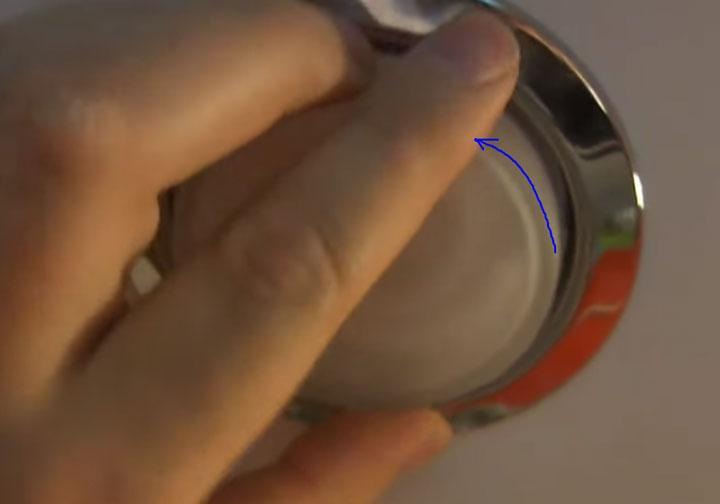
- While holding the body of the spot, turn the tablet counterclockwise by 10-15 degrees until it stops and pull it down.
![Features of replacing a lamp bulb in a false ceiling]() Turn counterclockwise.
Turn counterclockwise. - Install a working light bulb by aligning the pins with the slots on the connector in the area of their expansion and turn the tablet clockwise until it stops and clicks.
The design of the device is simple, but has a drawback. In the area of contact between the pins and the connector, carbon deposits may form over time, due to which the lamp starts flashing and periodically goes out. To avoid this, the tablets must be periodically removed and the contacts cleaned from oxide.In low-quality cartridge models, the tab in the connector sticks in the extreme position and you have to pull it out with a hook, and if this fails, change the cartridge entirely. Otherwise, tablets are considered the easiest spotlights to use.
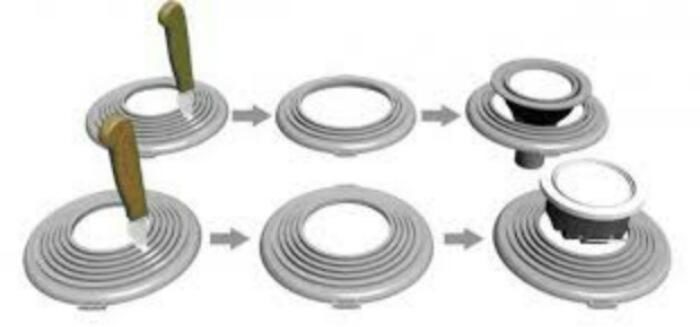
Replacing a luminaire in a stretch ceiling
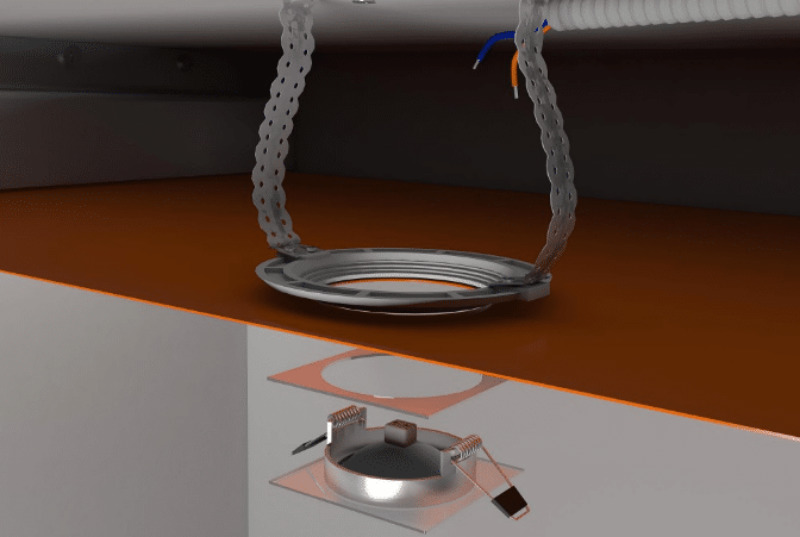
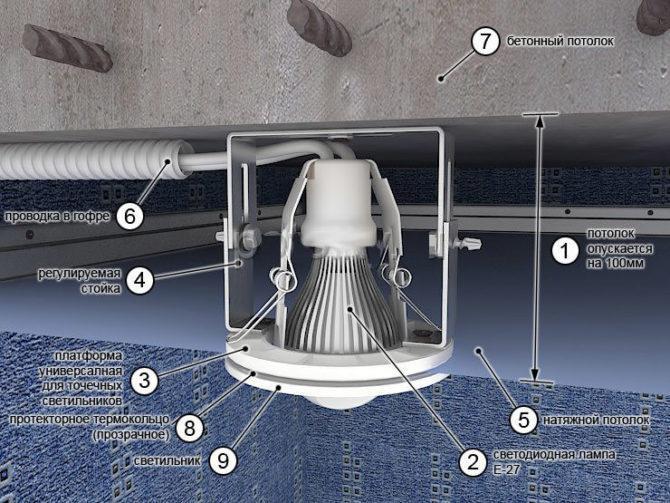
Ceiling spots mounted flush with the stretch fabric are mounted on a special platform attached to the supporting structure. The body of the soffit is held by two springs pressing the luminaire against the platform.
The load on the stretch ceiling canvas is minimal. To reinforce the canvas along the edge of the hole, tread and heat-insulating rings are glued, but even with them, an attempt to remove the lamp may result in a rupture of the thin fabric. To avoid damage, the following procedure should be observed when replacing spots:
- De-energize the lighting circuit.
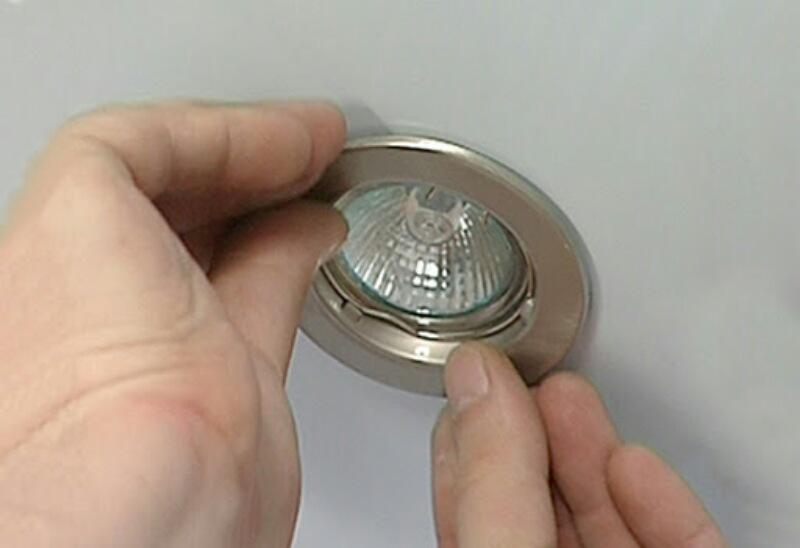
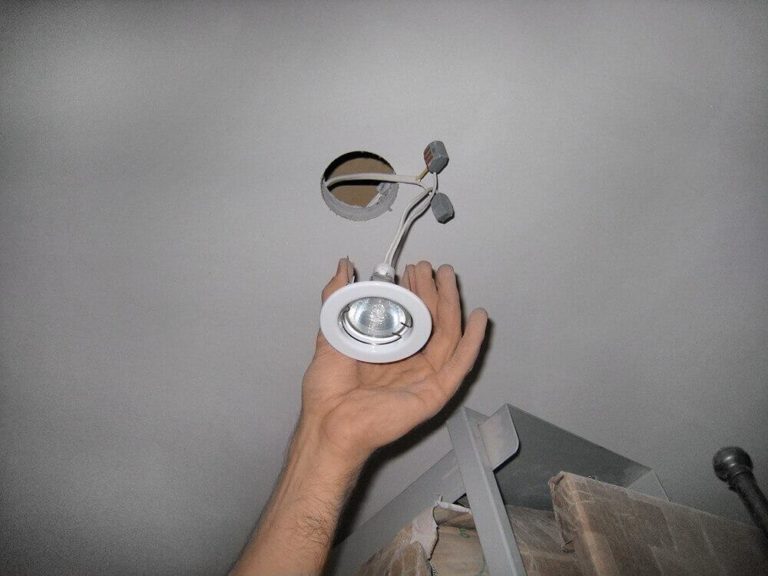
- With a flat screwdriver, carefully pry off the side of the lamp and pull it down with your hands with a slope to one side.
![Features of replacing a lamp bulb in a false ceiling]()
- Pull off one end and, holding one of the spacer springs with your finger, pull out first one spring, and then the other.
![Features of replacing a lamp bulb in a false ceiling]()
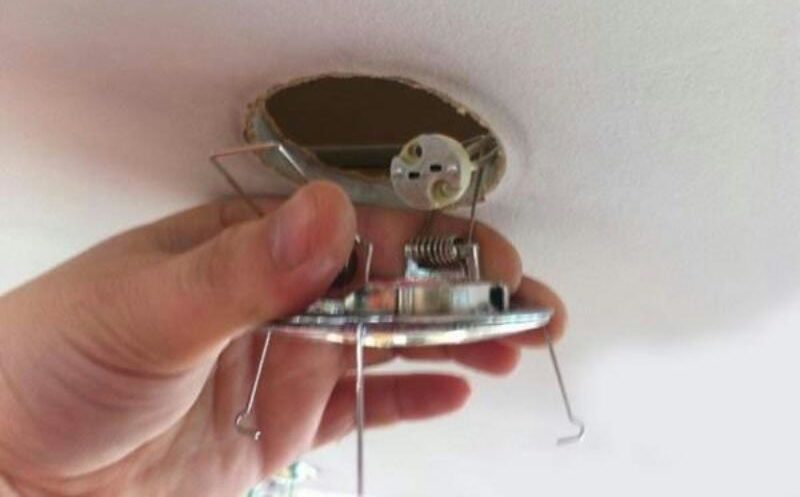
In this case, it is necessary to ensure that the springs do not fall into the gap between the platform and the canvas, since in this case an attempt to remove the device may result in tissue rupture.
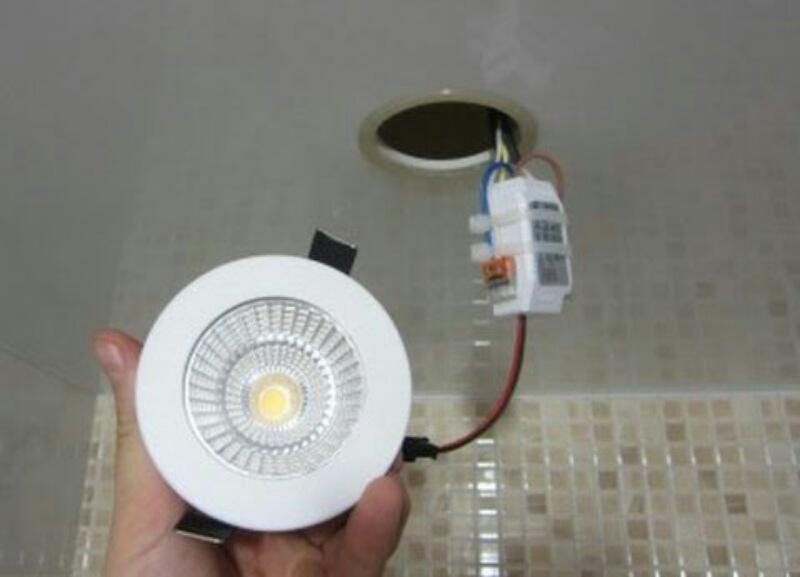
- If the luminaire is equipped with LED backlight or the lamp works through a transformer, then the power supply will be pulled out along with the wires.
![Features of replacing a lamp bulb in a false ceiling]()
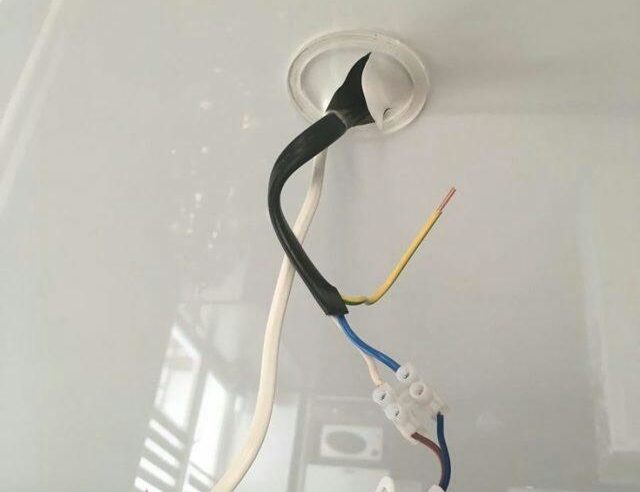
- Having disconnected the wires from the terminal block with a screwdriver, you need to place the stripped conductors of the new lamp into the connectors and tighten the bolts on the terminal block.
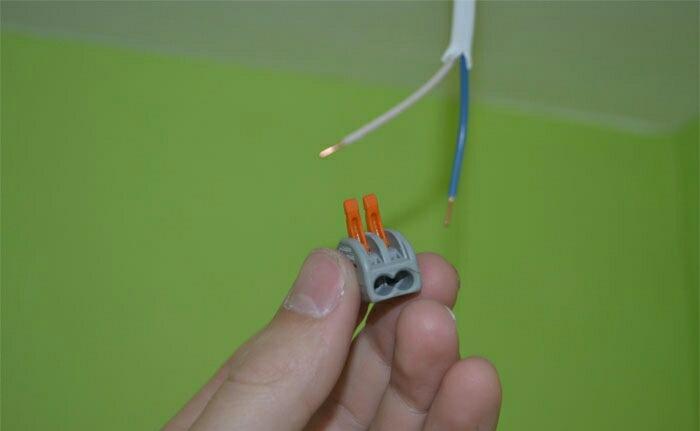
![Features of replacing a lamp bulb in a false ceiling]()
Or clamp the plastic retainer if the Vago terminal block is used.
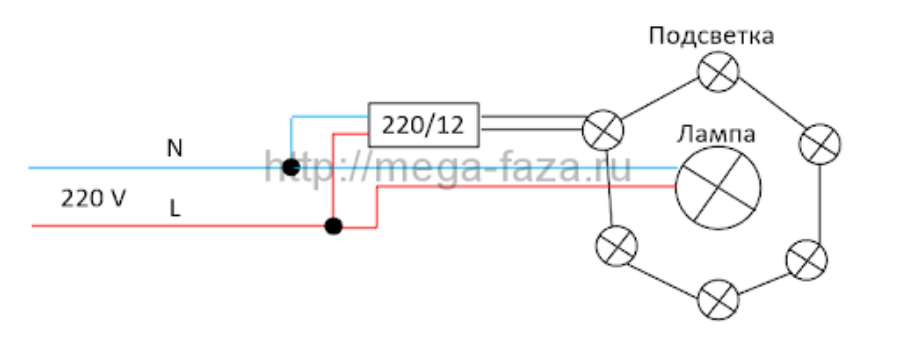
The power supply from contour lighting is connected to parallel connection with the main light bulb in the network 220 V.
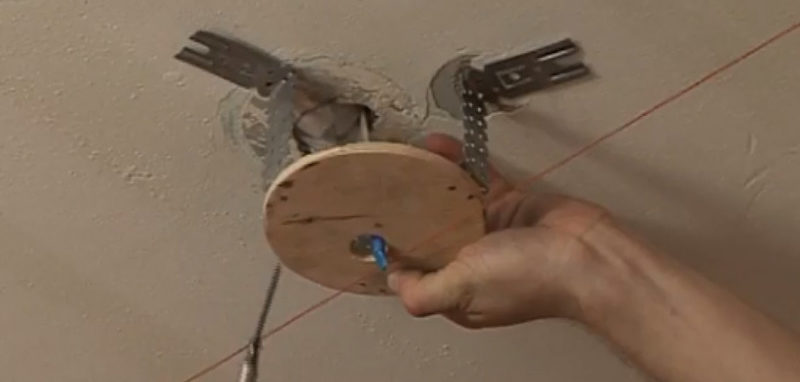
- After connecting the conductors from the cartridge to the electrical network, the lamp is installed in place. To do this, both springs need to be pressed up and, holding them with one hand, fill the wires with the power supply or transformer into the space on the platform. The springs are wound up behind the mortgage body and released.
At the same time, you need to make sure that the springs do not straighten out under the mortgage, otherwise the lamp will hang on the stretch ceiling. Also, the canvas sags if the transformer fell from the mortgage site onto the fabric. This may show up later, when the PVC will sag at the point of greatest pressure under the weight of the device. In this case, the body of the spot must be removed, all the elements of the circuit must be laid again on the site and the soffit must be placed on the seat in the same order.
How to change light bulbs in a false ceiling
Plasterboard constructions are more rigid, but it is better to avoid frequent manipulations with lighting fixtures, since gypsum crumbles over time in the place of the hole. The basic principles for dismantling and installing spotlights on plasterboard ceilings are the same as on stretch ceilings. Differences in the technique of execution relate only to the design of the soffit and the light source.
LED
LED elements are gradually replacing lamps of previous generations due to their efficiency, but they have a significant drawback: cheap devices have a flicker factor of more than 15%, which is noticeable when shooting video. Eyes from such light are very tired, and vision sits down over time.In this regard, it is better not to save money when choosing models for lighting residential and work premises. The design of LED bulbs implies the presence of a driver in the housing, so the devices work directly from a 220 V network, and the lighting circuit does not need additional stabilizers and rectifiers. When changing an LED light bulb, it is enough to simply remove it in a manner typical for the type of a particular base and install a new one in its place.
Halogen
With high energy consumption and a short resource of 5000-10,000 hours, this source has optimal characteristics for vision. The glow heat of halogens lies in a comfortable range of 3000-4000 K. In addition, their flicker coefficient is often less than 5%, but only if high-frequency transformers and voltage stabilizers are used. In some cases, the breakdown of the halogen is associated with the failure of the rectifier. Therefore, if the lamp does not work after replacing the light bulb, you need to verify on the performance of the remaining elements of the lighting scheme.
Luminescent
Gas-discharge light sources are rarely used for spot lighting, since their compactness is associated with low power. The principle of their operation implies the presence of a ballast in the lighting circuit, as a rule, starting a group of several fluorescent bulbs at once. There are samples with built-in electronic ballast, but its dimensions increase the distance between the main and suspended ceilings.
Most often, these lamps have an E14 screw base, so replacing them is not difficult.
How to change a light bulb in spots
For studio and design lighting Spotlights, fastened to the surface of the ceiling, walls directly through the canvas to the platform or by means of a mounting rod.
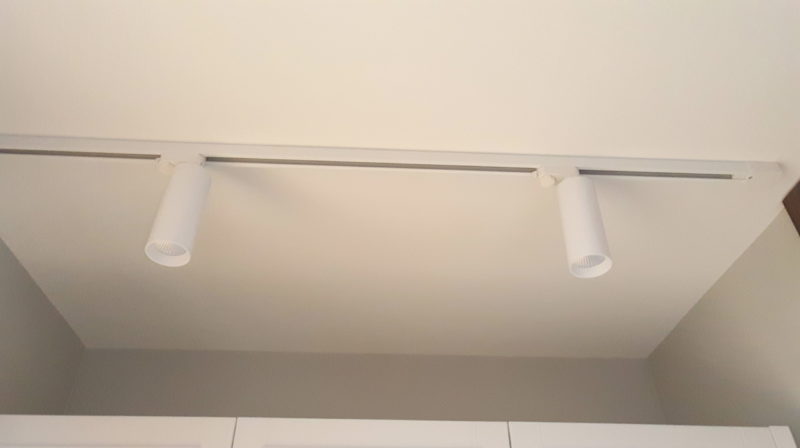
The peculiarity of the spots is the ability to adjust the direction of the spot of light by turning the body of the lamp on a hinge. The light bulbs in such devices are held by fastening in the cartridge, and a special vacuum applicator, which is a suction cup, is provided to remove them.
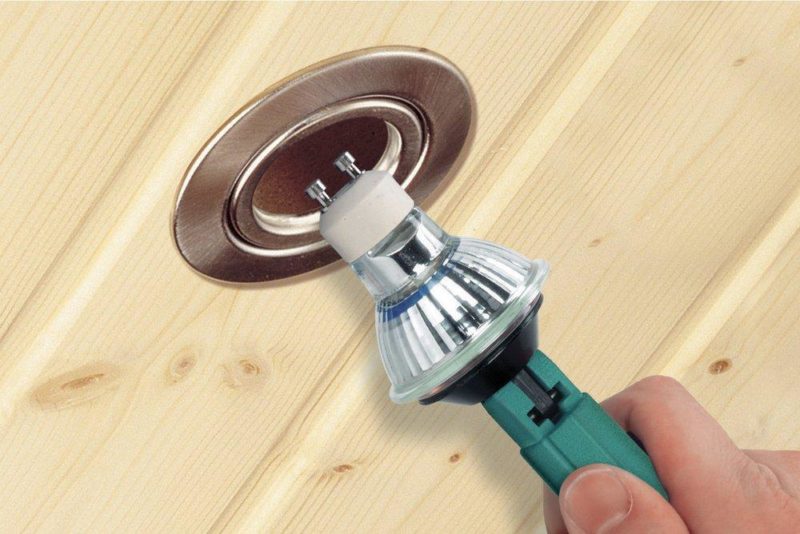
The replacement process is quite simple:
- The circuit is de-energized.
- A suction cup is pressed against the plane of the light bulb.
- Depending on the type of base, the applicator pulls towards itself (for GU5.3) or turns counterclockwise by 15-20 degrees and pulls out (for G10).
- The new light source is installed in the reverse order. If the base is pin, type GU5.3 or G9, then the light bulb is simply inserted until it locks. If the base is screwed, it must be screwed in until it stops (for E14) or clicks, like in G10 or GX53.
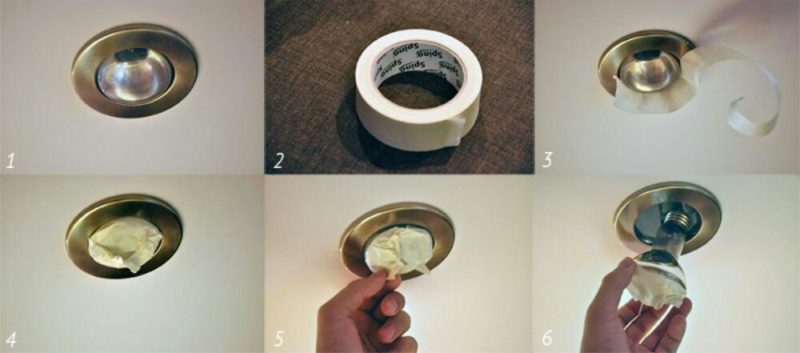
If the applicator is not available, you can get the lamp by pasting it with tape, as in the photo.
How to unscrew a broken lamp
If, when unscrewing the light bulb, the glass bulb burst or came off the base, leaving it inside the cartridge, there are several ways to get the base:
- disassemble completely the body of the device, unscrew the cartridge and unscrew the base, holding it with pliers by the protruding contact.
![Features of replacing a lamp bulb in a false ceiling]()
![Features of replacing a lamp bulb in a false ceiling]() Then for the protruding edge on the reverse side.
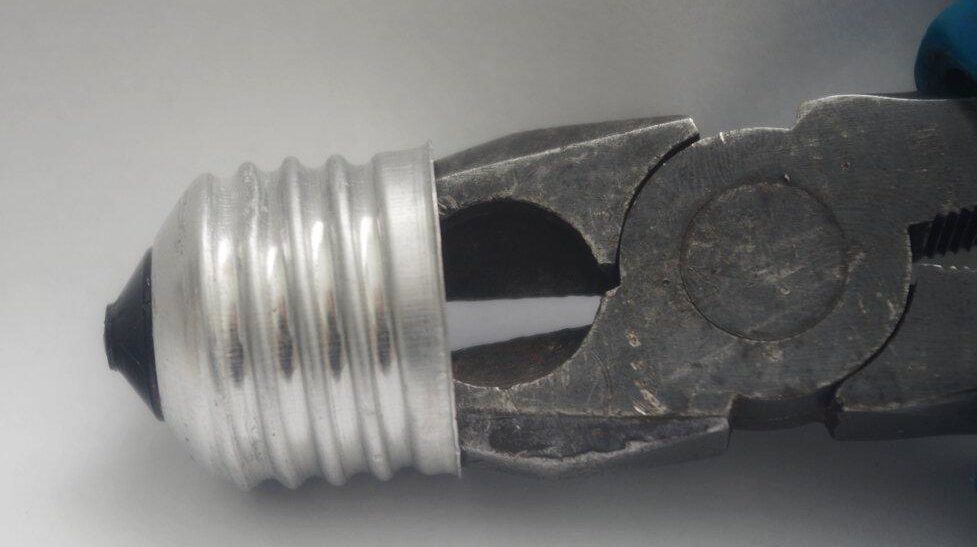
Then for the protruding edge on the reverse side. - Without dismantling the appliance, if the edge protrudes enough to be grasped with pliers.
![Features of replacing a lamp bulb in a false ceiling]()
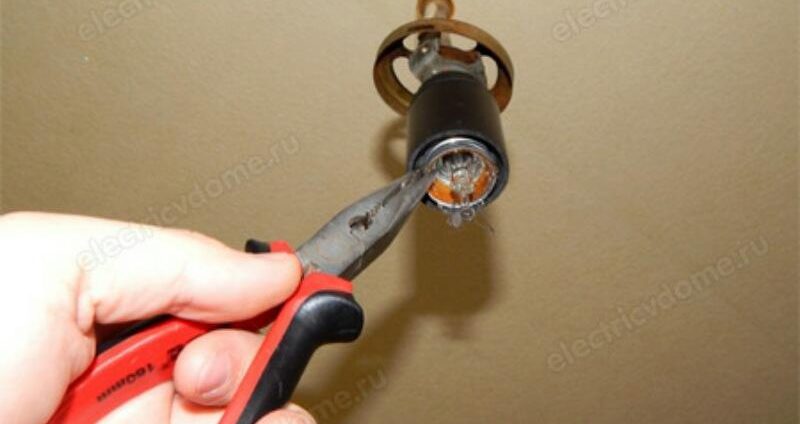
- Having broken the glass inner part of the flask, open the base with pliers from the inside and twist.
![Features of replacing a lamp bulb in a false ceiling]()
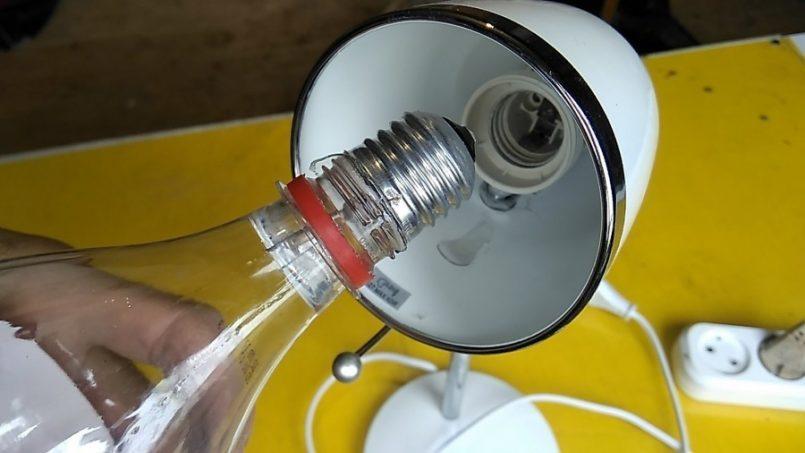
- Melt any plastic part with a lighter and insert it inside the base. For E27, a bottle is suitable, for a small E14, a fountain pen case.
![Features of replacing a lamp bulb in a false ceiling]() After the plastic hardens, you can try to unscrew it.
After the plastic hardens, you can try to unscrew it.

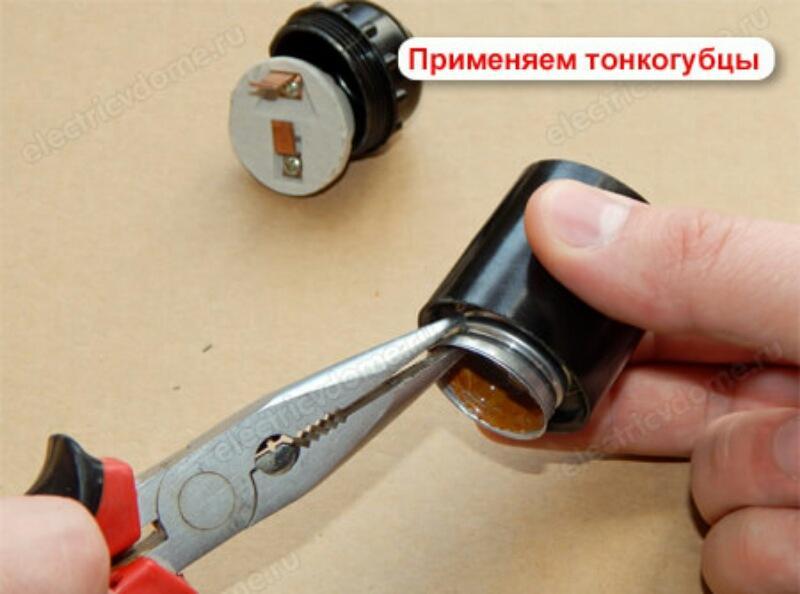
For small-sized halogens, you will need round-nose pliers or tongs with a thin antennae. When doing this, be careful not to deform the thin metal of the inside of the cartridge.
Selection of a new light source
The easiest way is to replace the halogen with an LED with the same type of base. To do this, it is enough to remove the transformer from the circuit, since the LED works directly from a 220 W network. The situation is more complicated when, instead of a two-inch MR16, you have to put a wider GU53 tablet in diameter. To do this, it is necessary to stick a new tread ring around the small old one on the tension fabric and cut off the excess fabric. If a universal mortgage is installed on the main ceiling, then it is enough to cut a new hole along the line on the site with a clerical knife.
In the case of home-made platforms, you will most likely have to remove the canvas, since it will be difficult to cut out a new seat without damaging the fabric of the stretch ceiling.
In some cases, overhead spots or a chandelier can be installed on a homemade mortgage.
Safety
In all cases, without exception, before manipulating lighting fixtures, it is necessary to de-energize the room by turning off the machine or unscrewing the plugs in the meter.
There are at least two objective reasons for this:
- Light switches sometimes do not break the phase, but zero. When a grounded body comes into contact with the active phase, electrical injury is possible.
- If moisture has accumulated on the stretch ceiling, an electric shock through the wet luminaire housing is possible. Most often this happens in apartment buildings, when neighbors from above flood the lower apartment.
To consolidate information thematic videos.
If for some reason it is impossible or too difficult to completely turn off the voltage in the house, then all manipulations are carried out in tight rubber gloves, with the switch previously turned off and checking the voltage with an indicator screwdriver. To protect your eyes from small debris from the ceiling, it is advisable to wear construction glasses. Wire connections are best done through terminal blocks, after tinning the contacts with tin. The use of twists insulated with electrical tape is fraught with overheating of the wire at the place of twisting, melting the insulation and exposing the conductors, followed by a short circuit.