How to fix an LED spotlight if it stopped working
Sooner or later, every owner of lighting equipment, including LED spotlights, is faced with a malfunction of devices - nothing on Earth is eternal. Repair or throw away - such a question sometimes needs to be resolved very quickly.
How does an LED spotlight work?
Externally, the LED spotlight works in the same way as its counterpart with an incandescent lamp. Only consumes less electricity and is more durable. In fact, it emits light based on completely different physical principles. "Ilyich's lamp" - the basis of obsolete lamps - shines due to a red-hot thread. To do this, you need to warm it up, and the efficiency in this process is only 3-4%, like in the first steam locomotives. The remaining 96-97% of the energy goes into heat.
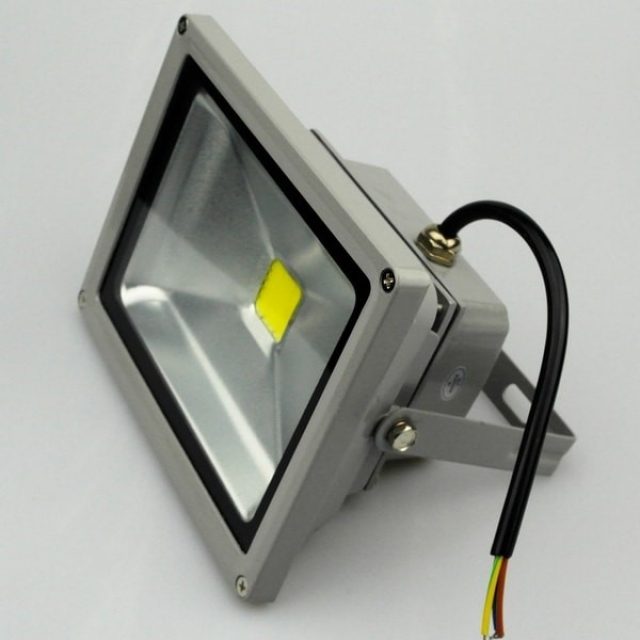
LED is another matter.Here, light emission is associated with physical processes occurring in the p-n junction of a diode made of a special semiconductor (usually gallium arsenide), and does not depend on the degree of heating. The efficiency of such a light source reaches 60% (according to manufacturers). The rest goes into heat (the Joule-Lenz law cannot be bypassed), so you have to take measures to remove heat. Otherwise, the life of the LEDs will drop dramatically.
LED Spotlight Diagram
An LED lamp can be built on a different element base, but the block diagram of an LED spotlight is usually the same.
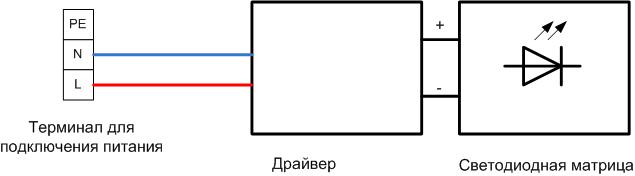
The purpose of the terminal (terminal block or connector) and the LED matrix is clear. The driver is a power supply that stabilizes the current. The stability of this particular parameter is important for the long-term operation of light-emitting elements. In low power flashlights, the driver is replaced by a resistor. In this way, the design is cheaper, but a significant part of the power is uselessly dissipated on the resistance.
Symptoms
The most obvious sign of a malfunction is that the spotlight does not light up when the voltage is turned on. Also, the following are considered abnormal modes of operation of the lighting device:
- reduced brightness of the glow;
- flicker;
- visible absence of glow in one or more elements;
- change in the color of the radiation.
In all these cases, the spotlight can be tried to be repaired.
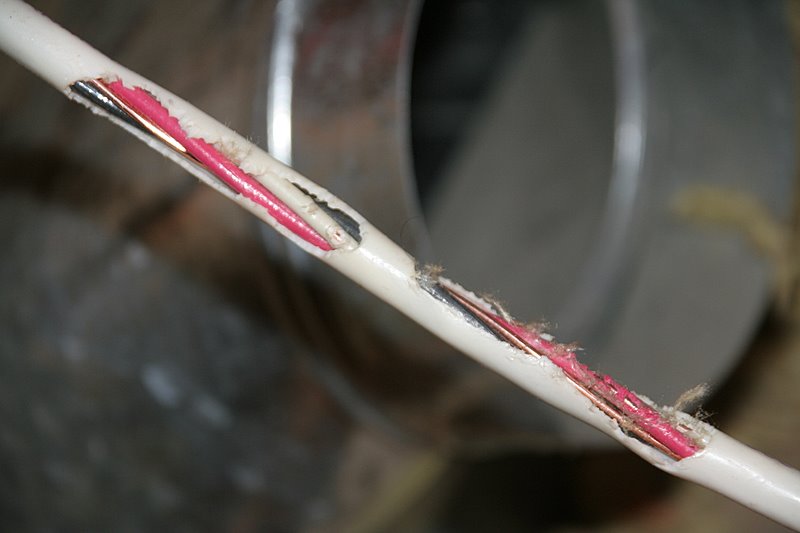
Carefully! If the LED lamp has visible signs of overheating, melting of the cable insulation, sparking, it must be immediately disconnected from the 220 V supply voltage.
Causes of failure
The reasons for the breakdown of LED equipment can be different:
- Mechanical damage caused by external interference (vandalism, accidental impact of mechanisms, etc.).
- Natural aging and failure of components. This cannot be avoided in any case, but the reasons for reducing the service life may be:
- the use by the manufacturer of low-quality materials that break down in a short time (terminals, wires, thermal paste, etc.);
- the use of low-quality electronic components (LEDs and driver elements);
- the use of components that do not meet the operating conditions in order to reduce the cost (wires of a smaller section, terminal blocks that are not designed for the rated load, etc.);
- the use of circuit solutions that reduce the cost of products, but adversely affect reliability (lack of overload protection, etc.);
- violation of production technology (fixing the matrix to a smaller number of screws with a concomitant decrease in the efficiency of heat dissipation).
When repairing, one should try to identify not only the faulty element, but also to understand the reason for its failure. If possible, it is necessary to refine the circuit and design (replace wires, terminal blocks, use better components, etc.). In this case, the chances are increased that the device will work longer after repair.
Recommended for viewing:
Diagnostics
Repair of any LED spotlight must begin with a diagnosis - the search for a faulty element. This is an important step. The more accurately the failed unit is determined, the more correct will be the decision on the feasibility of repair and the costs associated with the erroneous replacement of serviceable components will be excluded.
The first thing to start with troubleshooting is an external inspection.In this way, mechanical damage, sparking, etc. can be detected. At this stage, obvious violations can be identified. If everything is in order in this part, the searchlight must be disassembled.
Important! Disassembly can only be started with the power off and making sure that there is no voltage. It is impossible to check the absence of voltage with a control light - only with a voltmeter or a low voltage indicator!
First of all, it is necessary to identify visible damage - burnt blocks, melted insulation, etc.
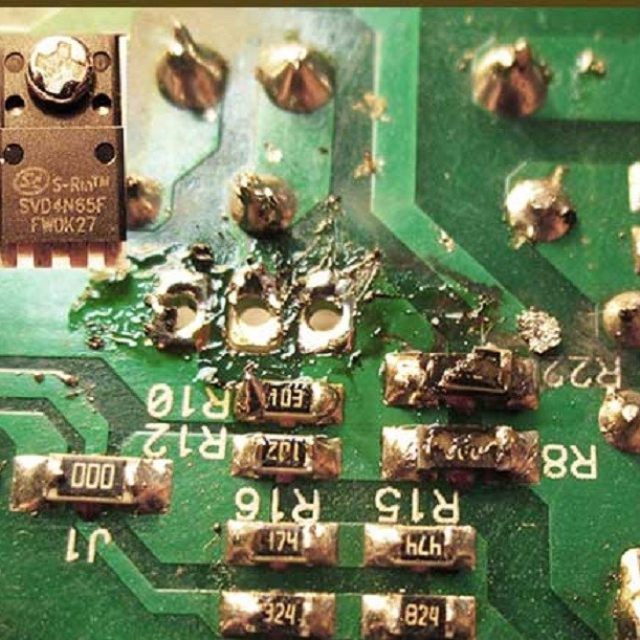
Components with such damage must be immediately rejected, taking into account two points:
- even if the unit, which has external signs of damage, turns out to be operational, it is already potentially unreliable and may finally fail in the near future;
- the reason for the failure of the module may be connected elements, even if they do not have external signs of damage (the reason for the melting of the terminal block may be a faulty driver, an inoperative matrix may lead to a malfunction of the current stabilizer, etc.).
If everything seems to be in order, you can check the performance of the driver.
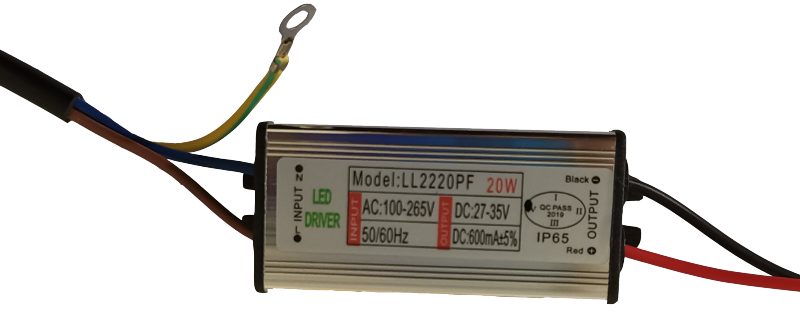
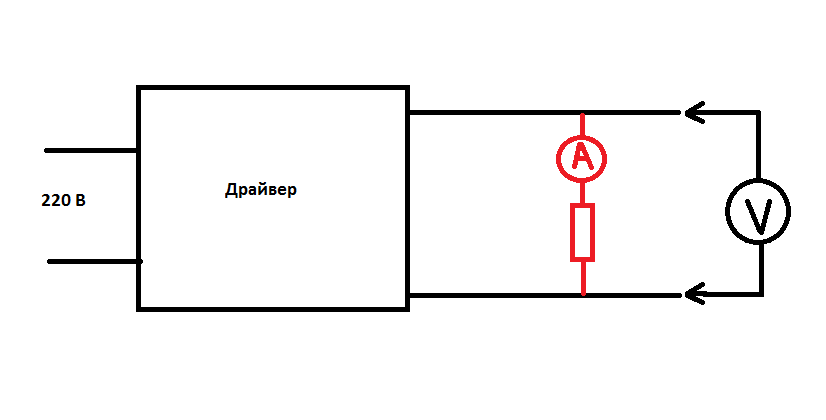
First you need to read the input and output parameters, and make sure that the device is designed to work from a household single-phase electrical network. If everything is in order, you need to apply 220 V to the input of the driver and measure the voltage at the output. Without load, it may be slightly higher than indicated. If you load the output with a resistor, the value of which is calculated by the formula R = Uout / Iout (in this case, 35 V / 0.6 A = 59 Ohm, you can take the standard value of 56 or 62 Ohm), then the output voltage should lie within the specified limits . The next step is to measure the output current.If there is no milliammeter, then the current can be calculated by the formula I \u003d U / R (actually measured values \u200b\u200bmust be substituted into the formula).
If the current is equal to the specified one, then the power supply is guaranteed to be working and you can proceed to check the LED matrix. She needs to plug to a power source with an output voltage read from the label on the driver (the current for control can be found there). When connecting, you must follow the polarity. The malfunction can be identified by the glow. If the chain of elements does not light up (due to the failure of 1-2 LEDs) or the light is completely absent, the matrix must be replaced or repaired.

How to disassemble LED spotlight with glued glass
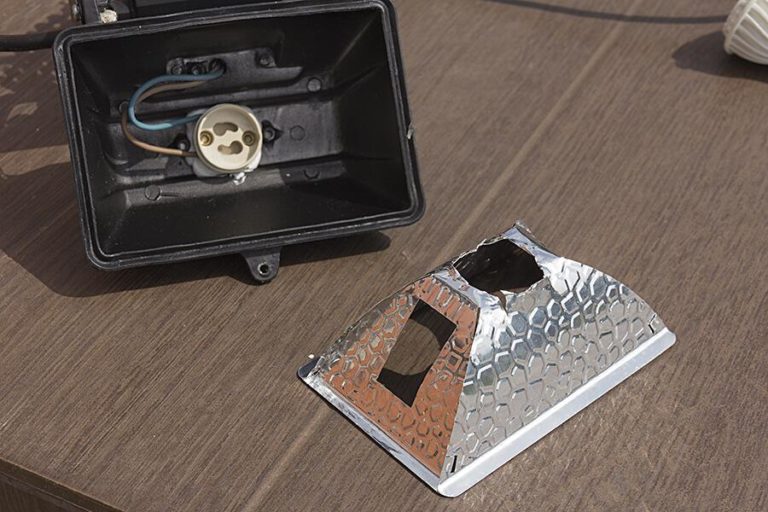
The design of many fixtures is such that you can get to the rest of the components only by removing the glass. In expensive spotlights, the frame with glass is often bolted. In most economy-class appliances, the glass is glued to the reflector compartment with a sealing compound, and it can be difficult to remove it.
How to remove glass from LED spotlight
If you need to disassemble an appliance with glued glass, as a first step, you can try to gently scrape off the sealant (at least part of it) with a sharp knife or a small screwdriver. If it does not help, you should try to warm the frame around the perimeter with a building hair dryer and pry it off with a sharp object. If it fails here, there is another way.
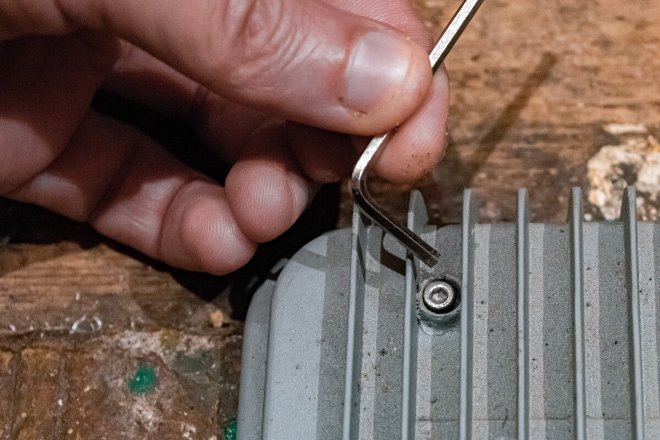
On the back of most spotlights there is a screw, the purpose of which is most likely a plug to seal the interior after assembly.Sometimes it is enough to unscrew this screw so that the pressure inside the lamp becomes equal to atmospheric pressure (a vacuum may occur due to cooling of the air inside the device). After that, you can try to repeat the operation with heating and prying the edge. If it doesn’t work out that way, then you need to find a screw with the same thread, but longer. This screw must be screwed into place until it rests. After that, you should again try to warm up the junction, slowly tightening the screw. And when the glass moves, pry it off in this place and continue heating around the perimeter, carefully tearing it off along the rest of the length.
Replacement Parts
Replacement parts can be found in stores that sell LED equipment. It is necessary to choose according to technical parameters, but it is also necessary to control the installation dimensions. It may turn out that there is a driver on sale that is suitable in terms of technical characteristics, but not suitable in terms of installation dimensions and dimensions. In this case, it is necessary to evaluate the possibility of installation in the existing housing and, if possible, drill additional holes for mounting.
You can also purchase spare parts via the Internet, in Russian and foreign stores. If a keyword search does not produce the desired result (especially for light-emitting matrices), then some Chinese marketplaces have a photo search function. In some cases this method works.
Even as donors, you can use the same type of fixtures that are out of order. From 2-3 faulty spotlights, you can often assemble one workable one.
Repair Features
It is not always necessary to rush to throw away a faulty item.In many cases, it can be repaired.
If the matrix contains several clearly faulty LEDs, you can try to solder them and replace them with new ones. Soldering should be done carefully and quickly, avoiding overheating of neighboring elements and connecting tracks. If the number of faulty radiating elements is small (1 or 2), you can close the place of the removed element in the hope that the driver will adjust the normal mode.

But to abuse this method of repair is not worth it.
To fix the driver, you need to try to find its electrical circuit diagram on the Internet. Almost all inexpensive current regulation drivers use pulse width modulation (PWM) and have roughly the same structure:
- rectifier (diode bridge);
- smoothing filter;
- driver chip;
- power key.
A typical method for finding a malfunction can be considered using the example of a common driver on the CL1502 chip.
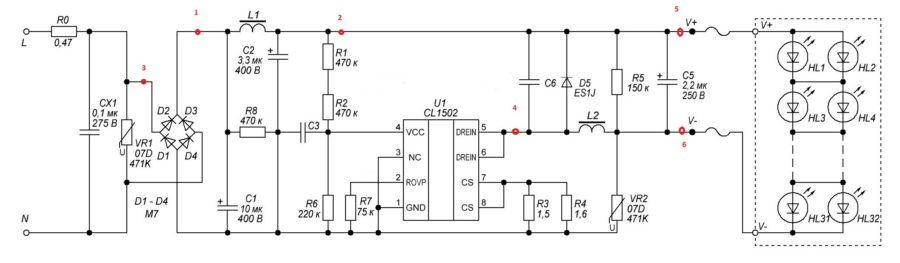
To check the first two elements, a tester is enough. The sequential verification algorithm is indicated in the table.
| Lack of voltage at a point | 1 | 2 | 3 |
| Faulty Items | Check the voltage at the input terminals of the driver, the health of the elements R0, CX1, VR1 | Check the condition of the diode bridge D1, D2, D3, D4 | Check the health of the smoothing filter elements (primarily L1, C1, C2) |
Next, you need to check the presence of voltage at pin 4 of the microcircuit, it should be 40-50 V.
Dangerous! The power supply circuit is transformerless, each element is under full mains voltage relative to ground. Strictly follow the safety measures!
If you have an oscilloscope and the skills to work on it, you can carry out further verification. At point 4 there should be impulses. If they are not, then the microcircuit is faulty. If the pulses go, but there is no output voltage between points 5 and 6, it is necessary to check the elements of the power switch (primarily the elements D5, L2, C5).
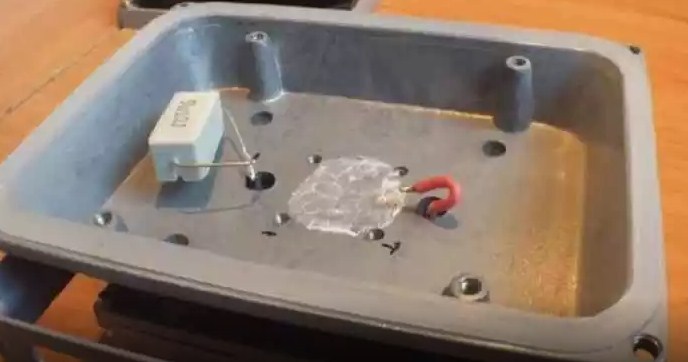
When installing a new LED matrix, a couple of important points must be observed:
- completely remove the remnants of the old thermal paste from the seat, rinse the surface with a solvent, and after drying, apply a sufficient layer of new paste;
- attach the new die using the full number of screws (do not use two screws instead of four) to ensure a complete and even fit to the heatsink.
In rare cases, a defective LED spotlight cannot be repaired. It can usually be restored. The economic feasibility of repair in each case is determined by the owner of the lighting fixture.