Converting monitor backlight to LED
LCD monitors occupy a large part of the display market for desktop computers, laptops, TVs, information and advertising monitors, etc. Although there are more promising technologies, LCD screens will hold their positions for a long time to come. These devices are reliable, but nothing in the world is eternal. And expensive devices fail sooner or later. In many cases, you can repair them yourself. Such situations include the failure of the backlight lamp.
LCD display device
Before you figure out how to replace a faulty backlight, you need to figure out why it is needed in and how the LCD screen works.
Liquid crystals are substances that have the property of fluidity, but the arrangement of molecules in them is ordered. The molecules in these substances are elongated or disk-shaped. The principle of operation of an LCD display is based on the property of LC molecules to change their spatial orientation under the action of an applied electric field.In this way, you can adjust the polarization of light passing through the LCD matrix and create an image based on the RGB color mixing principle.
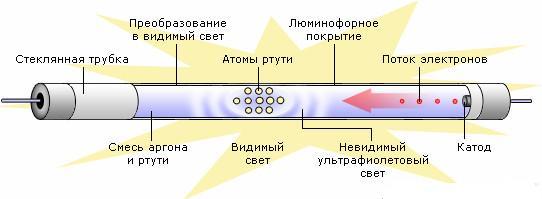
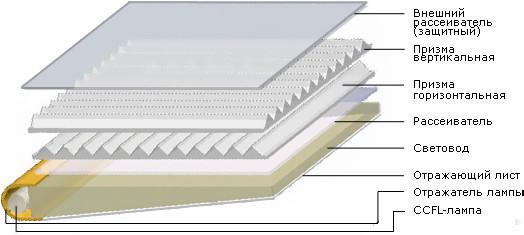
To create transmitted light radiation, a lamp is needed. In most cases, these are fluorescent lamps without cathode filaments (CCFL). Such a lamp is a hermetically sealed glass container filled with an inert gas with a small amount of mercury. To work, he needs a voltage source of 600..900 volts (depending on the modification), and for ignition a little more - 800..1500 volts. To create a uniform flow over the surface, a diffuser system is used.
The lamp is the most short-lived link in the system, but changing it to a working one yourself is not so difficult.
Backlight symptoms
The user may experience the following:
- when you turn on the monitor, the power indicator lights up, but the screen remains dark;
- The display turns on, an image appears on it, but after a few seconds it goes out.
In the first case, there are serious reasons to assume that the monitor backlight needs to be repaired, although the malfunction may also be in the power supply of the light source. In the second - the probability of lamp failure is 90+ percent. Also, a dim glow of the entire display or half, as well as the extinction of half of the display, indicate a high probability of a malfunction of light sources.
Self-replacement of the light source in the monitor
First of all, you need to get to the old lamp. If this is a TV monitor, computer or laptop, you need to stock up on tools:
- a small Phillips screwdriver;
- two screwdrivers with a flat wide slot;
- scalpel, tweezers and other disassembly tools.
Important! It is necessary to disassemble the monitor with the power completely turned off. Life-threatening voltage may be present at the lamp terminals.
The plastic casing is removed from the monitor with two flat, thin screwdrivers - you need to press the latches without applying excessive force.
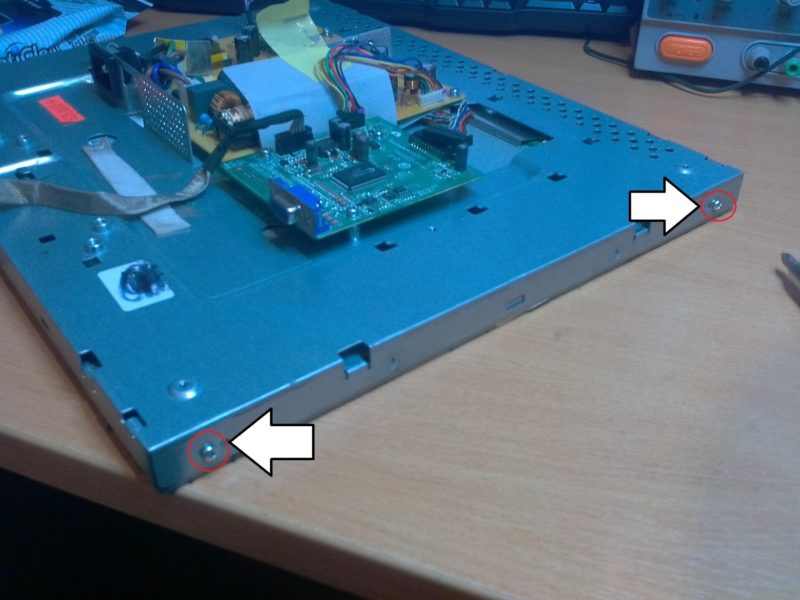
The next step is to remove all the connectors and unscrew all the small screws from the back and from all sides.
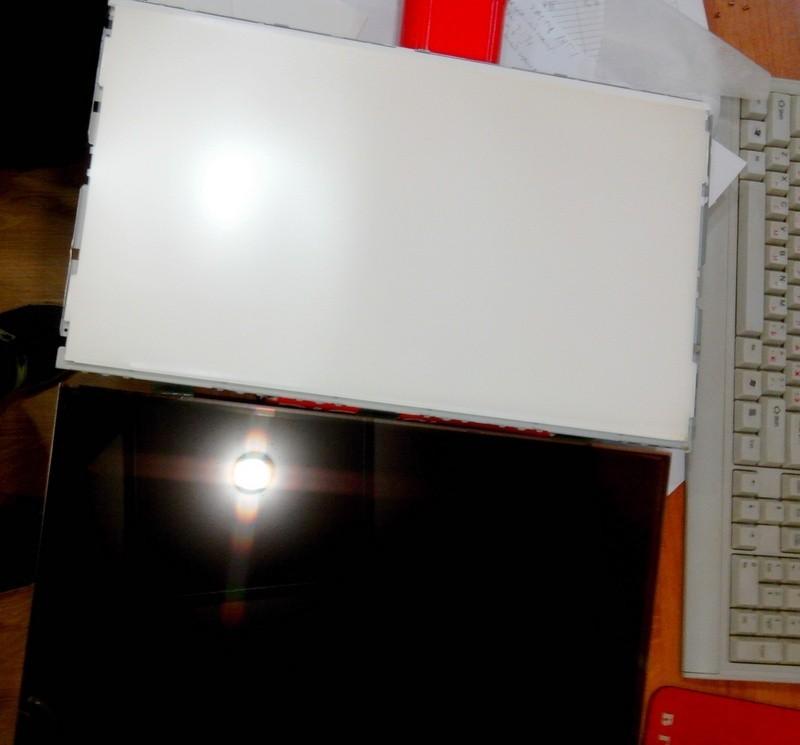
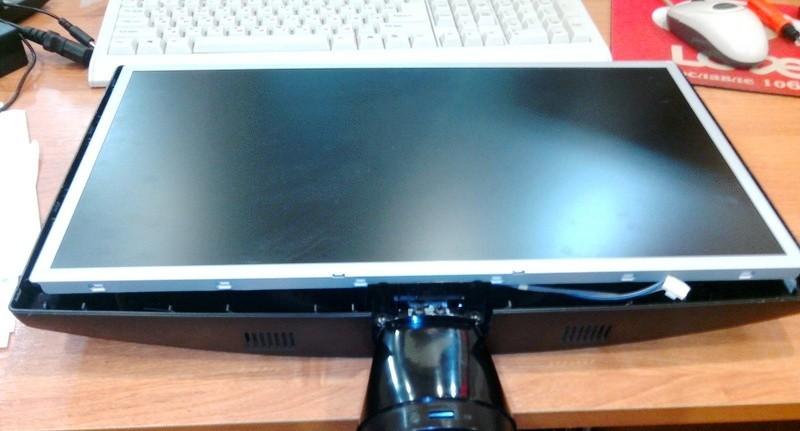
And then remove all covers and dismantle the matrix.
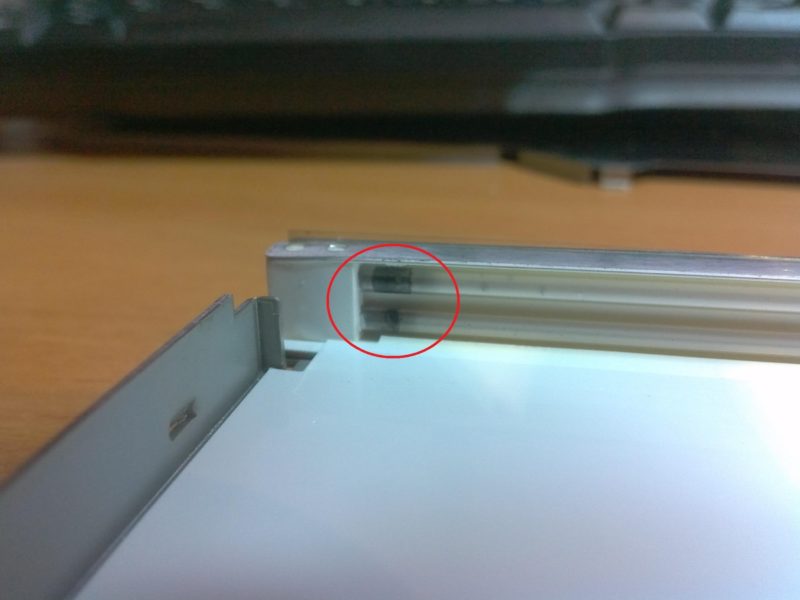
After removing the polarizing film, diffusers and light guides, you can get to the lamps. Sometimes traces of failure can be detected visually - in the form of black spots.
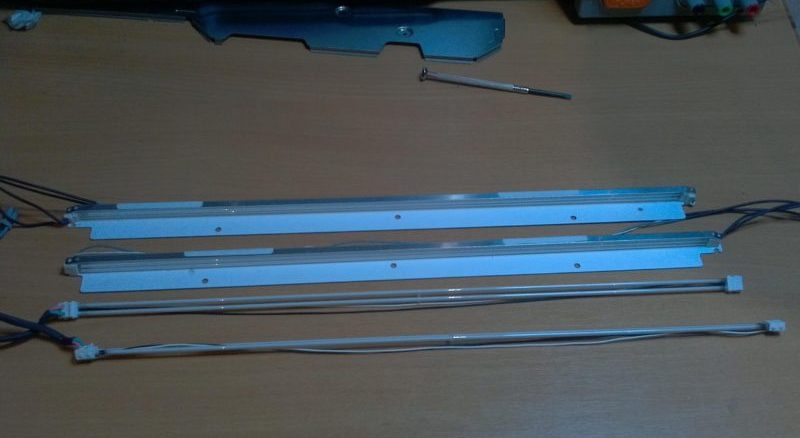
Next, serviceable lamps are taken and installed in place of the failed ones. To select lamps by size, depending on the size of the screen diagonal in inches, you can use the table.
| Monitor diagonal size, inches | Lamp diameter, mm | Lamp length, mm |
| 14,1 | 2,0 | 290 |
| 14.1 Wide | 2,0 | 310 |
| 15-15,1 | 2,0 | 300, 305, 310 |
| 15 – 15,3 | 2,0 | 315 |
| 15 – 15,3 | 2,6 | 316 |
| 15,4 – 16,3 | 2,0 | 324, 334 |
| 15.4 Wide | 2,0 | 334 |
| 16,3 – 17,0 | 2,6 | 336 |
| 17, 17,4 | 2,6 | 342, 345, 355, 360 |
| 17.1 Wide | 2,0 | 365, 370, 375 |
| 18-19 | 2,6 | 378, 388 |
The monitor is assembled in the reverse order. And if everything was done carefully, and the problem was only in the lamp, the monitor will last a long time.
Before assembly, it is recommended that all parts and the internal space in the case be thoroughly blown out of dust.
Lamp health check
If there are no external signs of damage to the lamp during disassembly, it will not be superfluous to check the dismantled lamp for serviceability, so there is a possibility that the malfunction is not in the lamp, but in the power circuit. Yes, and checking a new device also does not hurt.This cannot be done with a tester or oscilloscope, so a high voltage must be applied to the contacts of the lamp. For this you need an inverter. You can find it in various ways:
- Buy a ready-made inverter in a store or on the Internet. Not economically feasible for a one-time repair.
- In the repair shop, buy a damaged non-repairable monitor. In most cases, it will cost a penny. It will need to be disassembled and the voltage converter removed.
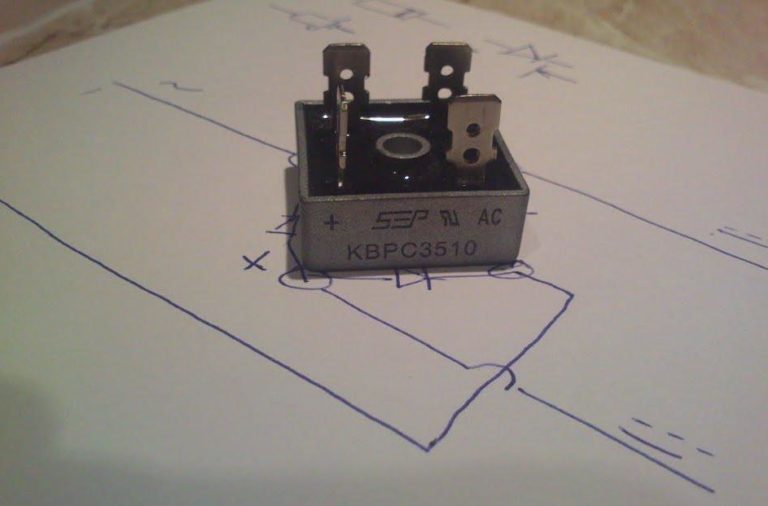
- If you have the skills to work with electronic components, you can assemble a simple inverter yourself. His scheme is simple.

The most time-consuming element is the transformer. It will have to be made by yourself. You can wind it on iron from a small-sized industrial transformer, for which you will have to remove all standard windings.
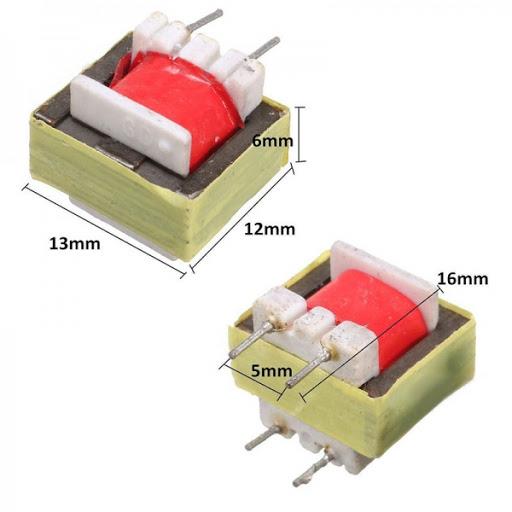
The primary winding contains 30-40 turns with a tap from the middle. The amplitude of oscillations on it will be about 3 volts. Therefore, to obtain 1000 volts on the secondary winding, it must contain 1000/3 = 333 times more turns than the primary. With 30 turns in the primary, it will be necessary to wind about 10,000 turns of the secondary winding. Perhaps this number will need to be picked up. It is more convenient to experimentally change the ratio by varying the primary winding. To do this, you must first wind the secondary, and on top of it - the primary winding. On the Internet, you can find circuits for other voltage converters of varying complexity for testing CCFL lamps.
Application of LED Lighting Sources in LCD Monitors
Due to the widespread use of LED lighting equipment during repairs, the idea often arises to replace obsolete gas discharge lamps with LED lamps. This idea has the right to life, and it is not difficult to realize it. But replacing the lamps with LEDs in the monitor will require solving several issues.
- Dimensions. The CCFL lamp is installed inside a special profile. The width of this groove is either 7 mm or 9 mm. The width of the tape should allow you to install it in the groove of this profile. In some cases it is possible undercut the edges of the "oversized" canvas up to 1 mm on each side so as not to damage the busbars. If everything works out, then the tape will fit well into the profile.
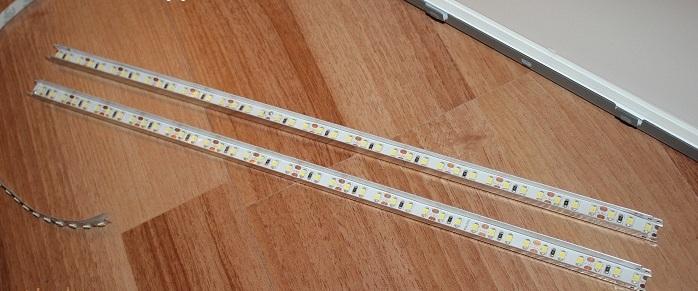
![Converting monitor backlight to LED]() LED-canvas installed in the profile.
LED-canvas installed in the profile. - Getting uniform illumination. The LEDs on the canvas are located at a distance from each other, so when using a conventional tape, it is easy to obtain a stream distribution in stripes, despite the presence of an effective diffusing system. To avoid this, a luminaire with at least 120 elements per meter (minimum 90) is required.
Source of power. Replacing the lamps in the monitor with a low-voltage LED strip will require a lower supply voltage compared to CCFL. This voltage can be searched on the standard display board, but the tape power should not be less than 10 W, since the luminous flux in the dissipating system is seriously weakened. It is not a fact that the load capacity of a regular source will be sufficient. Therefore, in some cases, a separate remote power supply for the appropriate voltage is used to power the LED strip.The inconvenience is obvious: the backlight is turned off separately from the monitor, and there is no brightness control (or you will have to fence a separate circuit for it). The problem of brightness also arises in the first case, but in both cases it is easy to solve.

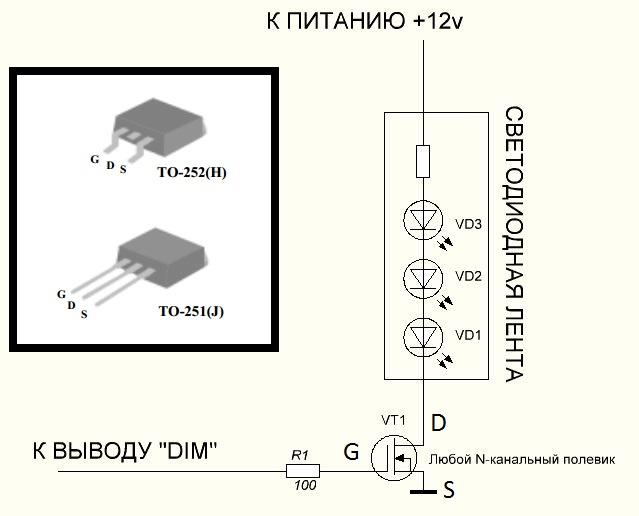
The brightness of the standard CCFL lamp is regulated by the PWM method; for this, a special circuit is provided in the inverter. In this case, the inverter must be removed, and the PWM signal can be used for your own purposes. To do this, you need to find a connector on the board, next to one of the conclusions of which there will be an inscription DIM. It has a PWM signal that can be monitored with an oscilloscope. To this point it is necessary to connect the negative terminal of the tape through a transistor switch. An N-channel MOSFET can be used as a key element. It must be designed for the full current of the tape segment with a margin. 99+ percent of cases will close the field worker AP9T18GH - it can be found on failed computer motherboards. It allows you to work with loads up to 10 A.
If you have the skills and knowledge, you can use the standard circuit for dimming and turning the backlight on and off by adding two transistor switches to it and setting the output voltage to 12 volts.
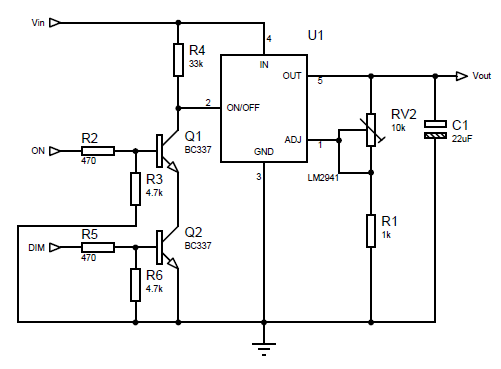
In this case, no additional and external devices will be required for conversion, and the monitor will work in normal mode. It is only necessary to apply the DIM and ON signals present on the connector to the switch input.
Important! LED strips have different color temperatures, so screen colors may change slightly after installation in the monitor.You can try to solve this problem with the standard display settings or take it into account in the future. To avoid this problem, when buying, you need to focus on neutral white glow colors.
To consolidate the information of the video: Replacing the worn-out LCD TV LED backlight board with a standard LED strip.
Replacing standard backlight lamps with similar or LED ones cannot be called simple. In fact, this is a laborious process that requires knowledge and skills. But still, for an average master, this is quite achievable, and after repair, the display will last for many more years. If necessary, the repair of the newly installed LED monitor backlight will not be difficult - the experience will have already been gained.