Connecting and installing LED bulbs in H4 headlights
Install LED bulbs H4 in lights not difficult on your own. The design of LED equipment is similar to the standard one, but there are some peculiarities that must be taken into account in order to carry out the work correctly. Therefore, it is better to study the specifics of installation in order to eliminate errors and ensure a good result.
Features of choice and settings
First of all, it must be taken into account that, according to the law, LED lamps can only be installed in headlights marked “LED” or “L”, it is applied to the reflector, or is on the body. If the system is designed for halogen, the installation of diode light sources may result in fine at 500 rubles.

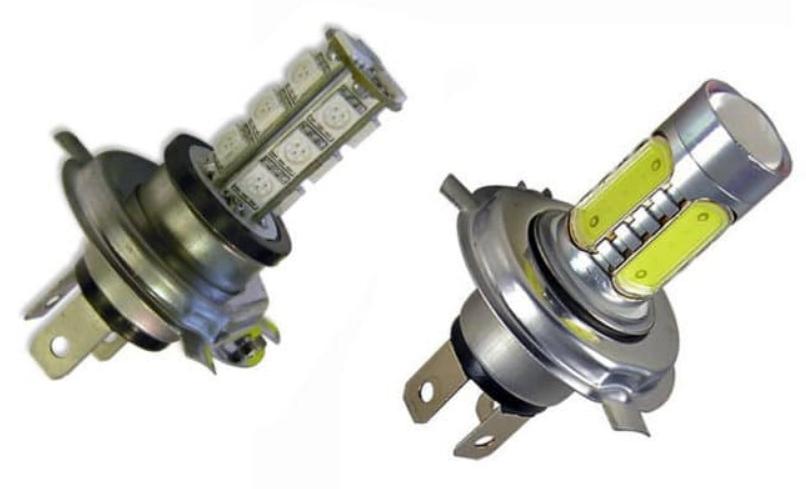
If the design is suitable, it is important choose led lamp with correct light distribution. In this embodiment, two spirals are used - low beam and high beam. Moreover, the first element is always equipped with a small reflector of a certain configuration, as in the example in the photo.
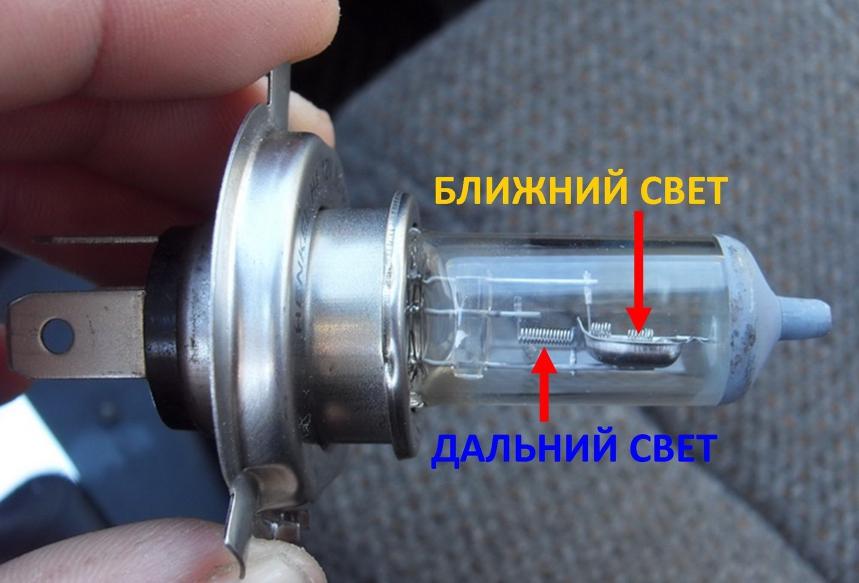
To ensure the correct distribution of the light flux and prevent dazzling oncoming drivers, the dipped beam spiral is moved forward slightly above the focal point. And the screen inside the bulb directs the light only to the top of the headlight reflector, as shown in the diagram.
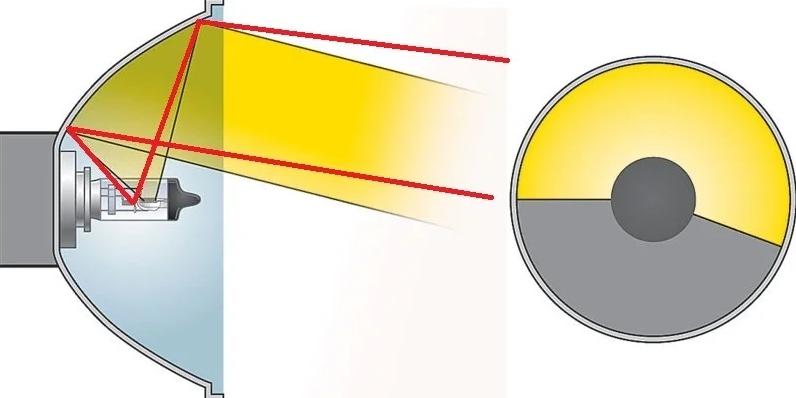
The main beam is different, its spiral is located at the focal point and shines on the entire reflector. This ensures a large illumination distance.
Read also: H4 car lamp rating
Connection and pinout of the H4 lamp
To connect the light bulbs correctly, you do not need to understand the design. Quality products should come with a standard connector, in which the contacts are always the same.
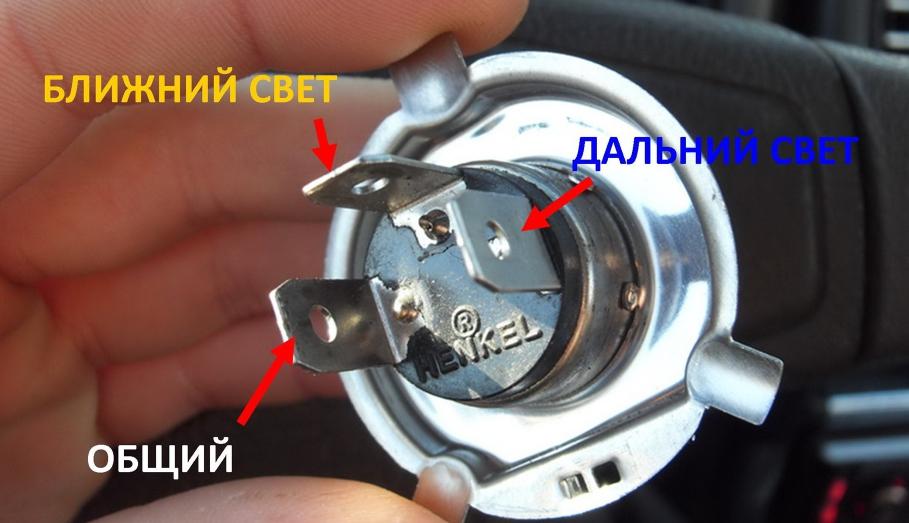
If for some reason you need to install the connector yourself, the pinout shown above is used. This is how you need to arrange the wires for the light bulb to work correctly. The connection is always made using a socket, you can't just twist the wires or wrap the docking area with electrical tape.
It is important that the plinth design matches the standard halogen. If this is done incorrectly, the light distribution will be disturbed and it is unlikely that it will be possible to adjust it.
It is better to buy light bulbs from well-known manufacturers, cheap Chinese products do not provide normal light quality.
Thematic video.
Installation in headlights
Installation of H4 LED lamps in the headlights is carried out according to step-by-step instructions.If you follow the correct sequence and do everything carefully, you can cope with the work, even if this is done for the first time:
- The back of the headlight housing and the location of the covers are inspected. Very often, access is limited due to vehicle components - the battery, air filter housing, etc. In this case, you need to remove everything that interferes in order to ensure normal working conditions.
- The battery terminal is removed before starting work. This rule should always be observed when you need to do something in the electrical equipment of the car. The necessary tool is being prepared, often you need to unscrew the screws or small nuts, and other devices may be required.
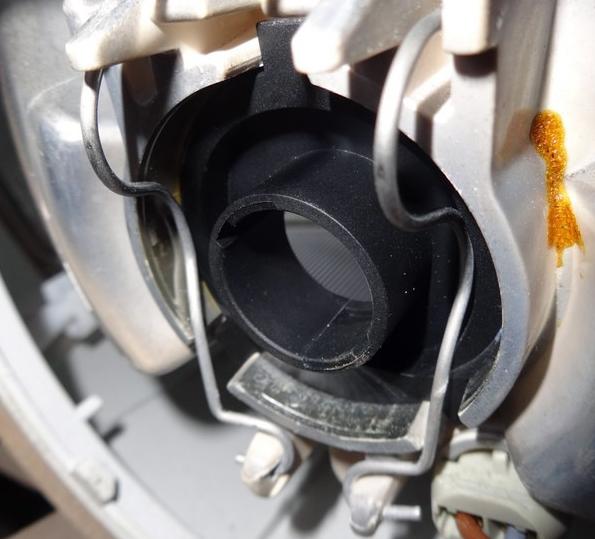
- The location of the lamp is inspected. Most often, it is fixed with a mounting bracket, which tightly presses the base to the seat. It is important to figure out how to open it so as not to break the wire protrusions and deform them.
![Connecting and installing LED bulbs in H4 headlights]() The light bulb should be removed carefully so as not to damage the bulb or break the retainer.
The light bulb should be removed carefully so as not to damage the bulb or break the retainer. - After removing the old light bulb, disconnect the connector by gently pulling it towards you to remove the contacts. Sometimes, due to long operation, moisture and constant heating, the terminals oxidize and are difficult to get. In this case, you can treat the connection with a contact cleaner and gently pry the joint with a flat screwdriver.
![Connecting and installing LED bulbs in H4 headlights]() It's easiest to remove the retainer and attach it separately to make installation easier.
It's easiest to remove the retainer and attach it separately to make installation easier. - It is advisable to remove the mounting plate from the LED lamp, usually it just turns a little and is removed. Better to put it separately, it's much more convenient. The element is fixed with a latch, after which you can insert the light bulb and turn it slightly to fix it in the correct position.
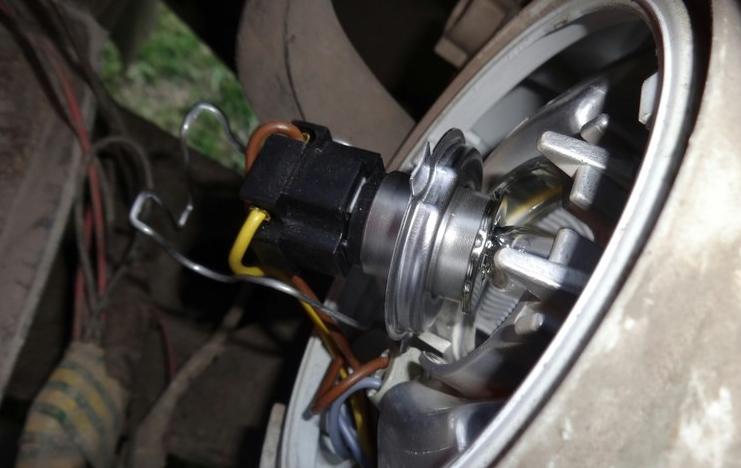
- Usually the lamp connector is located on a small wire with a power supply. This simplifies installation, since the elements can be connected from the outside. Everything is simple here the main thing is to insert the contacts all the way, after which you need to choose the location of the wire, it is best to put it inside the headlight. If this is not possible, the block with the connector is placed outside and fixed with a plastic tie or double-sided tape.
- The lid must be put in place so that it fits snugly. After that, the process is repeated on the second headlight
In some models, the headlight is removed entirely, for which you need to press the latches or unscrew the fasteners. There are also options when you need to remove the wheel, since the lamp is accessed through a hatch in the fender liner.
Video lesson: Replacing an H4 bulb with an LED bulb in Hyundai Solaris.
Installation errors
There are several typical mistakes that are often encountered when installing LED lamps. It is important to avoid them:
- Installing a lamp, the location of the LEDs in which does not match the position of the spirals in the halogen analogue. The light will be distributed incorrectly.
- Mounting the light bulb in the wrong position. If it is shifted or inverted, it will not work to achieve normal lighting.
- Riding without light settings. Even with a similar design, the luminous flux in LEDs is distributed differently than in a conventional light bulb. Therefore, a trip to adjust the headlights is required.
Read also: Improving the headlights in the car.
Security measures
To avoid electric shock and damage to auto parts, you must follow a few simple recommendations:
- Remove the terminal from the battery before starting work and put it back after assembling the headlights.
- Carefully remove the bulbs so as not to break the glass. If the block is not removed from the contacts, do not apply excessive force.
- It is advisable to wear gloves so as not to scratch your hands on protruding elements.
- Provide good lighting in the work area.
For clarity, we recommend thematic videos.
If the headlight fits under the LED lamps, it will not be difficult to install it. It does not require a complex circuit or a special tool, everything is done in almost the same way as when installing conventional halogen options.