Headlight improvement
Improving the headlights is within the power of almost any driver. To do this, you do not need to change the entire spare part, you can use a few recommendations to restore brightness. It all depends on the nature of the problem, it is also not difficult to find out the cause of the deterioration, usually this can be done by external signs.
Is it possible to improve the light with your own hands
The deterioration in performance is far from always due to the wear of the headlights or the development of their resource. As a rule, you can carry out a simple repair and return the quality of lighting to its original or significantly improve it. Over time, many elements wear out or the operation of the system is disrupted, so some details require attention.
It is very important to choose options that do not violate the law. For example, installing xenon lamps or lenses is a direct violation of traffic rules, which may result in a fine. In addition, non-standard xenon cannot be adjusted and it blinds oncoming drivers. Or the luminous flux is distributed so that at high brightness it illuminates the road worse than a regular halogen lamp.
How to improve headlights
There are several proven ways to solve the problem of poor light. Sometimes it is enough to make one of the options work, and sometimes you have to use 2-3 ways to ensure a good effect. It is important to strictly follow the instructions, since any violations can lead to failure of the headlight or damage to electrical equipment, which will result in more expensive and complex repairs.
If the problem occurs on the road, dirt on the outside of the headlights may be the culprit. You just need to wipe them to bring back the brightness. This happens when driving during rainfall, when spray rises from the road, which, when dried, leaves a coating on the glass that prevents the normal penetration of light from the light bulb.
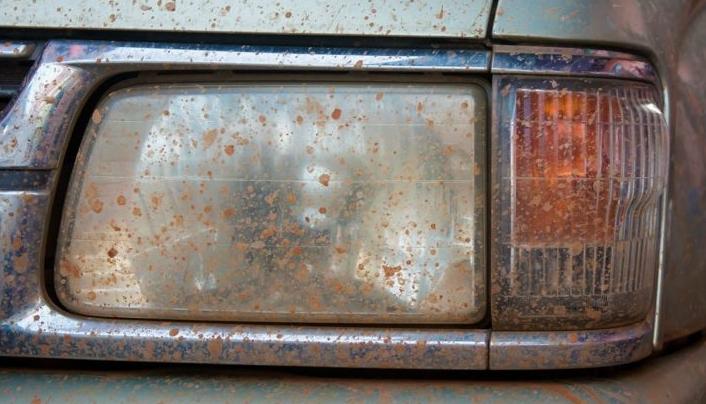
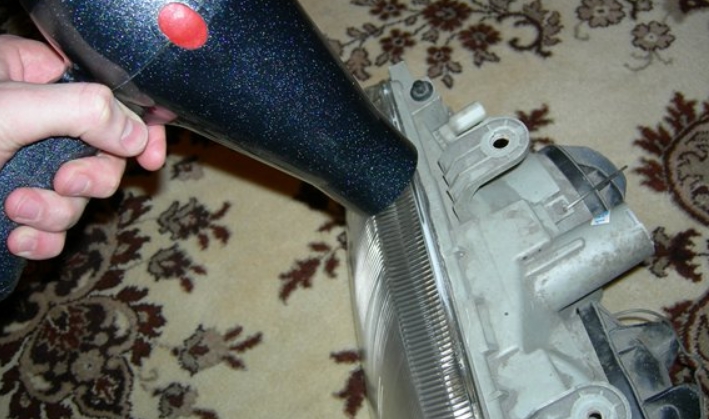
Worth seeing the structure during the daytime. If dirt and dust has accumulated on the inside of the glass, you need to clean it. To do this, you have to disassemble the structure, cutting off the factory sealant. To make it easier to move away, a building hair dryer is used. They need to warm up section by section and carefully separate the glass from the body. If you do this without heating, you can damage the elements and then you have to buy a new headlight.
After disassembly and cleaning with a soapy solution of dust and dirt from the inside, you need to inspect the reflectors. If they are also dirty, it is necessary to remove all connectors and elements that are afraid of water from the headlight and wash it. Do not rub the reflector, it should be washed in water with the addition of dishwashing detergent. Dip several times and shake vigorously.When the dirt is gone, rinse the body well to get rid of the detergent residue, after which the element is left to dry completely.
If it turns out that the reflector is damaged or part of it is burnt out from constant heating, you need to repair it. In some cases can be restored element with reflective tape, special film or spray paint. If the surface is deformed, the reflector should be replaced with a new one. In this case, the main thing is to carefully remove it so as not to damage the connections on the case.
Polishing
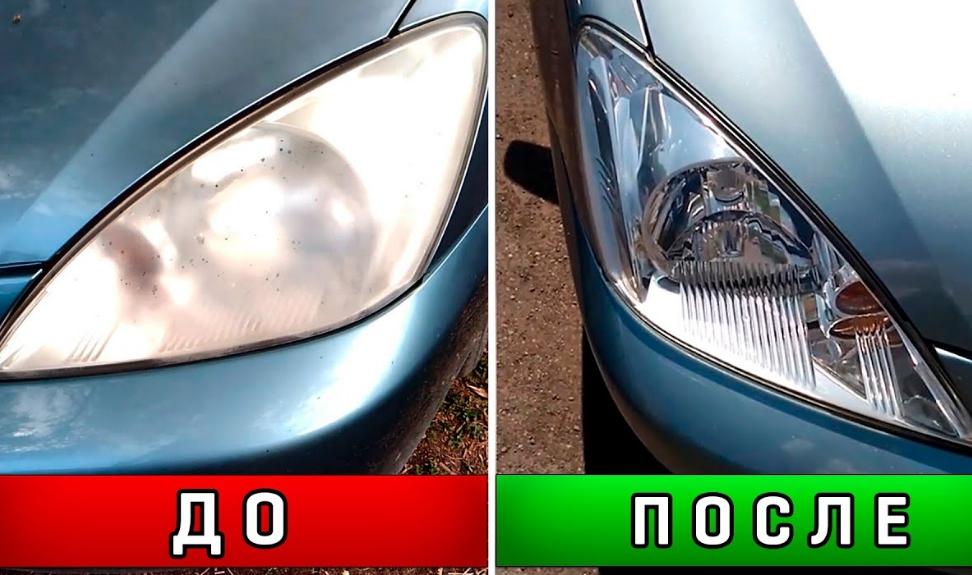
Most modern headlights are made of polymer materials. Over time, the plastic becomes covered with small scratches or becomes matte from constant heat. This can greatly affect lighting, as light transmission is reduced and the flow is not distributed correctly. It is easy to do the work on your own, in order to improve lighting, you must follow a simple instruction:
- Remove the headlights to ensure convenient operation. If this cannot be done, paste over all the elements around so that they do not get dirty or damaged during surface polishing. For this, a special masking tape for cars is used, which holds very well, and after removal does not leave traces of glue.
- For work, it is recommended to use two compositions. One for primary processing and leveling the surface (rougher) and the second for polishing and giving the element an ideal smoothness. You will also need a special polishing disc and a drill or grinder (better if it has speed control).
- Work begins with the first paste, it is evenly distributed over the surface, after which the glass is polished. It is important to do the work carefully, without missing a single section. After drying, the element will be matte - this is normal, this effect should be observed.
- The second paste is applied in the same way, polishing is carried out until the surface is perfectly smooth. It is necessary to carefully rub the composition until the element becomes transparent and dry. After that, you can put the headlights in place or remove the protective pasting.
By the way! Some after polishing varnish the surface for protection. This option is not the most successful, since the varnish begins to be damaged after 1-2 years, and if you polish the headlights again, you will have to spend time removing the coating, which complicates the work.
Voltage boost
The power supply circuit of the headlights consists of many elements and at each contact part of the voltage is lost. If this does not play a big role in new cars, then over the years the losses grow and instead of 14.2-14.4 V coming from the battery, 11 V or even less comes to the lamp. You can try to clean all the contacts, update the connections and treat them with a special compound to improve voltage transfer.
Particular attention in older models should be paid to the steering column switch, the contacts burn on it over time, so often the problem with light can be solved by replacing this element.
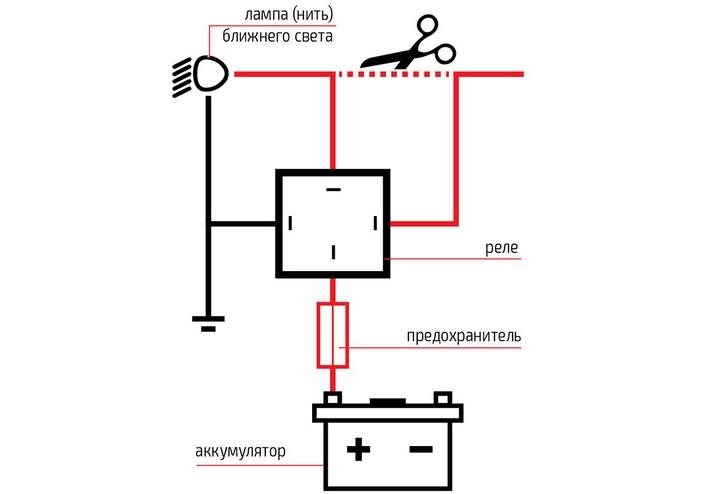
But the easiest and most reliable way is to install an additional relay in the dipped headlight circuit. This technique allows you to ensure normal voltage on the bulbs and they will work with maximum efficiency. The process is not difficult:
- You can buy a ready-made kit for installation under the hood, it will cost about 1000 rubles.But you can purchase a separate relay, fuse and wires to assemble the system yourself. You will also need heat shrink tubing to work.
- One wire is connected to the positive on the battery and through the fuse is connected to the corresponding relay contact (the connection diagram is in the instructions for each model, it can also be found on the network).
- A convenient place under the hood is selected for the relay, usually it is placed near the headlights and is attached to the body with a screw or a small bolt. Don't just put it in a niche.
- The wire from the switch must be cut and connected not directly, but through a relay, this is what will ensure a stable voltage on the bulbs. From the relay, the second piece is brought to the headlight bulb connector and connected to the contact. All connections must be protected with heat shrink tubing of a suitable size. For contacts, use ready-made chips, avoid twisting and using electrical tape.
After installing an additional relay, the brightness of the bulbs usually increases by 15-20%, and in some cases even more.
Video example: What gives an additional relay for low beam headlights.
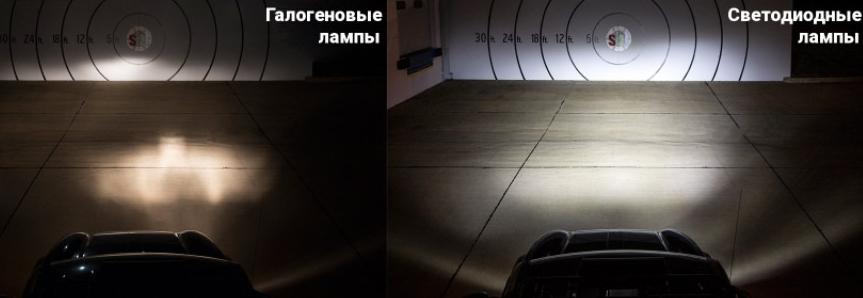
LED light bulbs
This option allows you to improve lighting without large-scale alterations. Its essence is to replace standard halogen bulbs with LED ones. They consume little electricity, which reduces the load on the elements of electrical equipment, they heat up less, which prolongs the life of the reflector. But here are a few tips to keep in mind:
- Choose LED bulbs the same design as the halogen ones.The main thing is that the light distribution should match, otherwise the light will be reflected incorrectly, which can lead to blinding oncoming drivers or inefficient lighting. It is worth reading the reviews to find out which option is best for you.
- During installation, it is often necessary to place the power supply inside, usually it is inserted into the case so that there are no unnecessary elements under the hood.
It is worth clarifying the size of the lamps, due to the radiator in the rear, they are larger and may not fit into the body of some headlights.
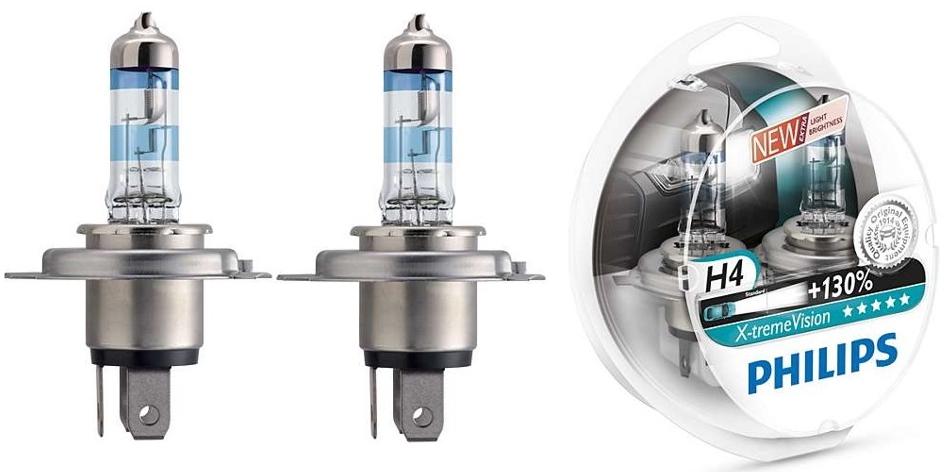
Light bulbs with improved light output
Many manufacturers have product lines with increased light output. Moreover, the difference can be from 20 to 100% and even more, it all depends on the model. This option is much better than installing higher power lamps, since the headlight is designed for a certain heating and the reflector will deteriorate if it is constantly overheated.
In addition, halogen options are rated for 500 hours of operation, over time the coil becomes thinner and the light deteriorates, even if the light bulb is working. Therefore, replacement can solve the problem, and improved light output will provide light that is even better than originally.
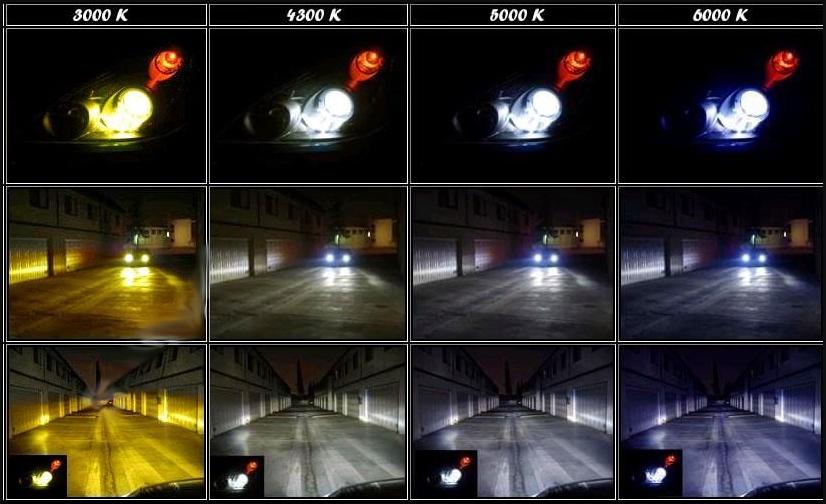
Light bulbs with a higher color temperature
If there are ordinary elements with yellow light in the car, it is worth replacing them with lamps with white radiation. They will provide good color reproduction and significantly improve visibility without much alteration. And if you choose an option with improved light output, the effect will be even greater. The main thing is not to use too cold light, its temperature should not exceed 6000 K.
You should not put bi-xenon bulbs in regular diffusers, as they get very hot and can melt the plastic. In this case, you should buy blocks assembled with a lens. But this decision can be implemented not on all cars, if lenses were not installed at the factory, this is illegal and entails a fine.
In most cases, you can increase the brightness of the light in the car without replacing the headlights. It all depends on the nature of the malfunction and the condition of the elements. Sometimes a complex of measures is required, for example, polishing the glass and replacing light bulbs or installing a relay.