Arrangement of fence lighting in a country house
For a country house or summer cottage, fence lighting is one of the essential elements. This increases the safety of movement around the yard, protects the house from uninvited guests, and helps to illuminate driveways. This article will tell you about the purpose of the fence lighting, the choice of lamps, the do-it-yourself installation technique in an alternative way.
Basic Rules
When planning the organization of lighting the fence of a private house, one must rely on a number of basic rules:
- If the fence is not installed, it is better to start resolving the issue even before the installation of the structure. You can draw up a preliminary wiring plan and choose the location of the fixtures.
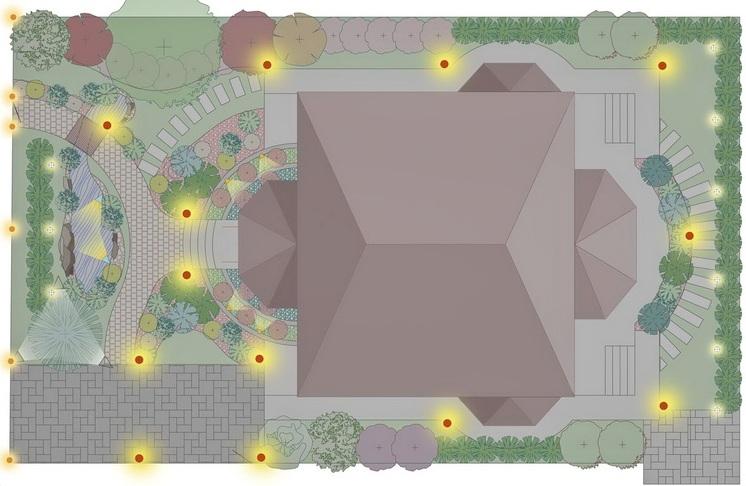
![fence lighting plan]() One of the options for the lighting plan.
One of the options for the lighting plan. - If there is no confidence that it will be possible to do everything from start to finish with your own hands, then you need to hire craftsmen. All cables and additional elements must be de-energized during operation.
- It is worth doing everything to eliminate the risk of unauthorized switching on the network.
- Work should be done with protective gloves. In addition, rubberized boots will come in handy.
- It is also necessary to isolate the handle of each working tool.
- During installation, you should constantly check all cables and devices with a tester.
Compliance with these simple principles will help protect against electric shock. But most importantly, proper installation will provide high-quality and reliable fence lighting for a long time. You just need to remember to regularly clean the street lamps from dust and replace the lamps.
Tasks and functions of lighting
Illumination of the fence of a country house has several important goals:
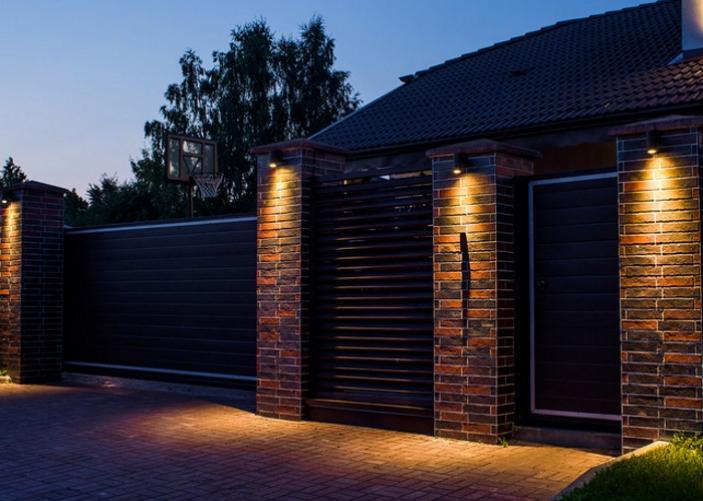
- Illumination of sections of the road at the entrance to the house. This will not only greatly facilitate the “car” issue, but will also help you walk without fear of catching on something in the dark. To do this, at least 2 lanterns must be installed next to the gate and the gate, one can be on each side.
![Here you can safely drive up and approach.]() Here you can safely drive up and approach.
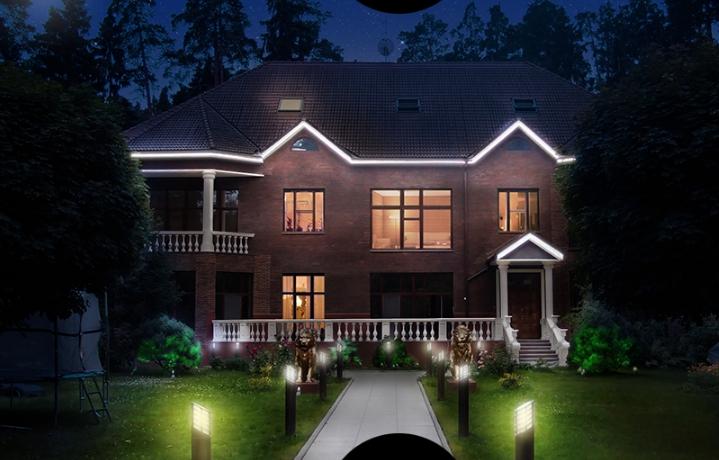
Here you can safely drive up and approach. - Courtyard lighting from the inside. For a calm and safe movement around the site, you additionally need illuminate flower beds and paths. If there are plans to install motion sensors and/or security cameras, they should be mounted as close to the lights as possible.
- decorative value. In addition to the obvious benefits, fence lighting is also very beautiful if done correctly. Accents on individual flower beds, plants, and other design elements will add aesthetic appeal to the site. And you can additionally create exciting visual effects.
The choice of lighting depending on the type of fence
The first thing you should pay attention to when planning a backlight installation is the type of fence.
High solid
Usually a solid fence reaches over 2 m in height and does not have slots or gaps. It is made from different materials:
- concrete;
- metal;
- brick;
- corrugated board;
- wood.
Fence lighting of this type involves the use of lamps with directional light or round lamps on support legs. In the first case, you can direct the light flux to the desired areas on both sides, in the second case, evenly distribute the light with a more moderate brightness.
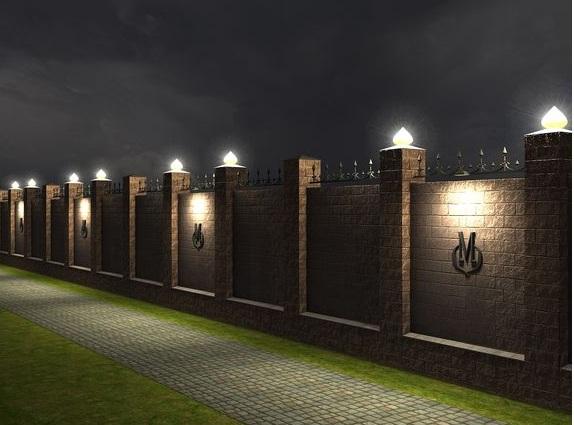
If the installation of the backlight is done for decorative purposes, spotlights or unobtrusive spotlights are placed at the bottom of the high fence, and then the light is directed to the surface. This way you can achieve interesting patterns. But for this, only a fence with an aluminum or steel surface is suitable.
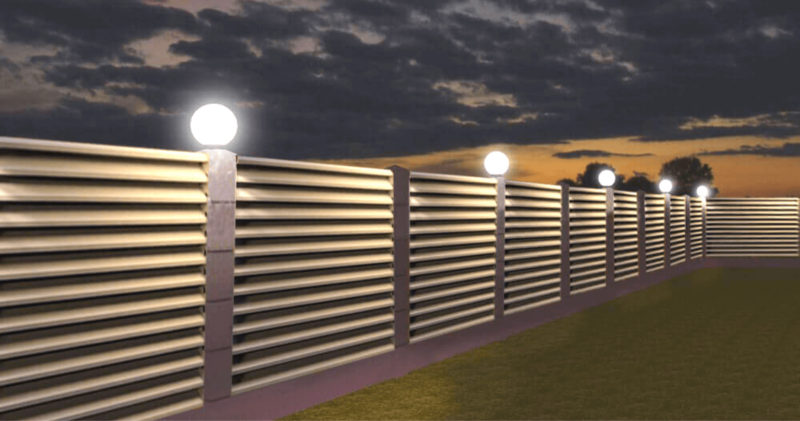
ventilated solid
The main difference between this type and the previous one is the holes and gaps between the sections. Through such a fence, the territory of the dacha is visible and, conversely, the street. Manufacturing materials are similar. The same type includes fences-blinds that open and close when necessary.
The advantage of a ventilated fence over a solid fence is less electricity consumption. After all, light breaks through the cracks from both street lamps and household lamps.
Such fences are best illuminated using spotlights or spots mounted directly into the ground. They will not only fulfill their direct task, but will also make it possible to make a beautiful decor for the backyard territory. Lamps on poles will not give such an opportunity.In fences-louvers, special contact pads are installed on the sections - lamellas. If there is a dimming option, this will create the right balance between natural and artificial light.
Low
This type includes picket fences and fences made of poles. With such a fence, 2 lanterns on high racks near the gates and gates will illuminate the driveway well. To make the fence visually taller, small lamps will help, which are attached to the top of the supporting structures. The main thing is that they have sufficient resistance to mechanical stress. An alternative way is to install spotlights with directional light from the courtyard side.
Video cut with original light ideas for fences and railings.
Original do-it-yourself site lighting
Now about the procedure for installing the backlight on the fence of the cottage.
Tools
The first step is to acquire the necessary materials:
- lamps;
- cables;
- electrical tape;
- corrugated tube.
From improvised tools you will need a screwdriver, a drill, pliers or pliers, a well-sharpened knife, as well as a tester for constantly checking the current.
Cable marking and laying
First you need to correctly mark the trench for laying the cable. Recommended sizes:
- trench width - 25-30 cm;
- depth - not less than 70 cm;
- distance to the nearest bush - from 80 cm;
- from a tree - 1.5 m;
- from the fence - 60-70 cm.
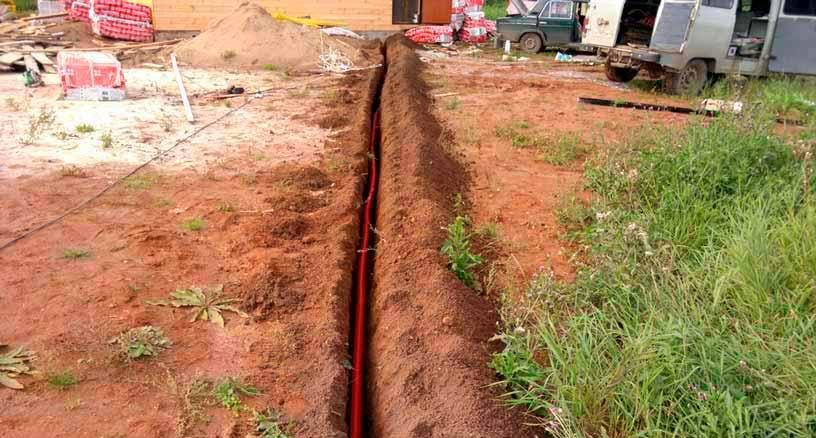
Before laying the cable, the bottom of the dug trench must be well leveled, sprinkled with sand, and all roots, pebbles and other interfering slag removed. There should not be even the slightest danger of damaging the cable.
Next, laying the wire is done in the following sequence:
- Place the cable in the corrugated tube. There should be no folds, tensions.
- Check the wiring with a tester. If there are no problems, carefully lay the cable along the bottom of the trench.
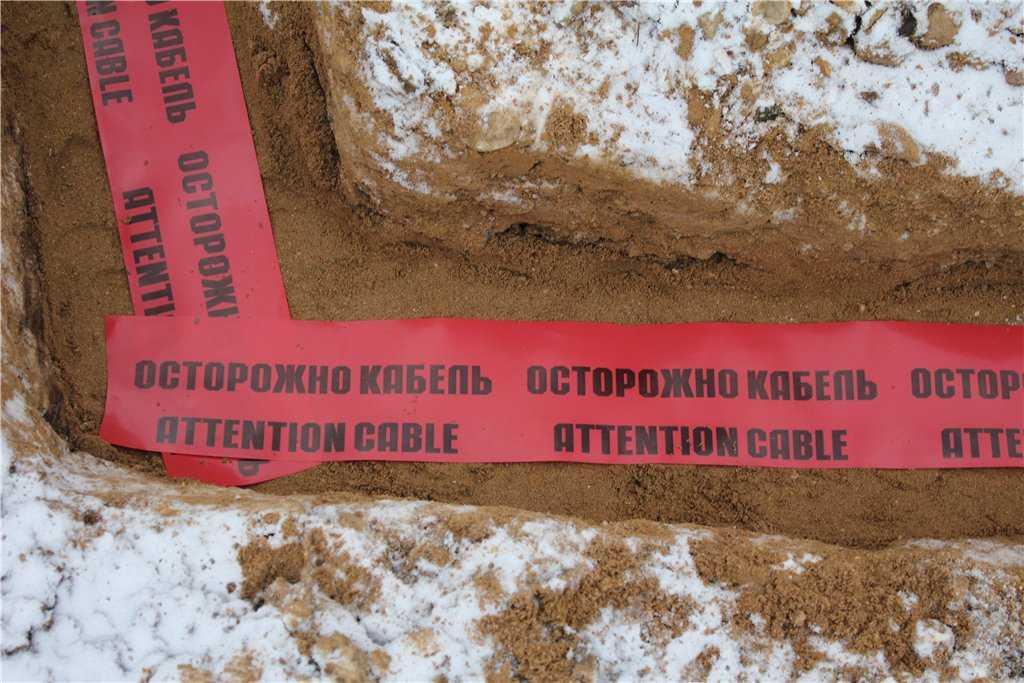
- An additional means of protection is signal tape. It reduces to zero the risk of damage to the wiring when digging.
![Signal tape.]() Signal tape, buried in a trench with a cable.
Signal tape, buried in a trench with a cable. - When everything is ready, the trench is first covered with sand (10-15 cm). To test the stability, you need to carefully stomp your feet on the sand.
- Bury the trench to the top with soil. The layer must be made thick, at least 20-25 cm. There is no need to trample down the soil, it will settle anyway.
Connection
Now the wiring can be connected to the fixtures. Having placed them in their places, with each you need to do the following:
- Thoroughly clean the ends of the wires.
- Bring the phase to the central contact of the lantern, securely connect them to each other, insulate well.
- Use a tester to check grounding and resistance.
After checking, you can supply electricity. If everything is done correctly, each lamp will turn on and work reliably.
Illumination without the use of electricity
To illuminate the fence of a suburban area, alternative options without electricians can also be used. One of the most common now is backlighting with solar panels. In the context of the mass transition of mankind to this type of energy, this method looks correct and reliable. Its advantages are obvious:
- no need to start digging trenches and laying cables;
- no electricity is consumed;
- benefit for the environment.
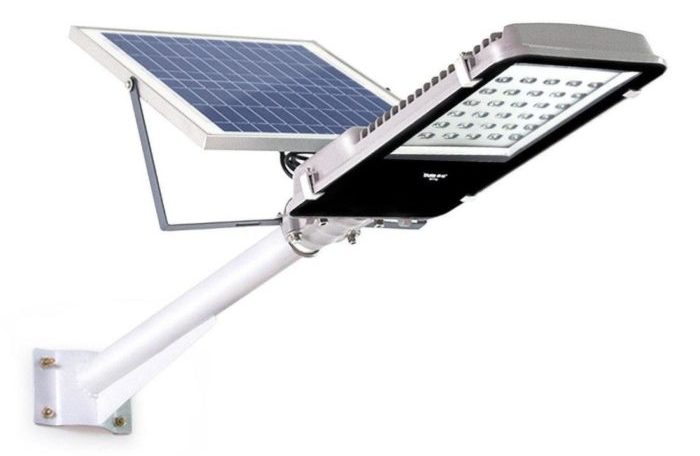
But the most important thing is that you can put the lamp anywhere, without a specific binding. The design of such a lamp is simple:
- housing with LED;
- solar battery;
- automatic lighting controller;
- battery;
- stand, support.
Another big plus of this type of illumination lies in the automatic controller. Full automation allows the lights to turn on and off only on demand. When leaving after the weekend from the dacha, you can be calm that they will not light up for no reason.
However, the disadvantages of solar-powered lighting negate all the positive aspects:
- It is extremely difficult to get by with only this light - it is not bright enough to fully illuminate the territory of the site.
- Even on the sunniest day, the battery will not charge for more than 8 hours of operation.
- Cloudy weather and rainy seasons do not go well with solar panels. They will be charged very slowly, and this is only up to 4 hours of glow.
- A good lamp "will cost a pretty penny" - 10 thousand, no less.
At the end of the video: street lighting
Installation illumination a fence for a country house on solar panels is a modern and good solution. But, by and large, you can’t do without electricians. Gates, gates, porches, steps - areas near these places should have reliable bright lighting.