How to make a neon sign with your own hands
Relatively recently, flexible neon appeared on the market very quickly spread to many areas and turned into a convenient advertising tool. With it, you can create almost any drawings and inscriptions that attract buyers. Such a design can be ordered ready-made or made independently.
What is flexible neon
A feature of flexible neon is the uniformity of the glow, stability and resistance to external factors.
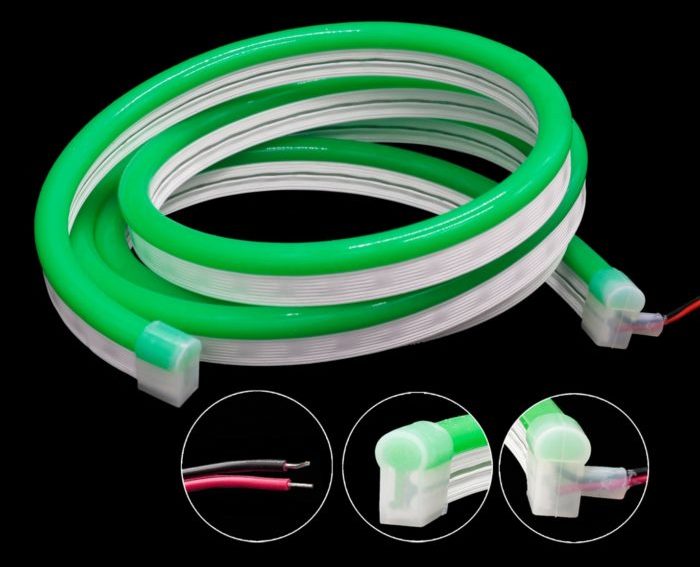
The composition includes:
- A set of LEDs that convert electricity into a bright glow.
- Wiring. A set of wires that switch diodes together.
- Shell. Flexible structure made of silicone or polymeric materials. Can have almost any color. Performs a protective function, and also forms the necessary shade of the glow.
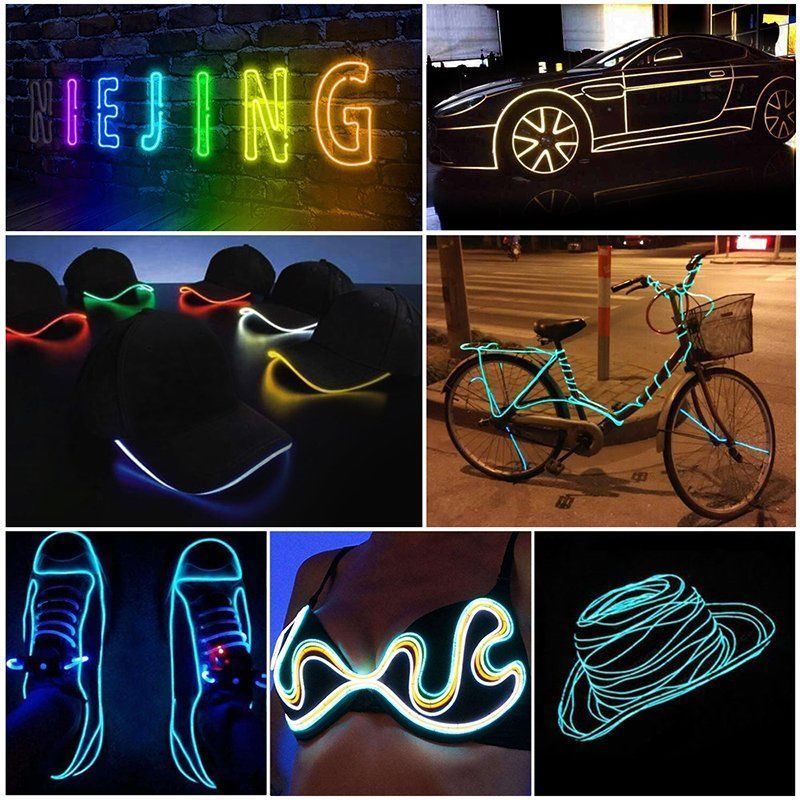
Where can I use flexible neon
The most common areas include:
- decoration of facades of buildings, architectural monuments;
- design of advertising signs, banners and billboards;
- decoration of parks with illumination of trees and bushes;
- car design (body, interior);
- interior design of clubs, bars and other establishments.
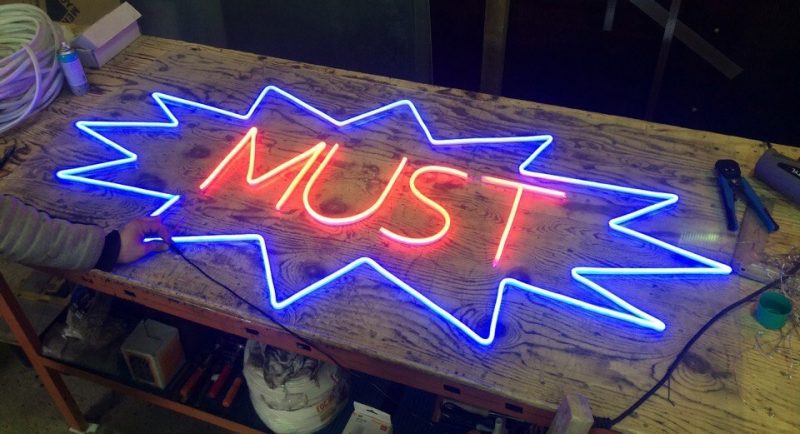
Making a neon sign with your own hands
You can make a neon sign with your own hands. This will require some tools, materials and basic skills in working with electrical circuits. It is important to observe safety precautions.
The video will tell you about the manufacture of neon signs with your own hands
Preparation of tools and materials
For self-production you will need:
- flexible neon (12 or 24 V models are suitable);
- source of power;
- fastenings (profile, brackets, etc.);
- plugs for free edges of wires;
- glue;
- aluminum flat tube for frame;
- soldering iron;
- paper or cardboard to create the necessary layout;
- insulating tape;
- special connector for 2 pins for connecting neon;
- sandpaper;
- knife or scissors.
Other tools may be required, such as vise, seals or sealants. The specific set will depend on the type of attachment chosen and the specific design features.
Creating a sign
Operating procedure:
- On paper or cardboard, draw a layout of the future design.
- Form a frame from a flat tube, and then boil it in the right places.
- To one of the sides of the frame, weld fasteners to the wall.
- Clean and polish the resulting structure with sandpaper.
- Install the profile or other selected fasteners for the wire along the entire length of the circuit at a short distance.For strength, put on glue.
- Cover the resulting frame with a primer and wait for it to dry.
- Flexible neon is mounted in appropriate fixtures. You can use glue for hardening.
- Parts of the tubes are soldered together, after which all connections are isolated.
- Cut off excess tubing.
- Connect to the network through the power connector.
- Check system performance.
- With the help of insulating tape and plugs, ensure complete tightness of the circuit.
This way you can create signs in the form of pictures, words or whole phrases. It remains to install the structure in the right place and conduct power.
How to solder flexible neon
The connection of the tubes is done with a soldering iron, preferably with a power of up to 40 watts. For insulation, heat shrink tubing and electrical tape are used.

Neon soldering procedure:
- Carefully remove the insulation (silicone or polymer) from the tube approximately 1 cm long from the edge. To do this, heat it with a lighter, and then gently pull it off.
- Clean the contacts from carbon deposits and insulation residues.
- Use a knife or other sharp object to scrape off the phosphor layer.
- Connect the two wires of the outer braid into a pigtail.
- Strip the insulation from the supply cable. In this case, it is important to carefully wipe the contacts with a special gel, and then apply solder to them.
- 3 heat shrink tubes (one large diameter and two small ones) are put on the power cable.
- One of the cores of the power cable is connected to the cores on the outer sheath of the neon and soldered.
- The prepared thermotube shifts and shrinks under the influence of high temperatures, completely isolating the connection.
- The central core of the neon is also connected to the second contact of the power cable.
- It remains to move the wide tube to the right place and ensure the tightness of the connection.
How to hang
Neon signs can be attached in different ways, and the appearance will depend on this. One of the most common options is a ceiling mount in a showcase or on a wall.

In this case, the image or inscription is fixed on a plastic or plexiglass substrate using cables or thick fishing line. To do this, holes are drilled in the substrate, and hooks or other fasteners are mounted on the ceiling.
Often there are signs mounted directly on the walls without any substrates. In this case, profiles or brackets for installing neon tubes are fixed on the wall without a frame. The installation process requires certain skills. Most of the problems arise at the stage of wiring output and power connection.
Signs in the form of neon letters on a frame suspended from the ceiling are very common. The frame is usually made of aluminum or some kind of light but strong alloy. Suspension is also created using hooks and strong ropes or lines.
Making a sign from flexible neon, without the use of professional equipment
How to extend the life of a neon sign
The finished neon sign is quite durable and resistant to various influences. To extend the service life, it is recommended to follow the rules:
- For street signs, tubes with protection against moisture and dust must be used.
- Do not turn on the structure while there are covers on it. This will hinder heat dissipation and cause overheating.
- The voltage and current supplied to the electrical circuit must comply with the standards prescribed in the passport.
- It is recommended to regularly clean the structure from settling dust.
- Operating conditions (temperature, humidity) must not exceed the specified range.
The described recommendations will keep the sign in working condition for a long time. And since signs are usually created for a long time, increasing the resource of products turns out to be fundamental.