Replacing a cartridge in a lamp with your own hands
You can change the cartridge in the chandelier on your own, for this you do not need to call an electrician. The main thing is to understand the features of the work and study the design of the main types of equipment. If you follow the recommendations for the work, any danger is excluded, and the result will be no worse than that of professionals.
Varieties and marking of cartridges for chandeliers
Currently, several options are used, each has its own characteristics. Two main groups can be distinguished: screw (marked with the letter E) and pin (marked with the letter G).
Requirements for threaded cartridges are prescribed in GOST R IEC 60238-99. There are three main varieties:
- E14, it is also called "Mignon". Diameter 14 mm, designed to connect low power incandescent lamps and almost all LED light sources, as they consume little electricity. The main option in most modern chandeliers and fixtures. The maximum allowable power is 440 W at a load current of up to 2 A.
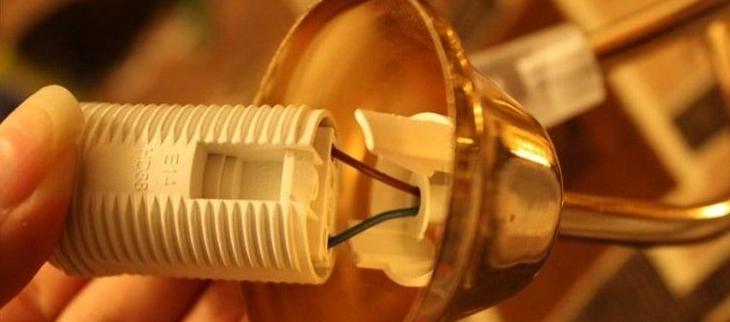
![Replacing a cartridge in a lamp with your own hands]() The E14 cartridge is much narrower than the standard E27 variant.
The E14 cartridge is much narrower than the standard E27 variant. - E27. A cartridge with a round Edison thread with a diameter of 27 mm, until recently, was the main one and was used in almost all chandeliers. A standard solution familiar to everyone, suitable for conventional incandescent bulbs and any other options. Designed for power up to 880 W, the maximum load current should not exceed 4 A.
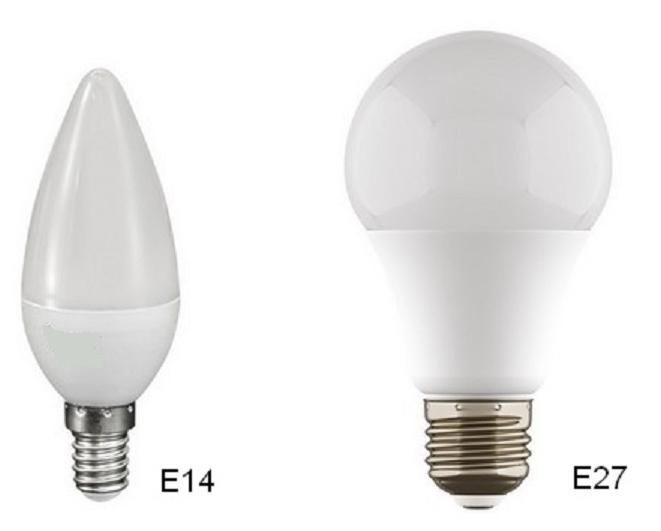
![Replacing a cartridge in a lamp with your own hands]() A visual comparison of the two varieties.
A visual comparison of the two varieties. - E40. The version with a thread diameter of 40 mm is used for high power street lighting. It can use lamps up to 3500 W at a load current of up to 16 A.

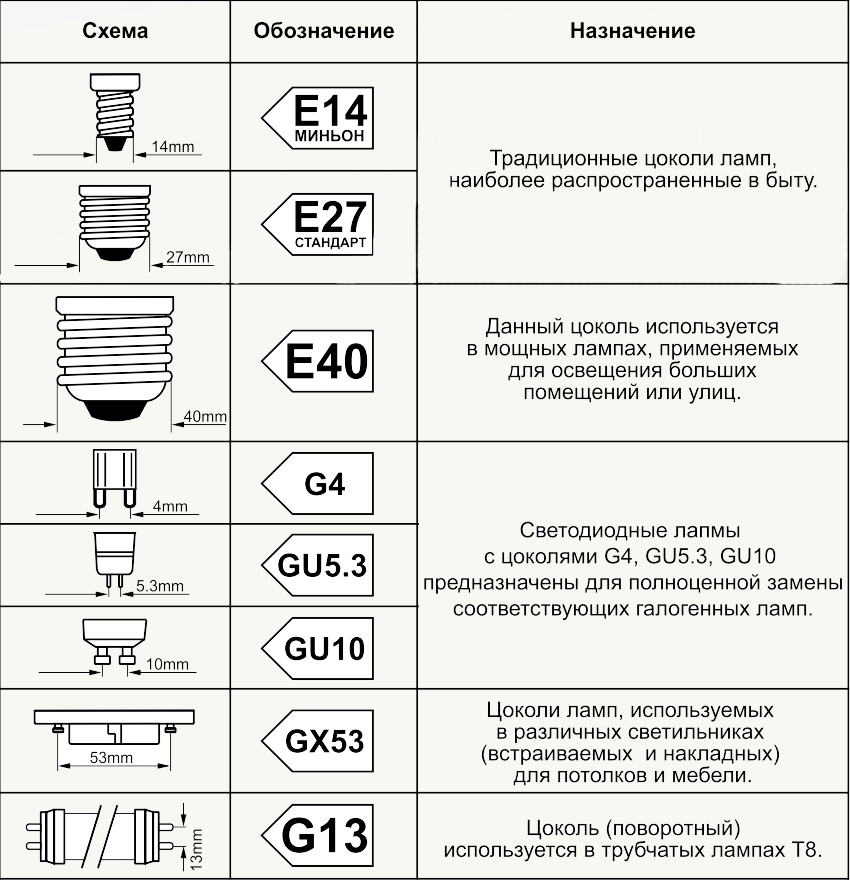
Specifications for pin type cartridges are specified in GOST R IEC 60400-99. All products of this type must comply with the technical regulations from the document. Main varieties:
- G4, G5.3, G6.35, G8, G10. All modifications of the pin cartridge have the same design, only the distance between the contacts differs. The figure indicates the distance in millimeters, which allows you to navigate the design features. The maximum power of the bulbs should not exceed 60 W, the load limit is 4 A.
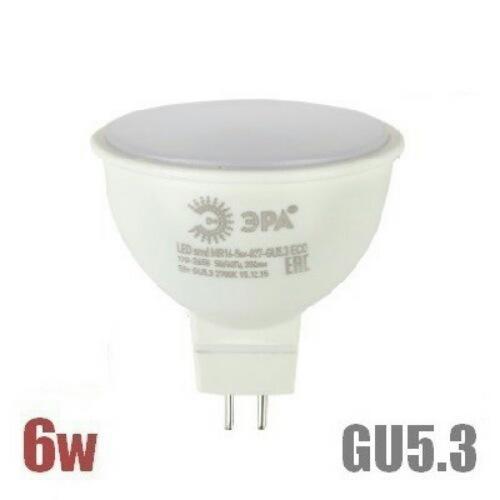
![Lamp with GU5.3 socket]() Lamp with GU5.3 socket
Lamp with GU5.3 socket - G9. This variant uses LED and halogen bulbs with flat pins. At the same time, the technical indicators are the same as those of the products above.
- GU10. The system is similar to conventional pin chucks, but in this case, the contact diameter is increased. Installation is carried out not only due to the tight arrangement of contacts, the light bulb rotates clockwise and is firmly fixed in the cartridge. You can install elements up to 60 W with a load current of up to 5 A.
![Replacing a cartridge in a lamp with your own hands]() Cartridge GU10 in the lamp.
Cartridge GU10 in the lamp. - G13. Modification for linear lamps, when inserting the lamp, you need to turn it 90 degrees to fix it.The peculiarity is that the replacement of the base in a chandelier or lamp is carried out in pairs, since there are 2 elements for each light source. Designed for lamps up to 80 W with current up to 4 A.
![Luminaire with socket G23]() Luminaire with socket G23
Luminaire with socket G23

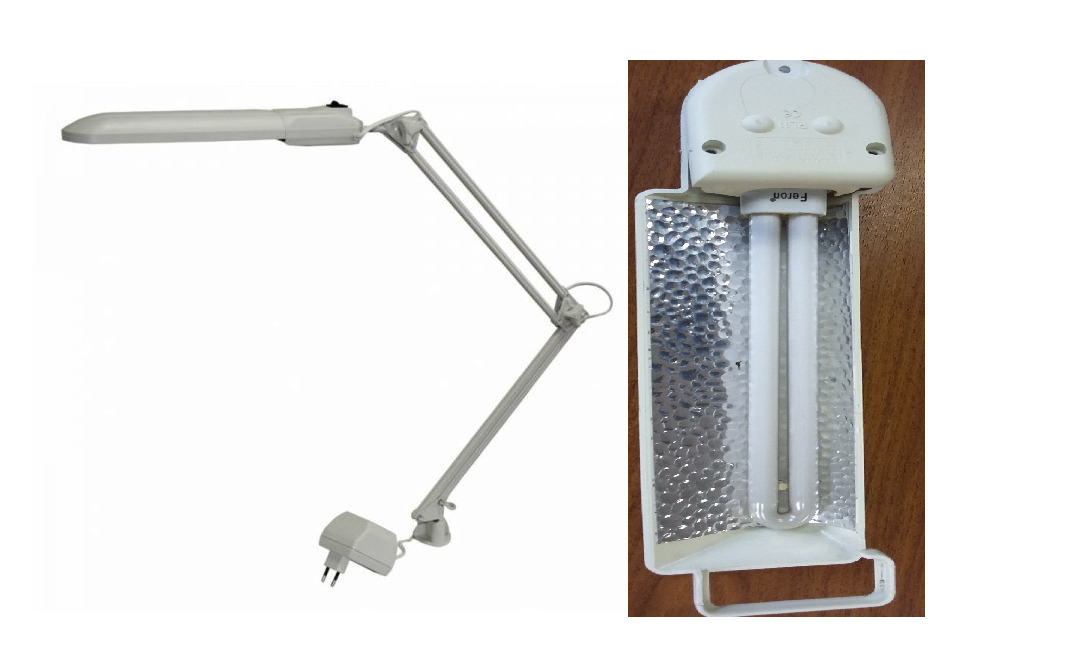
For suspended and stretch ceilings, a special GX53 cartridge of small thickness is produced, which is suitable for limited spaces.
Production material
For the production of cartridges, heat-resistant plastic or ceramics are used. Each of the options has its own characteristics, in the polymer type they are:
- Plastic products are inexpensive. But at the same time, from constant heating, the material eventually becomes brittle and begins to collapse. Also, it can be deformed, especially if the quality of the raw materials is not very good.
- Elements are easy to disassemble and replace. White options will inevitably turn yellow over time, this indicates that it is time to change them.
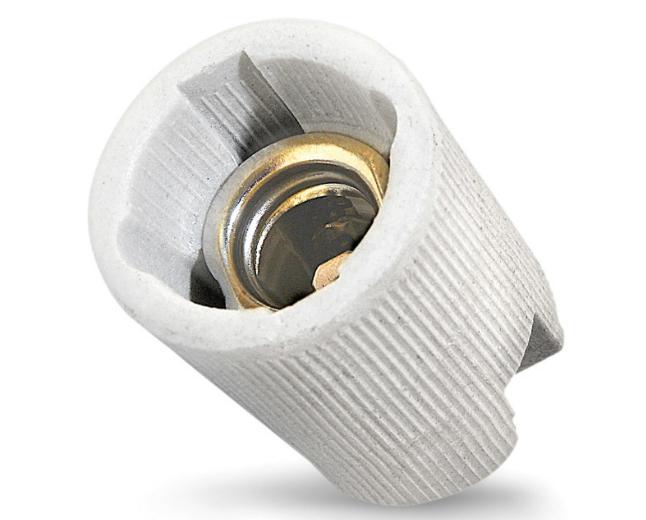
Ceramic cartridges are less common, but are in demand due to the following features:
- Inside, a metal fastening nut is always used, since ceramics stick with prolonged heating and it is difficult to remove it.
- If the base still sticks to the threaded part due to heating, it is unscrewed together with the sleeve. This allows you to disassemble the bulb holder quickly.
- The heat resistance of this option is an order of magnitude higher than that of plastic, but at the same time the price is higher.
Reasons for cartridge replacement
Work should be carried out in the following cases:
- If the element has visible damage or cracks. Another option is that the plastic became brittle and showed signs of severe overheating.
- When the light is turned on, the light bulb does not work, despite the fact that everything is in order with it.This is usually due to severe corrosion of the center contact or threaded part. It is not worth cleaning them, it is wiser to immediately put a new part.
- The lamp base is stuck and does not turn out from the threaded section. It is better not to apply excessive force, as the bulb may burst. It's easier to change the cartridge.
- Damage to the terminals, their deformation, which leads to short circuits in the structure.
By the way! Experts advise changing cartridges for preventive purposes at least once every 5 years. This will prevent any problems and ensure the safety of the equipment.
The process of replacing the cartridge in the chandelier
First of all, you need to collect the necessary tool:
- Regular and indicator screwdrivers. Better several options for different types of fasteners.
- Electrician's knife.
- Several pieces of wire. Preferably the same as in the chandelier.
- Terminals or soldering iron for connecting wires.
- Insulating tape.
Cartridge replacement consists of several stages:
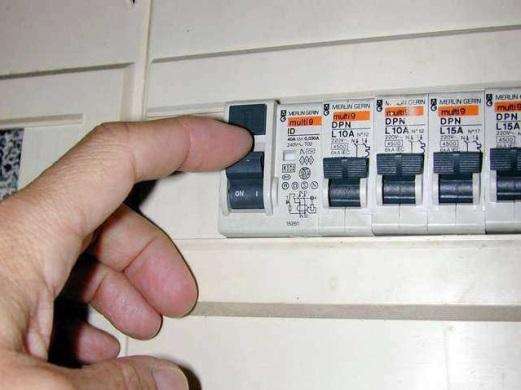
- The power supply to the switchboard is turned off. Most often, a separate machine is used for lighting. You need to check and find the one that is responsible for the lamps. You can check by turning on the light or other equipment operating on the same line.
![Disconnecting the power supply to remove the ceiling]() Before working on electrical appliances, turn off the power supply at the switchboard.
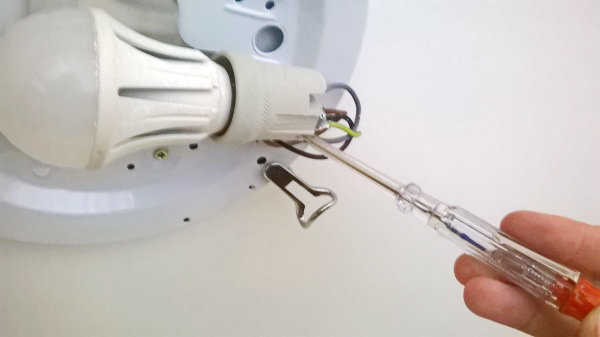
Before working on electrical appliances, turn off the power supply at the switchboard. - Next, you need to make sure that no voltage is applied to the chandelier. For this, an indicator screwdriver is used. Even with the machine turned off, this must be done without fail in order to eliminate any problems. Only after verification can work be continued.
![Replacing a cartridge in a lamp with your own hands]() We measure the voltage on all suitable wires, the indicator should not light.
We measure the voltage on all suitable wires, the indicator should not light. - The cover is carefully unscrewed, covering the attachment point under the ceiling, and the wires are disconnected.Most often they are connected through a block, in old houses it can be a twist wrapped with electrical tape. It is desirable to replace it with a normal connection later, it is easier and safer. The disconnected wires are separated to the sides to eliminate the possibility of a short circuit.
![Replacing a cartridge in a lamp with your own hands]() It is best to connect to the wiring using a special block.
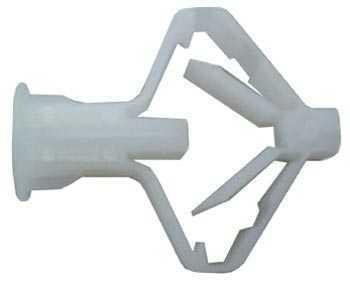
It is best to connect to the wiring using a special block. - If there are fragile and easily removable elements on the chandelier, they should be removed first. If the structure is hanging on a hook, it must be carefully removed, everything is simple here. When the lamp is fixed on the plate, it must be unscrewed, most often a screwdriver or a small wrench is required there. On stretch ceilings, a special mount is used, which is called a "butterfly", when it is removed, it is advisable to install a new one, it should be purchased in advance.
![Fixer "Butterfly"]() Fixer "Butterfly"
Fixer "Butterfly"
for mounting luminaires on false ceilings. - If the chandelier is hot due to prolonged use, let it cool down. Then the shades are removed (it all depends on the method of their fastening) and decorative elements that interfere with the work.
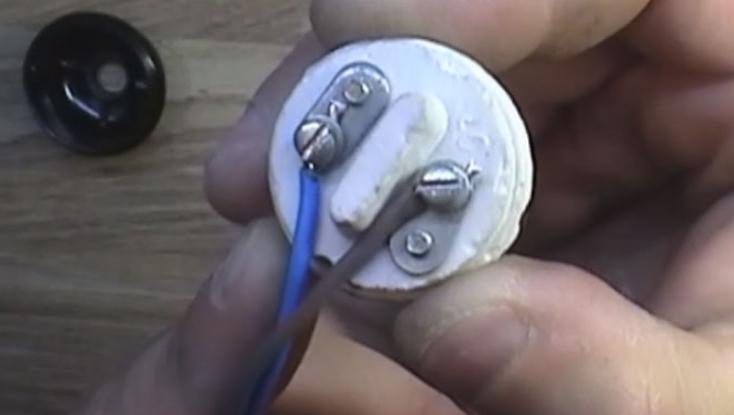
- Cartridges are dismantled in different ways, it all depends on the method of attachment. Most often they are held by a thread or a large clamping ring, which must be carefully unscrewed. Sometimes the elements are fixed on small bolts, then they just unscrew. After disassembly, the clamping screws of the wires are loosened and they are disconnected.
- Changing the cartridge in the lamp is easy, the work is carried out in the reverse order. First, wires are connected to the new node, this is done using terminals or clamping screws with plates, the main thing is to exclude the contact of the wires and their short circuit. Next, the cartridge is put in place and fixed.Then you can put the shades and connect the chandelier to the wiring, after hanging it on the ceiling.

By the way! In an LED chandelier, a light bulb cannot be replaced; you will have to solder the diodes there, which is much more difficult.
This video shows how to properly disable and remove a damaged cartridge.
How to properly disassemble the cartridge
When the threaded part has become attached, the easiest way is to unscrew the cartridge case along with the light bulb, this will greatly simplify the process. If everything is in order with the node, you need to inspect the mount and, based on its type, carry out work.
Most often, you just need to unscrew the top from the base, then carefully pull out the ceramic insert and disconnect the wires. There are options with a nut that presses the element to the body of the ceiling, it gently turns away after disassembly.
In new fixtures, there is an option when the cartridge is pressed with a screw on the side, in which case you just need to unscrew it and remove the part out.
From the video you will learn: How to properly disassemble a plastic cartridge with a snap-on lid.
Replacing the cartridge with your own hands is easy. The main thing is to observe safety measures and carry out work according to simple instructions. It is important not to damage the seat in the chandelier, there are no other restrictions.