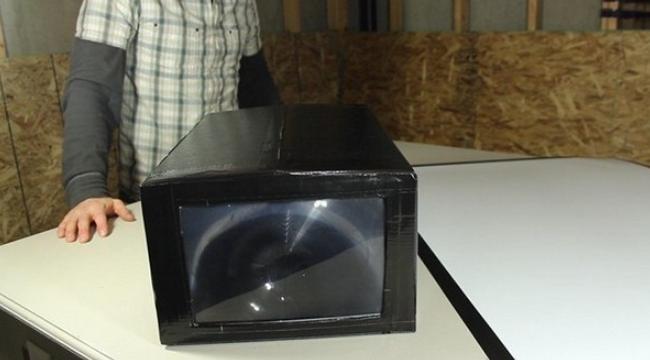
Making a homemade projector at home
Making a projector with your own hands is much easier than it seems at first glance. If desired, to assemble the simplest version of the design is within the power of everyone, even a teenager. This does not require expensive components, you can find the right parts cheaply or even for free, it all depends on the chosen project.
Calculation of parameters and features of implementation
To assemble the system, you need to understand the principle of operation of the device. It should be noted right away that it is impossible to make a projector that will be similar in characteristics and capabilities to finished models. These are complex devices, consisting of many nodes and providing ideal image quality. But you can get a workable system that will give a good picture without any problems.
Most often as an image source using a smartphone, tablet or laptop. All options are suitable, but it is important to understand that the larger the size of the base image, the higher the quality of the picture on the wall or screen. It is necessary to determine the type of device used in advance, since the choice of the necessary materials depends on this. You will need the following:
- A box of a suitable size is used as a basis. It is important that it is durable and does not let light in. It is best to take ready-made, made of hard cardboard. But if there is no suitable solution at hand, you can do it yourself, for this you will need to collect cardboard boxes of a suitable size and assemble a case from them.
- To enlarge the image in a homemade video projector, a magnifying glass or Fresnel lens is used. The size is selected depending on what will be used to transfer the picture. You can purchase a finished product or use what is at hand. Adjusting to the size is easy by choosing the distance from the screen to the magnifying glass.
- If you don't have a magnifying glass, a slide projector will do. Most often they are A4 format, but they can be of other sizes. In this case, you need to select a screen from a tablet that is comparable in size. You can purchase an inexpensive used model, the main thing is that it has a working screen, the case may be damaged, it will not be needed anyway.
- Any suitable adhesive is used to connect the elements. You can also use a glue gun with rods, it is convenient because the glue hardens in seconds, due to which the work is significantly accelerated. You may also need adhesive tape or electrical tape, it is better to have different options on hand, since you will have to choose the best one according to the situation.
- Sometimes large paper clips or other similar devices are used to install the smartphone and fix it. And for marking and measuring it is better to take a tape measure and a pencil.
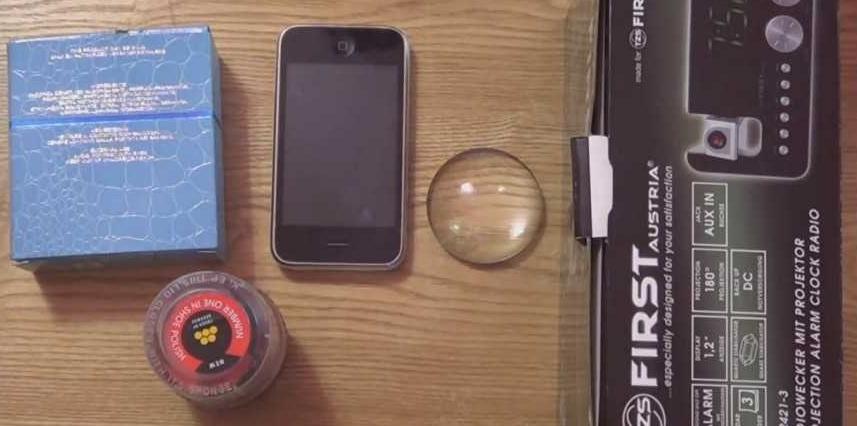
By the way! When choosing a magnifying glass, give preference only to options with a magnification of 10 times or more. The higher the quality, the better the image will be, there is no need to save on this.
How to make a phone-based home theater projector
A projector from a smartphone is the simplest and at the same time affordable solution that allows you to quickly and efficiently carry out work. If you spend one evening, you can ensure that you watch cartoons or videos not on a small screen, but on a wall or a prepared surface. It's comfortable and much better for the eyes. And if you connect a wireless speaker or stereo system to your phone, you get a home theater. The work is carried out according to the following instructions:
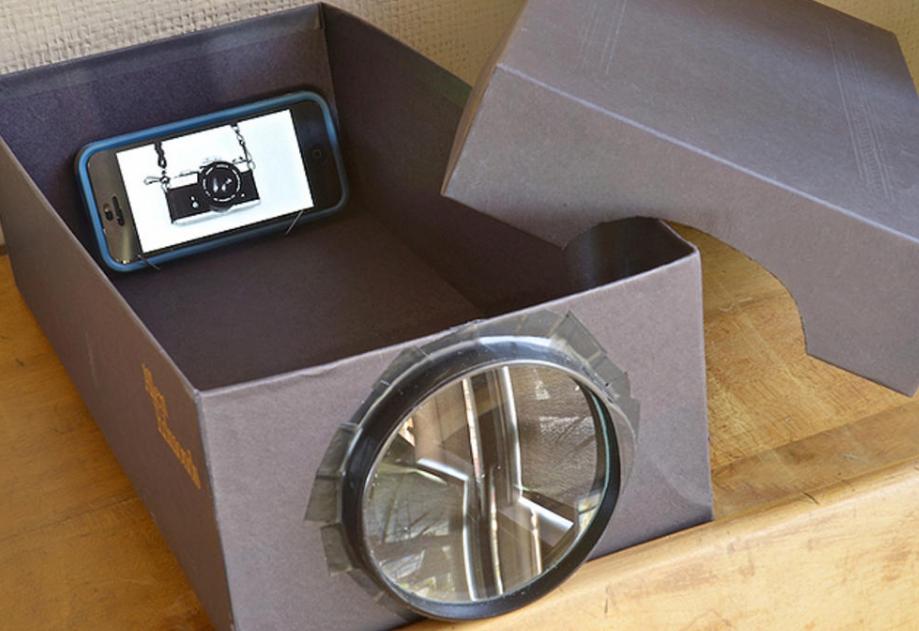
- Pick up the box according to the size of the smartphone, it should become exactly in width. An option from shoes or other products of a sufficiently large length is suitable. The greater the distance from one wall to another, the wider the range of settings, which will allow you to achieve the best result in any room.
- If there is no box of a suitable size, you can make it yourself. This is a little more complicated, but you can make a design that will fit the size of your smartphone. First you need to cut blanks for all the walls, but you should not fasten them, first the preparatory work described below is carried out.
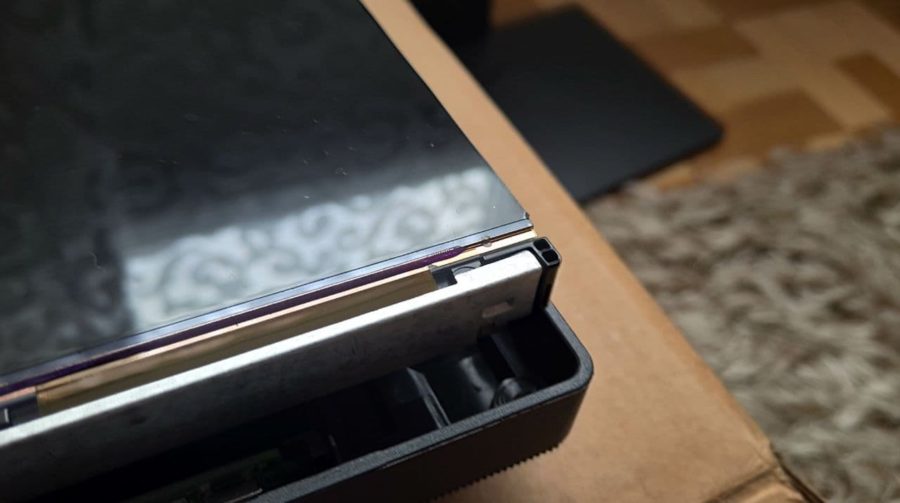
- In the wall opposite the smartphone screen, you need to put a magnifying glass.Here it is very important to determine the exact location of the element, the center must match the center of the screen on the phone, so it is better to take measurements. The more precisely the hole is cut, the better. The lens must be inserted evenly and secured with either opaque tape or sealant. It is important that no light enters through the joint, this will degrade the image quality.
![The lens must be centered]() The lens must be clearly centered and securely glued.
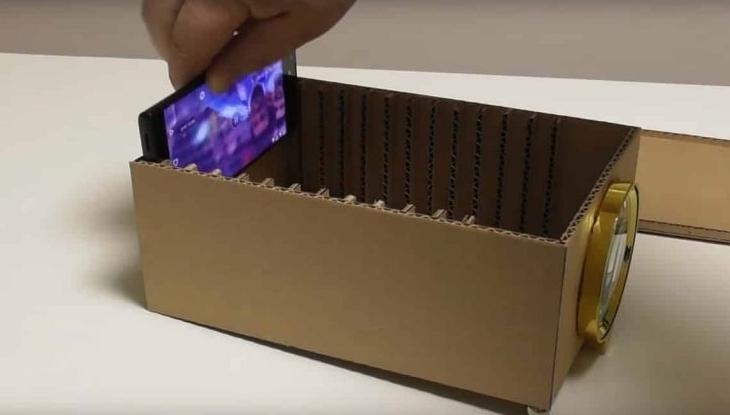
The lens must be clearly centered and securely glued. - Next, you need to assemble the frame, if the cartons are separate, glue the walls and bottom. When a ready-made box is used, you need to consider how the smartphone will be fixed inside. The easiest way is to make small protrusions on both sides to insert the phone and it sits flat without additional effort. If you don’t want to make partitions, then a large paper clip is often used as a stand, which is easy to bend at the desired angle.
![Making a homemade projector at home]() If small strips are glued to the walls, then the smartphone can be inserted into the grooves without additional fastening.
If small strips are glued to the walls, then the smartphone can be inserted into the grooves without additional fastening. - To ensure the desired effect, it is desirable that there is a tight-fitting lid. It is best to make it like in a shoe box - so that there are protrusions on the outside that securely close the joint. Also, do not forget that to connect the charging you need to make a neat hole in the back.

When an image hits the magnifying glass, the projector from the phone flips the image. Therefore, you need to download an application in advance that will allow you to turn the picture upside down in order to get the correct one in the end. There are many options and it's easy to find them.
Laptop based projector
This option is good because it allows you to get a good quality image due to the fact that the screen in the device is much larger than in a smartphone.But at the same time, you need to find a large magnifying element, the Fresnel lens or a special element for full-page reading of books is best suited. As for the work, it should be organized like this:
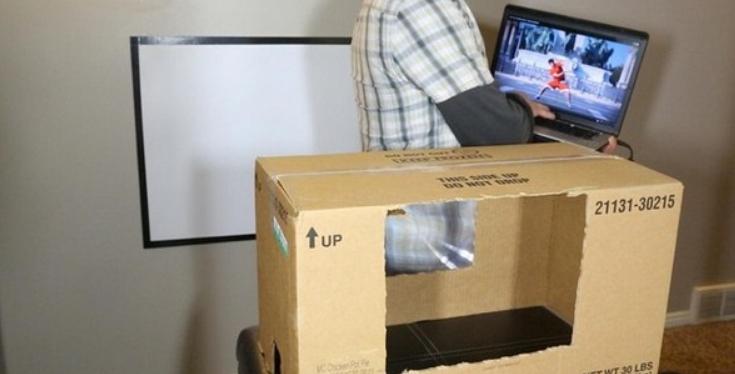
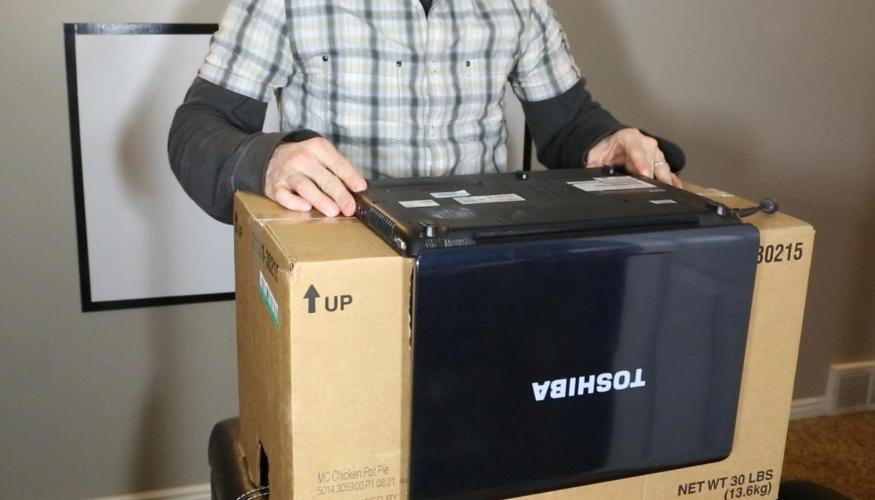
- The main thing is to find a box of the right size. One side should be slightly larger than the laptop monitor, and the distance between the walls should be at least 50 cm to ensure normal magnification of the image. At the same time, the box must be strong enough to withstand the laptop lying on it, this is an important point.
![Making a homemade projector at home]() To use a laptop, you will need a larger box and lens.
To use a laptop, you will need a larger box and lens. - In the wall opposite the one on which the laptop screen will be, you need to carefully insert the lens, after cutting out a hole of a suitable size. It is worth considering in advance how to fix the element so that it holds firmly and the tape does not go over the edges of the magnifying glass. The lens should be exactly in the center so that you do not have to adjust later.
- Cut a hole in the opposite wall for the screen. There is one feature here - the laptop will be located on the top side down with the keyboard, the image is turned upside down, which is what is needed for the projector, you do not have to use any applications. The easiest way is to put the gadget, mark the position of the screen and cut it exactly along the contour.
![Making a homemade projector at home]() This is how the laptop is located on a homemade projector.
This is how the laptop is located on a homemade projector. - Then you need to check the operation of the system. The laptop is put down and turned on, you can bring the mouse out and then it is easy to control the device, even if it is turned upside down. It is important to determine the optimal distance from a wall or other surface.
Some make the box sliding so that you can adjust the image and change the distance between the screen and the lens. To do this, you can pick up two boxes that are inserted into each other tightly and cut off two walls inside them.
Using your device to view slides
If there is a ready-made fixture that is not used, then it is not difficult to make a projector at home with good image quality. In this case, everything is calibrated and you do not have to adjust the picture, which simplifies use. When assembling, follow these instructions:
- First of all, find a tablet with a screen size that will be as close as possible to the size of the window in the projector. You can buy a used model in a battered case, the main thing is that the display is intact and works fine, the rest is unimportant.
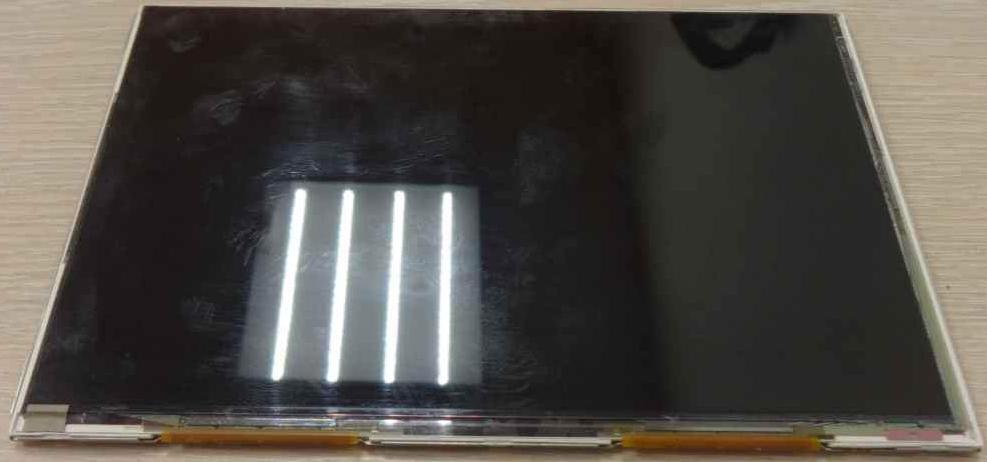
- The screen must be carefully removed, it is important to act carefully so as not to deform the matrix and not damage the connectors. You will need a board as it controls the screen and can be used to connect to a smartphone, laptop or other device. Or you can receive a signal on the tablet and watch movies via the Internet.
![Making a homemade projector at home]() When removing the matrix, care must be taken.
When removing the matrix, care must be taken.![Making a homemade projector at home]() The first layer (the one that is slightly bent) is a matte film, under it is the matrix itself.
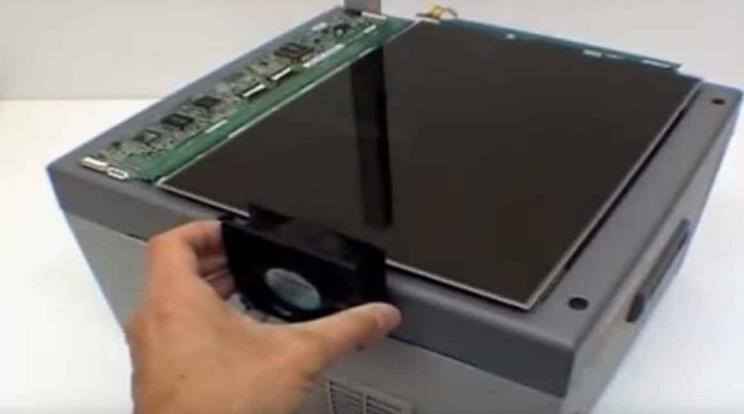
The first layer (the one that is slightly bent) is a matte film, under it is the matrix itself. - The removed matrix must not be placed on the glass, it is necessary to adapt pieces of any suitable material so that a gap of 5 mm remains between the surfaces. It is needed for cooling, since during prolonged operation heat will be generated, which must be removed. The easiest way is to put a computer cooler on one side.
![Making a homemade projector at home]() For cooling, a fan is placed opposite the gap between the screen and the projector.
For cooling, a fan is placed opposite the gap between the screen and the projector. - For normal operation, it is enough to choose the height of the location and the distance to the wall, often the device has the ability to adjust, which further simplifies the process.
There are small slide projectors, so it's easy to find the right model for your smartphone. In this case, you can not disassemble the gadget, just put it through a small gasket to prevent overheating.
Thematic video:
Ways to improve picture quality
Since a homemade projector out of the box does not differ in the breadth of settings, it can be difficult to achieve good image quality. This is due to errors made in the manufacture and non-compliance with the recommendations. But if you know a few simple tips, you can improve the picture:
- On the device that transmits the picture, you need to adjust the contrast and brightness. The higher the resolution, the better the result will be, it is important to understand this aspect, many people lose sight of it.
- The fewer slots and holes in the box, the better. There should be complete darkness inside the case, even the slightest glare can cause a strong deterioration in the image. The easiest way is to look inside at the light, so you can find even the slightest problems and eliminate them.
- Light should not be reflected from the walls inside, this is also a factor that has a bad effect on the final picture. Therefore, it is undesirable to use glossy cardboard, cheap matte is suitable. It is most reasonable to paint the entire interior with black matte paint, it can be bought in a spray can, so it is not difficult to carry out the work. And ideally, paste over the walls with black velvet or a similar fabric, then the light will be completely absorbed and the image will be much clearer.
- The darker the room, the better.Therefore, it is advisable to put blinds on the windows or a day-night system that securely closes the openings. At night, turn off all light sources so that they do not light up the image.
- The distance from the lens to the wall is also important, the larger it is, the larger the picture, but the quality will be worse. It is important to choose a distance at which both the size will be suitable and the sharpness will not decrease too much.
![Making a homemade projector at home]() The size and quality of the magnifying glass also affect the image.
The size and quality of the magnifying glass also affect the image. - In order for a cardboard film projector to show video in high quality, it must broadcast it on a flat, light surface. It can be a painted wall or a light fabric. But it is better to use a special screen or make it from a piece of awning material.
It is worth periodically checking the cleanliness of the lens, as if it becomes dirty, the quality will also decrease.
At the end of the video, instructions for making a screen for the projector.
Making a projector out of the box with your own hands is not difficult if you have the necessary materials at hand. It is important to follow all the tips given in the review and use the recommendations to improve image quality.