How to restore the headlight reflector yourself
Restoring headlight reflectors is a job that, if desired, can be done at home. However, there are a number of conditions that must be observed. Violations of technology will lead to a deterioration in light. And in the most unfortunate cases, the headlight will be damaged and you will have to buy a new one.
Causes of damage
If over time the headlights become less bright and the beam blurs, there is most likely a problem with the reflector. This happens for a number of reasons, the most common being:
- Physical deterioration. Now most reflector housings are made of plastic, the surface of which is coated with a special compound. Its service life is limited and over time, the coating begins to crack, flake or lose reflectivity. This is due to repeated temperature changes.
- Installing higher power lamps. This improves the light, but over time, part of the coating just darkens from constant overheating.
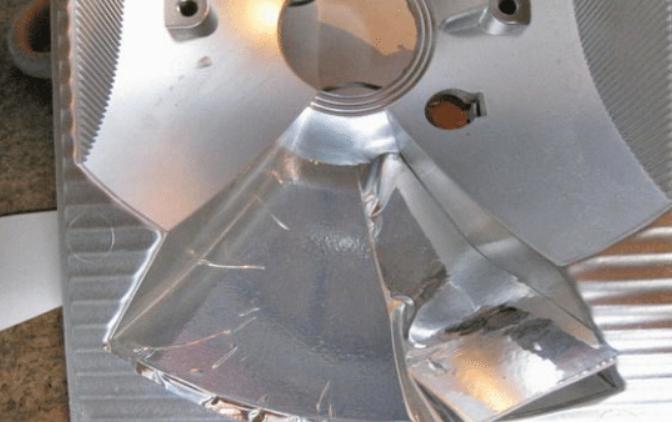
![How to restore the headlight reflector yourself]() Too powerful a light bulb literally survives the reflective layer.
Too powerful a light bulb literally survives the reflective layer. - Violation of the tightness of the structure. Moisture and dust are bad for the elements, and over time, this causes damage to the elements and a decrease in the reflectivity of the surface.
If the integrity of the element is broken, there is no point in restoring it, it is easier to replace it with another one.
Recovery methods
There are many ways to restore a reflector at home. Each of them has its own characteristics. It is worth choosing the one that is best suited to a particular situation and will provide a good effect.
Regardless of the repair method, the headlight must first be disassembled. If the glass is kept on the seal by snaps, they are carefully removed. But most often it is glued to a special sealant. In this case, you need to heat the element to a temperature of over 70 degrees and carefully separate the diffuser. This can be done using a building hair dryer or by placing the element in the oven at 100 degrees for 15-20 minutes.
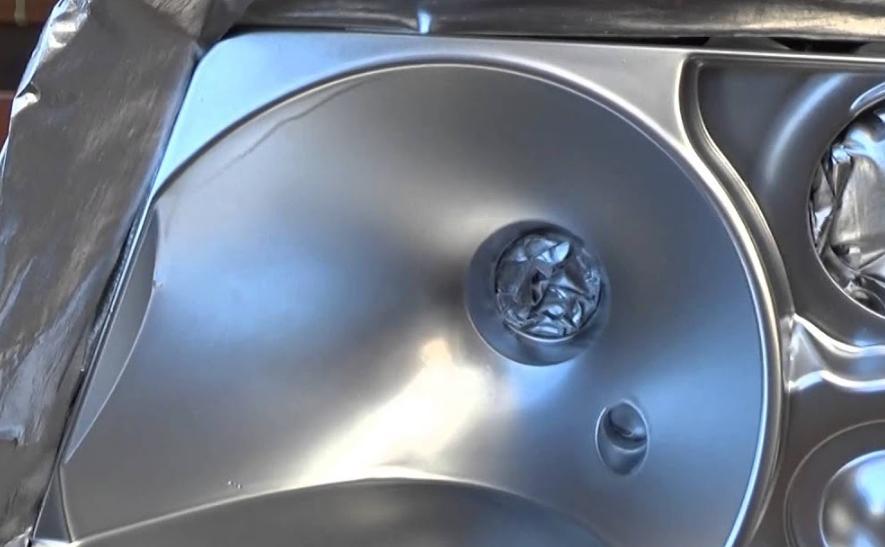
Aluminum Coated Tape
It is also called metallized tape and is sold in automotive and hardware stores. It is suitable for repairs, as it withstands temperature extremes well and has good reflective properties. The work is done like this:
- Damaged surfaces should be carefully cleaned with any means without alcohol content. If necessary, remove the peeled coating.
- Pieces are cut to the right size, tried on to make sure everything fits correctly.
- The protective layer is removed from the tape and it is glued to the surface, there should be no wrinkles so that the light is not distorted.
How effective this method is, you will learn from the video.
The fewer joints between tape, the better.
The main advantage can be considered the simplicity and accessibility of the method. Minus - the tape repeats the irregularities of the reflector, and the seams on the surface reduce the effectiveness of the headlight.
Mirror film
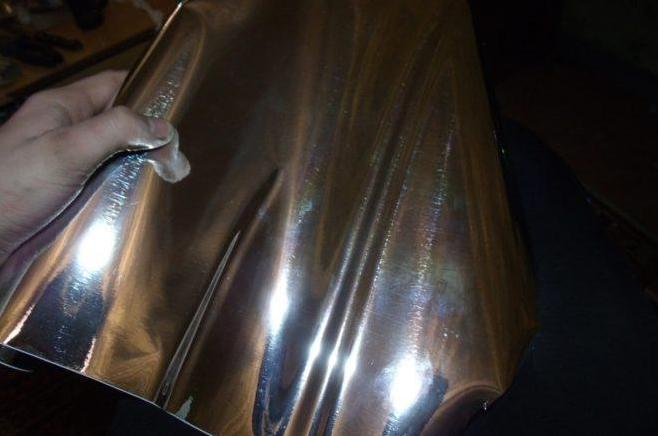
Most often, car dealerships have material from Oracal, it withstands temperature extremes well and is resistant to adverse effects. Sold by the yard, you can buy a small piece to repair a damaged reflector. Repair instructions:
- It is worth purchasing an option called "glossy chrome", it reflects light best.
- First, precise templates are made from paper or cardboard, according to which the film is cut.
- The surface is thoroughly cleaned and degreased. Then a film is glued to the prepared places, heated with a hairdryer and leveled so that there are no wrinkles and bubbles.
Headlight needs to be glued on sealant and leave to dry. If done correctly, you can restore the reflectivity of the surface almost completely.
aluminum tape
The material is used in thermal insulation and plumbing work. It withstands high temperatures well and lasts for many years. The work should be done like this:
- The surface is prepared and cleaned as usual. Then templates are made from cardboard or thick paper exactly to the size of the damaged areas.
- Cut out pieces of foil. The surface of the reflector on which they will be placed is lubricated with a thin layer of epoxy.
- After gluing, you need to leave the headlight in a warm place for at least a day to dry.
The choice is simple, but foil can't be removedif problems arise later, the element will have to be replaced.
From the video you will learn: Is it worth restoring the reflector with foil tape.
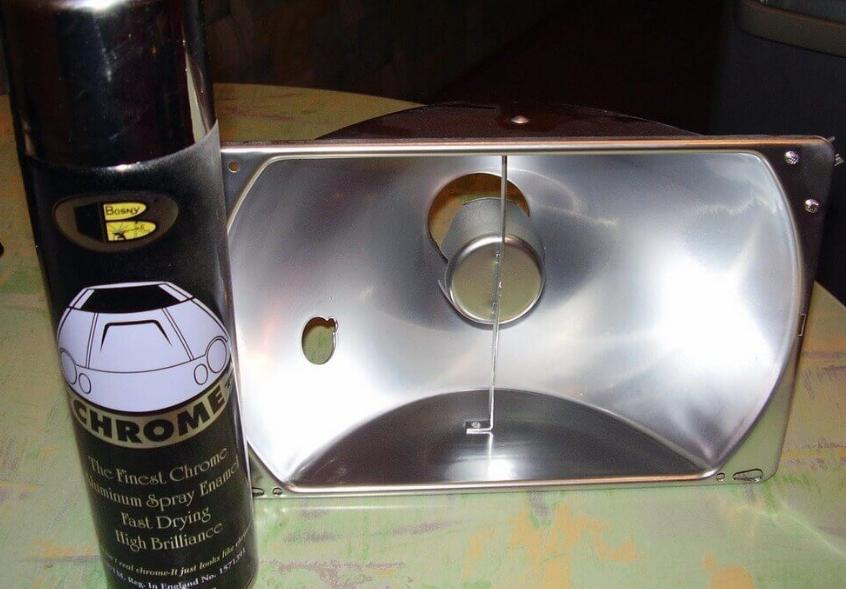
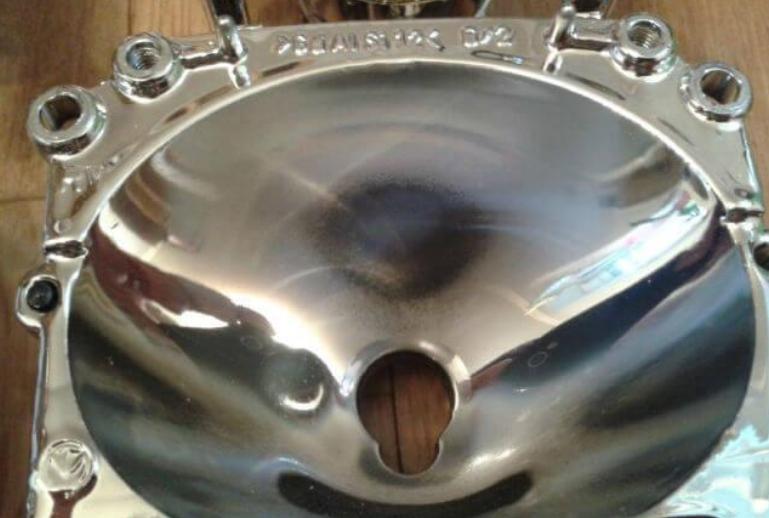
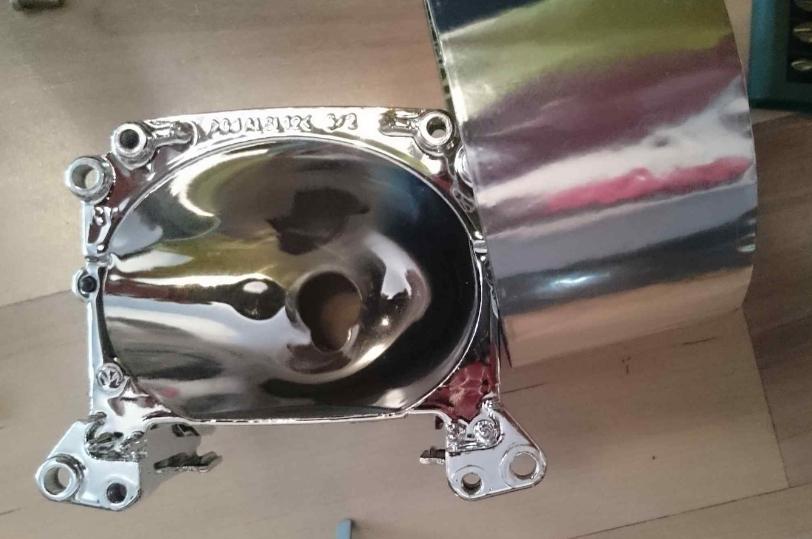
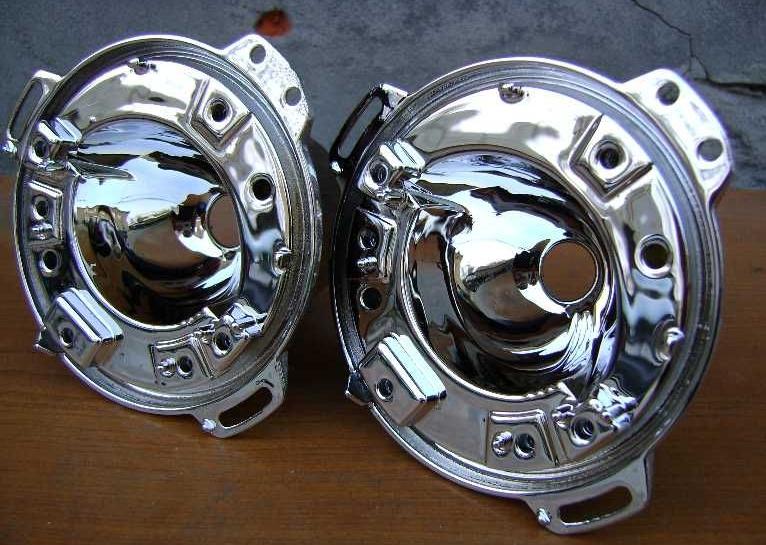
Chrome paint spray
On sale you can find a special paint for reflectors, which creates the effect of chrome plating and allows you to eliminate tarnishing quickly and efficiently. The main thing is that the composition is resistant to temperature extremes.. The work is done like this:
- The reflector is cleaned with fine sandpaper to perfect smoothness. If you apply paint to a shiny surface, it will begin to flake off over time.
- The paint is applied according to the instructions. Usually you need to shake the can for 2-3 minutes and apply in an even, neat layer so that there are no smudges. It is better to make 2-3 thin layers for reliability.
- Dry as recommended by the paint manufacturer. Surfaces must not be touched during installation.
The reflector must not be washed and wiped in places that cannot be restored. It can only be cleaned with compressed air from a compressor.
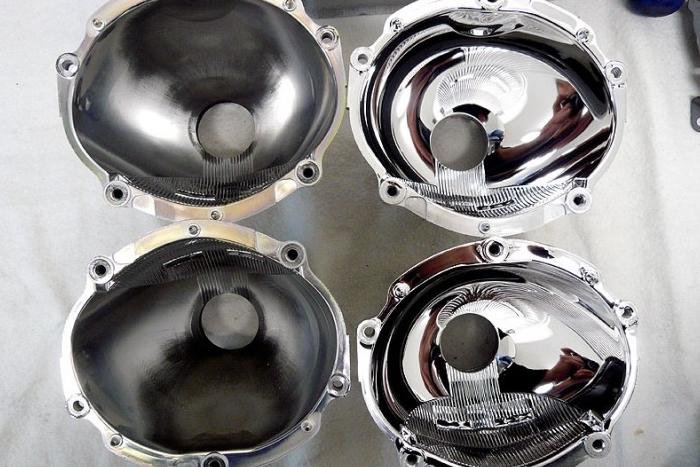
Restoration of headlight reflectors
If the condition of the elements is poor or the design is such that it will not work to restore the surface on their own, it is worth giving them for restoration. This service is provided by specialized companies that clean the elements and prepare them perfectly.
Metallization in the factory is of high quality and uniform. The reflectors are dried at a high temperature, which ensures their durability and allows you to restore high-quality light without replacing parts. The cost of the service depends on the region and design lightsthe more complex it is, the more expensive the repair will cost.
Replacing the headlight reflector
If during disassembly it turned out that the reflector is damaged or its condition is very poor, it is better to replace it with a new or refurbished one. The work is not difficult, but requires accuracy, as small parts can be damaged. The process looks like this:
- First, all connectors, bulbs and other elements are removed. The nature of the work depends on the model of the machine and the design features of the headlights. Most often, a screwdriver or TORX stars are used in the work.
- The reflector is usually fixed in the housing with screws or held by latches. In the first case, you need to carefully unscrew the fasteners. In the second, press the latches and remove the element so as not to damage the plastic.
- When installing a new reflector, it do not touch with hands or wipe with a cloth. This results in small scratches on the surface. It is best to unpack the part just before installation so that less dust gets on it.
- Assembly is carried out in reverse order. The installation of glass requires special attention, first a new layer of sealant is applied around the perimeter of the headlight, after which it is put in place and pressed. For fixing in the desired position, it is most convenient to use small clamps.
It is easier to remove the remains of the sealant by pre-cooling the parts, then it can be easily peeled off with a knife.
In conclusion, we recommend watching a series of thematic videos.
You can restore the headlight reflector on your own, for this, one of four methods is used. The main thing is that the surface is not deformed, otherwise only replacement will help.