How to connect the registrar to the ceiling lighting interior
The article talks about connecting the DVR to the do-it-yourself do-it-yourself car ceiling light. The main advantages, phased work technology, the nuances of connecting wires, the use of a special adapter: attention has been paid to all this important issue. Recommendations are also given on the use of the finished structure.
Benefits of connecting the recorder to a ceiling light
The method of connecting the DVR to the ceiling lamp of the car interior has several advantages at once:
- The cigarette lighter socket is not used, that is, it can be used to charge a phone, tablet, etc.
- All connecting wires are hidden under the skin, without spoiling the view of the cabin.
- The ignition is not required to operate the recorder.
- Installation is simple and anyone can do it.
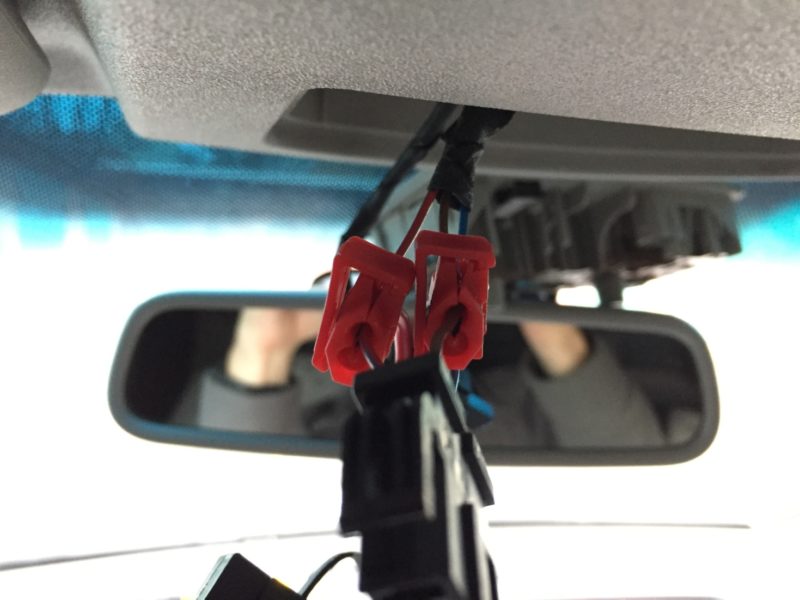
The dome light is the closest power point to the rearview mirror, so the dash cam needs to be mounted on the top front of the windshield.
Installation process
Now - in detail about connecting the DVR to lighting, with a description of all the stages.
What is needed for installation
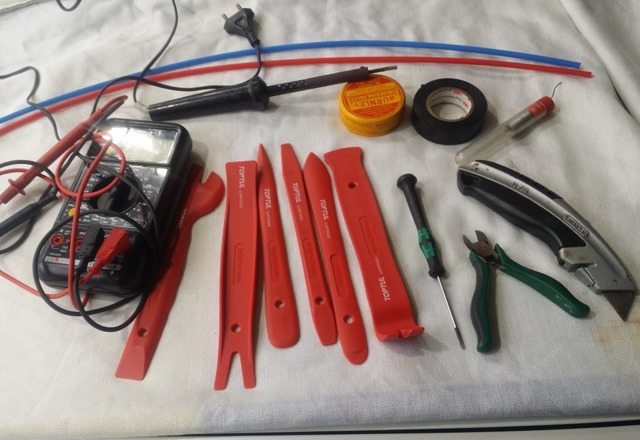
To connect the recorder to the ceiling light, you will need the following tools at hand:
- 2 screwdrivers - Phillips and flat;
- wires for connection;
- wire cutters;
- soldering iron;
- insulating tape;
- fastening brackets with Velcro;
- multimeter.
Removing the dome light
The first thing to do is to remove the ceiling light in the car. The protective case is removed first. Depending on the brand of car, you can remove it with a plastic spatula, prying with a sharp object, or simply with your hands. After removing the protective housing, you will need to unscrew the fasteners with a flat or Phillips screwdriver. Then the lamp is removed without interference. If something interferes, then the ceiling probably has an additional mount. To determine its location, it is worth prying the lamp again with a spatula or a sharp object.

The nuances of connecting wires
After removing the cover, the stage of connecting wires begins. The step-by-step technology of work is as follows:
- Wiring in progress. So that they are not visible, they need to be brought under the interior trim. To do this, in addition to the ceiling, you will need to remove the sun visors and the covering of the side walls of the windshield.
- Detect Polarity wires or terminals on the registrar and the ceiling.A multimeter will help with this, but often everything is clear by the color of the winding: red - at the "plus", black - at the "minus". The negative wire of the DVR must be connected to the same contact on the ceiling, the positive wire to the "plus".
- Carefully cut the insulation on the wires from the lamp. The contacts are soldered to each other, the joints are carefully isolated. The connection of wires must be as reliable as possible, otherwise there will be failures in the operation of the registrar - interference, image distortion.
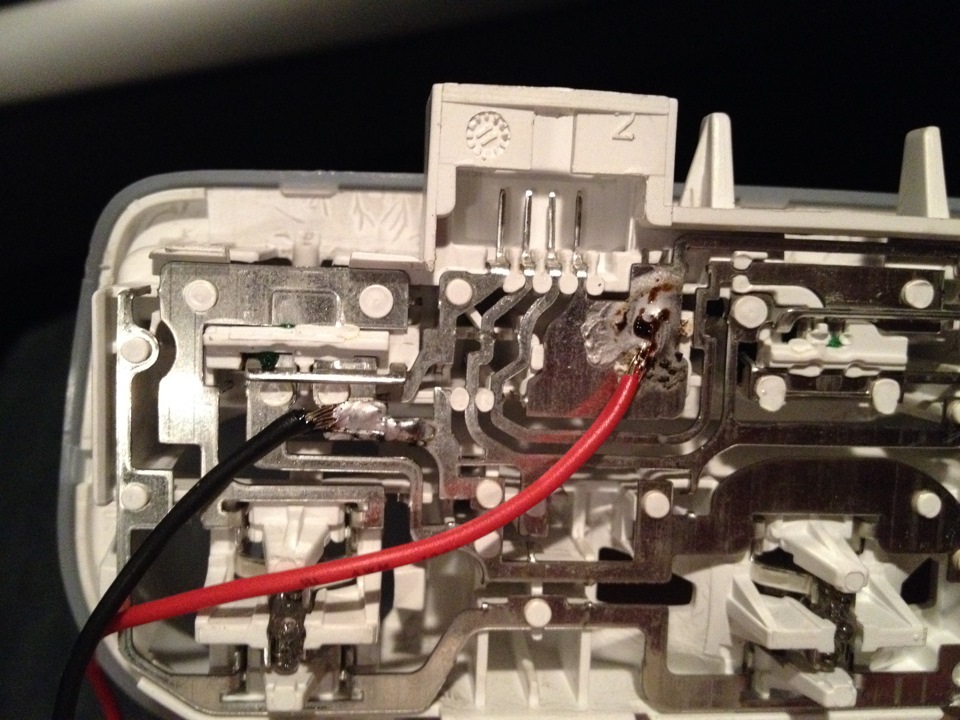
Use a multimeter to check the voltage on each wire. There is a subtlety here: some wires going to the ceiling receive voltage only when the doors are opened. Therefore, if the multimeter does not ring, such a wire should not be used to connect the device. Only those wires that are given a constant positive voltage are needed.
Checking and assembly
The last step is to make sure that all connections are firmly sealed, and check the voltage on each wire with a multimeter. After that, you can turn on the DVR, check the quality of the picture, the absence of interference. If everything works, then you can start laying the wires. It is necessary to ensure that there are no kinks, wrinkling. The body of the ceiling is installed in place, the visors are hung, all sections of the interior trim are returned to their original form.

How to power the DVR using an adapter
The fact is that the “native” plug of the device is not suitable for connecting to a lighting dome. The on-board voltage of the car is 12V, while the registrar needs only 5V. To reduce the voltage, an additional element is added to the circuit - an adapter or adapter.
Usually this is a special power supply module, which is not included in the standard package of the car network and is purchased separately. The module has a built-in 150 Ohm resistor. If the recorder consumes less than 200 mA, it is recommended to add a few more load resistors to the circuit. The power supply module has connectors for connecting cables from the recorder and the car ceiling.
You can also remake the regular power supply of the registrar itself. You need to remove the plastic case from it, and attach an additional fuse. It will operate at a current of more than 1.5 A: this will protect the system from failure. After dismantling the case, the wires of the registrar must be powered with metal leads.
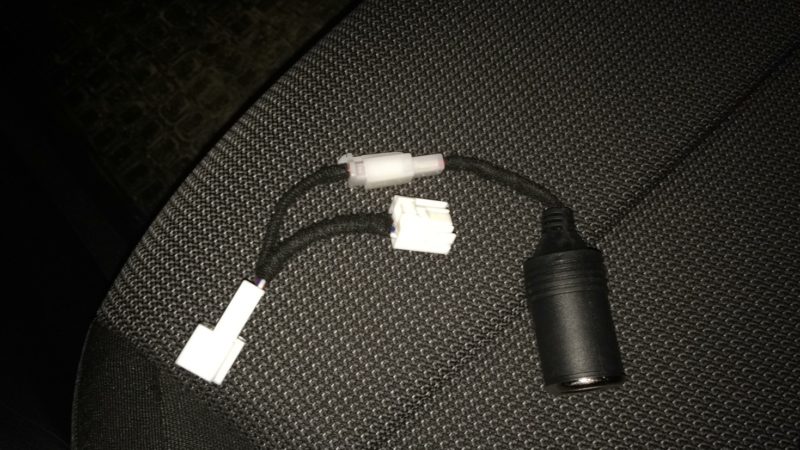
There is another version of the adapter in the form of a cigarette lighter socket "mother". It is attached to the ceiling and hidden under the ceiling lining. For this method, you do not need to remake the standard registrar unit - it is simply inserted into the socket. This design, like other adapter options, is recommended to be equipped with an additional fuse.
Conclusion and operating tips
Since connecting the recorder to the lighting dome is a spare method and is done by the driver himself, it is worth adhering to a number of important rules:
- If there is no confidence in your skills, it is better to entrust the installation to auto repairmen.
- It is possible to start work only when the power supply of the on-board network is turned off.
- Check the polarity by the color of the cables or by using a multimeter.
- It is imperative to isolate the junctions of the harnesses.
- Power must be supplied through an electrical fuse.
- During the connection work, there must not be the slightest contact with water.
- The video recording on the registrar should be put even before the ignition is turned on - at the time of landing in the salon.
- If you have to not use the car for more than a few days, it is recommended to disconnect the device from the ceiling, and even better - take it out of the car for the downtime.
- Serious failures with the picture, unexpected loss of the image, the smell of burning, smoke: in all these cases, the recorder must be immediately disconnected from the socket.
- You can still connect the device to the ceiling on your own, but it is not recommended to make repairs in case of a breakdown. Here you will need the services of masters. Do-it-yourself repair is unlikely to fix the breakdown, but it is more likely to aggravate it.
Video for popular car brands
Renault Logan II
Kia Ceed
Hyundai Creta
Skoda Octavia
Connecting the recorder to the car's lighting dome is one of the alternative methods to the traditional connection to the cigarette lighter. The advantages of such a connection are the absence of wiring in the visibility zone, the ability of the DVR to work with the ignition off, ease of installation. The most important thing is to determine the wires with constant voltage on the ceiling, observe the polarity, and carefully seal the joints. It is also required to add an adapter to the circuit, since the registrar requires less than the on-board voltage.