How to convert an LED lamp
It may seem to an inexperienced master that a do-it-yourself eternal LED light bulb is too difficult a task. But the instruction does not contain complex processes; special knowledge in electrics is also not needed. The only thing that is required from the master is attentiveness, preparation of the workplace, the right choice of components and a set of tools at hand.
For the manufacture of an eternal LED lamp, it is recommended to use chips of high or medium power. It makes sense to start work only if there are no problems with the wiring, since network instability can lead to burnout of diodes or drivers, regardless of their quality.
What is a perpetual LED light bulb
None of the manufacturers produces LED lamps with the loud name "eternal". Quality products can last up to 50,000 hours, but only if there are no wiring problems and reliable assembly elements that will help overcome overheating if this occurs.To extend the service life, the master can replace the components with more expensive ones, which will not allow the diodes to burn out even after 5-6 years.
To get an eternal LED lamp, first of all, you should deal with the cooling system. It is on it that many manufacturers save, because of which the temperature regime is violated and the LEDs burn out. Also, the electronic filling of the device often suffers. The design may look like the picture below.
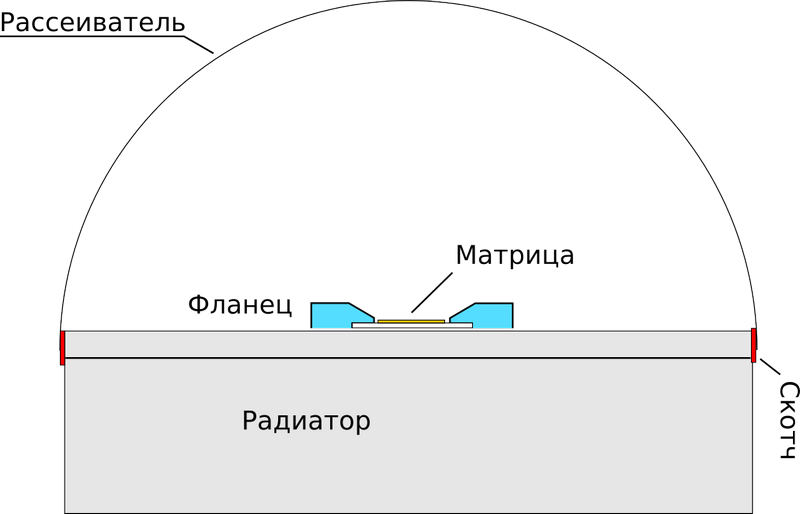
To assemble this lamp, you will need experience. Therefore, it is better for a novice master to remake the purchased LED lamp. An eternal lamp can be considered a product with elements replaced by more powerful and efficient ones.
Which light bulbs are suitable for rework
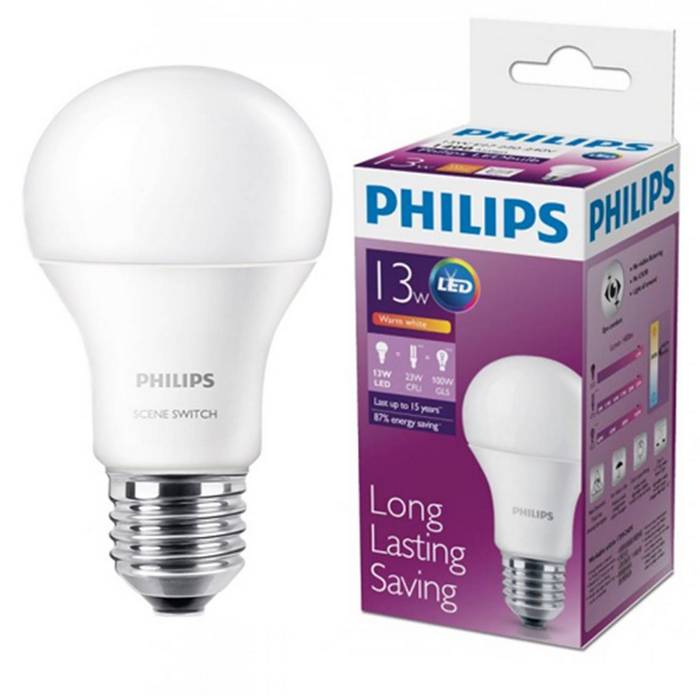
In order for the converted lamp to last for a really long time, it is better to take a known high-quality model. For example, products from the following manufacturers:
- Osram;
- Philips;
- Gauss;
- ASD;
- camelion.
It is worth considering the models of Russian companies, as they are already adapted to the operation of local power networks and therefore are more resistant to voltage drops.
What does it take to convert an LED light bulb into an eternal one?
To work, you must have:
- holder;
- glue;
- knife;
- soldering iron with a thin tip;
- new diodes (if replacement is to be made);
- resistor of greater resistance;
- posistor for soft start;
- tweezers;
- capacitor.
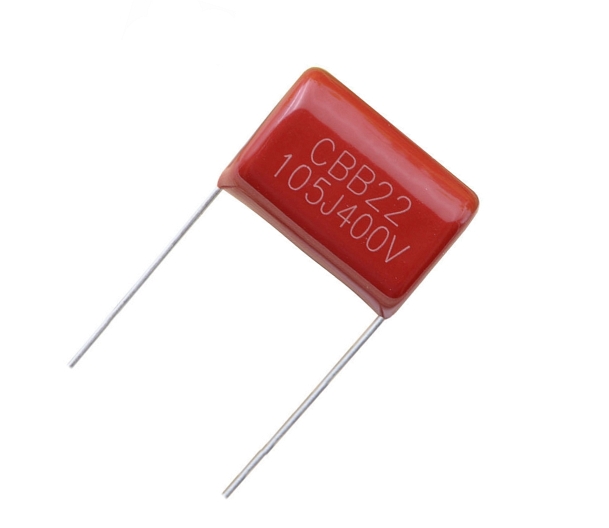
The last element of the assembly is necessary to remove heat, the excess of which reduces the life of all components of the lamp. The capacitor is installed between the plate with LEDs and the base, and is selected depending on the power of the light bulb.
Related article: How to disassemble and repair an LED light bulb
Step-by-step instructions for remaking a light bulb
At the first stage of alteration, it is necessary to reduce the current through the LEDs. This will extend the life of the product. But the characteristics of the brightness of the glow will also be reduced. The decrease in parameters does not occur linearly, but with a lag. At the same time, the efficiency of each of the chips increases. This helps to reduce the temperature of the crystals during operation.
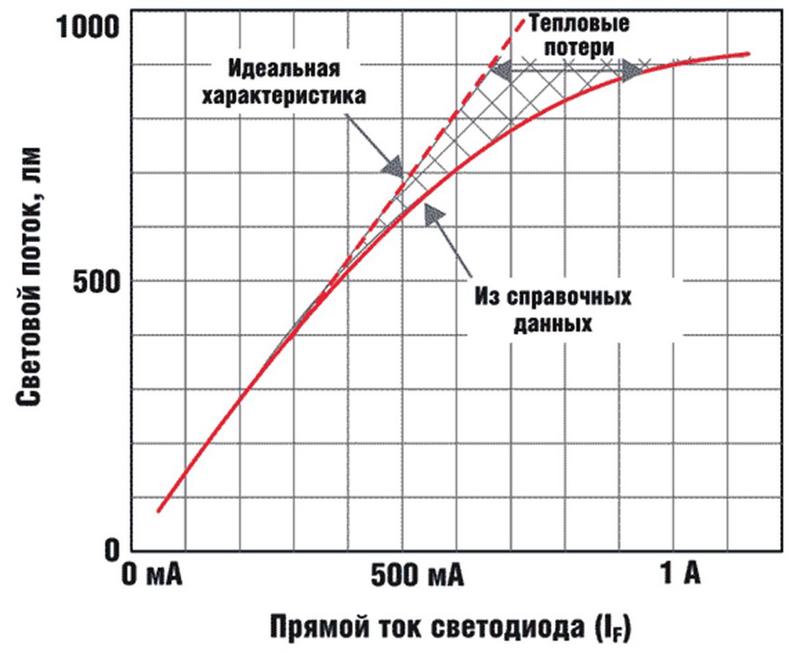
On the graph, you can clearly see the efficiency of the chip and heat loss in the form of a non-linear relationship. To reduce, you should find one or two resistors on the board. The board is connected in parallel with a resistance of a few ohms. This is the sensor to work with. It is found in all driver circuits, both linear and pulsed.
The resistor is replaced with another one with a higher resistance. Alternatively, you can solder one of them. The current through the diodes will decrease in proportion to the increase in the resistance of the current sensor. Even if the current is reduced slightly, this will affect the service life of the product by reducing the temperature of the crystal during operation.
If an expensive lamp is used for conversion, a larger number of LEDs are installed here than cheap counterparts, and the operation mode is more gentle. It is recommended to reduce the power by about 20-30% only if a new light bulb is used. If the chips are powerful, the current through them should be reduced by 50%. If one of the diodes burns out, after a while the rest will also become unusable. This may continue until all elements have been replaced with new ones.
Gradual increase in brightness after switching on
The next step in refining the 220V LED lamp is to provide a smooth increase in brightness. To do this, you need a posistor. This is a thermistor with a positive temperature dependence. It is included in the circuit in parallel with most of the chips or all without exception.
While the posistor is cold, the resistance indicators are minimal. Current passes through some of the LEDs and gradually heats it up. As it heats up, the resistance gradually increases, which includes the rest of the chips in the circuit, and the brightness also begins to grow.
To work, you need a posistor marked WMZ11a (330-470 ohms). Elements can be easily found on sale or removed from an energy-saving light bulb with a power of at least 32 watts. In devices with less power, a posistor of 1 ohm or more is installed, which is not suitable for rework.
Video: How posistors, thermistors work and where they are used.
You can get out of the situation by connecting several elements in parallel, but this method is unpopular. Light bulbs with such modifications are mainly installed in chandeliers on the ceiling. If the circuit is assembled correctly, turning on at full brightness will occur in 25-30 seconds.
How to make a nightlight
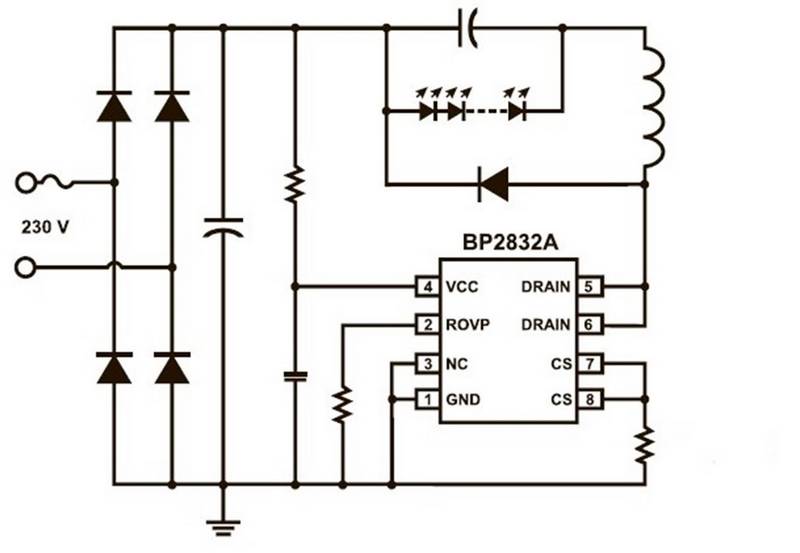
The lamp can be equipped with a night light function. It can be installed in a dark corridor and left on at night. Here you will need to modify the driver. To begin with, the resistor installed on the driver board is removed, which is used when discharging the output filter capacitor.
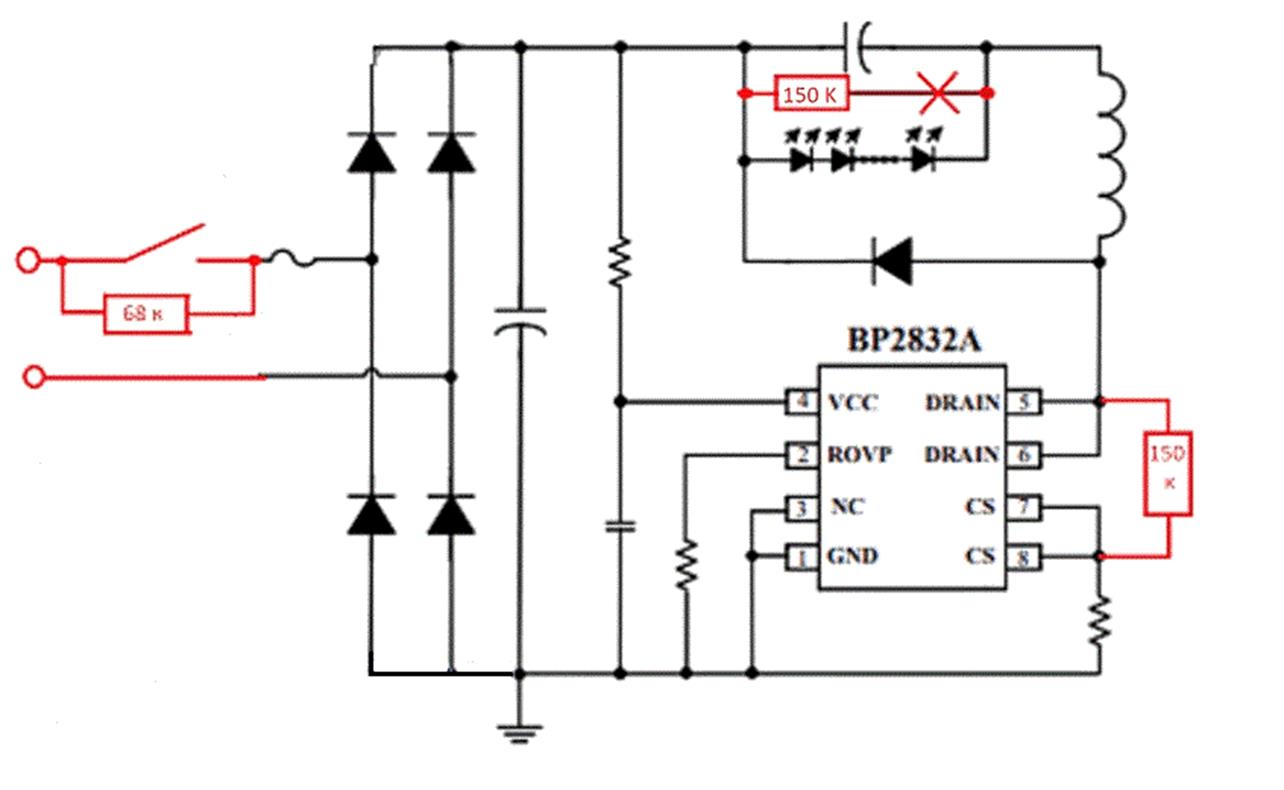
A resistor with a power of 1 W at 150 kOhm should be added to the circuit in parallel with the pins of the microcircuit.Also, a 68 kOhm 1 W resistor is installed in the switch in parallel with the switch contacts.
In the driver circuit, you can install a 100 kΩ resistor in parallel with the IC power filter capacitor. This is necessary to stabilize the voltage and eliminate the flickering of the lamp. If the master did everything correctly, the power consumption of energy will not exceed 0.42 watts.